Great, I’ll try every one of those suggestions. Thanks!
1 Like
My pleasure, bro! Hope it helps.
How are you carving it so precise? I mean, it all have to match in size etc… And which tools do you use?
I really, really like this board and can hopefully make something similar myself! 
First, I make sure that I take the time to make a good, scale drawing. Then I make sure my pieces of wood are nice and flat, or run it through a planer if not. Then I drew an exact centerline on the wood pieces. From the centerline, you can find the true center of the board. Getting a piece flat with centerline and true center is half the battle. With those critical reference points layed out, I drew in the rest of my reference lines from my drawing. Once you start drawing things inm, frequently measure to make sure it all matches the drawing. The outside dimensions are not too critical because you will want to sand the pieces flush after they are glued up. I actually used chisels for most of the detailed work. An angle grinder for some of the heavier wood “carving” and an orbital sander to smooth it all out. I used a drill press to drill the truck bolt holes. Nothing high tech… I’m sure you can make something like this. Just don’t get frustrated when things don’t work out like you thought. It happens. I made a bunch of revisions to my drawing before I got something I could work with. Once you have that, you just keep it tight to the dimensions and keep going back to the drawing for reference. Measure 3X cut once! LOL Seriously…I make mistakes sometimes and it’s usually because of some bad measurement I took because I was trying to rush or because I got frustrated…If you have any specific questions about woodworking or you get stuck on something PM me and I’ll help you out.
2 Likes
Thanks for a detailed description!
How do you get the same angles and depth in the four different cutouts?
It’s all about the reference lines. Every spot where lines and edges meet. I drew the lines for the depth on the side of the piece. With all of the reference lines drawn in, I was able to use a chisel to “trace” the lines. I go over once with very little pressure to cut the line clean. Then I go over a couple more times with more pressure. Once you have a nice clean cut, you chisel one side leaving kind of a shelf. I keep making passes until I get to the depth I want. With a sharp chisel it goes faster than one would think. I got this done quicker than if I had set up a template for a router. To get those angles I cut a shelf then carved it down with a chisel and flattened it with a little sanding block I made out of a small 2x2" piece of maple with sandpaper glued to it. I just try to stay inside the lines and keep looking at the rest of the board to make sure that it’s not getting out of whack and to make sure that I didn’t make any mistakes in drawing in my lines.
1 Like
This is beautiful. I would go for showing the grain.
With hubs, maybe 4wd hubs.
I would go for showing the grain.
With hubs, maybe 4wd hubs. 
1 Like
Is it done? I love seeng people work with wood, this is beautiful, can’t wait to see more!
1 Like
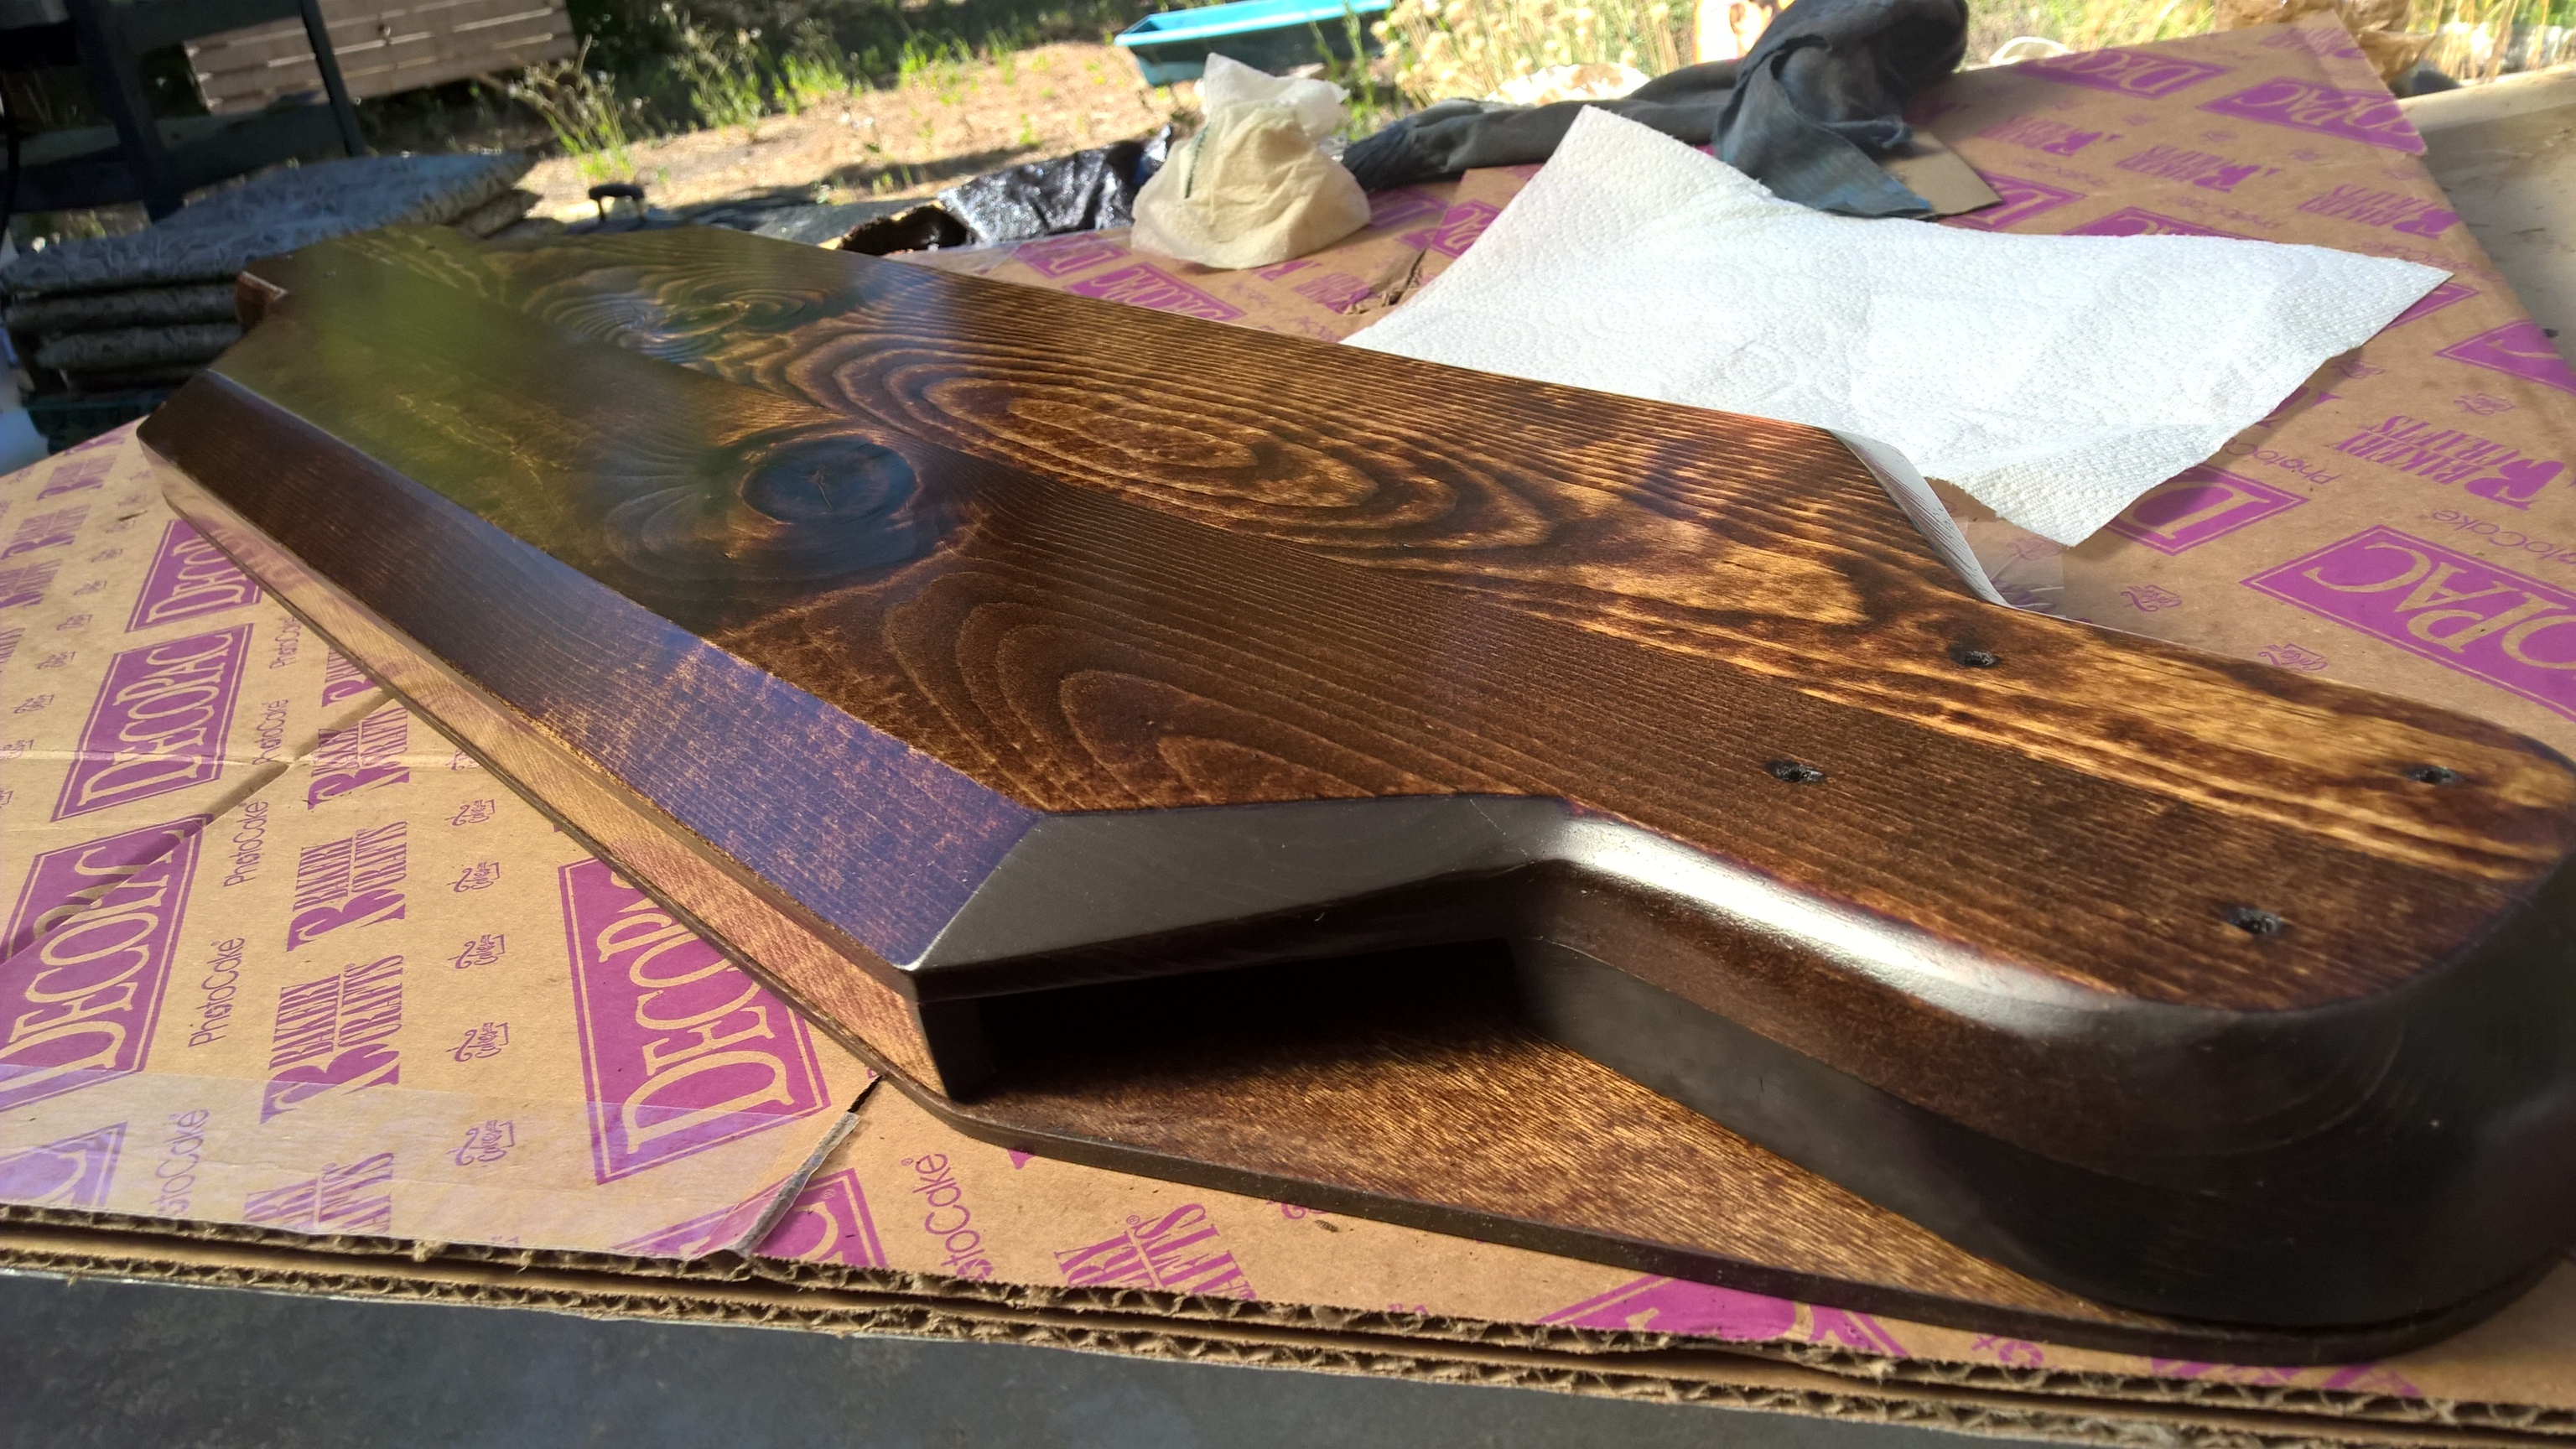
@MidnightOne Shoot! Sorry I took so long to get back to you! I haven’t been getting my notifications on this forum lately. I get some, but not all…Weird… To answer your question. NO…The one I already posted pics of is not done. I tested it and it had some issues with wheelbite with the 90mm ABEC 11s that I wanted to run on it. I’ll come back to it and rework it later. So… I designed another version that would be more compact, yet have plenty of space inside for the electronics and a much better ram air intake style design to keep the electronics cooler. Here’s some more recent pics. I’m not great at taking pics step by step. I usually just get lost in it and do chunks at a time. LOL Here’s a few pics I snapped of the V2 design. Once I get some designs that work great and a “proof of concept” I’m going to make these out of better woods. Sort of like an electric guitar. There’s no reason why we can’t be rolling on something a little more refined. IMO. It’s pine with figured maple sides and a dark walnut Danish oil finish. The upgraded V3 will have mahogany or walnut sides with a dye finished flame maple bottom. Just killer…That will allow me to do custom colors, sunburst finishes, and fades. The other’s are in the works right now…I’m trying to get better at taking pics of my stuff. LOL
I’m working on getting my CNC fully upgraded and ready to go. I’m pretty stoked about the parts that I got. I got some precision ground, C5 grade ballscrews for my X and Y axis and a C3 grade ballscrew for my Z axis. Once that happens, I’ll be able to pop these little beauties out per custom order. Laser etching and custom carved artwork are all coming down the pipe…


18 Likes
Bad ass man
1 Like
That looks beautiful! How much does it weight? It looks like a tank
1 Like
Again I call dibs on any kick me downs lol
1 Like

4lbs 11 ounces with a couple of hardware screws attached for hanging the piece. I’ll be getting that weight down a little bit, but probably not more than 3 ounces or so…
Edit: Sorry about that pic. It doesn’t seem to show the display too well. 
3 Likes
it is a tank! maybe you can fit a 1kw pack in there 
It’s not that much heavier than a regular longboard, but yes…I’m going to be able to fit a pretty fat battery pack in there. And maybe a small refrigerator. 

You’ll only really feel it picking it up…
I bet it will be much smoother ride than an off the shelf board of the same size…
Also, maybe drop a tooth in your original plan to make up for the extra mass of the board
1 Like
I’m thinking about getting some 40T pulleys from TB when they come in and running a 40t/16t setup with it. I have a fresh set of 90mm ABEC 11s just waiting to see some action.
2 Likes


Abt time … You Tease!
1 Like
Classy board, Nice!
1 Like