That’s it.
So…as they say…I’ve been charging my skateboard with my trusty Fusion LX60B.
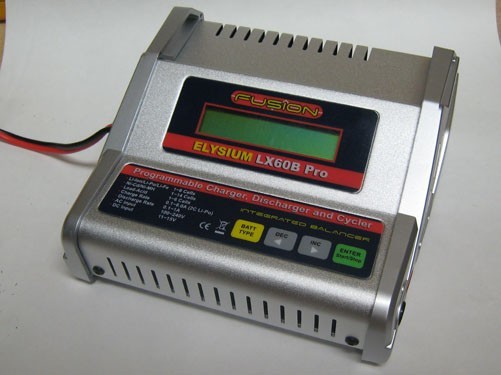
It’s a great charger and I’ve been charging my 3s and 4s drone LiPo’s with it for some years. It’s only a 50w charger though and although it will charge one of my 3s 5000mah LiPo’s in about an hour, it’s got it’s hands full with my 10000mah of 6s LiPo in the skateboard.
It charges them fine but as it can only maintain around 2A max on a 6s pack, charging can take up to 4 hours if the skateboard needs a full 8000mah putting in.
So, I’m ready for a more powerful charger. At around £60, I really couldn’t resist the fairly new iSDT SC-620.

It’s a 500w charger so easily manages a solid 10A on 6s packs, which is what I want to charge at. It will sustain a whopping 20A on 6s if one were so inclined. Seeing at my 6s pack is effectively 10000mah, I’ll stick with 10A which represents a 1C charge rate and delivers the required 8000mah in around 48 minutes.
The only thing is, this charger requires a power supply, ie, it’s not built in like my old Fusion charger. No problem, time to get involved with converting an old server power supply to use as a power source. There’s lots of info on converting these but the Dell units looked well documented and straight forward so this is what I chose.

This is the Dell Z670P and is rated at 670W continuous. That’s a thumping 54A at 12v!
Units like this are being churned out on ebay for really low prices. I picked two of these up for £13 delivered, that’s £6.50 each!!
I know…you know how to divide 13 by 2.
So, they arrived, I tested them and they both work perfectly.
Now, I was going to wire two of these in series to give me 24v as the iSDT charger will run on up to 30v.
(Note: if you do connect two server supplies in series it is essential to remove the ground connections on the 12v side of at least one of the units. This is to protect against a nasty short circuit if the casings happen to touch together. I can explain further if anyone requires but I’ll leave this safety note at that for now)
Moving on, I quickly realised that the iSDT charger will happily run on 12v and still create a 6s (25.2v) output. It just (obviously) draws more amps to do it. So, I only need to use one of my Dell PSU’s and no need to mess around with casing grounds.
So, the first slight hitch. I was expecting the Dell PSU to have a built in cooling fan. This particular PSU must rely on cooling fans built into the actual server as there isn’t one.
A few quick (monitored) test charges and I can see that the PSU will start getting quite hot so I’ll need to install a little 12v fan.
Another £3 from ebay and I’m in business. Ironic that the little Chinese cooling fan cost half the price of the PSU! 
I cut a hole in the top of the PSU directly above the heatsinks and now no heat can be felt at all when in use even under heavy load. The Dell PSU is cruising as, during a normal 10A charge, I’m only drawing around 22A from the PSU which is only 40% of what it is capable of.
Here’s a pic with the fan fitted.


Time for my nap. Next I’ll describe the simple mods needed to make a this Dell server PSU run.
2 Likes
Cool. You sorta should make a tutorial on how to use these server psu units.
Nice charger btw! Price seems really good. I kind of feel bad now for only choosing 300w 20A turnigy reaktor which cost me 70eur in the end.
Capable of “only” 12.2 amps at li ion rate (6 x 4.1v). Yours seems like could pump out a whopping 20A in li ion 6s charge mode 
Thanks Okami,
The next installment will conclude the remainder of what you need to know to convert this PSU. It’s not pioneering stuff though as it’s well covered throughout the internet and indeed esk8.builders.
Don’t worry though, the Reaktor chargers are fantastic and solid performers. 12A is plenty for most 6s Li-Ion packs isn’t it? What is the capacity of your pack?
7.6ah ive discharged max (4p x 2100mah cells) Should be good for abou 8ah but i dont charge till 4.2v per cell and have to stop at 3.45-3.5v per cell.
I plan to upgrade. 8ah with emtb which consumes 20wh is a bit too little. 10-12ah would be more suited.
I plan to build street carver (hybrid) with higher pressure and smaller size wheels. I hope that this will also improve mileage (lower energy consumtion).
I meant the fact itself that server psu units should be more popularized. I believe.there are some.tuts about using meanwell or other psu’s but i got.to know abou server psu’s only from electric bike forum.
Their charging needs start at 1kw power and more. 3kw was already a good amount for them i think (or maybe just a start) have to check this once again
Initially got 80w charger. Takes about 3h 15min to charge. Or about 25mins for 1ah.
Plan to charge with 0.5c on normal occasions. 1-1.5c when i need some juice fast. (8-12amps). Will see how it goes
Got 203w xbox 360 psu for now. Should be good.for 150w output ~6amps. So psu will be also upgraded.
Form factor of this grey brick psu should still make it possible to put it in the backpack, if neccesary. In comparison, PC psu would not be as nice to carry around…
Hi Okami, I was looking at the Reaktor 300w charger a few months ago and noticed that if you run it on 12v, the maximum output is 220w. That would limit charging a 25v pack to around 8.8A. To take advantage of the full 300w it requires 17v input.
Onward with the Dell server PSU project.
Only two things left to do.
The PSU connects up with its mother server by way of a so called hot shoe. The hot shoe is basically a bunch of terminals on the end of the PSU.
The small pins on the left need bridging as shown in the picture. Bridging these three pins makes the PSU run as soon as you plug it in to the mains (UK 240v AC in my case)
The bridging of these three pins is well documented on the internet and applies to most, but not all, Dell server PSU’s.
Do a little search for bridging method your chosen PSU.
The terminals on the right are the 12v DC power out. The three left ones are negative and the three right ones are positive. As you can see, I soldered some strips of thin brass sheet across them to unify them and then installed an XT60 connector.
The PSU is now ready to run and works a treat.
See pics below.


Thanks for reading, more soon.
1 Like
Youre right about 220w limitation. I totally forgot it / left it out. I wont use full power for now anyways but will probably have to come up with more beefy psu to utilise all 300w.
Thanks for showing some pics. My xbox psu also needed to bridge 2pins together and i still have to come up with.a connector which connects directly to the.contact pins.of.xbox.360 psu
–
Side topic - what a bummer… 72 eur for your type of charger… directly from eu warehouse through hobbyking… uuhh I just ‘‘wasted’’ 200w of max power and also a pretty nice shape charger with nice display…
Lesson learned I assume…
I wouldn’t worry. The Reaktor’s are great. The only reason I didn’t get one is that they are always out of stock when I looked. Simply get two of these server PSU’s rigged up in series and you’ll have the full 300w available. That will allow you to charge your Li-Ions at 1C easily anyway which is under an hour.
Andy
Yeah, you are right… wont probably complain as long as I dont have 20ah battery… which will probably be a while anyways It’s just that my budget for charger was around 45-50 eur… then it jumped to 70eur at the end with shipping and tax…
–
Ok to bring this back on topic… Can you tell what other (perhaps better) functions that iSDT charger got compared to reaktor? It looks like it is pretty sophisticated… also included usb port…  dont know is that so useful (unless can supply 3A perhaps?) but at least its something extra
It’s quite a simple charger. Just does all the usual stuff only with a great user interface all controlled with the wheel on the side. The USB port is just for firmware updates. The only things it does that I haven’t seen other similarly priced chargers do is you can alter the charge current mid charge without stopping. It also displays each cell resistance during the charge. Don’t get me wrong, these are two features I can live without but just saying. It’s best features are the display, the interface and the price. I doubt it does any more than the Reaktor. I’ll do a little video of the menu’s but there’s not much to play with.
Andy.
1 Like
Current change and resistance display does sound compelling…
Yeah, I just saw how nice and slim that charger looks … and compared to reaktor… reaktor is quite a beast a actually
Yeah, video does sound good…
So far through this forum I’ve found about chargers I did not know about… One of them is venom but they seem to be a bit pricy and come in limited wattage / power output range it seems…
Then there is anti-matter charger for 10A 250W (found on banggood), looks somewhat decent and ppl said that the internals are basically the same as Icharger brand has or so.
– ah too much talk about chargers… but yeah, they matter, so I assume others will be able to use this info later on anyways…
AWESOME, greatful for sharing of build.
Great looking build - Nice to see someone semi local on here too. I am just on the North bank in Hull. Not completed my build yet. Just waiting on parts from the group now. Looking forward to getting it finished and getting to that first ride.
Thanks Norco. If I can help with anything, let me know.
Andy.
Very nice work
Thanks CFRP.
Turns out I’m an idiot after all.
I’ll give you a clue before I start…wear a helmet!
Now go easy on me, I have learnt my lesson. I was always going to buy a helmet, there just wasn’t anything suitable available in my town. I knew that if I ordered online, it probably wouldn’t fit properly and I’d have all the fuss of sending it back and so on.
So, in the interim, until I got the chance to visit a near by city, with descent helmet retailers, I’d taken to wearing a very thick beanie hat.
Even though my board easily manages 30km/h, I was most comfortable in the 15-20km/h range. I believed that at his speed, if I got into trouble, I’d be able to step off and run to a standstill.
So, after two significant incidents, strangely enough, it has proven impossible to exercise this maneuver, both of which were at a mere 15km/h.
Incident one. I’m riding along a wide tarmac cycle path. There’s loads of room and I’m only coming across the occasional cyclist. So, along comes an old chap on a mountain bike from the opposite direction. I pick an obvious line at the edge of the path well in advance. As we get closer, it becomes clear he can’t see me so I release the throttle and freewheel. As we got closer, I didn’t want to swerve as this may confuse matters so I tuck in hard to the edge of the path in the hope that he will make the slight evasive maneuver required to avoid a head on crash. Nope, didn’t happen and we crashed. To avoid an undignified coming together of bodies, I somehow leapt over his right shoulder, like a Ninja, and landed on my head. This hurt for a minute or two and gave me a little brain shake but the thick beanie saved the day from any scalp vs tarmac interaction. The old chap was unharmed and yes, he didn’t see me.
Incident two.
I’m riding along another even wider cycle track with no-one around. I’m practicing some swerving/slalom at around 15km/h. There is a grass verge each side of the track and after a brief wobble, the wheels are on the muddy grass and I’m in the air. I land on my shoulder but I can’t prevent my head from hitting the tarmac. The forces are too great and I’m tumbling anyway. Worse still, the collar of my coat pushed my beanie off just before I hit the ground and there’s damage to my head. Not only did I suffer brain shake again but blood is running out of my scalp from a large flapping gash with my skull showing beyond.
I sat there for a while, mad as hell, and in a little pain, before getting back on the board and heading home. Made it home ok and got the wife to take me to hospital. 3 hours in A&E, a painful cleaning operation of the wound and four stitches later and I’m leaving the hospital.
Why didn’t I buy the helmet immediately after the first incident? I guess I thought the crash wasn’t a usual type and the next one would be saved by my running plan.
Believe me, when you crash unexpectedly, there’s no time to run.
I know its just another “buy a helmet” story, but it has to be said again.
Here’s the pic of my head after the A&E visit.

I know, a pic before the stitches would have been better but I wasn’t in the mood. Note the flecks of flesh in my hair. You could have slid a small coin under the flap before it was stitched down.
Come on guys, I was lucky…twice.
This is my helmet which I wear every trip.

Apart from this, I am really enjoying my board. It has performed flawlessly. I’ll update again in the near future.
Cheers for now, Andy.
ps, If you ride without a helmet…you’re an idiot…like me. 
3 Likes
glad you are ok! I almost always wear a helmet, but the last few times i’ve forgotten either gloves or knee pads… I’m trying to now wear knee pads as well as helmet and gloves after skinning both (still pretty fortunate).
Great build thread and gotta love the dell server PSU’s! I have a pair in series for 24v 50+ amps. I run a few chargers off them, some limited 12v, others love 24v! Great option vs the typical AC->DC PSU’s for RC Hobby use.
Appreciate you sharing the good and the bad!
Thanks sl33py. You live and learn.
Andy.