I used to have blobs but 3 things removed all blobbing.
Putting a silicone sock(I glued it to the heater block using some silicone sealant)
Putting a thin layer of the silicone sealant on the exposed nozzle itself
Raise the nozzle just a little bit from the bed than what you would do for PLA.
For sticking to the glass bed I use hairspray once in a while, but spray isopropyl alcohol before every print to reactivate the hairspray that is still present on the bed. This prevents a constant build up of hairspray on the bed. Also I print at 245 without any cooling. That greatly improves layer adhesion and hence the strength. Print speed 40mm/sec and nozzle dia 0.4mm
I actually just got my perfect layer height going today, so way less blobbing! I use a gluestick layer over the PEI sheet on my glass bed at 70c, 245c for the Econofil PETG with no cooling. I found a silicone sock made printing worse, or at least it did when it got caught in the print one day. Moved my retraction up to 4mm too, that helped.
EDIT: My main scaling problem is that the positive/negative sides of the battery bulge the case out slightly, so the lid requires a lot of hand strength to make the slots line up.
DIY’ing tabs would still be a lot more expensive. You need to make a die, then get the tabs cut to shape and punch them. I paid 150€ for my test die plus
30€ for clamps. Then it cost me 70ct per one copper tab to laser cut it.
Making them from nickel strip reneders little sence, better spotweld battery pack.
They are not too expensive when you start adding things up. You can look up abother project here that was meant to make cheaper versions of what i have. He used copper braid and it ended up being just marginally cheaper.
Perhaps someone knows how to insert a reply at the top of the page or even if mods can do it? Would like to get most important stuff there so people wont have to dig through all the chat.
@agniusm You could and should create a new thread–your own thread–with all details, photos, FAQ, designs, user builds, etc and we’ll just start posting there. That way we can get rid of a lot of junk post(a lot from me, hehe) and start clean.
You’ll also have the editing power of the 1st post for 3 or 6 months.
We can ask a mod to edit to put that as a link on the very top of this thread. So that people know where to go.
Not even done building and every time my sharp Vruzend kit scratches my hands during assembly, it acts as a reminder of how much better I like this design
Hey, I bought N.E.S.E Tabs from the website and planning on using the 2s4p cases for a 12s4p battery that will go in a HAYA deck. Does the layout bellow make sense? Is there a better layout? Thanks.
Looks good. Same I will do but make sure you have space left for vesc ecc… Otherwise you can go with 5 2s4p modules and two 1s4p modules where one side has two 2s4p and one 1s4p modules and the other has three 2s4p and one 1s4p modules. Depends on the space available
On the new thread? Had no time yet to sit and put it all together.
I need to find some time to finish 2 of the ebikes till june. 1 battery build and one more intense build with welding and stuff
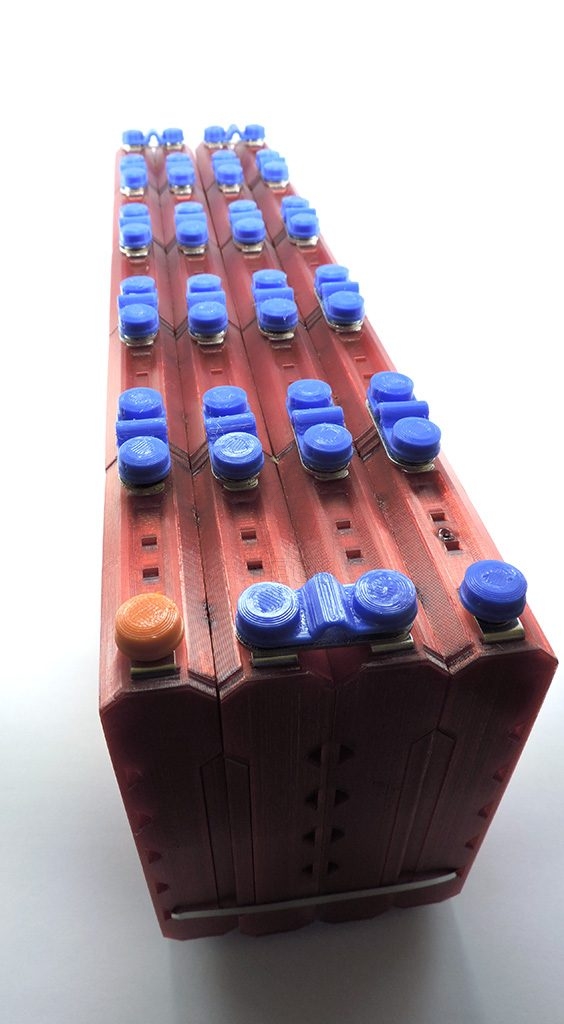
Listing this here as well:
I have 20S6P kit that was intended for my cargo bike. Driven 200 meters and crappy BMS drained my cells dry over winter. I am building new one, only larger.
Modules are in bright red color and include everything to build 20S6P battery pack. Very easy to build and even easier to take apart to swap cells. The kit is reusable and can serve for a lifetime of human.
List:
20 6P modules (bright red)
19 series bus bars
19 twin bolt caps (blue)
2 single bolt cap (orange/blue)