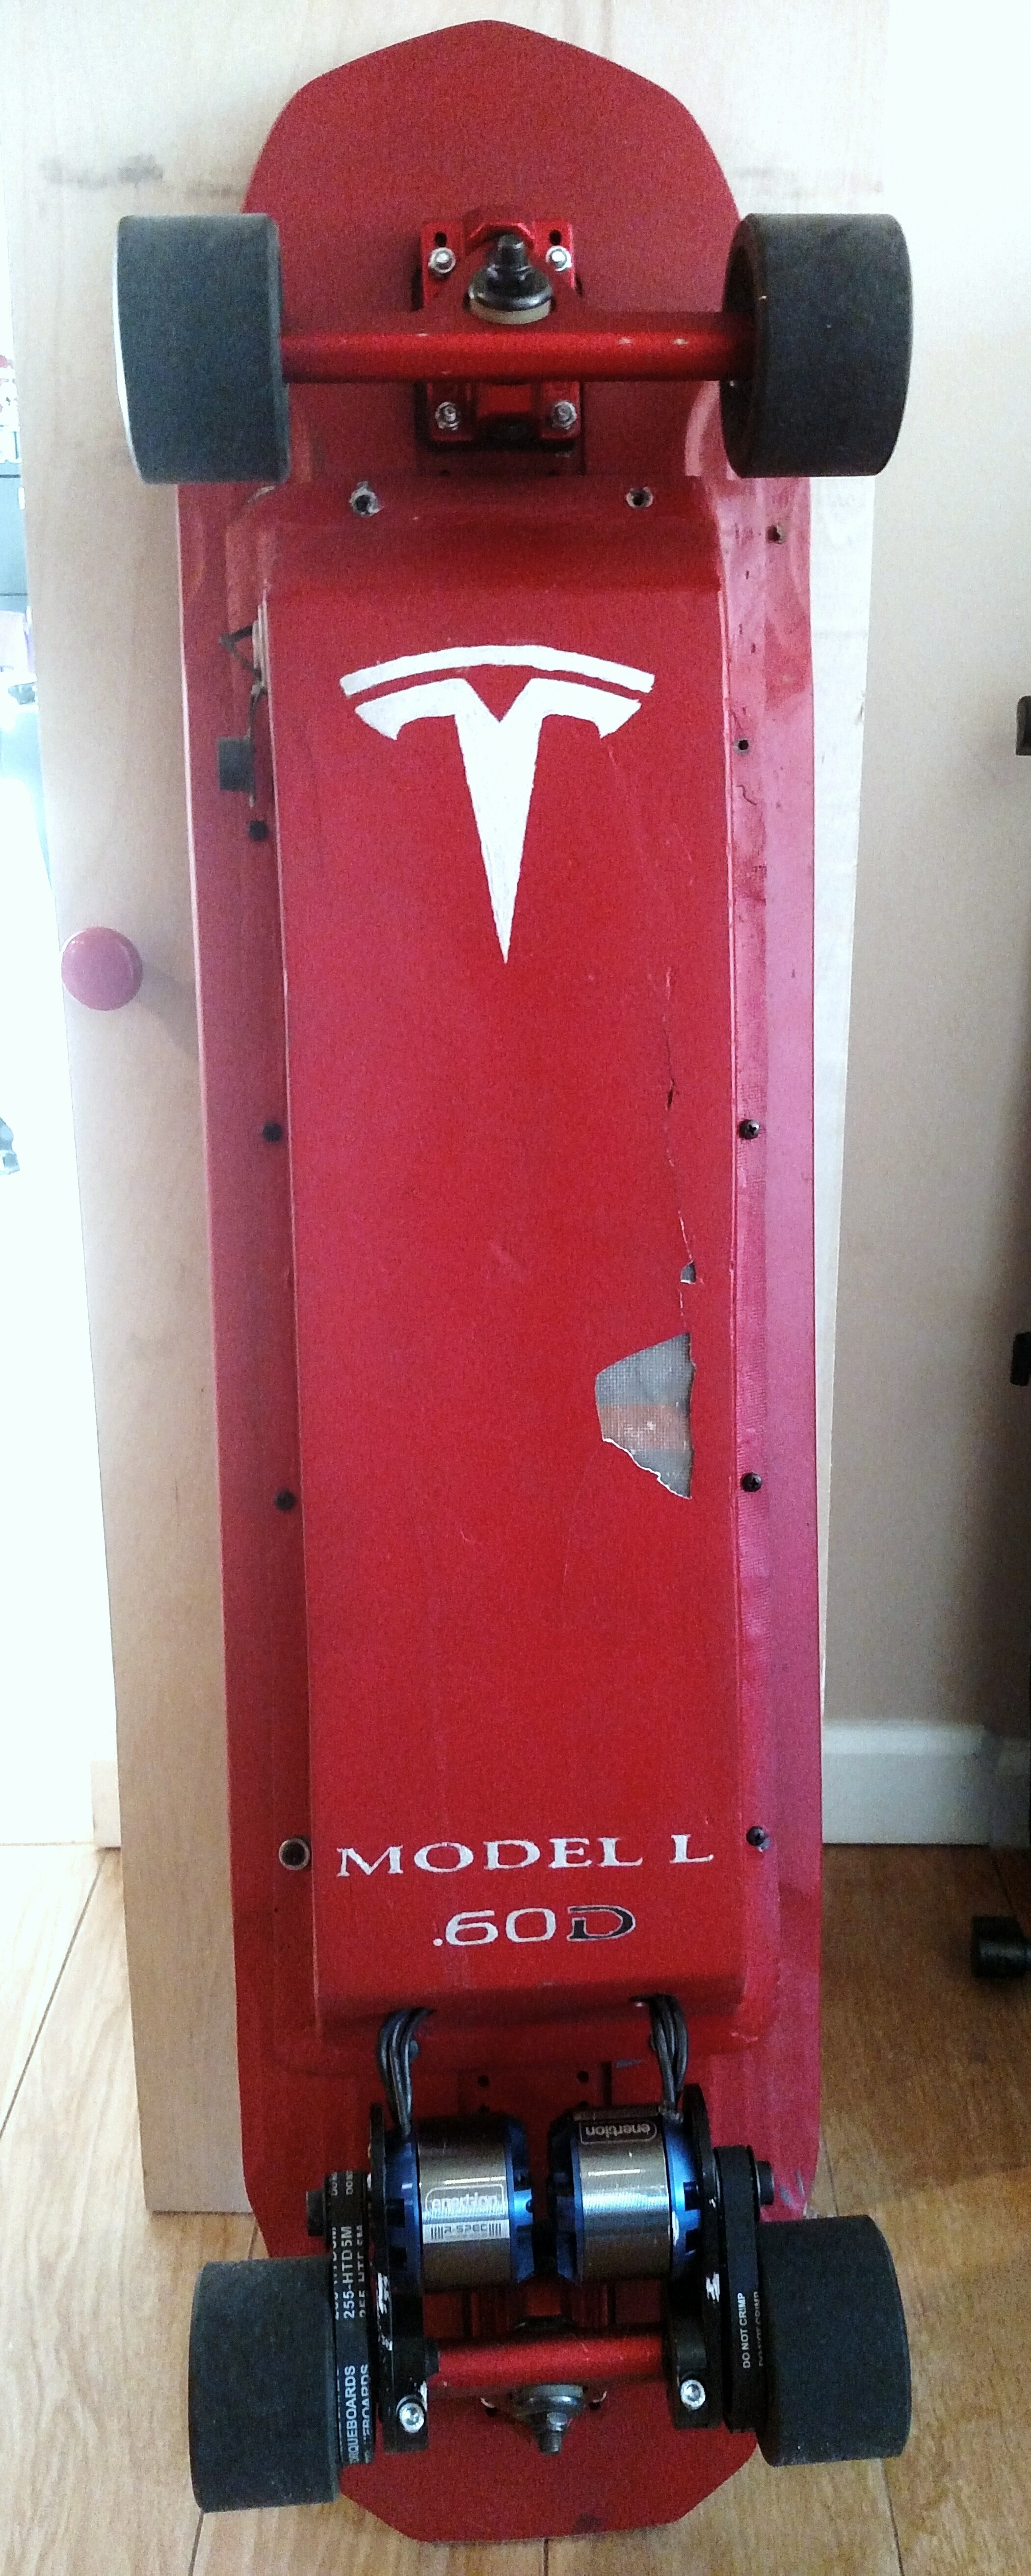
Hi everyone! I just recently finished my second board and I want to show it off a bit. The inspiration for the theme came from the batteries, I was able to buy some salvaged 18650’s from a model S. This lead to the idea of the “Model L .60D”

Quite the build especially coming from the first build I did ( still love it though!)

Here are the Specs:
- Dual Enertion R-Spec 6355 190Kv Motors
- Custom 18650 10S5P Pack built out of Salvaged Tesla Model S cells
- Arbor Backlash 40
- Caliber II trucks, Red
- 83mm flywheel clones in Black
- Dual Torqueboards Motor mounts
- Custom assembled VESC x2
- DIY Fiberglass enclosure
- GT2B Throttle in a badwolf enclosure
- Redesigned Antispark Switch
Let me know if you want any more information. From here on i’ve got some pictures from the build process, hope you all enjoy!
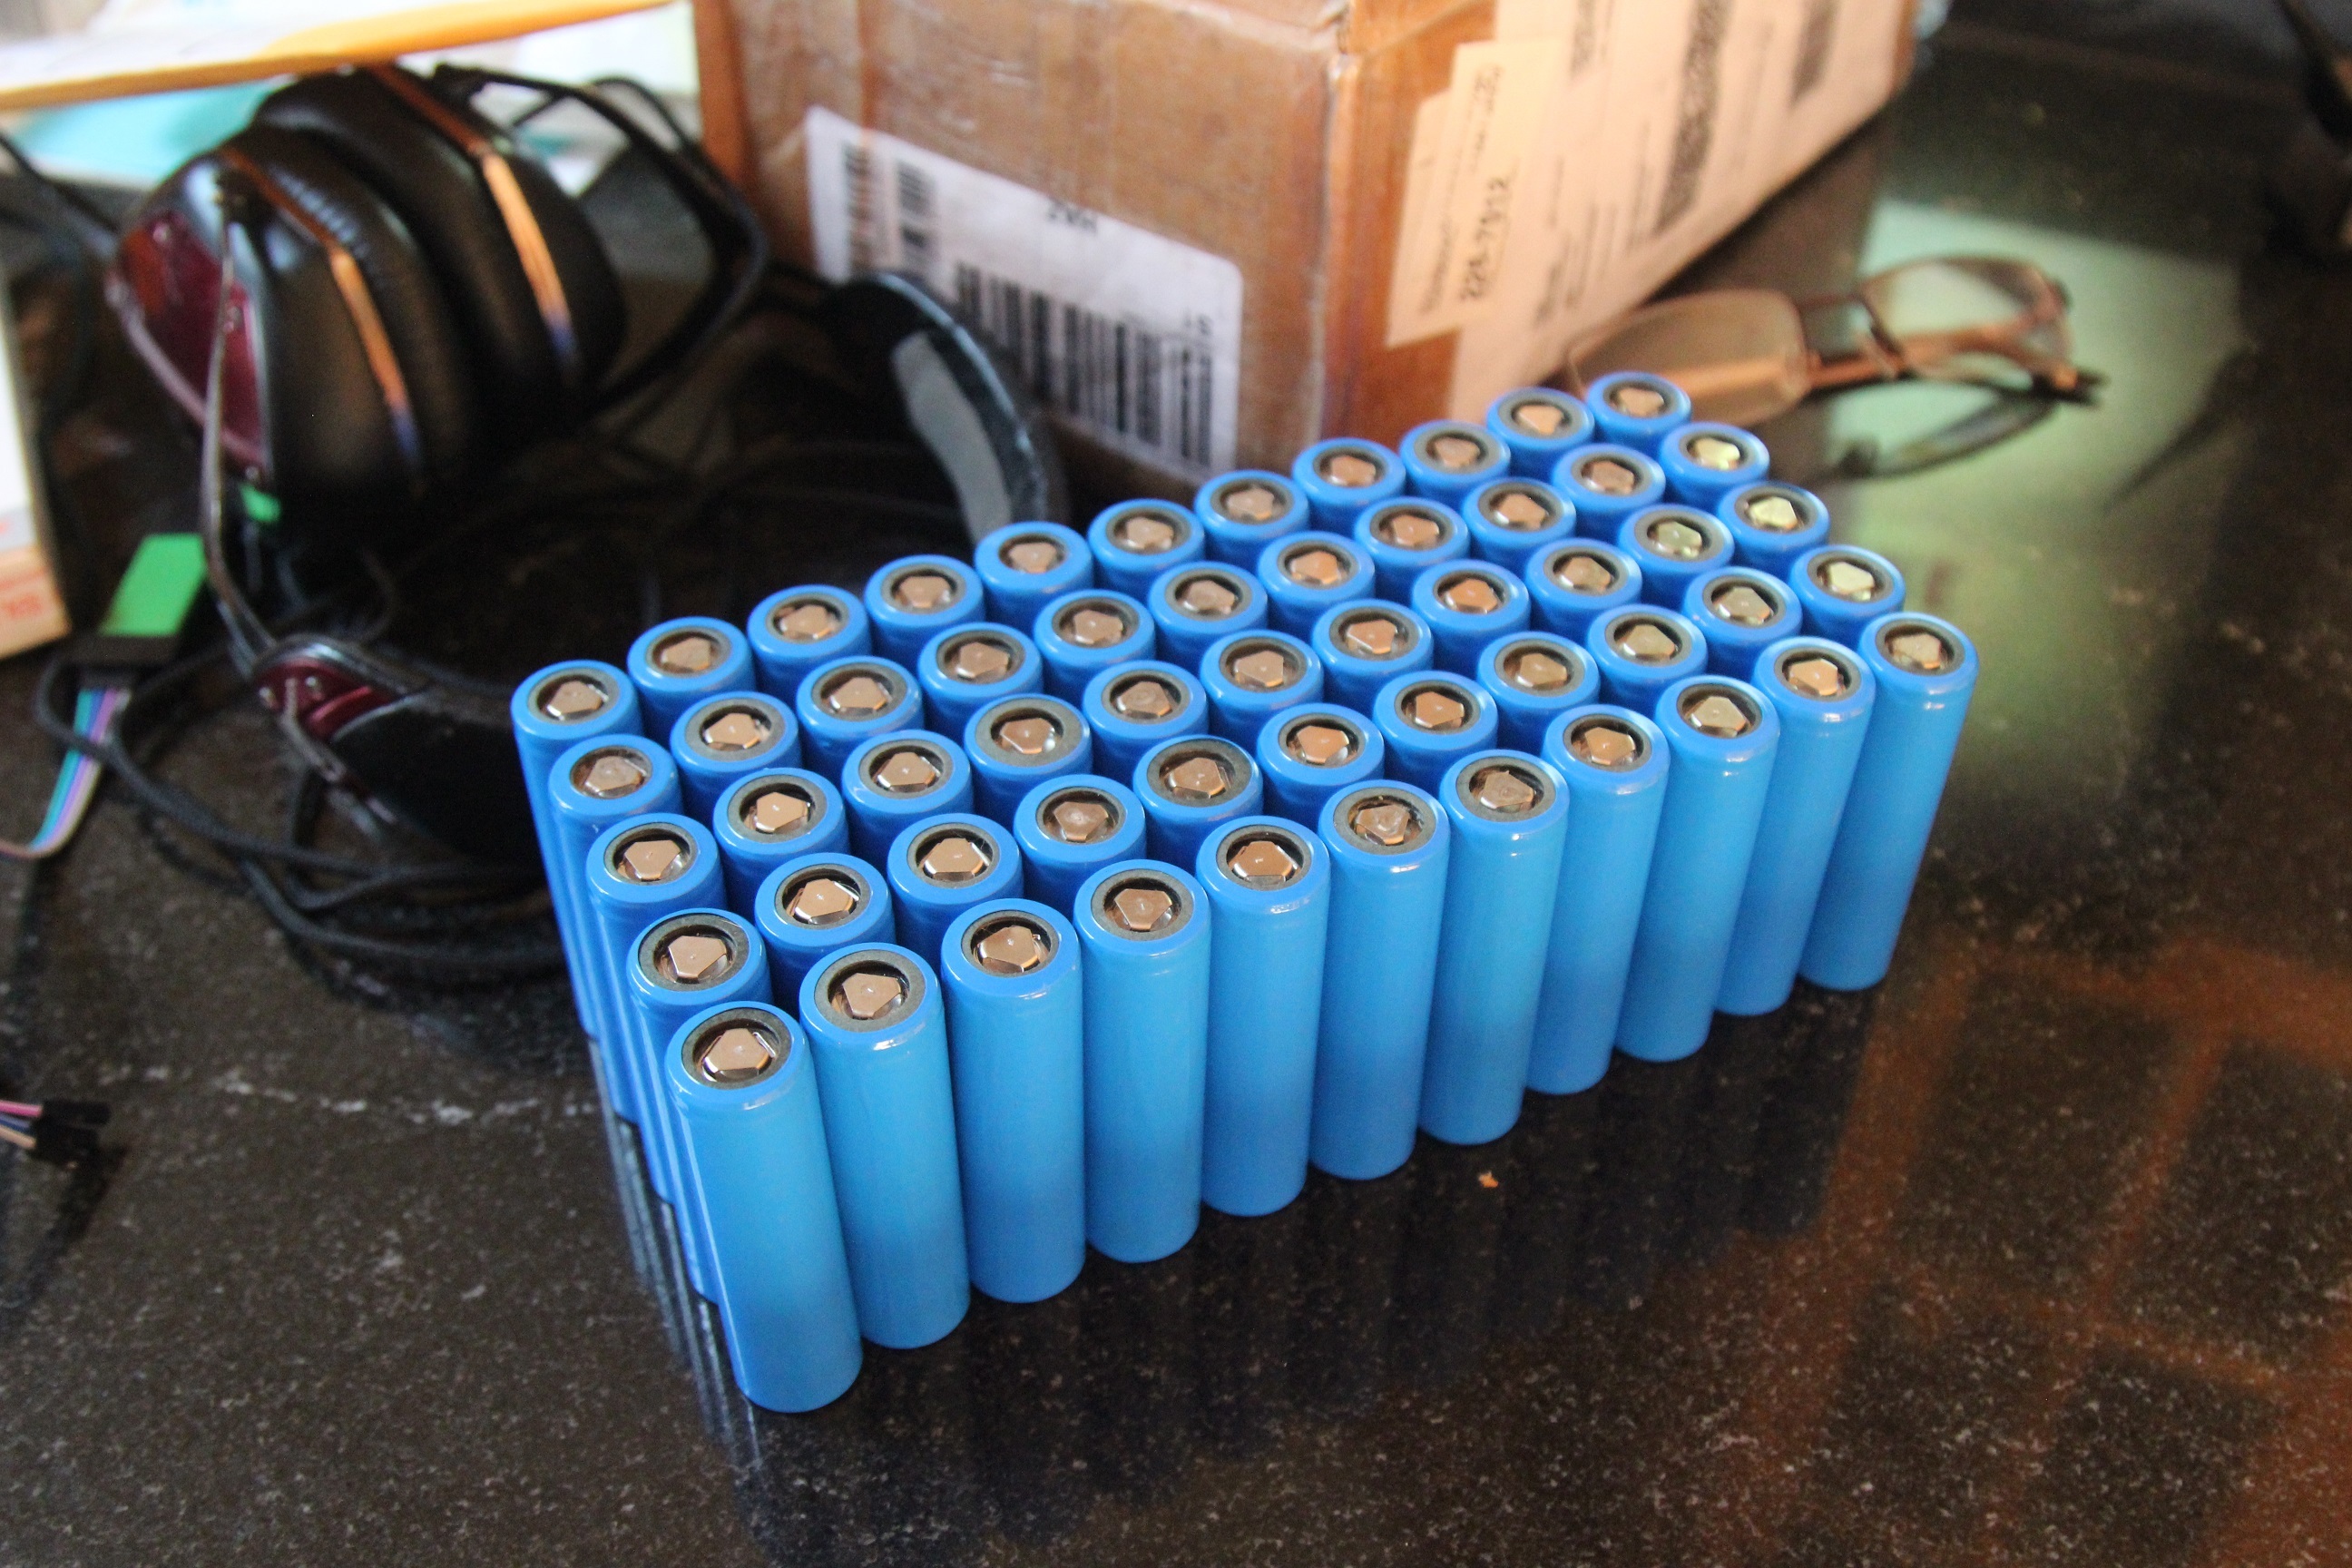
The cells have arrived! 55 in total, 50 used in the board.

Hardware showed up, time to assemble the drive unit. As a side note torqueboard is awesome, helped me out with an order issue with zero problems and incredibly fast responses.

Assembling the drive truck, still plenty left to go.

The graphics on the board were nice, but they had to go, sorry arbor.

Checking fit, needed to make sure I could fit all these cells and have clearance for the wheels.

I built an arduino spotwelder to build my pack, I want to redesign the spotwelder eventually as it was a little more quirky than I liked. This was the first pack of 10, it was a fun learning experience. Only tried welding the pack to itself twice lol.

The completed pack, with balance leads but sans main power lines and BMS.

I wasnt happy with just a strip of nickel, got the idea from whitepony for the extra copper on the pack.

Pack is all done! BMS wired in and i needed to test fit the other parts so I could figure out the wiring.
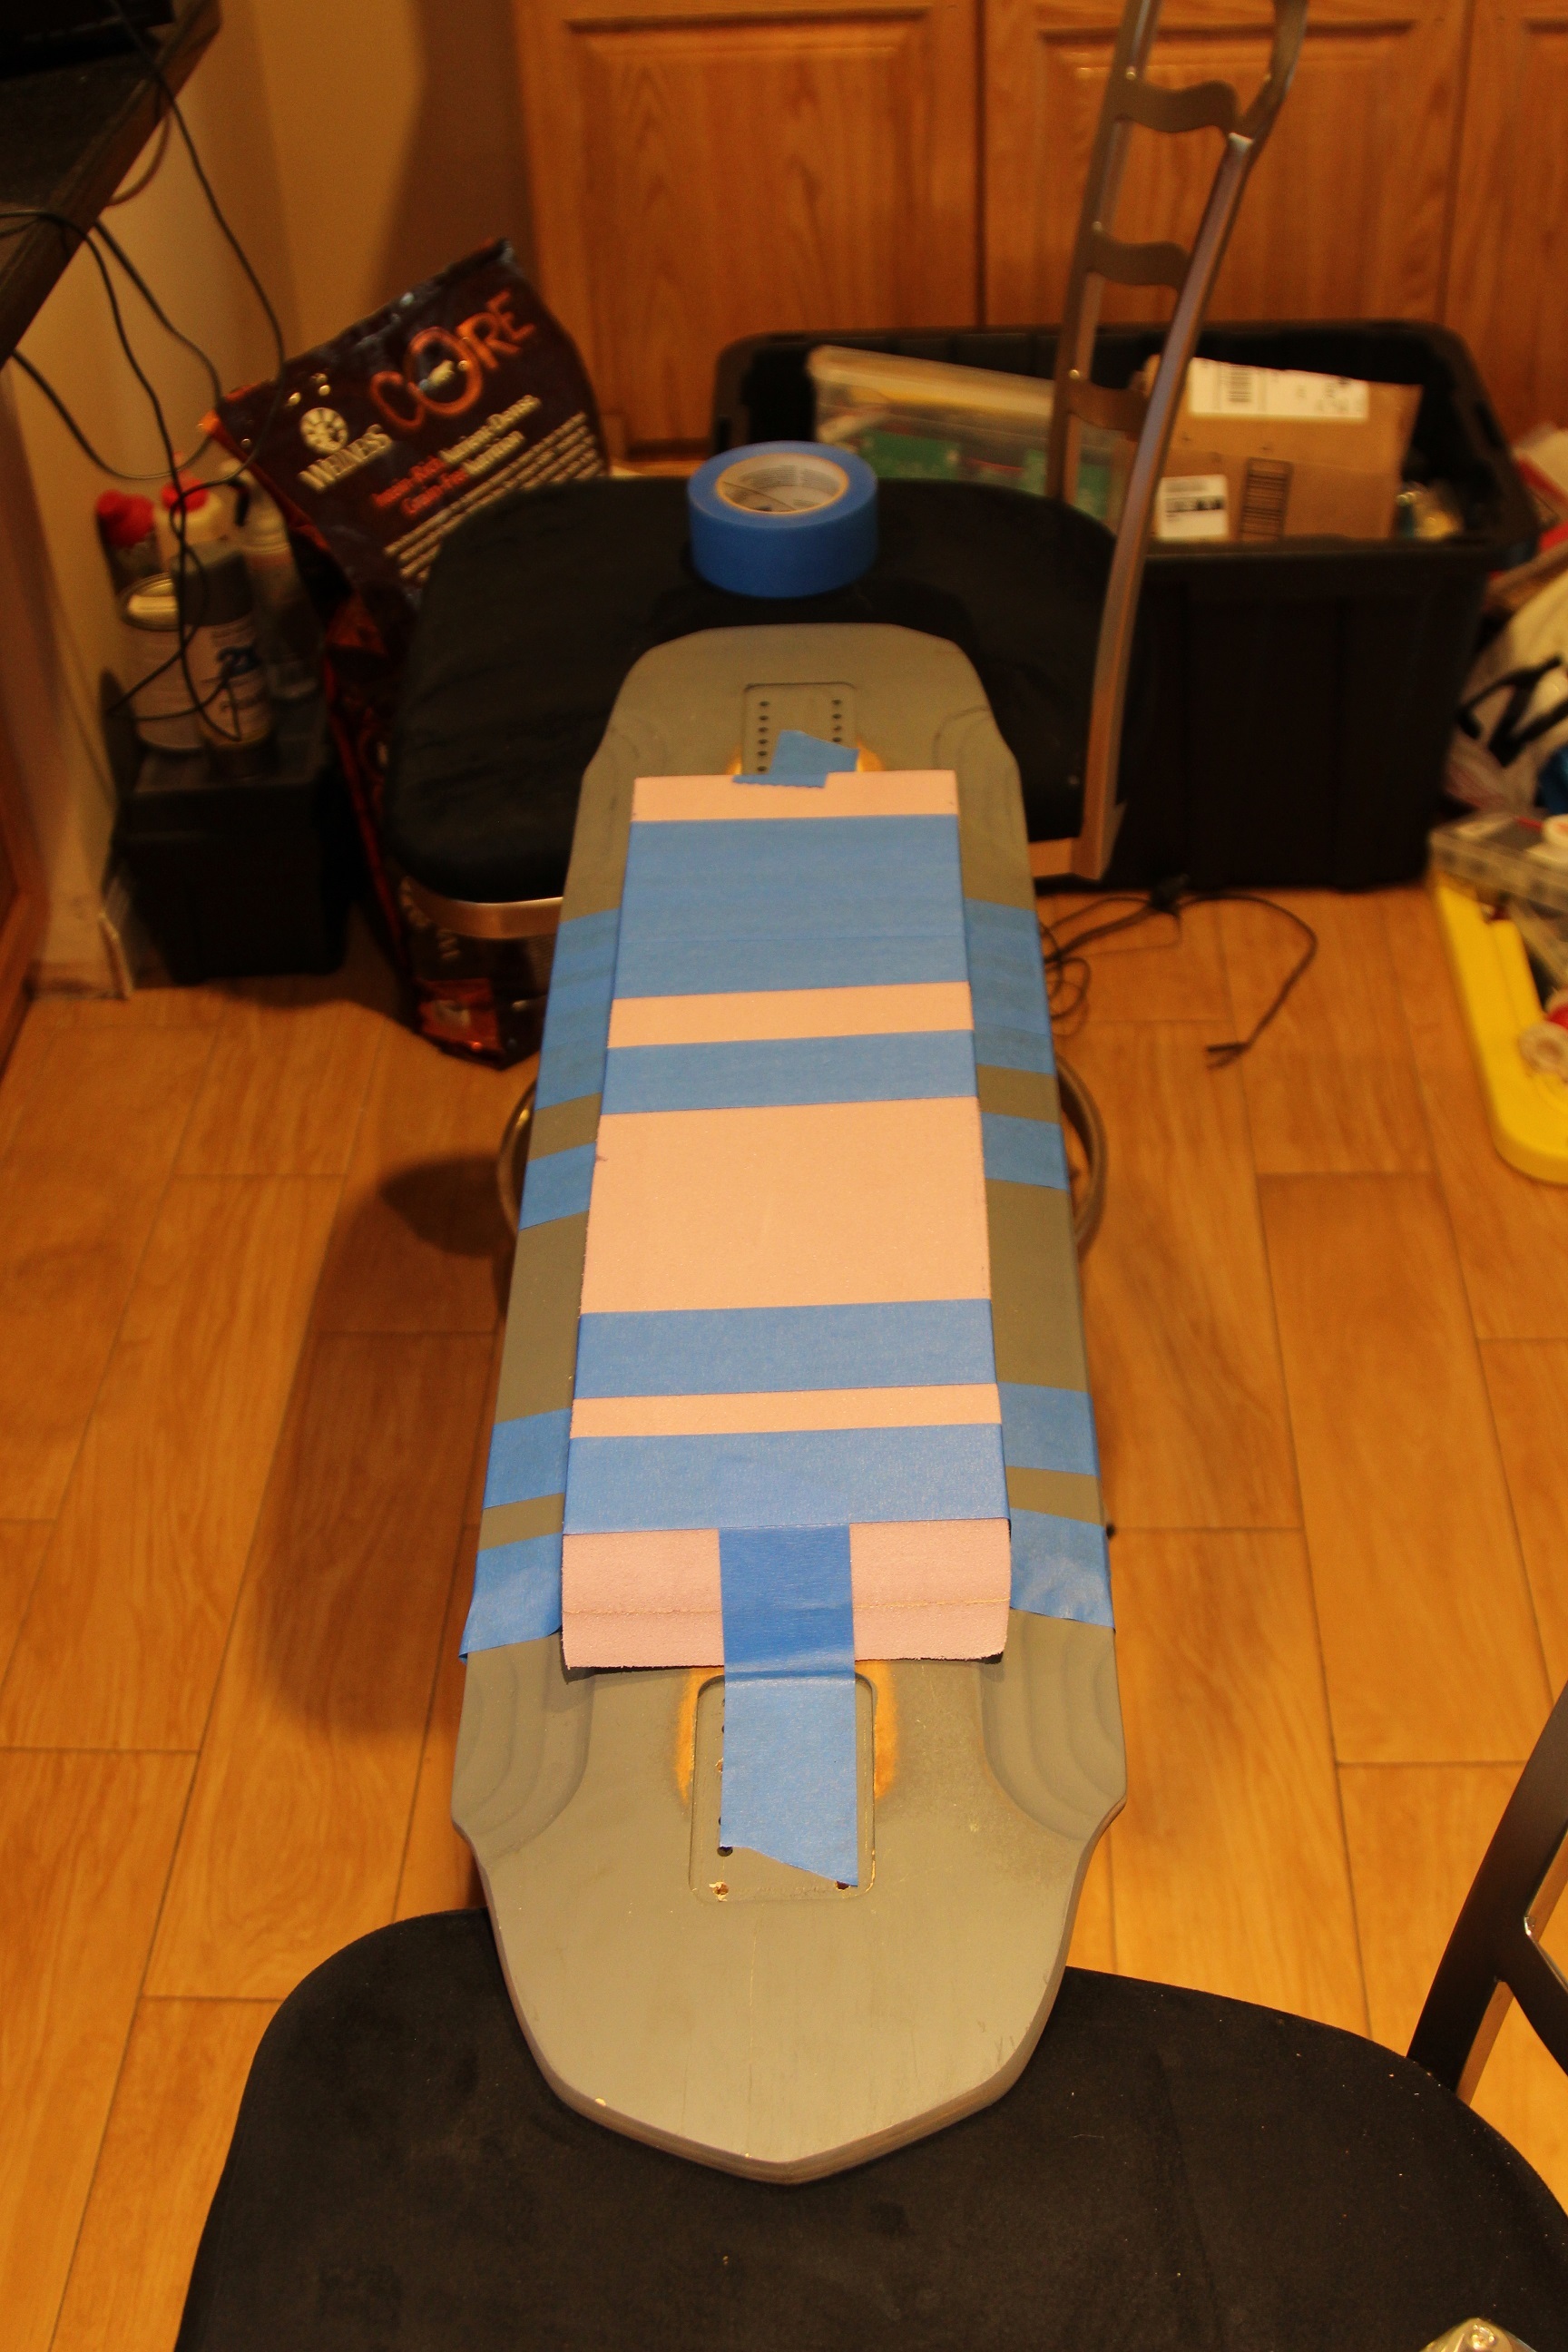
Time for the fiberglass case, the mold was made out of 2" foam sanded down to size and then taped on.

The previously mentioned tape covered mold, ready for fiberglass.
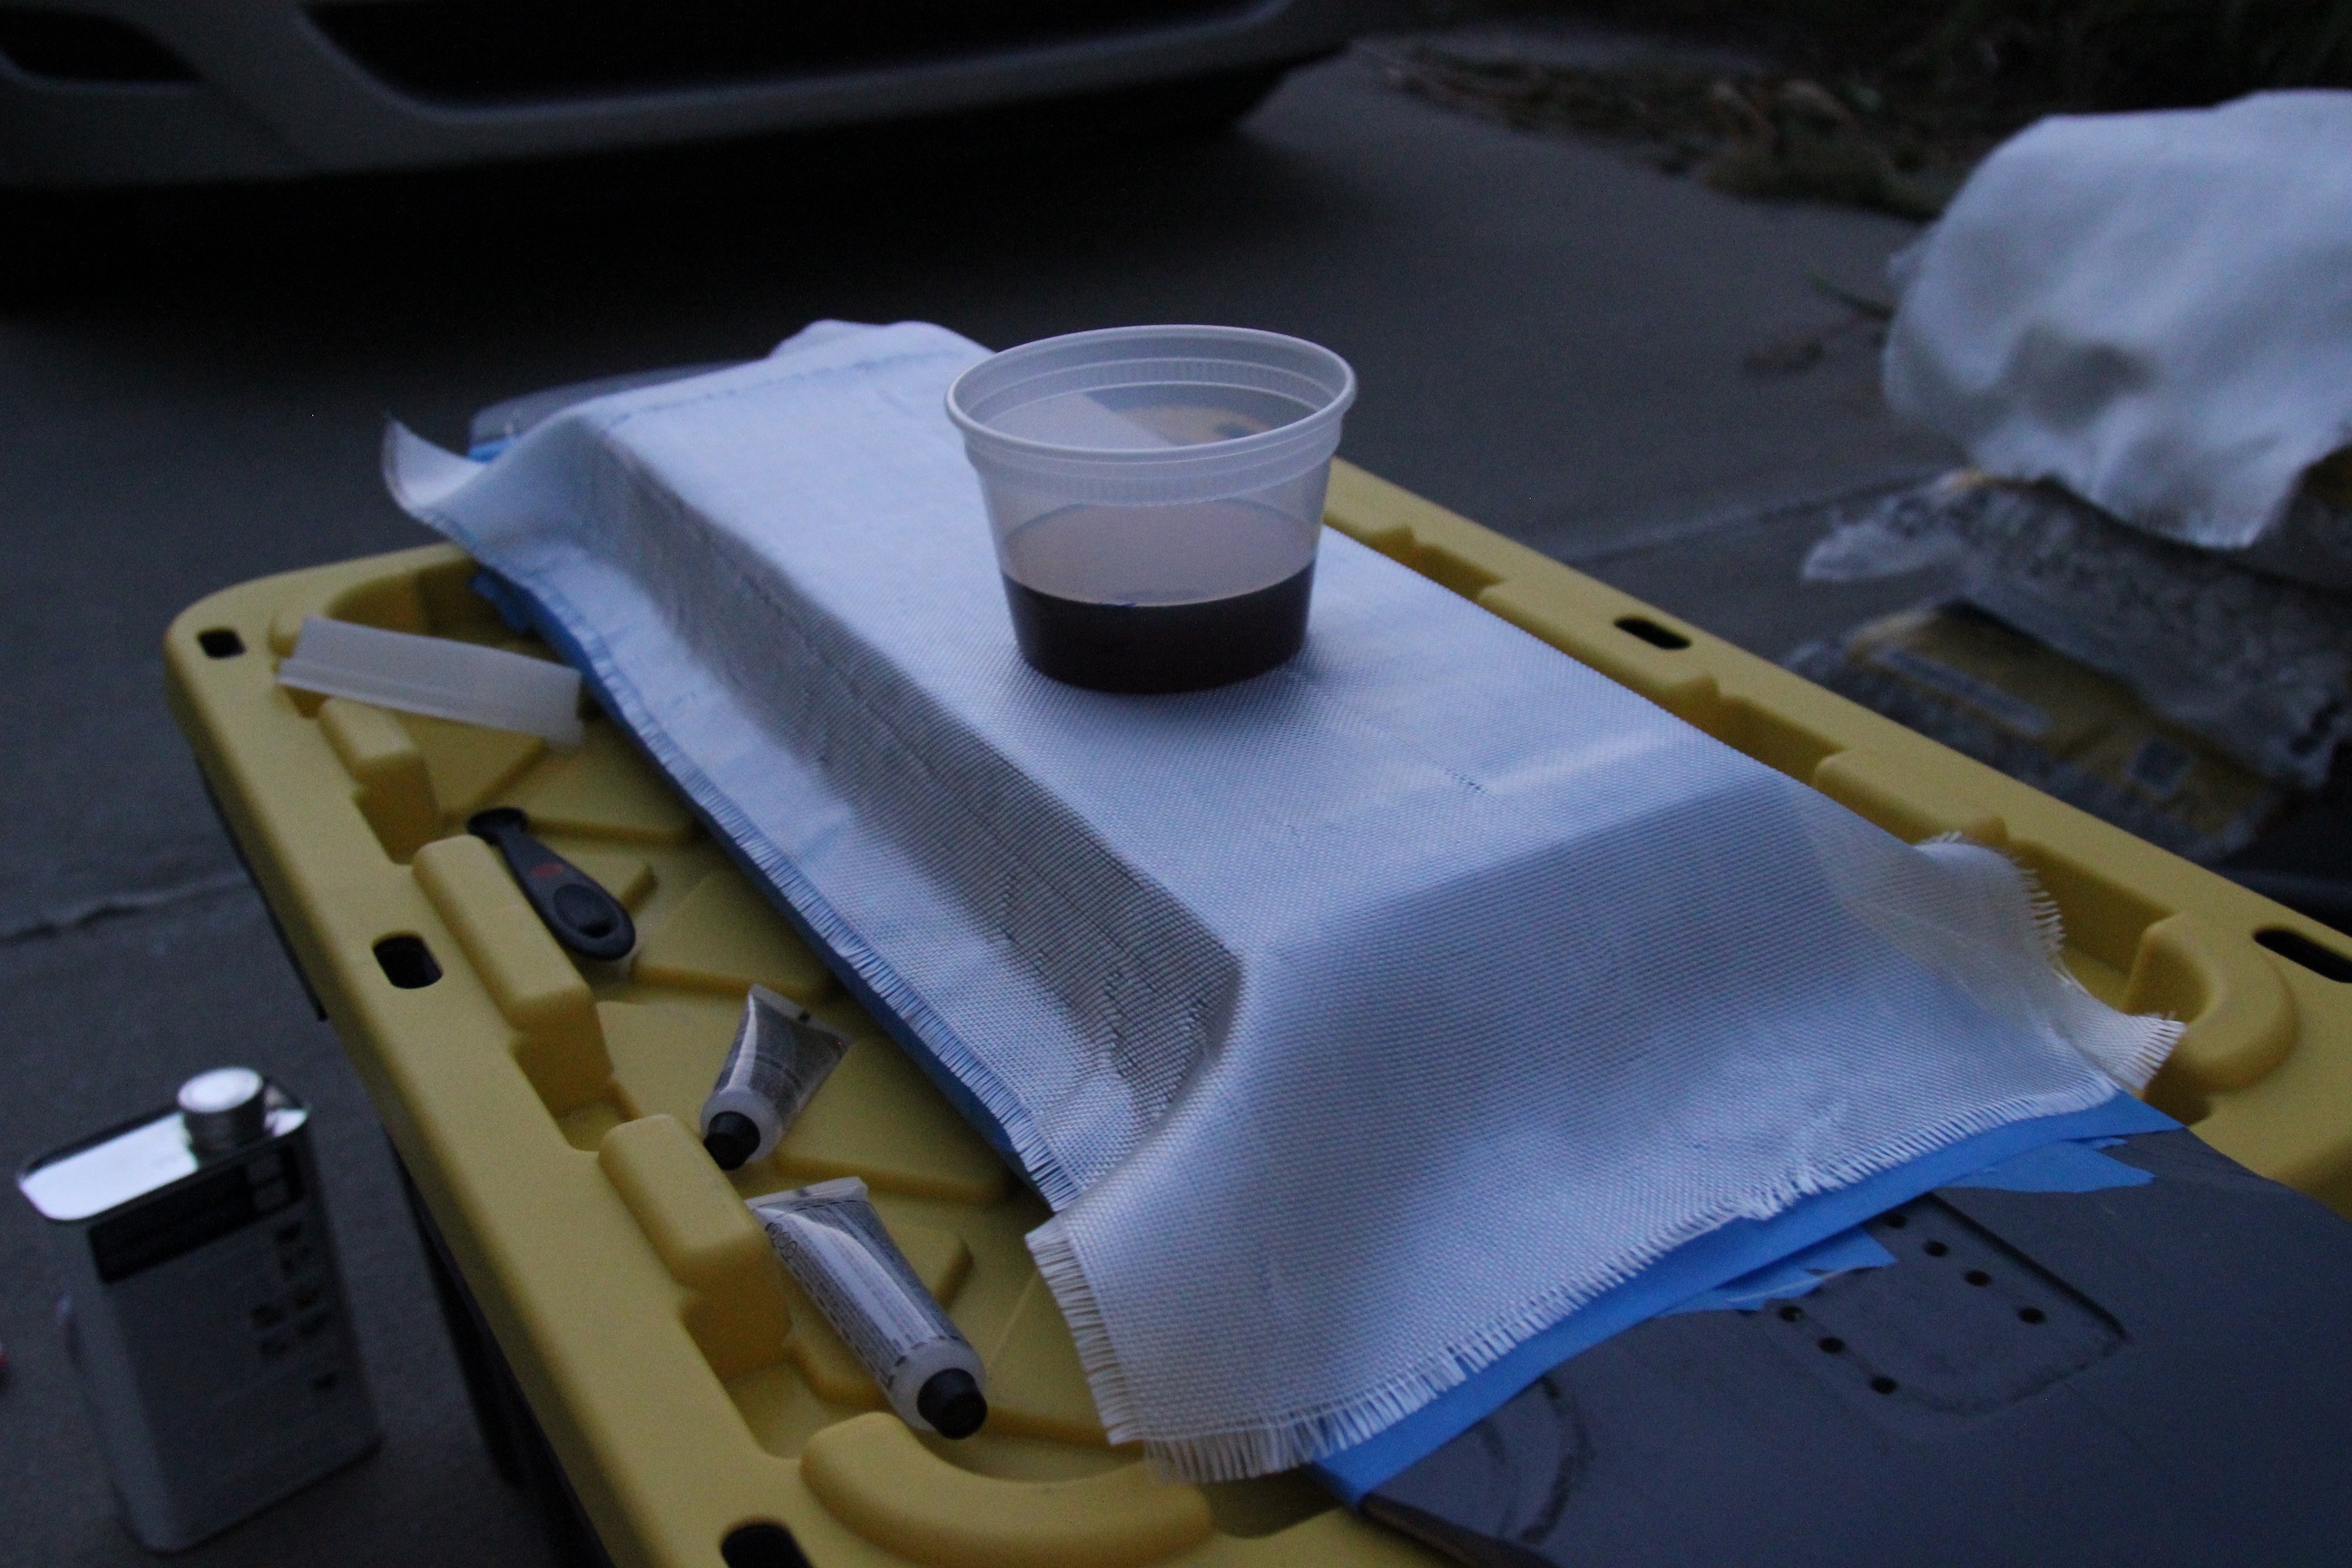
Here we go! Fiberglass time, never done this before this case.

Annnnd done, time to dry, it came out a lot better than I was expecting.
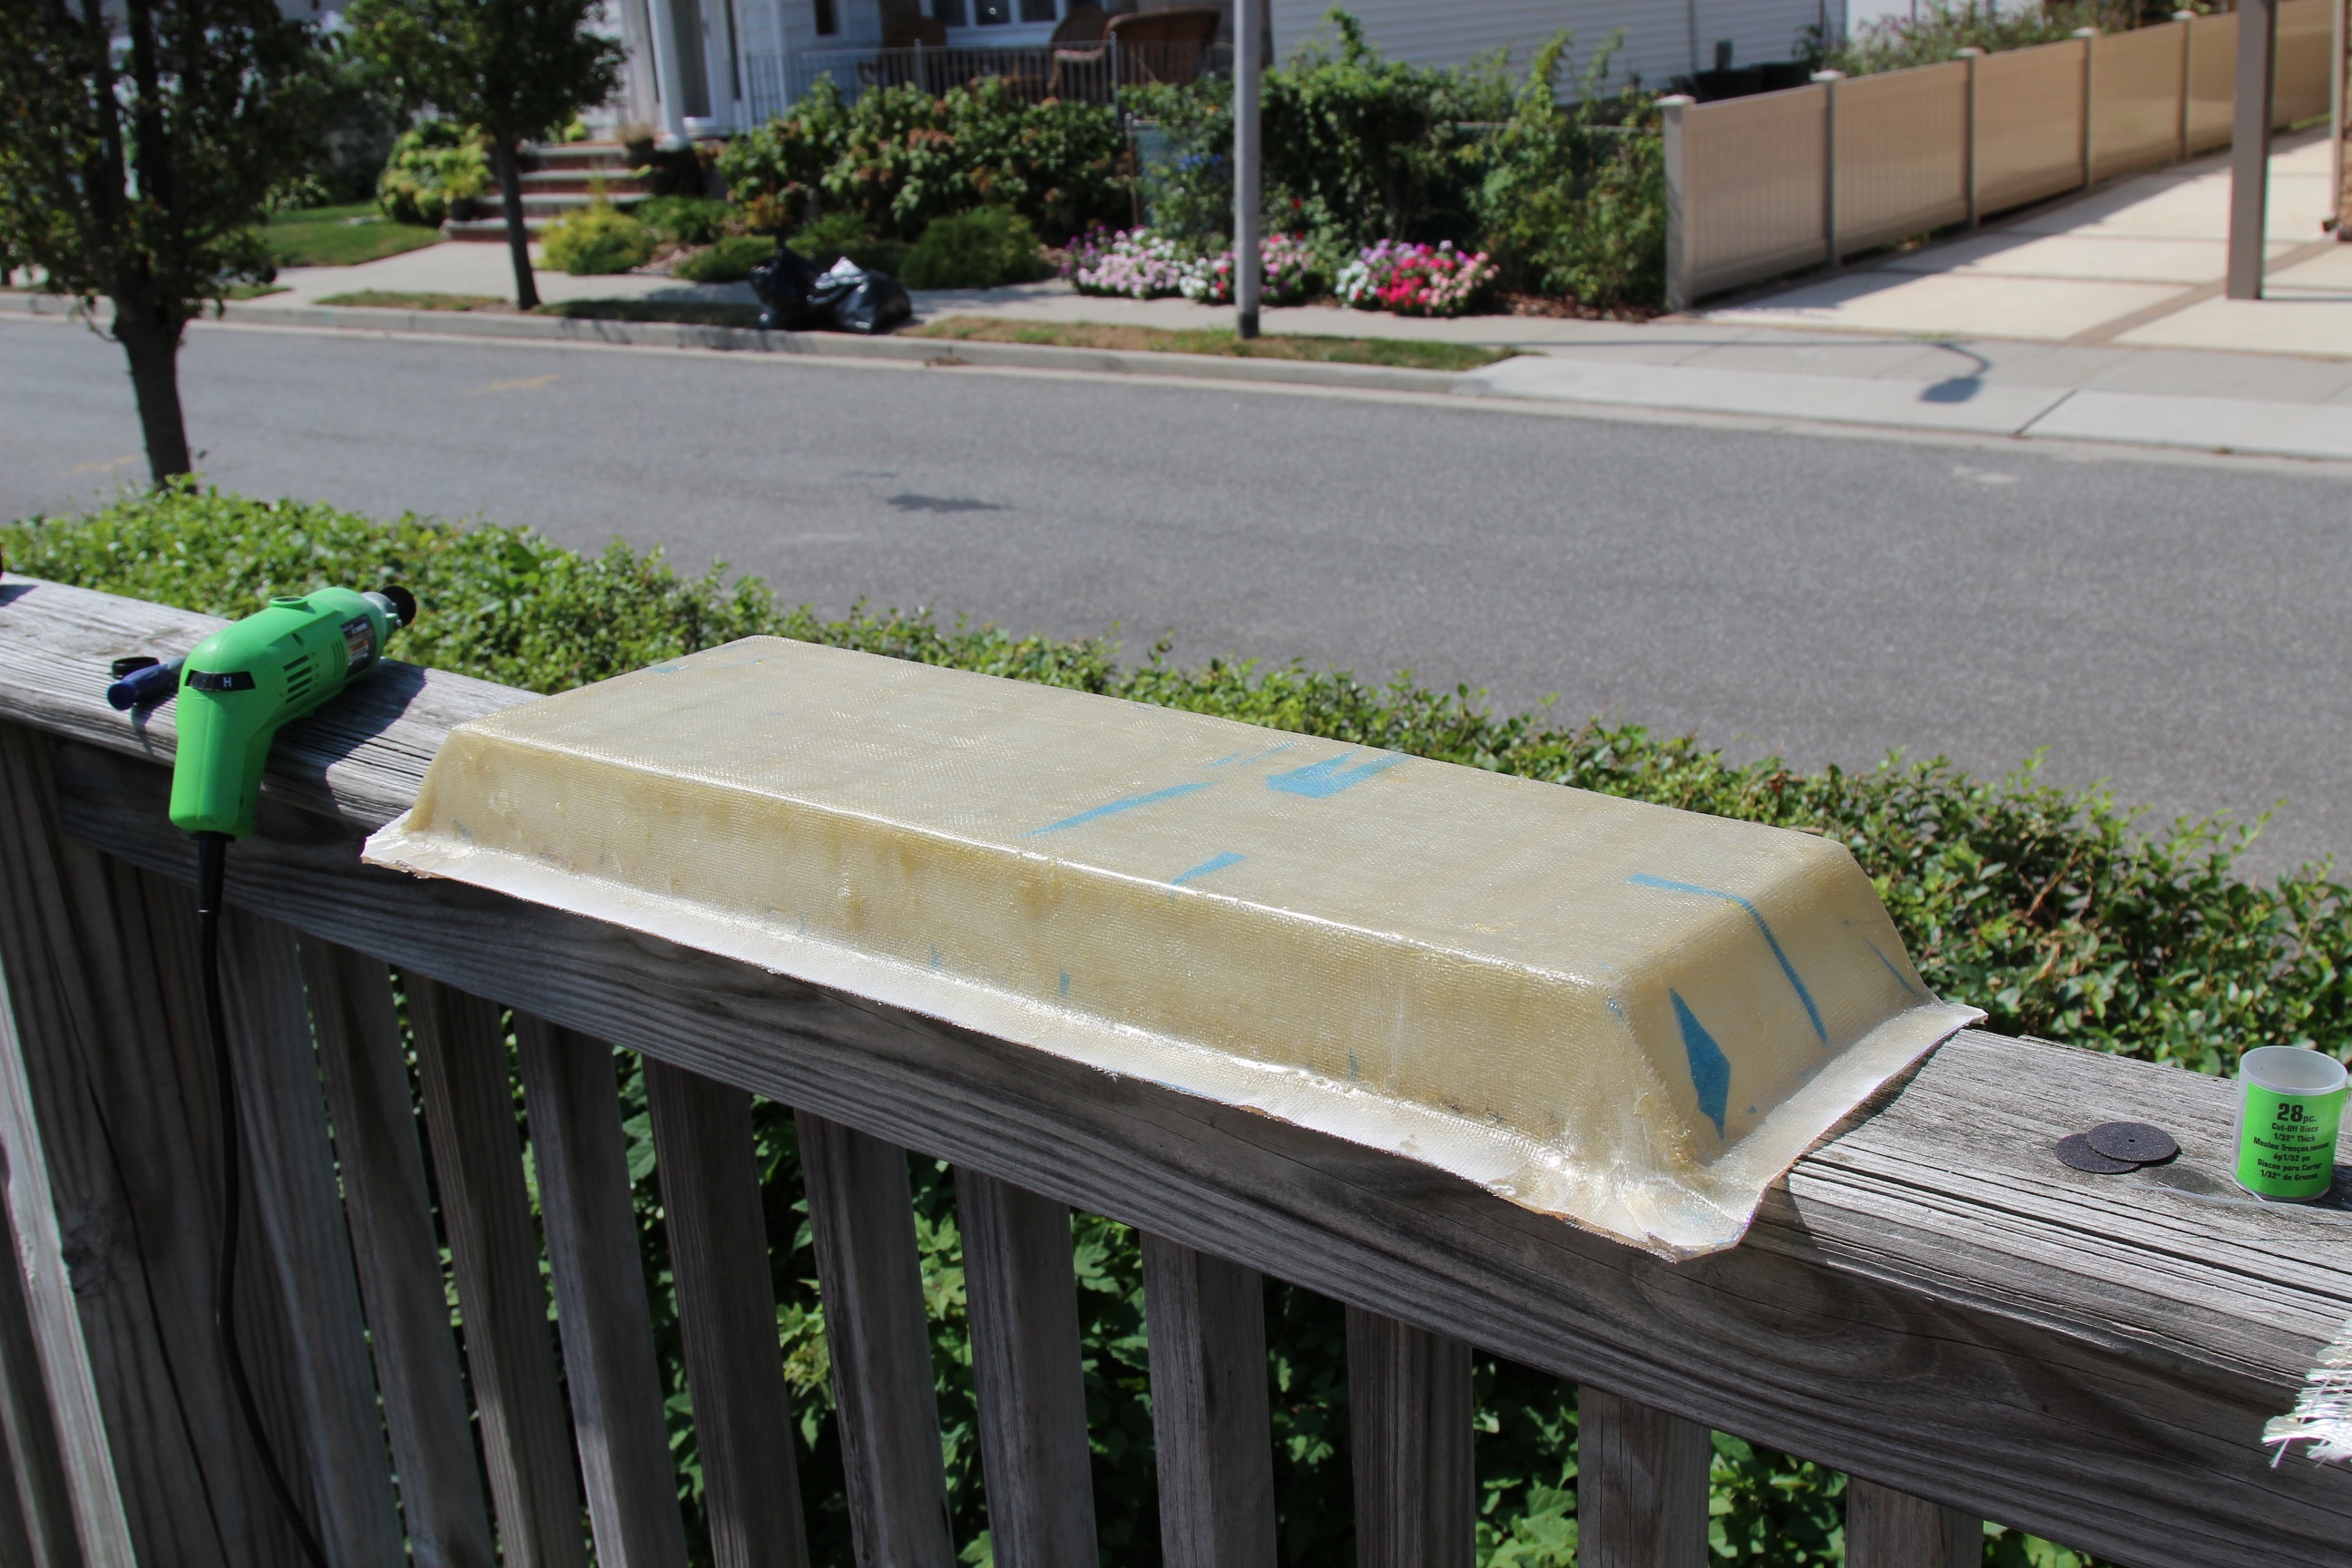
The finished box, with the extra fiberglass trimmed off and ready for painting.

Primered the deck and case.

I wasnt happy with how the case looked so I got some bondo and went to town, took a while and as such I’m going to look into vacuum stuff for the next time I do this.

I used ezlok inserts to attach the case, turns out they break VERY easy using a drill to drive them in, but I eventually got them driven in using a screw in the socket and screwdriver. They work very well though.

Painted and sealed, still have some masking over the mounting points but the board is done now.

Electronics all buttoned up and stuffed in the case, air conditioner insulation foam works amazing for this, everything is nice and snug.
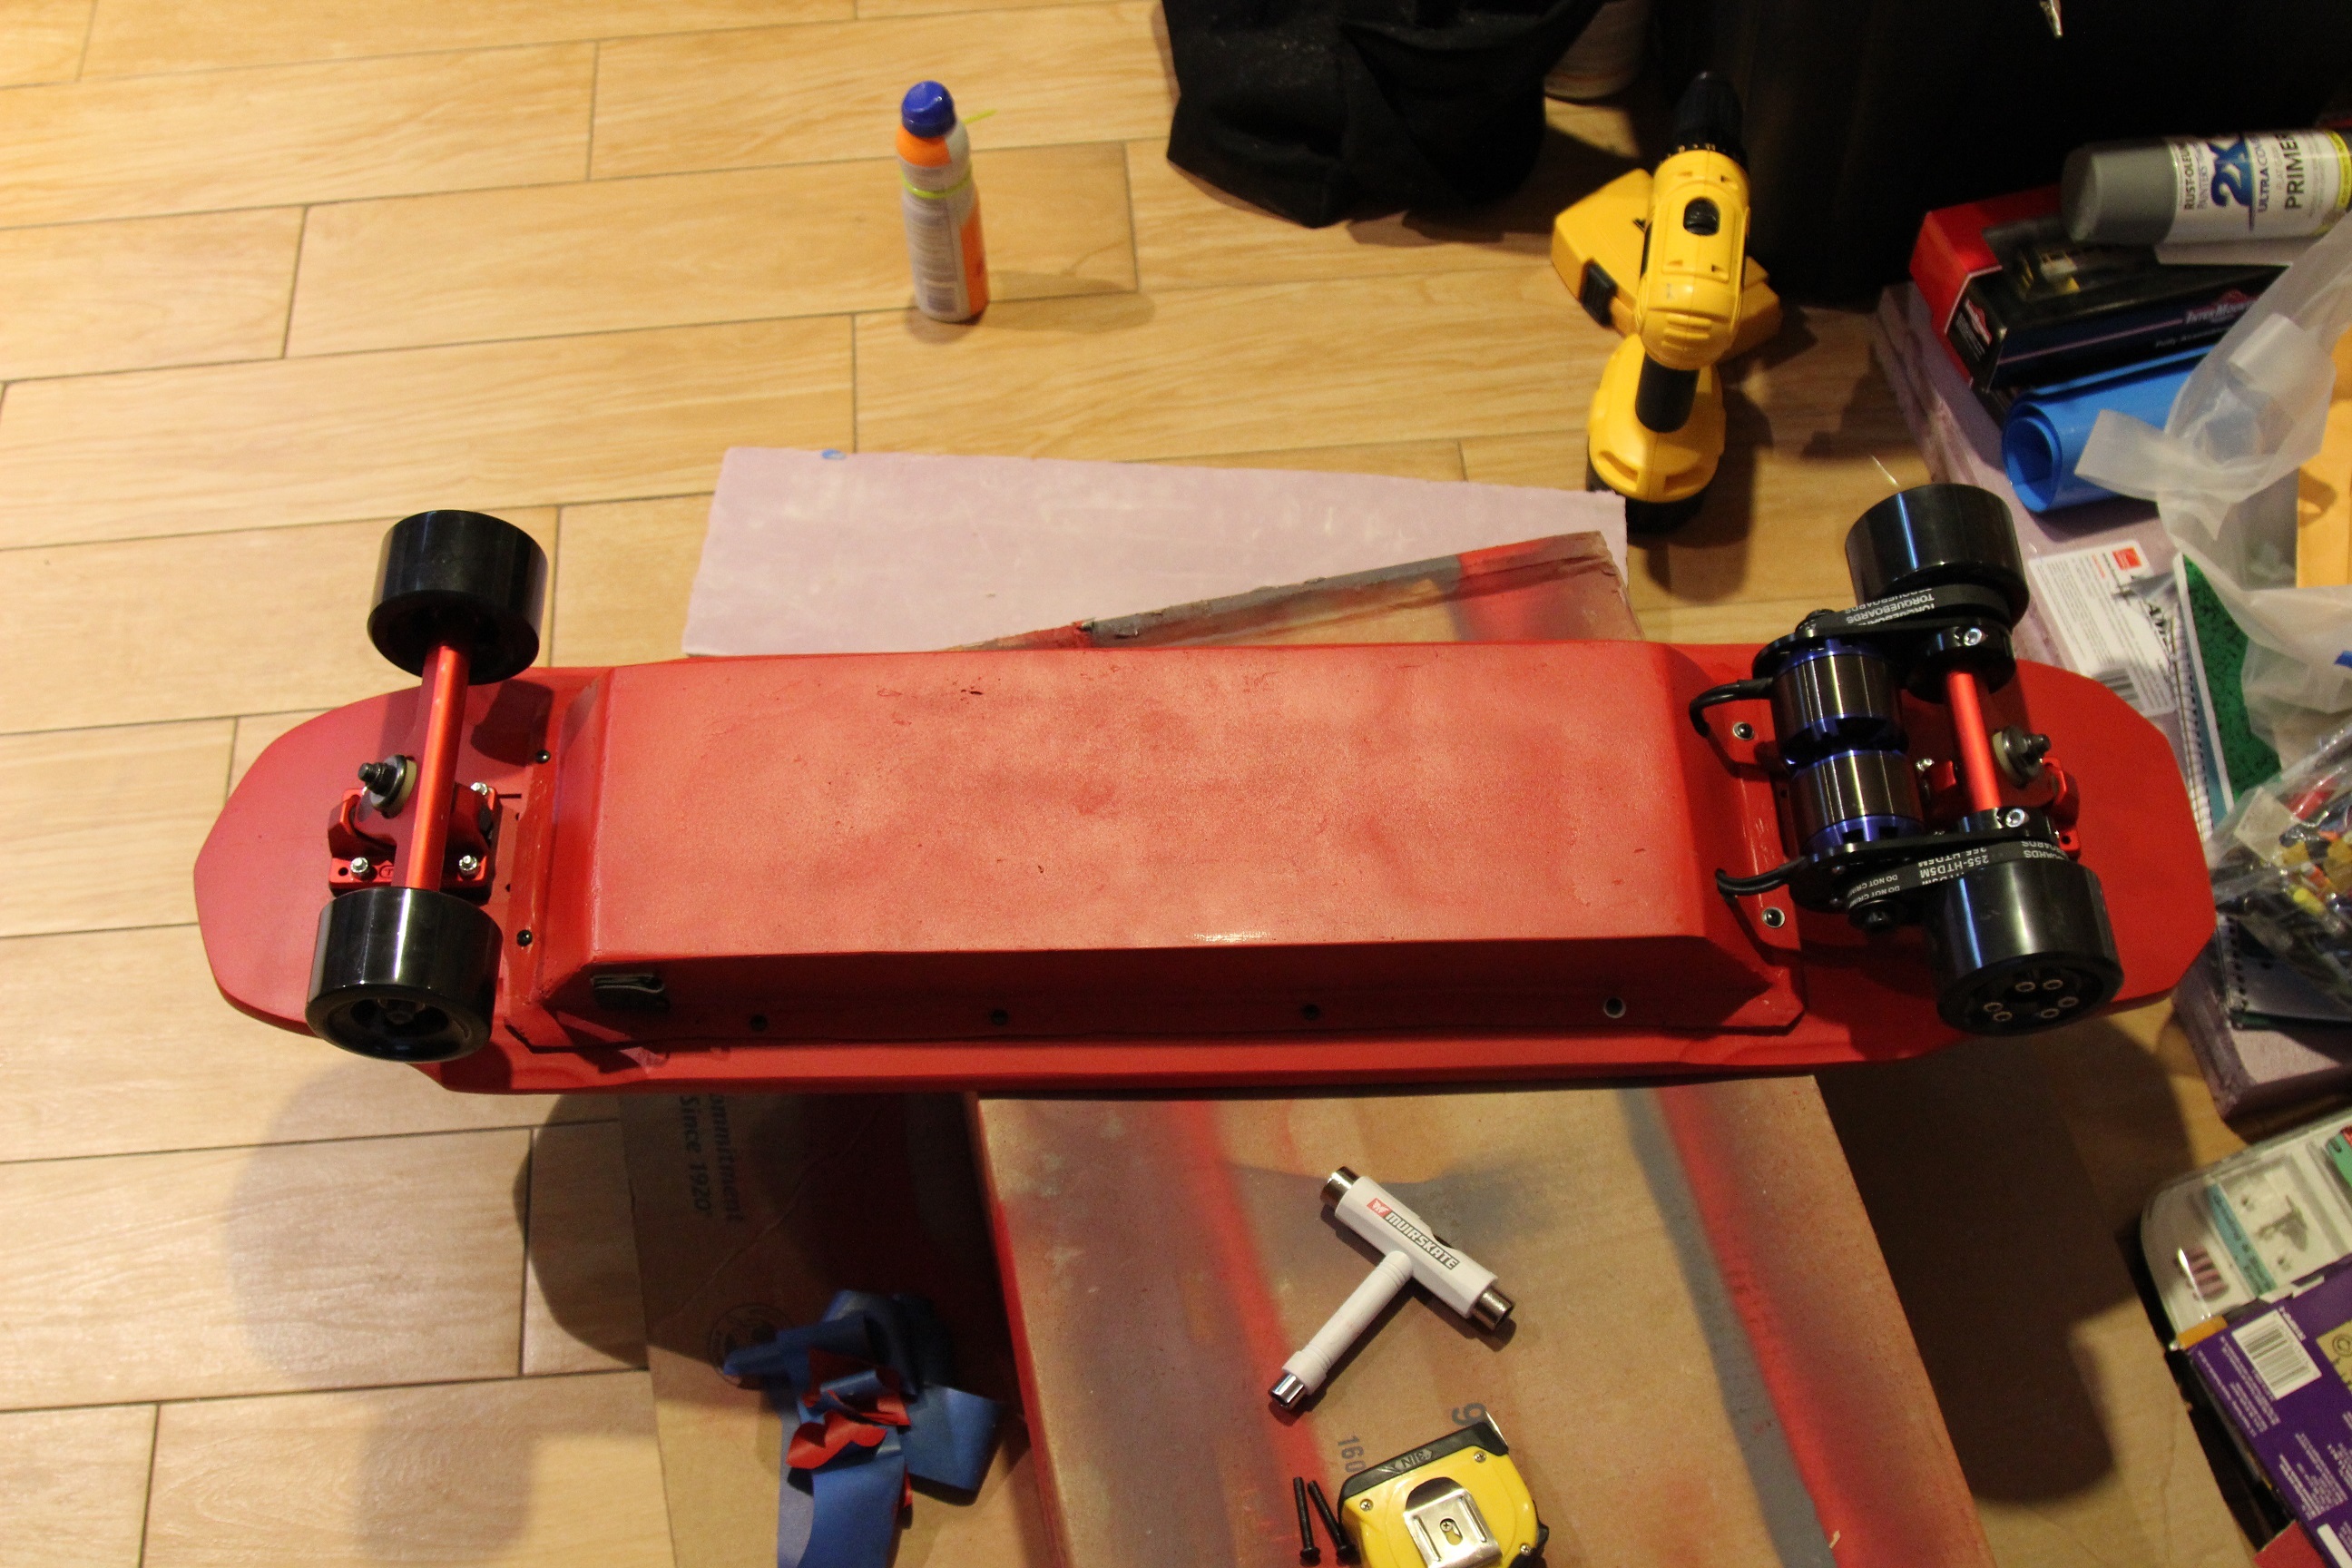
Was doing some testing, here’s the board before I did the final paint job.

Finally, this is how i was reprogramming it the other day, had to tie the board to a chair using some left over wire hah.
The board runs amazingly, i’ve just been having some fit and finish issues. Mainly just getting the motor mount to stay put, but I did a ~5 mile run with no issues today so I think i nailed it down. I love the fact that the board’s motors sound like turbines spooling up and down as I accelerate/brake. Havent maxed out the speed yet but I’ve broken my personal speed record by hitting 25mph, the board should easily hit 30+mph. Also havent ran the board dry but checking the voltage change based off my ride today, I should have nearly ~30 miles of range aswell. This project has been one hell of a success and this is just the start!
I’ll be building a second “Model L” so I can have a board for my friends to ride, only single motor but I think ill still throw a 10S5P at it. Next up on custom hardware is a Power distribution board for LED’s, headlights as well as the same board providing bluetooth support so I can pull data from the board. Sometime in the future I’d also like to design a BMS, I started a design but threw it due to time constraints and unreasonable scope creep.
Comments/Critiques, throw them my way!