Just get 2 and stack them like LEGO bricks 
2 Likes

5 Likes
Yeah. I might get this one for the VESC: https://www.amazon.com/LEGO-Mini-Box-4-Red/dp/B008KQ0SO4/
And then after upgrading to dual motor setup things will align nicely. 
5 Likes
Weird I was thinking it would be fun to use lego this is awesome

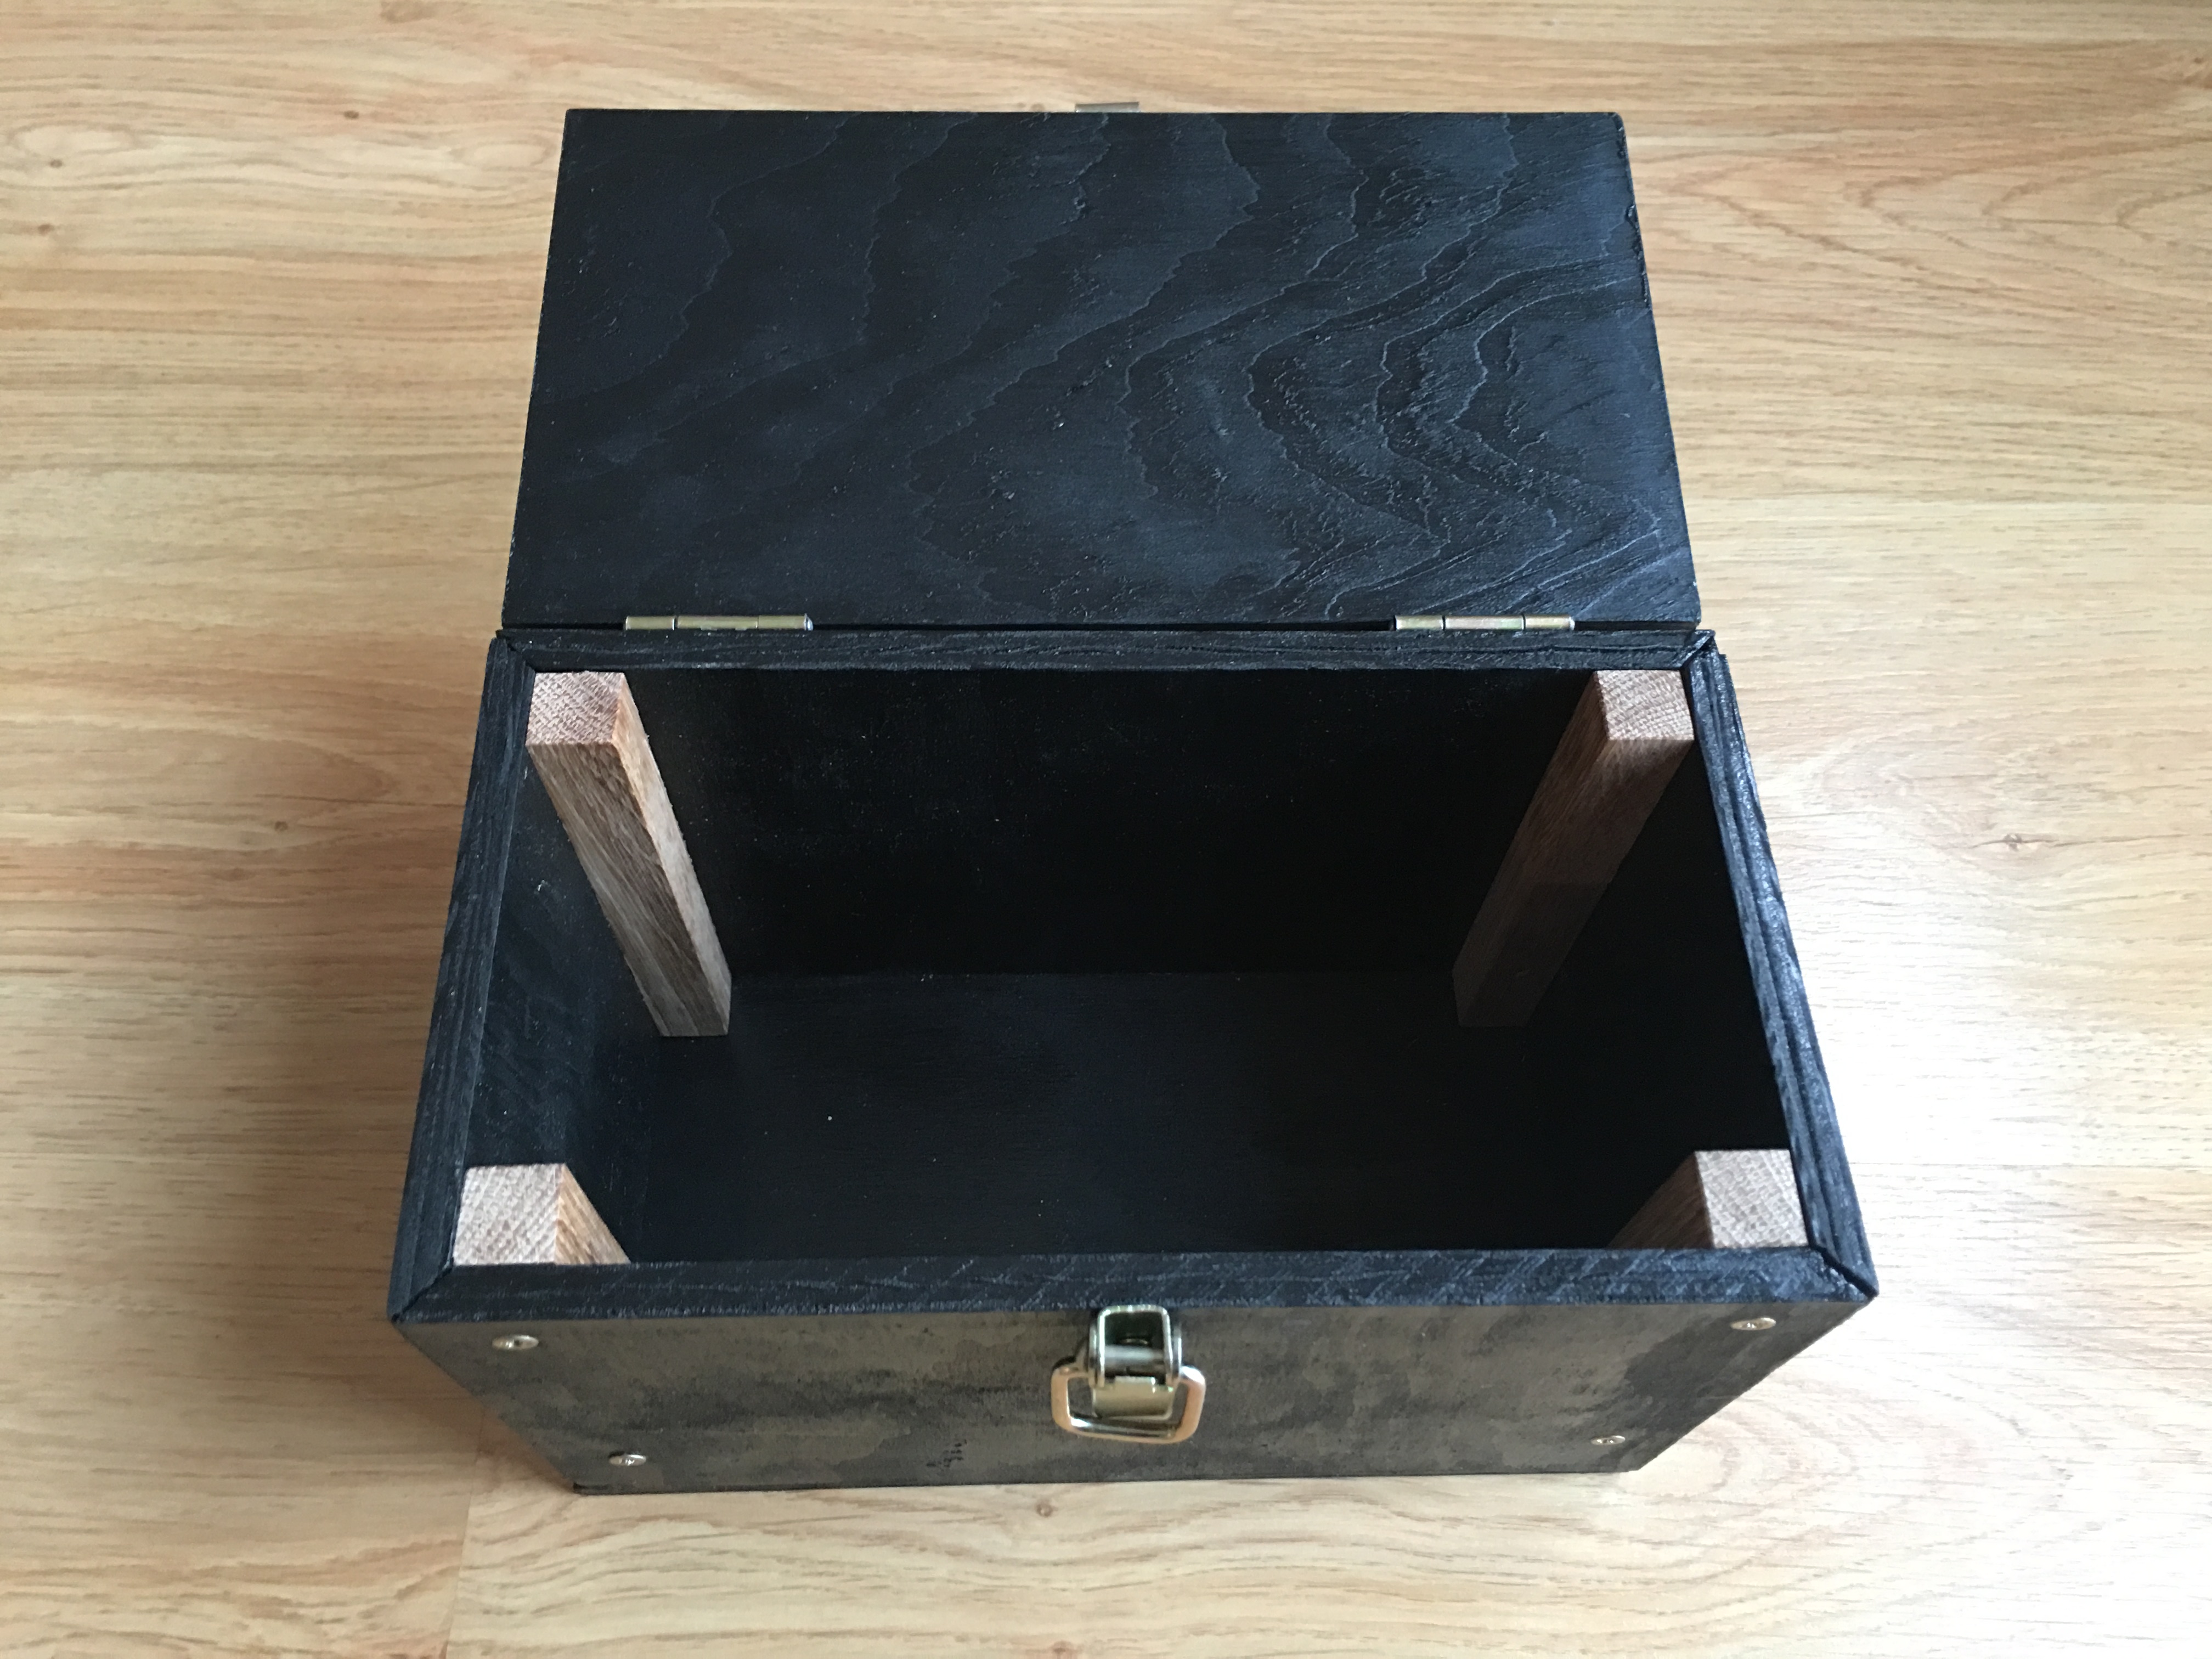
Made a battery box! It’s probably a 30 minutes project for most people with the skills. Well, I’m an IT guy. I have never really built anything. I have helped my kids with lego a few times, but that’s about it. So, it took me about a week. It’s as bad as it can be. There are no two pieces that align well. The paint is uneven. There are some extra holes where I drilled at wrong places. And I think I made it higher than necessary. But, it’s a battery box!


6 Likes
Hey everyone starts somewhere with DIY 
Maybe you could add some foam to the sides of the box to dampen any vibrations the lipos might be subjected to?
Don’t worry, you can redo it later if you want. As @Der6FingerJo mentioned I would add neoprene or foam to secure the batteries. Also add a gasket between the 2 parts of the box otherwise it will rattle and debris and moisture can enter. And maybe you find some edge protectors because it could really hurt if your leg touches an edge when falling.
Thanks for the tips guys. The batteries are a pretty tight fit, but I’ll try to squeeze in a little bit of foam.
A gasket sounds like a very good idea.
I also found these very safe looking edge protectors: https://goo.gl/images/SkwHTd
BTW, the box is meant for both batteries and VESC. The VESC will go under the batteries. On the last picture, there’s about 2.5 cm of space under the batteries. The space at the sides is for battery-VESC cables. The batteries won’t sit directly on the VESC. There will be some space between them. I hope that helps to reduce heat, though I’m not really sure it will make a difference.
I suggest doing it the other way around, Vescs on top. It´s better to access and you don´t have to worry about batteries damaging them over time from vibrations. Also like you mentioned better heat dissipation. If you want your wires to exit at the bottom, simply route them down at the sides.
Yes, I think that would work as well. The only problem is that I will need easy access to battery cables for charging. I’ll definitely try that option though.
all cables on top - no problem with charging 
Serious. Power.
1 Like
XT150 connectors soldered on! First time soldering. The first connector took me like 2 hours. I just wasn’t able to attach the cable to the connector quickly enough. Then, once I finally managed to make a solid connection, I realized I forgot to put the plastic housing on the cable first. 
Nevertheless, by the sixth connector, I can do it all in a blink of eye! I mean, a slow blink… like 10 minutes or so. 
I’m still not sure whether I should put XT150 on the last two cables. I have purchased some AS150 as well. I’m thinking about using those instead and connect to VESC directly. Is that a bad idea?
For charging, I have two iMAX B6 chargers and I plan to break the 4x 3S to 2x 2x 3S for charging. I could then either use the alligator connectors to connect to the charger (they came with the charger) or make charging cables with one AS150 male, one XT150 female for one battery pair and one AS150 female and one XT150 male for the other pair. Given my excellent soldering skills, that shouldn’t take more than full afternoon.

2 Likes
So I got this great idea to attach the velcro to the board with glue only because “I won’t drill into my nice and shiny board”. As a test, I glued some velcro to a piece of plywood first. It held on fine. How different can it be with a board, right?
It only took a single test to find out. Now my shiny board looks like this:

… which is clearly much better than having a few tiny holes in it.
3 Likes
That sucks  !
!
Use a black edding and try to forget it Your velcro seems very weak and is not even self-adhesive. No way that could work with this tiny stripes even with perfect velcro. Also the paint on your deck is a problem. Furthermore I think your enclosure will come apart after some rides because of the structure ( wood screws only).
If you don’t care about how it looks I have some suggestions.
Take some black gaffer tape and wrap it around your box that will hold it together and it won’t come apart, maybe it wiggles a bit one day but no battery or vesc is leaving the box (that happened with my very first box  ).
).
Because you want to take the box off for kiting I think the easiest and safer way would be to use 2 straps and some high density foam (or camping mat) between deck and box. There are also velcro straps available, the one in the pic would be too small but just to get an idea what I’m talking about.

1 Like
The velcro strips on the board are only to prevent moving the box from side to side. In addition to that I’m using two straps that go around the box and the board (probably similar to what you’re suggesting). That seems to keep it in place really well. Will post some pics later.
The box is glued together. The screws are only to reinforce the joins. It seems pretty sturdy. Plus, I’m not going to abuse my board the way you do. Still, wrapping some tape around just in case sounds a good idea. It’s not that I don’t care about how the box looks but I think it can hardly get much worse. The tape might actually improve the looks. 
1 Like
Ah alright. Maybe you can use an antislip mat between box and deck (additional or instead of foam). Also good that you glued the box, too.
![]() When my electronics left the box it happened because a friend tried it the first and last time. I couldn’t know that he goes full throttle instead of braking and crush into a concrete wall
When my electronics left the box it happened because a friend tried it the first and last time. I couldn’t know that he goes full throttle instead of braking and crush into a concrete wall ![]() For such cases it’s good to have a sturdy box.
For such cases it’s good to have a sturdy box.
Yeah. It also pays off when falling off a cliff or getting run over by a truck.
None of that is what I would consider the primary use case for myself. 
1 Like
As promised, here’s some pictures of my super sophisticated velcro mounting system.
Here’s how the box looks on the board. It’s sooo bulky and awkwardly shaped. This is my v1. Will need to at least trim the height or (more likely) redo it completely.


I have two velcro straps on the board and on the bottom of the box.

Two long straps are attached to one side of the box by screws and go under the board and attach to the other side of the box with the velcro adhesive part.


After unmounting the box, I can re-attach the straps to the sides so that they are not in the way. The bottom pieces and the straps that go around are the same velcro… ehm… sex? I mean, they are either both male or both female. Not sure which is which as far as velcro is concerned. The point is, they don’t stick to each other, which is a cool feature. That’s not a coincidence!

Here’s also some gasket that I have added as @rich has suggested. It’s just some window gasket I found home. Probably won’t keep the color for very long. BTW, this is with the batteries sitting on the bottom. I think I have space for like 5 more VESCs than I need. I actually may need to call this “v1 early alpha”.

3 Likes