Trampa Street Carver .. NoWind Build History

Got this Street Carver about 2 years now.

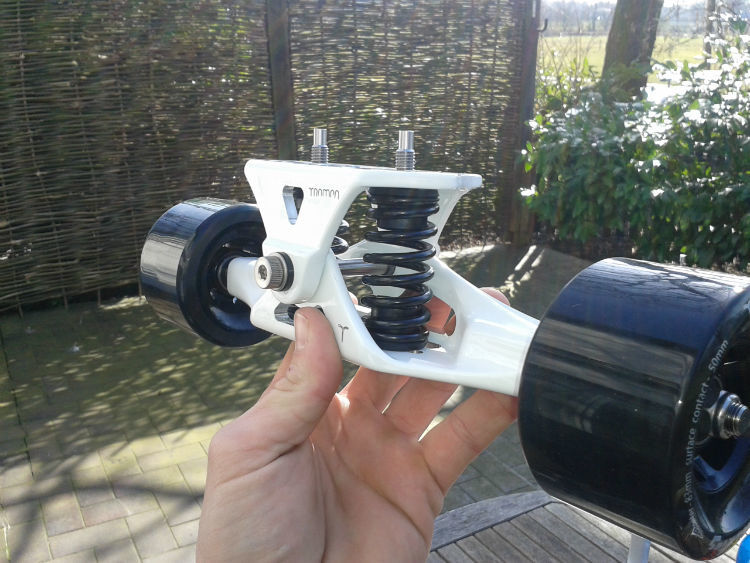
This is how it arives, with 83mm Wheels, Ultimate Trucks and thinnest Deck :

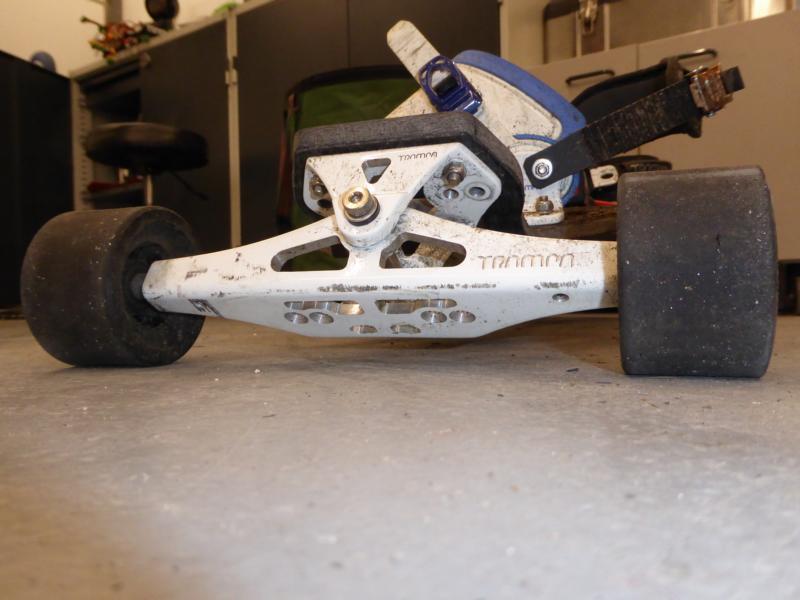
Beautiful Trucks imo :

Run it as single rear drive the first time with a SK3-6374 :

Placed the ESC and Battery on the underside like in most common streetbuilds :

Nice to ride but as always i wanted more (-; added a second drivetrain on the frontend. Dual Diagonal Drive is not bad but compared to Dual rear as usal on the MTB´s i dont really get on with it. Drivetrain parts are HTD5-9mm with, made from steel raw material…

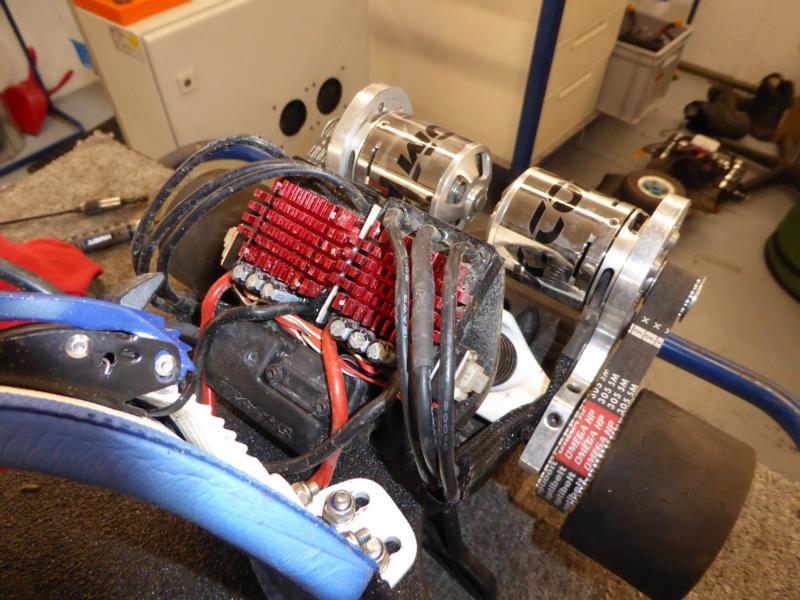
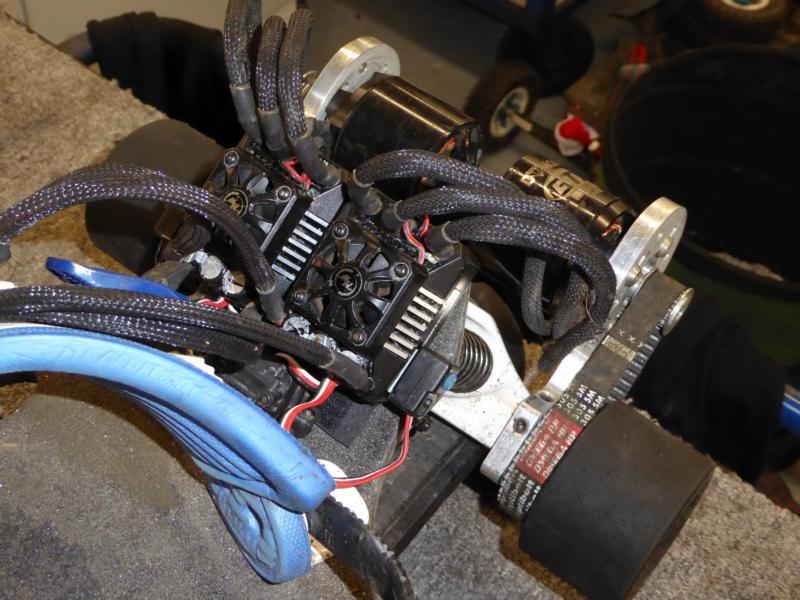
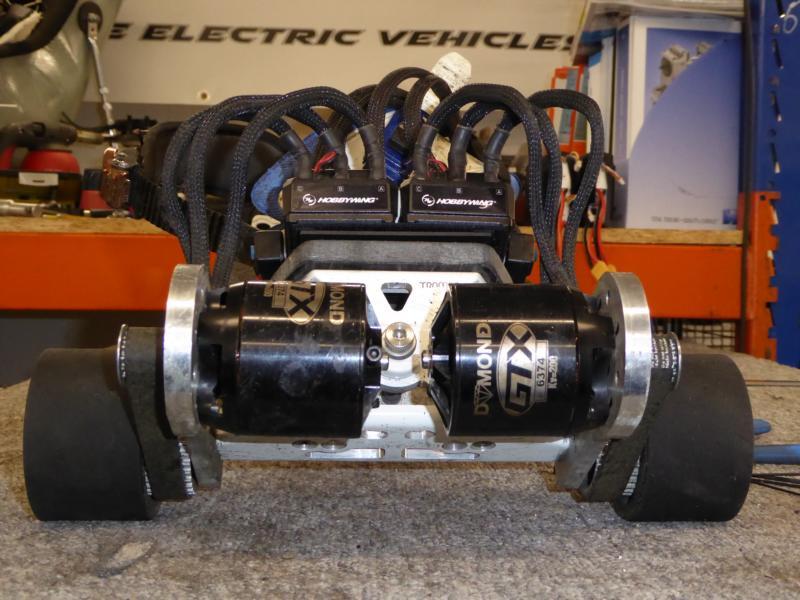
Changed Motors to shorter 6364-213KV and mounted both on the rear truck, still running the 6S Quicrun ESC´s :

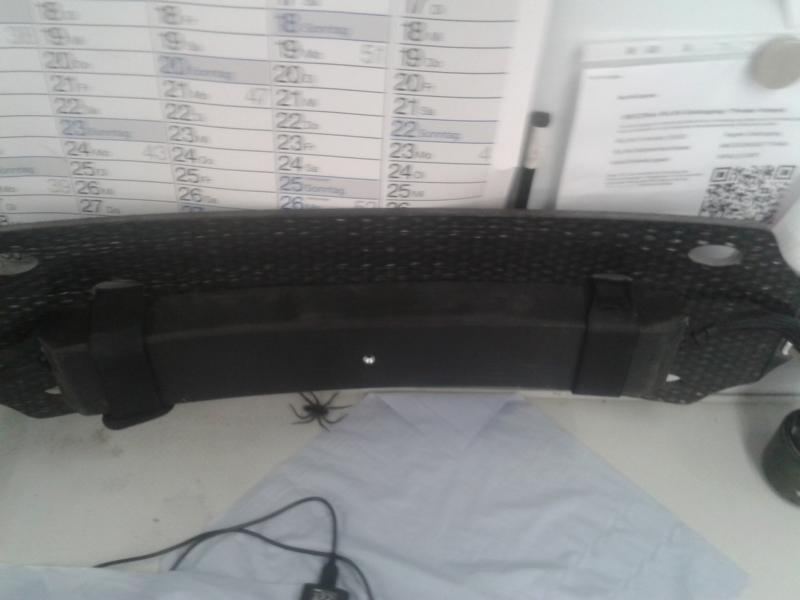
Used some shity hobbyfoam to cover all the mess on the underside … cutted with a knive and hotglued

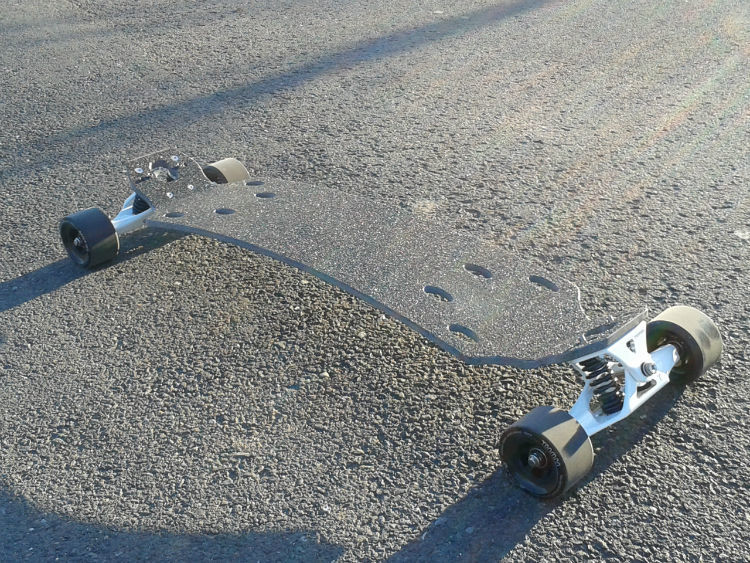
I have to say that i not used the Carver much, i´m so much into the MTB stuff and just take it out for a ride to rare … Thought about what i can do to have more fun with it and decidet to modify the Carver with Bindings and a Layout lime the MTB to get more ground clearence for jumps etc …

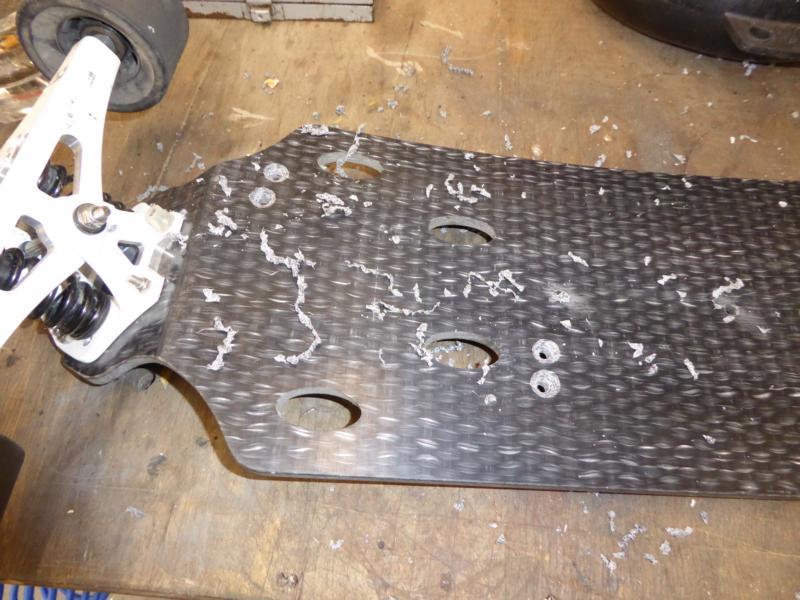
Used another Trampa MTB Deck as a template to drill the binding holes :

countersunk from underside :

Mounted Trampa Bindings and Heelstraps :
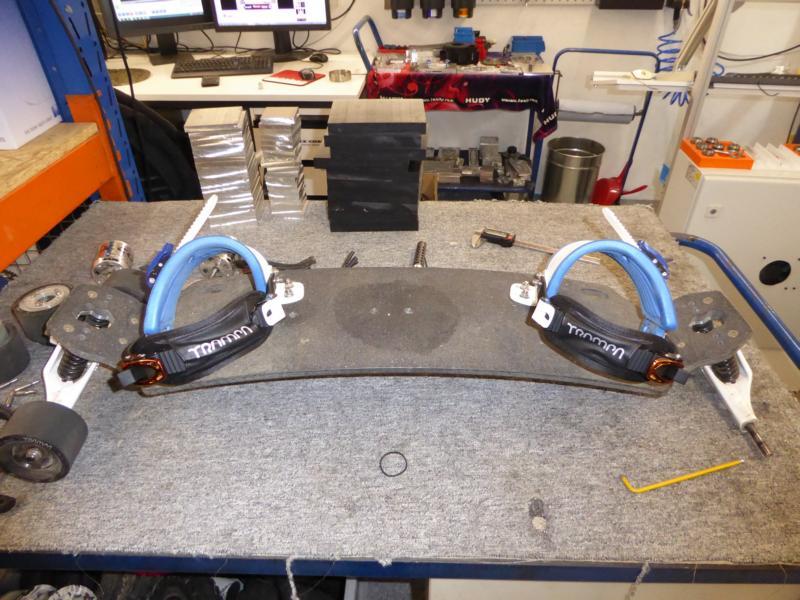
Hell yeah (-;

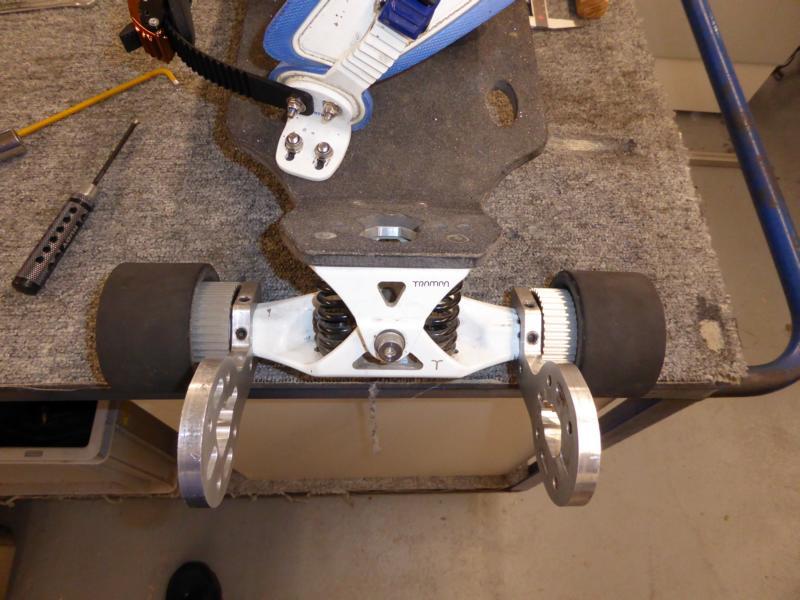
After Trampa starts selling pulleys for the Carver Wheels i decidet to go with this parts. So a nice upgrade to 15mm Belts, and some lost gramms compared to my heavy steel parts :

Modified my excisting mounts for the shorter gearing / axledistance, fast mod :

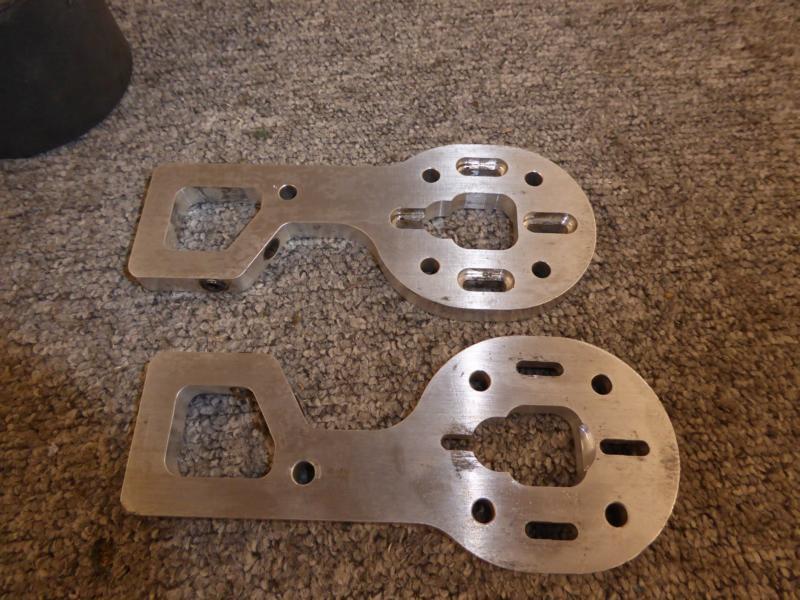
Looking badass with the wide aluminium pulleys imo … :

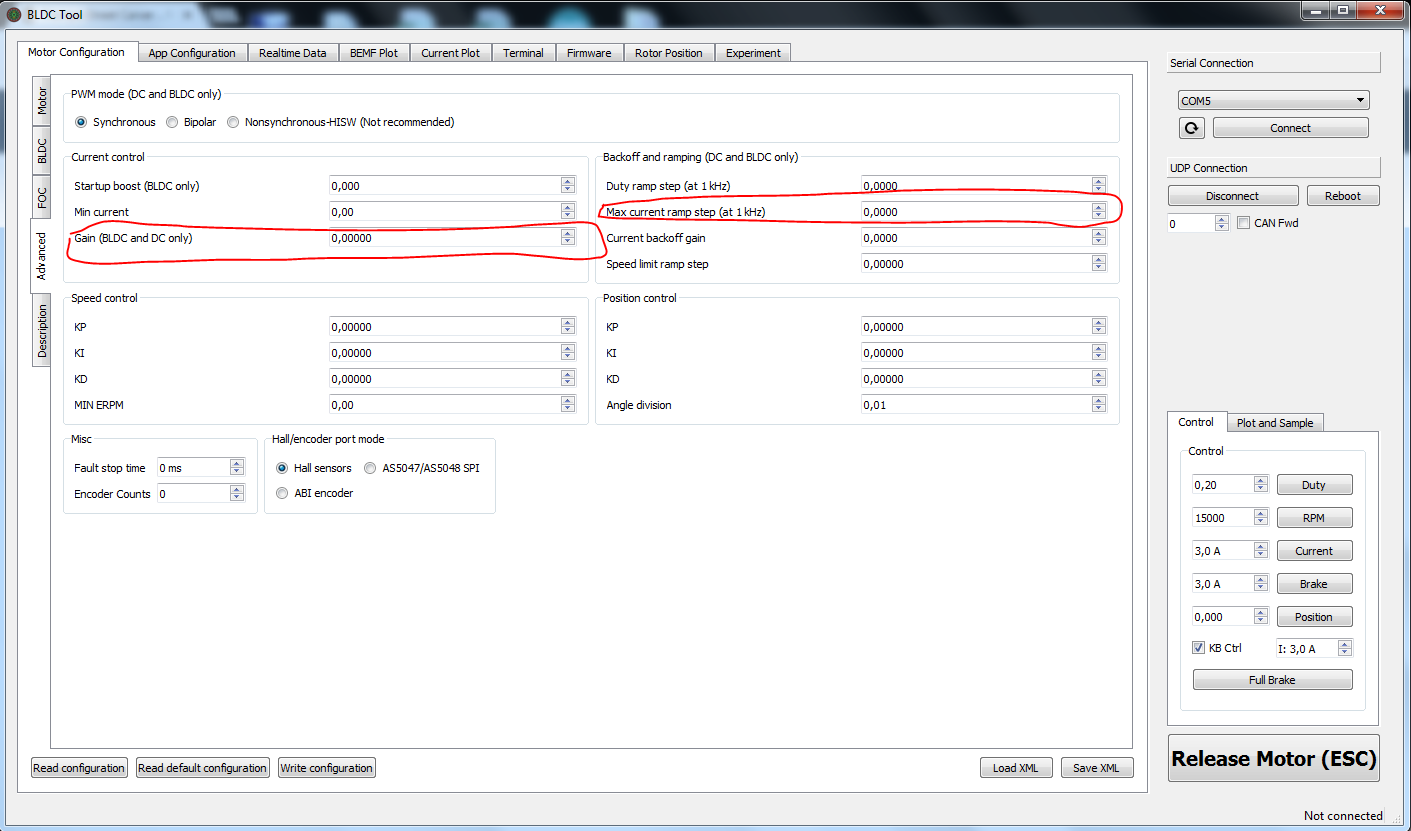
Added for a short test some VESC´s with 10S Lipo, but i dont get on with it. I know most people love it but for me the delay in torque is a big downside. So quick change to the old 6S Hobbywings for some rainy Christmas runs (-;

Have had a lot of fun on really small area bei doing little drifts on wet surface until it gets dark (-::: Now preparing the next upgrade :imp:

To be continiued …

Cheers Jenso

23 Likes

Cool build, looks like tons of fun.

Thanks mmaner, yes it is. Super tight corners, and really light compared to a MTB with pneumatics !

great one Jenso, the only big challenge with such a flexy deck is the battery enclosure clearance below the deck

What do you mean when you say “the delay in torque is a big downside”

With a classic ESC the torque is immediate and strong whereas on the VESC with normal firmware; it’s smoothed.

1 Like

Should be adjustable by the settings. Maybe the vesc gets killed when the current ramps too quick but it would be worth a try.

1 Like

Sick I’m working on a overspill street carver too

By the values in red you can adjust how fast the vesc ramps with the current. The Gain controls the step on each calculation (the higher the value the faaster it ramps). And the Max current limits the maximum aloowed value. Means the value that got calculated by the Gain is not allowed to be higher than this. So at the beginning i would suggest to double the values and play a little with it. I think you will find a setup that perfectly fits your needs. Maybe you kill the VESC but it’s for science.

And to give that setup the perfect finish you could try my throttle curves.

1 Like

Thanks Ced, yes its really flexy.

Was thinking about some A123 Cells inside of something like this : http://kabelschlepp.de/produkte/energiefuehrungen/tube-series/serie-tka/index.html Maybe i will test one day… Actually i will go the classic MTB style with all electronics topmounted. Just wanna have all posibilities like jumps and grinds. So astethics will be second…

Thanks for your input. You have to know that i´m not new to the Vesc, i tryed alot settings with my Mountainboards and never was happy in the end with torque delivery. For sure i love it raw and direct and i´m used to from many RC-ESC´s. Owned 6 VESC, two burned, two sold, last two wait for a chilled cruiser build (-; Thanks again for your input, but for science i burned enough Vesc´s

Nice that you work on a carver too! Whats the meaning of overspill ? Looking forward to little sneak preview (-;

1 Like

Sorry! Overkill*

It will be epic I hope. This build of yours is beautiful. 12s5p Samsung 30q cells dual sensored SK3 6374 motors. Dual vescx.

What are your thoughts on the bindings on this board?

1 Like

Oh yes overkill makes sense (-; For me bindings are perfect, just more controll and i feel safer with ! Moved outside with the Springs to outer mounting position and screw in the adjuster more.

2 Likes

Oh yea that sounds like a good idea. I’ll be testing without bindings but I could argue I feel less safe with them on! Unless it’s off road.

1 Like

Steroids Upgrade

Changed the SK3- 6364 - 213KV to Dymond 6374-200kv Changed 6S Quicrun to 8S MAX6

Take it for a little ride in middle of the night, dark and rainy, destroyed my Remote by a little crash… but anyways : The increase in performance is huge, love it :heart_eyes:

What i´m thinking about is : Trampa mounted the Mini Trucks on the Street Carver switched… on the Urban Carver regular. The difference is a shorter wheelbase in switched mode… what else will change? What you guy think? For sure Frank can explain @trampa

4 Likes

The reverse hanger position allows more ground clearance. 83mm Wheels and MTB hanger position will result in less ground clearance. If you ride the board on smooth tarmac both positions work. We have clamps for both hanger positions and offer a short and long motor mount (carbon panel). Both clamps fit both carbon panels. So with our kit its possible to set up your built either way. The MTB hanger position in combination with the long carbon panel allows to mount street and pneumatic wheels without the need to disassemble the motors. You just swap wheels and belt. 10mins job…

Frank

Thank you Frank for clarifying :slight_smile:

Make a short test with front Truck in regular non flipped position…

Call it LOWRIDER (-:

compared to flipped rear truck :

So you loose alot of ground clearence, wheelbase increases about 60mm. Maybe like frank mentioned for really smooth concret ok, but i will stay with the flipped ones… The way it comes from Trampa :wink:

3 Likes

Unfortunaly i managed to kill both driven wheels… :pensive: 
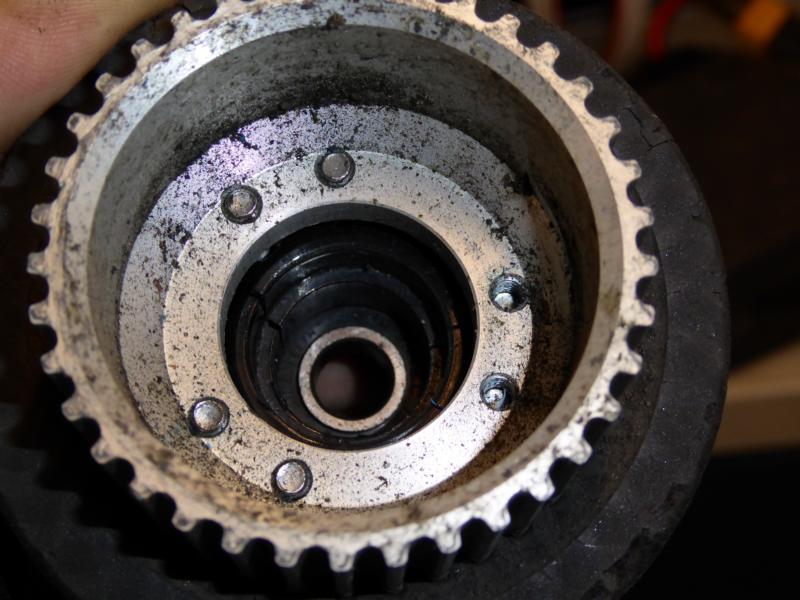
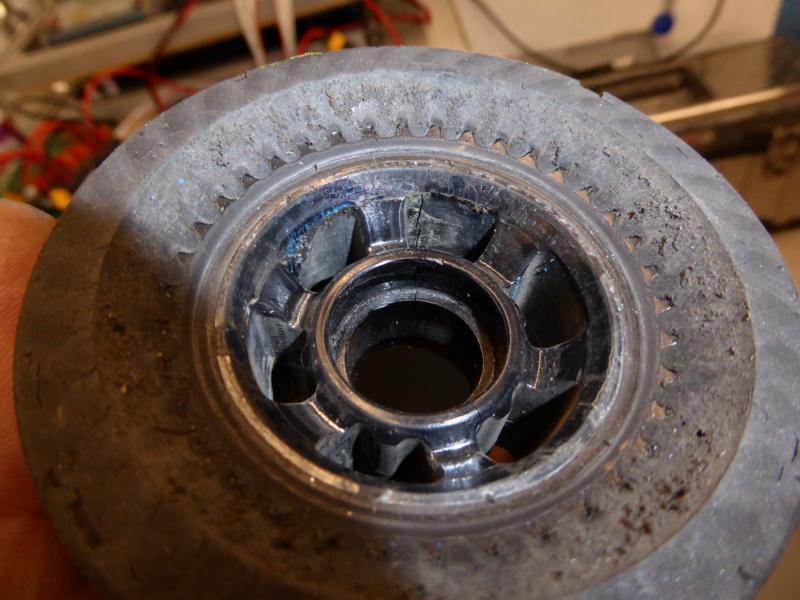
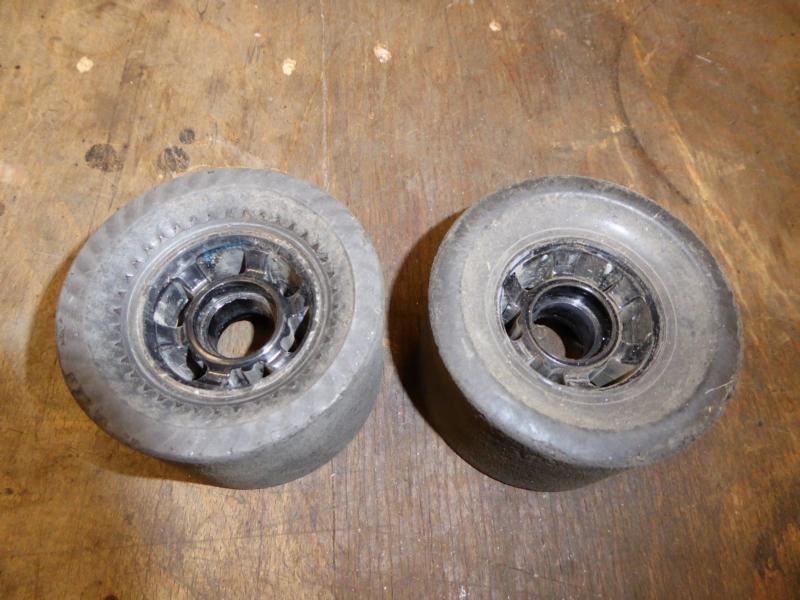
Do some small jumps and 180´s, suddenly there was a strange noise, after dismounting the rear wheels i see the cracks running through complete inner hub. Two cracks per wheel :

Maybe i overtighten the screws of the center ring ??? Dont think so but there must be a reason for it! @trampa : Do you see this before Frank ?

Cheers

1 Like

I have broken many flywheel clones like this. I think its because you maybe tighten the wheel pulley too much. I think i stopped breaking the clones after being careful not to over tighten the pulley. Or could be the wheels are cheap plastic since this never happened to my real Abec11 flywheels.

i already gave that feedback to trampa a few months ago, but frank @trampa never responded. if you tighten the pulleys too much, the retainer side will be compressed and the bearing sits tight in the bearing seat of the wheel core. the pulley side however is expanded, leading to really loose bearings. guess you took it one step further and actually cracked it open.

wish the pulley side would be equal to the retainer side, so both bearing seats are compressed. in the end I barely tightened the screws and added a lot of loctite to make sure the screws wont come loose. :confused:

1 Like