The Rocket | 4wd hummies hubs | 4x chaka vesc | 10s4p LG HE2 li-ion | CNC milled veneer pressed deck

Not 100% done, but I did the first tests today, and I’m satisfied with the results so far. Tests showed drastically decrease heat in 4wd steel (131 F on the back 90 kv, and 97 F on the front 80 kv) vs 2wd steel (210 F) and 2wd aluminum (243 F). Torque is insane. I almost feel on my butt a few times in my first test. Took a bit of riding to get used to before I could get the hang of it. Once I did, I tested it the acceleration from 0-20 mph and recorded 2.8 seconds. I went up a relatively normally steep hill for San Francisco at 21 mph constant. Top speed seems to be about 24 mph though, which was a bit disappointing to me. Bumping the battery up to a 12s would give me at least another 5 mph though. But I’m out of space for any more cells for now, so 10s it is for now.

Here’s a basic run down again on the parts used:

  • 4x chaka vescs (now a custom made quad vesc from chaka)
  • 4x hummie’s hubs (front is 80 kv, back is 90 kv) (now with ceramic bearings)
  • Custom built 10s4p li-ion battery pack made of LG HE2 18650’s (now at 12s4p)
  • Custom deck, CNC milled one sheet at a time, and pressed 4 layers at a time in roar rocket vacuum bag
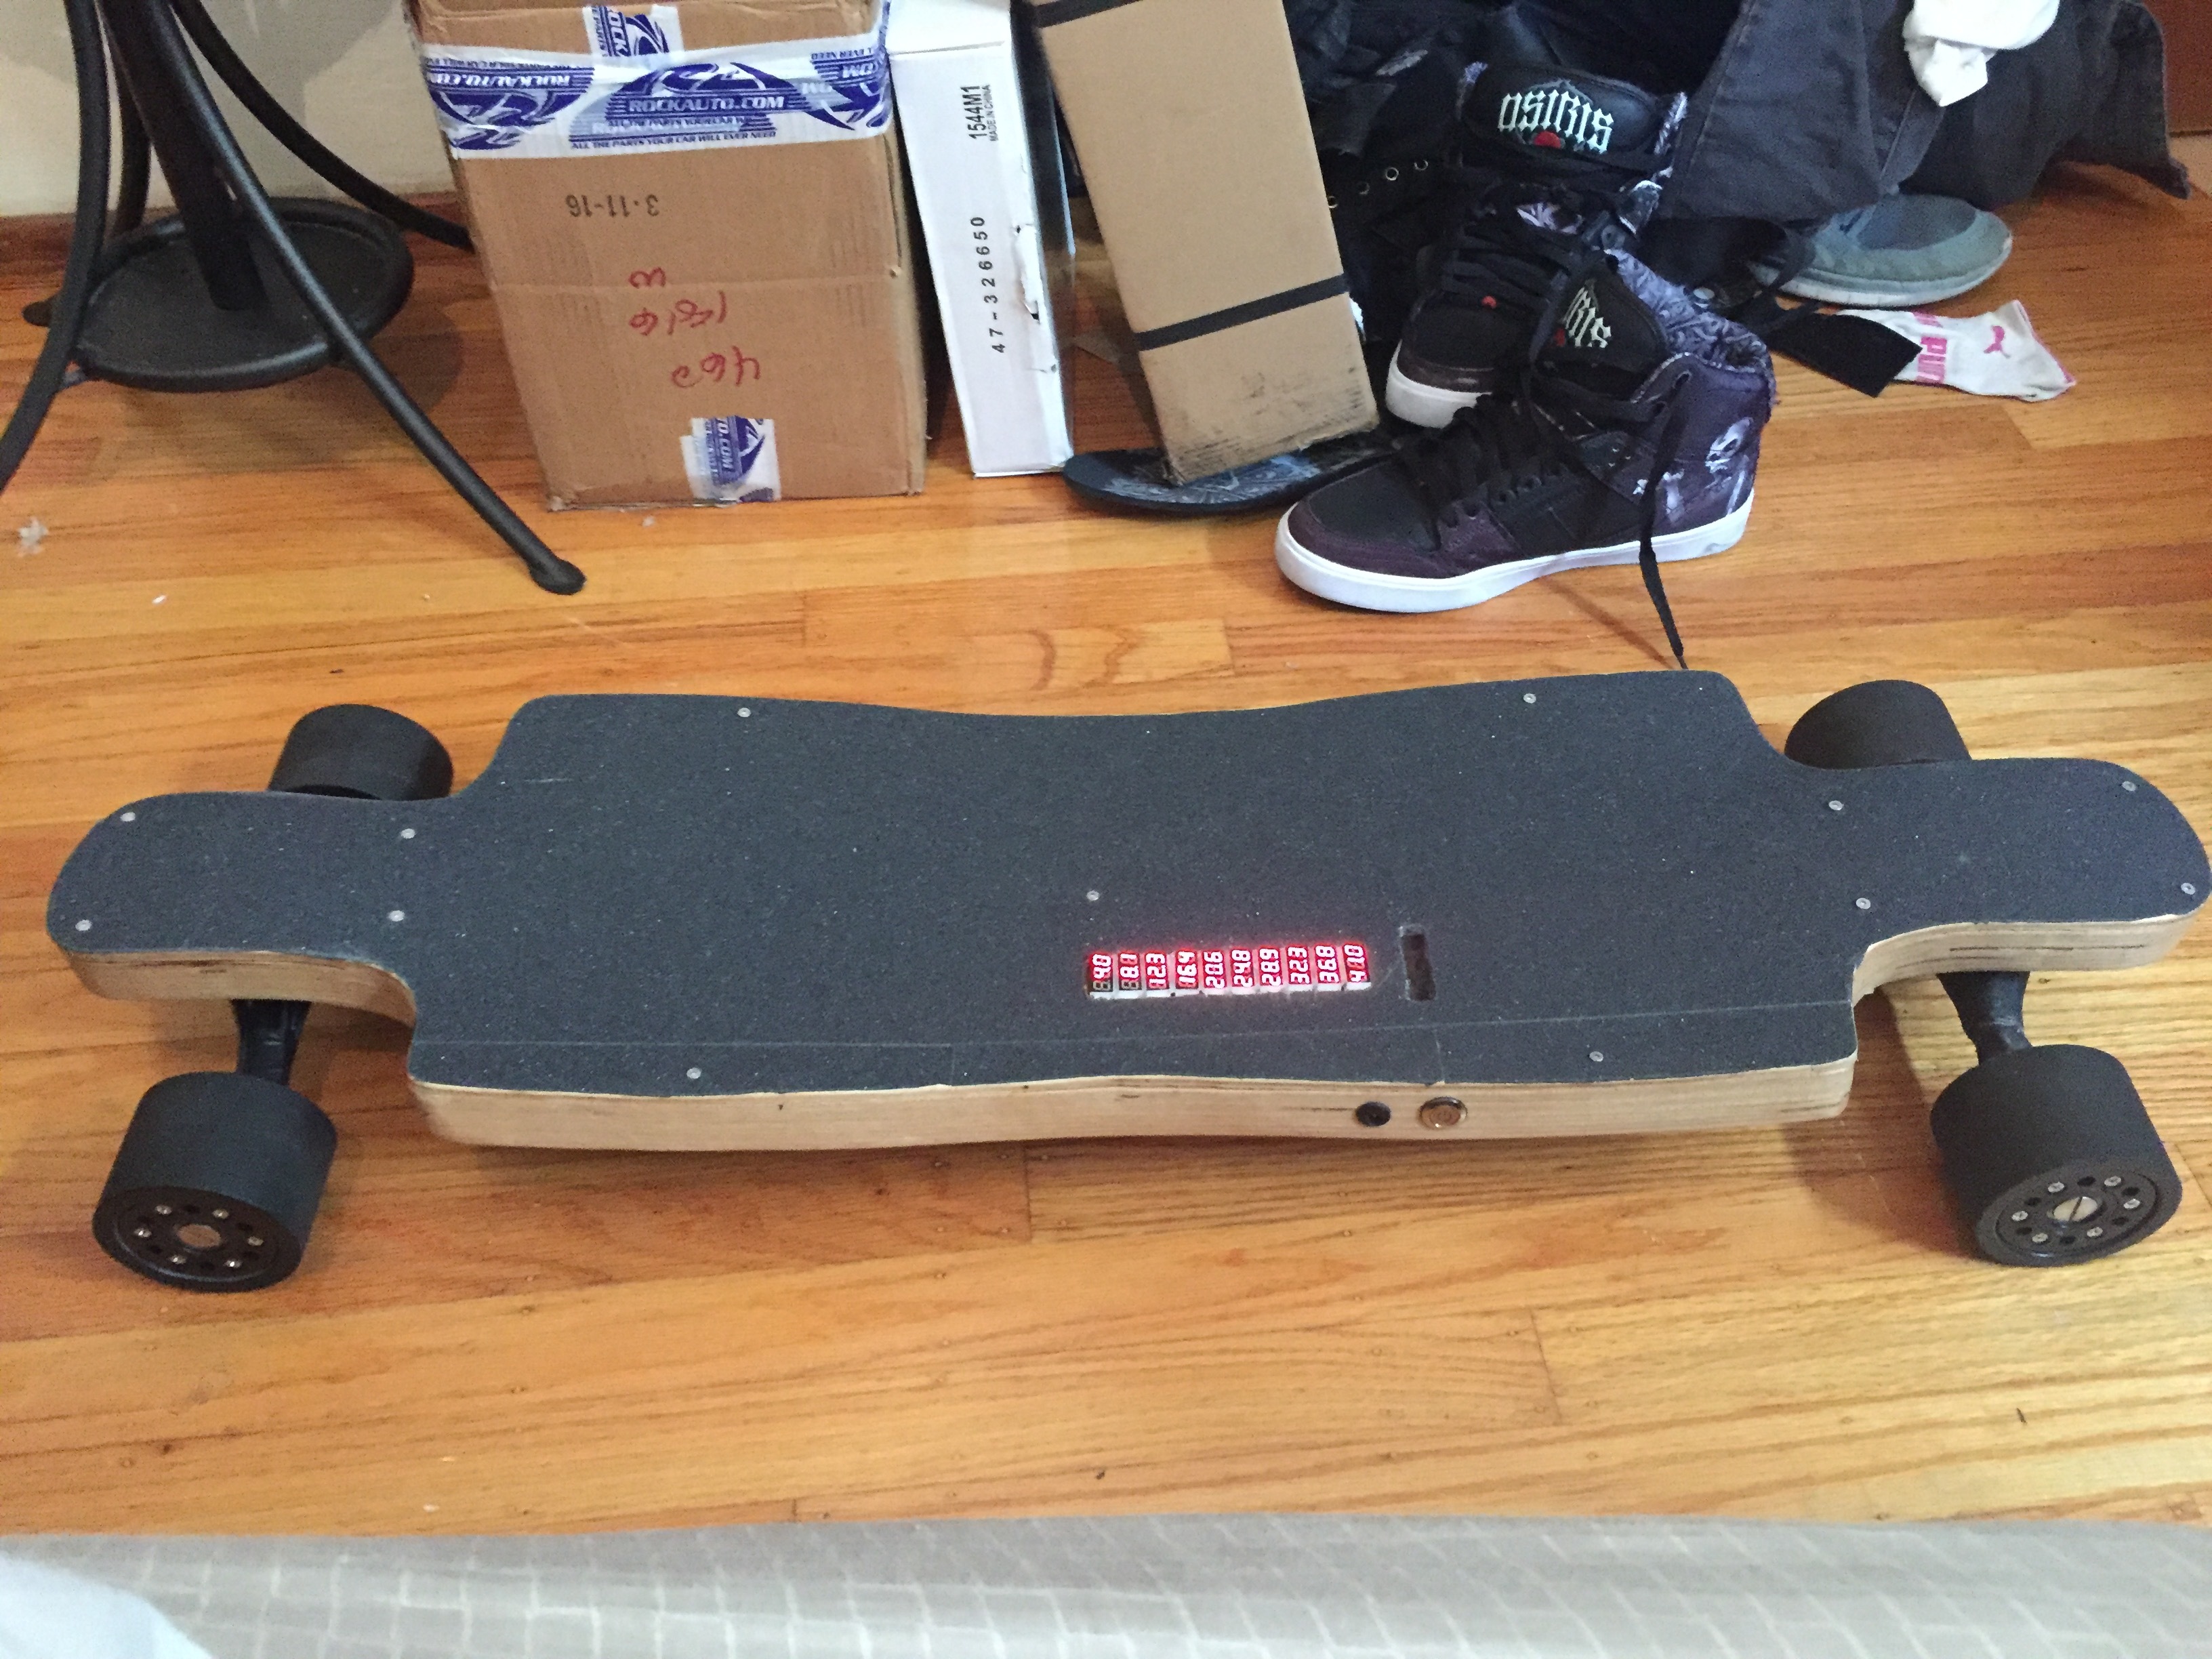
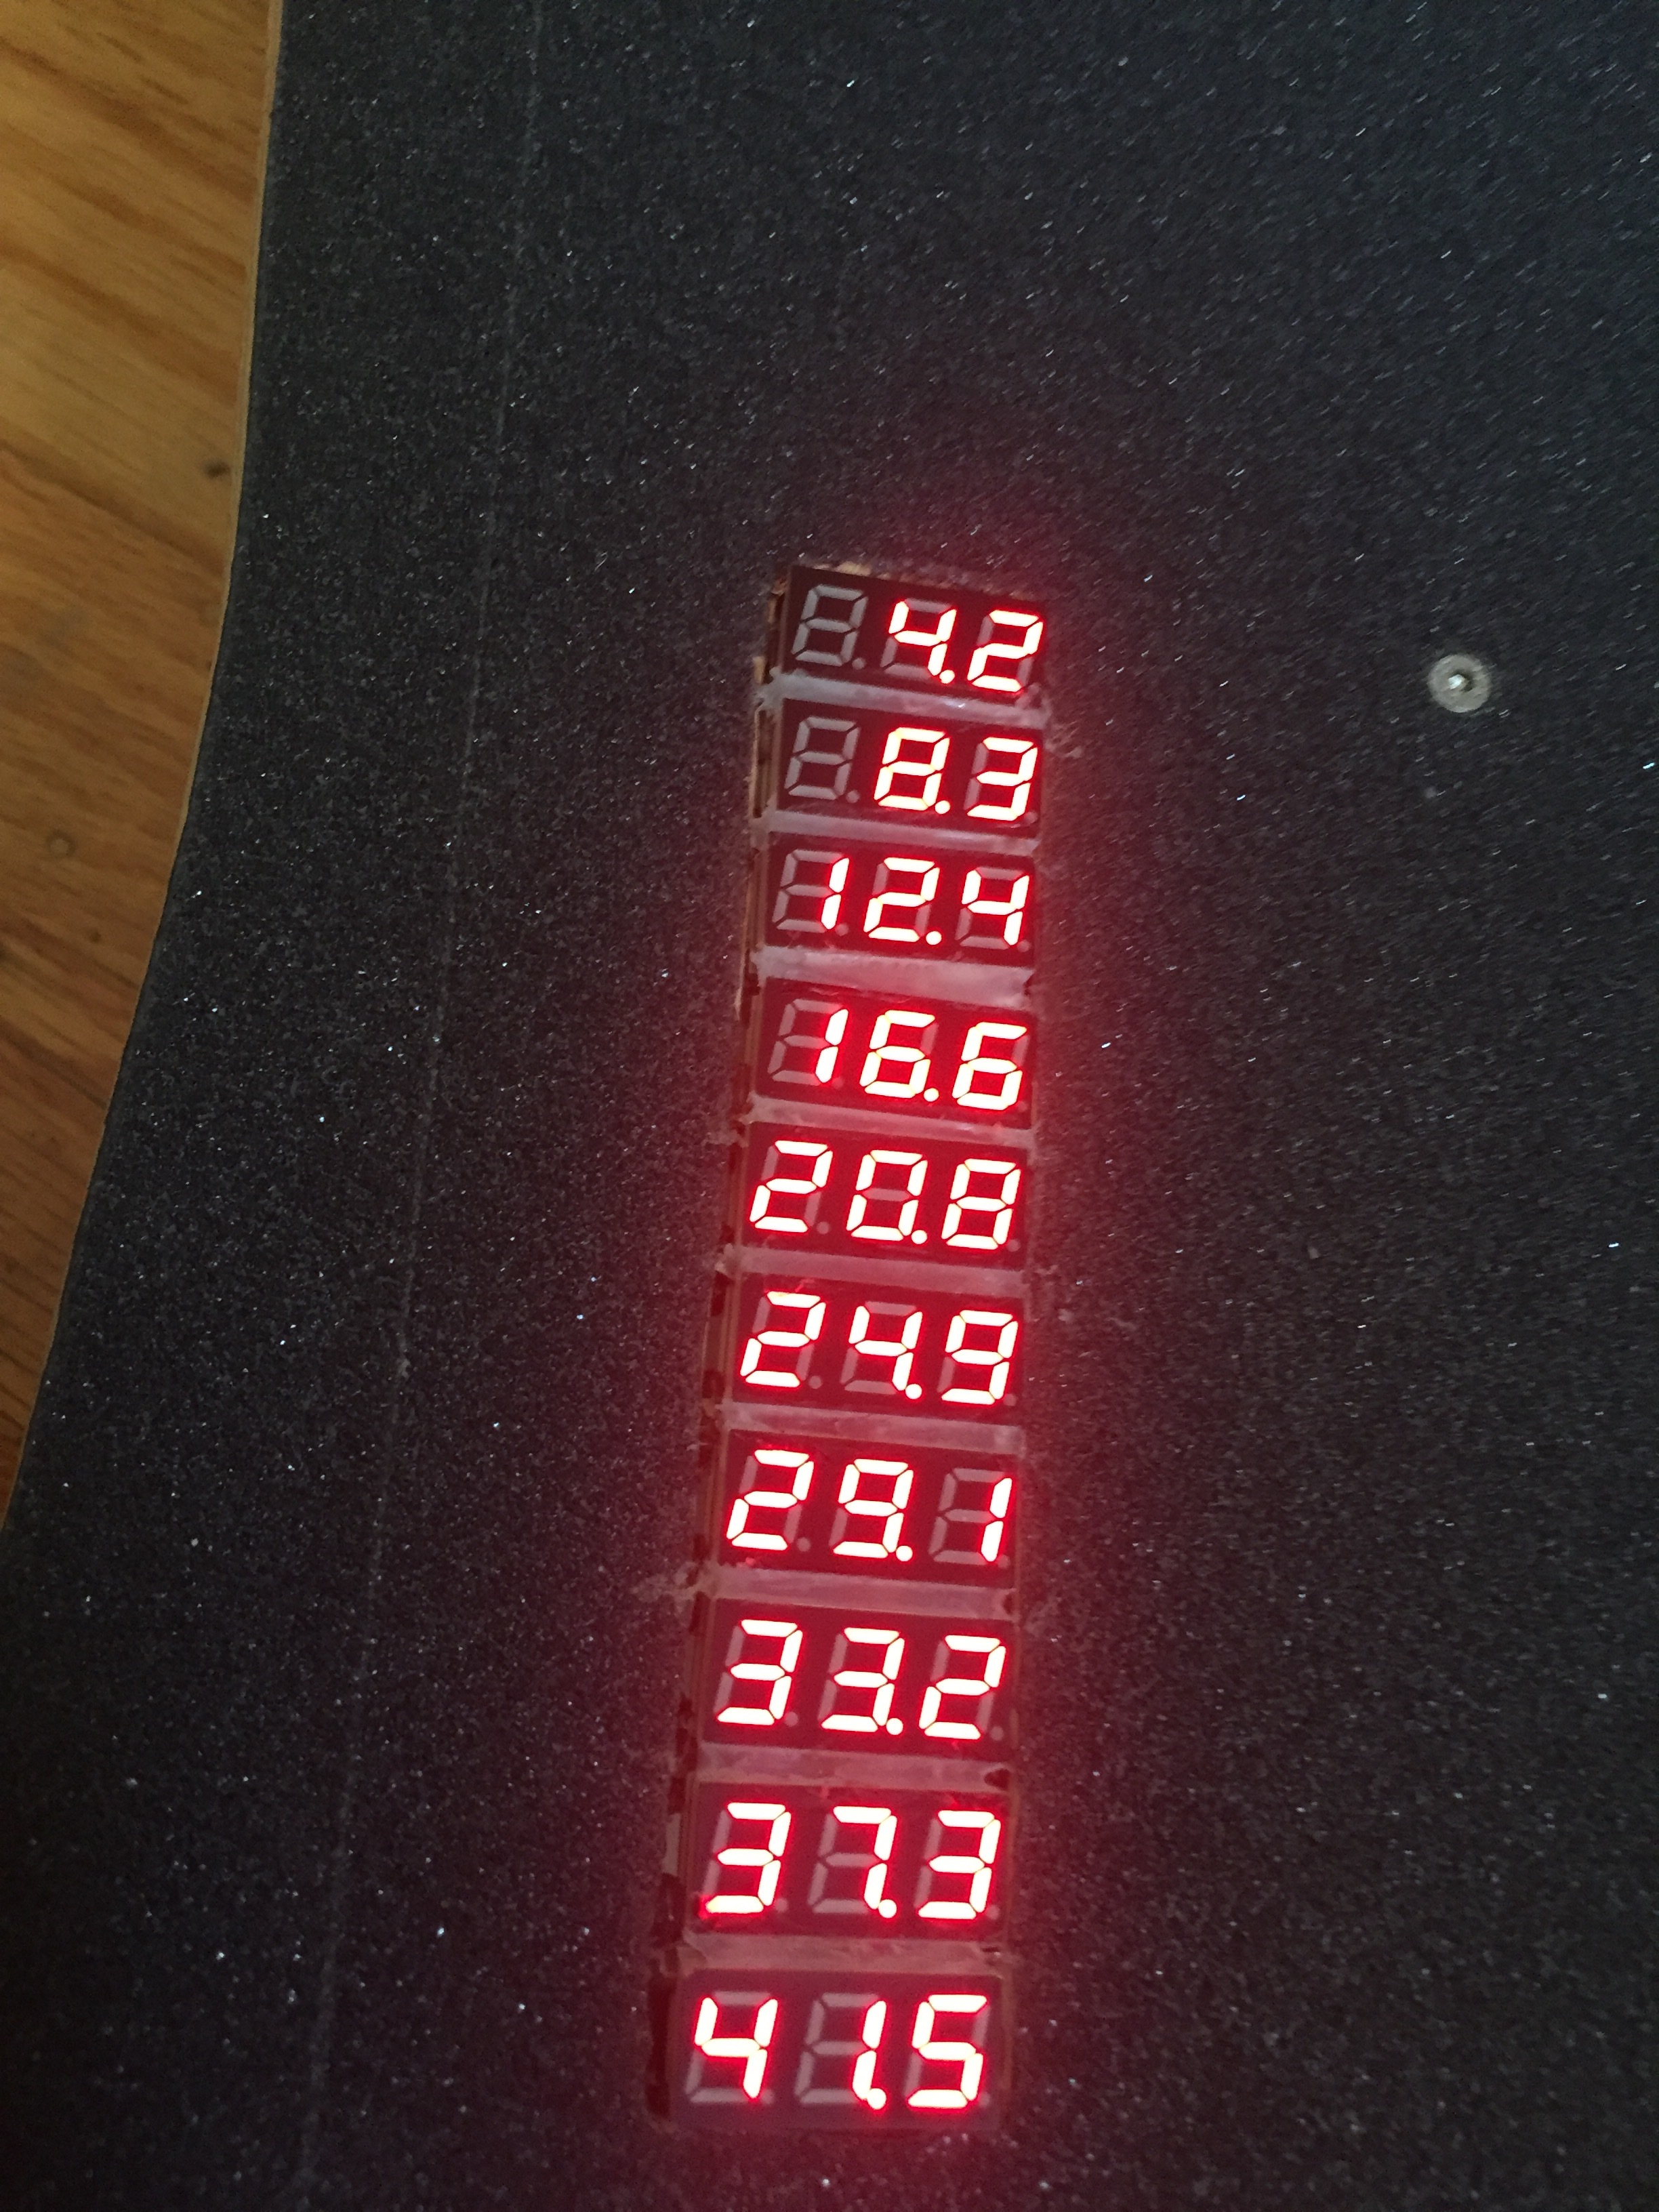
  • Custom battery display (now showing individual cell voltages instead of a combinations of cells)
  • No BMS!!

Now, on to the fun stuff…

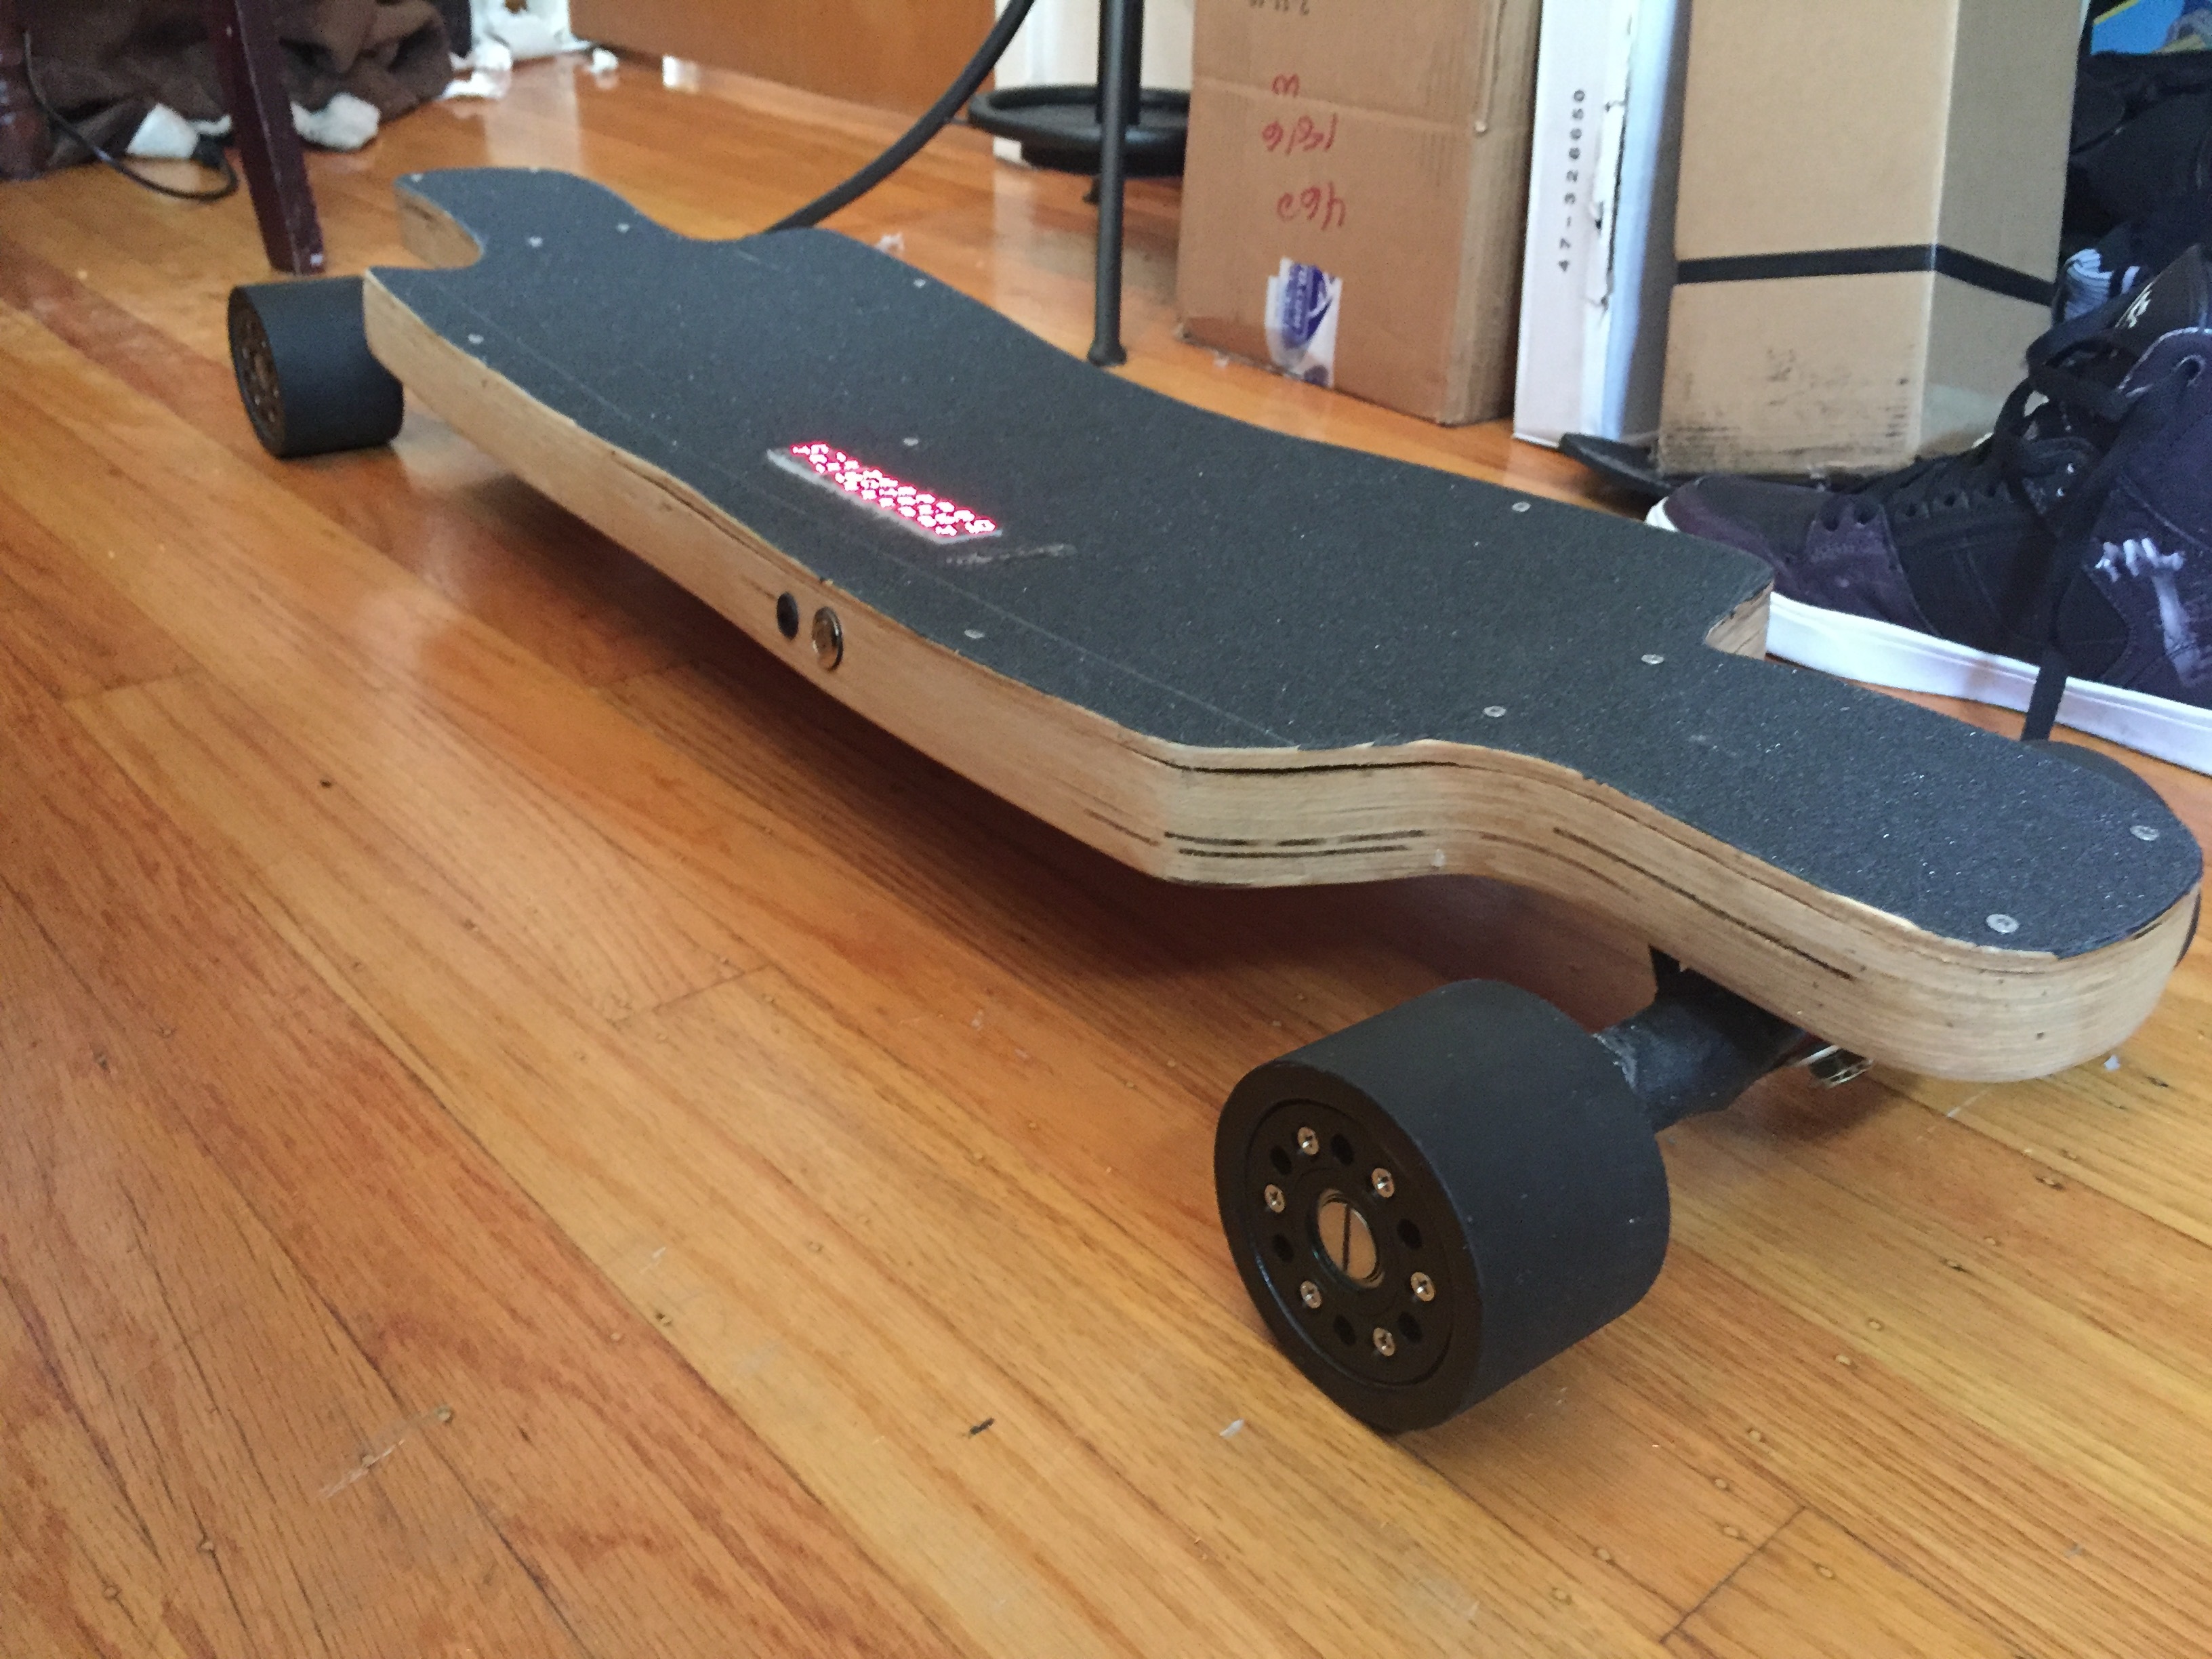
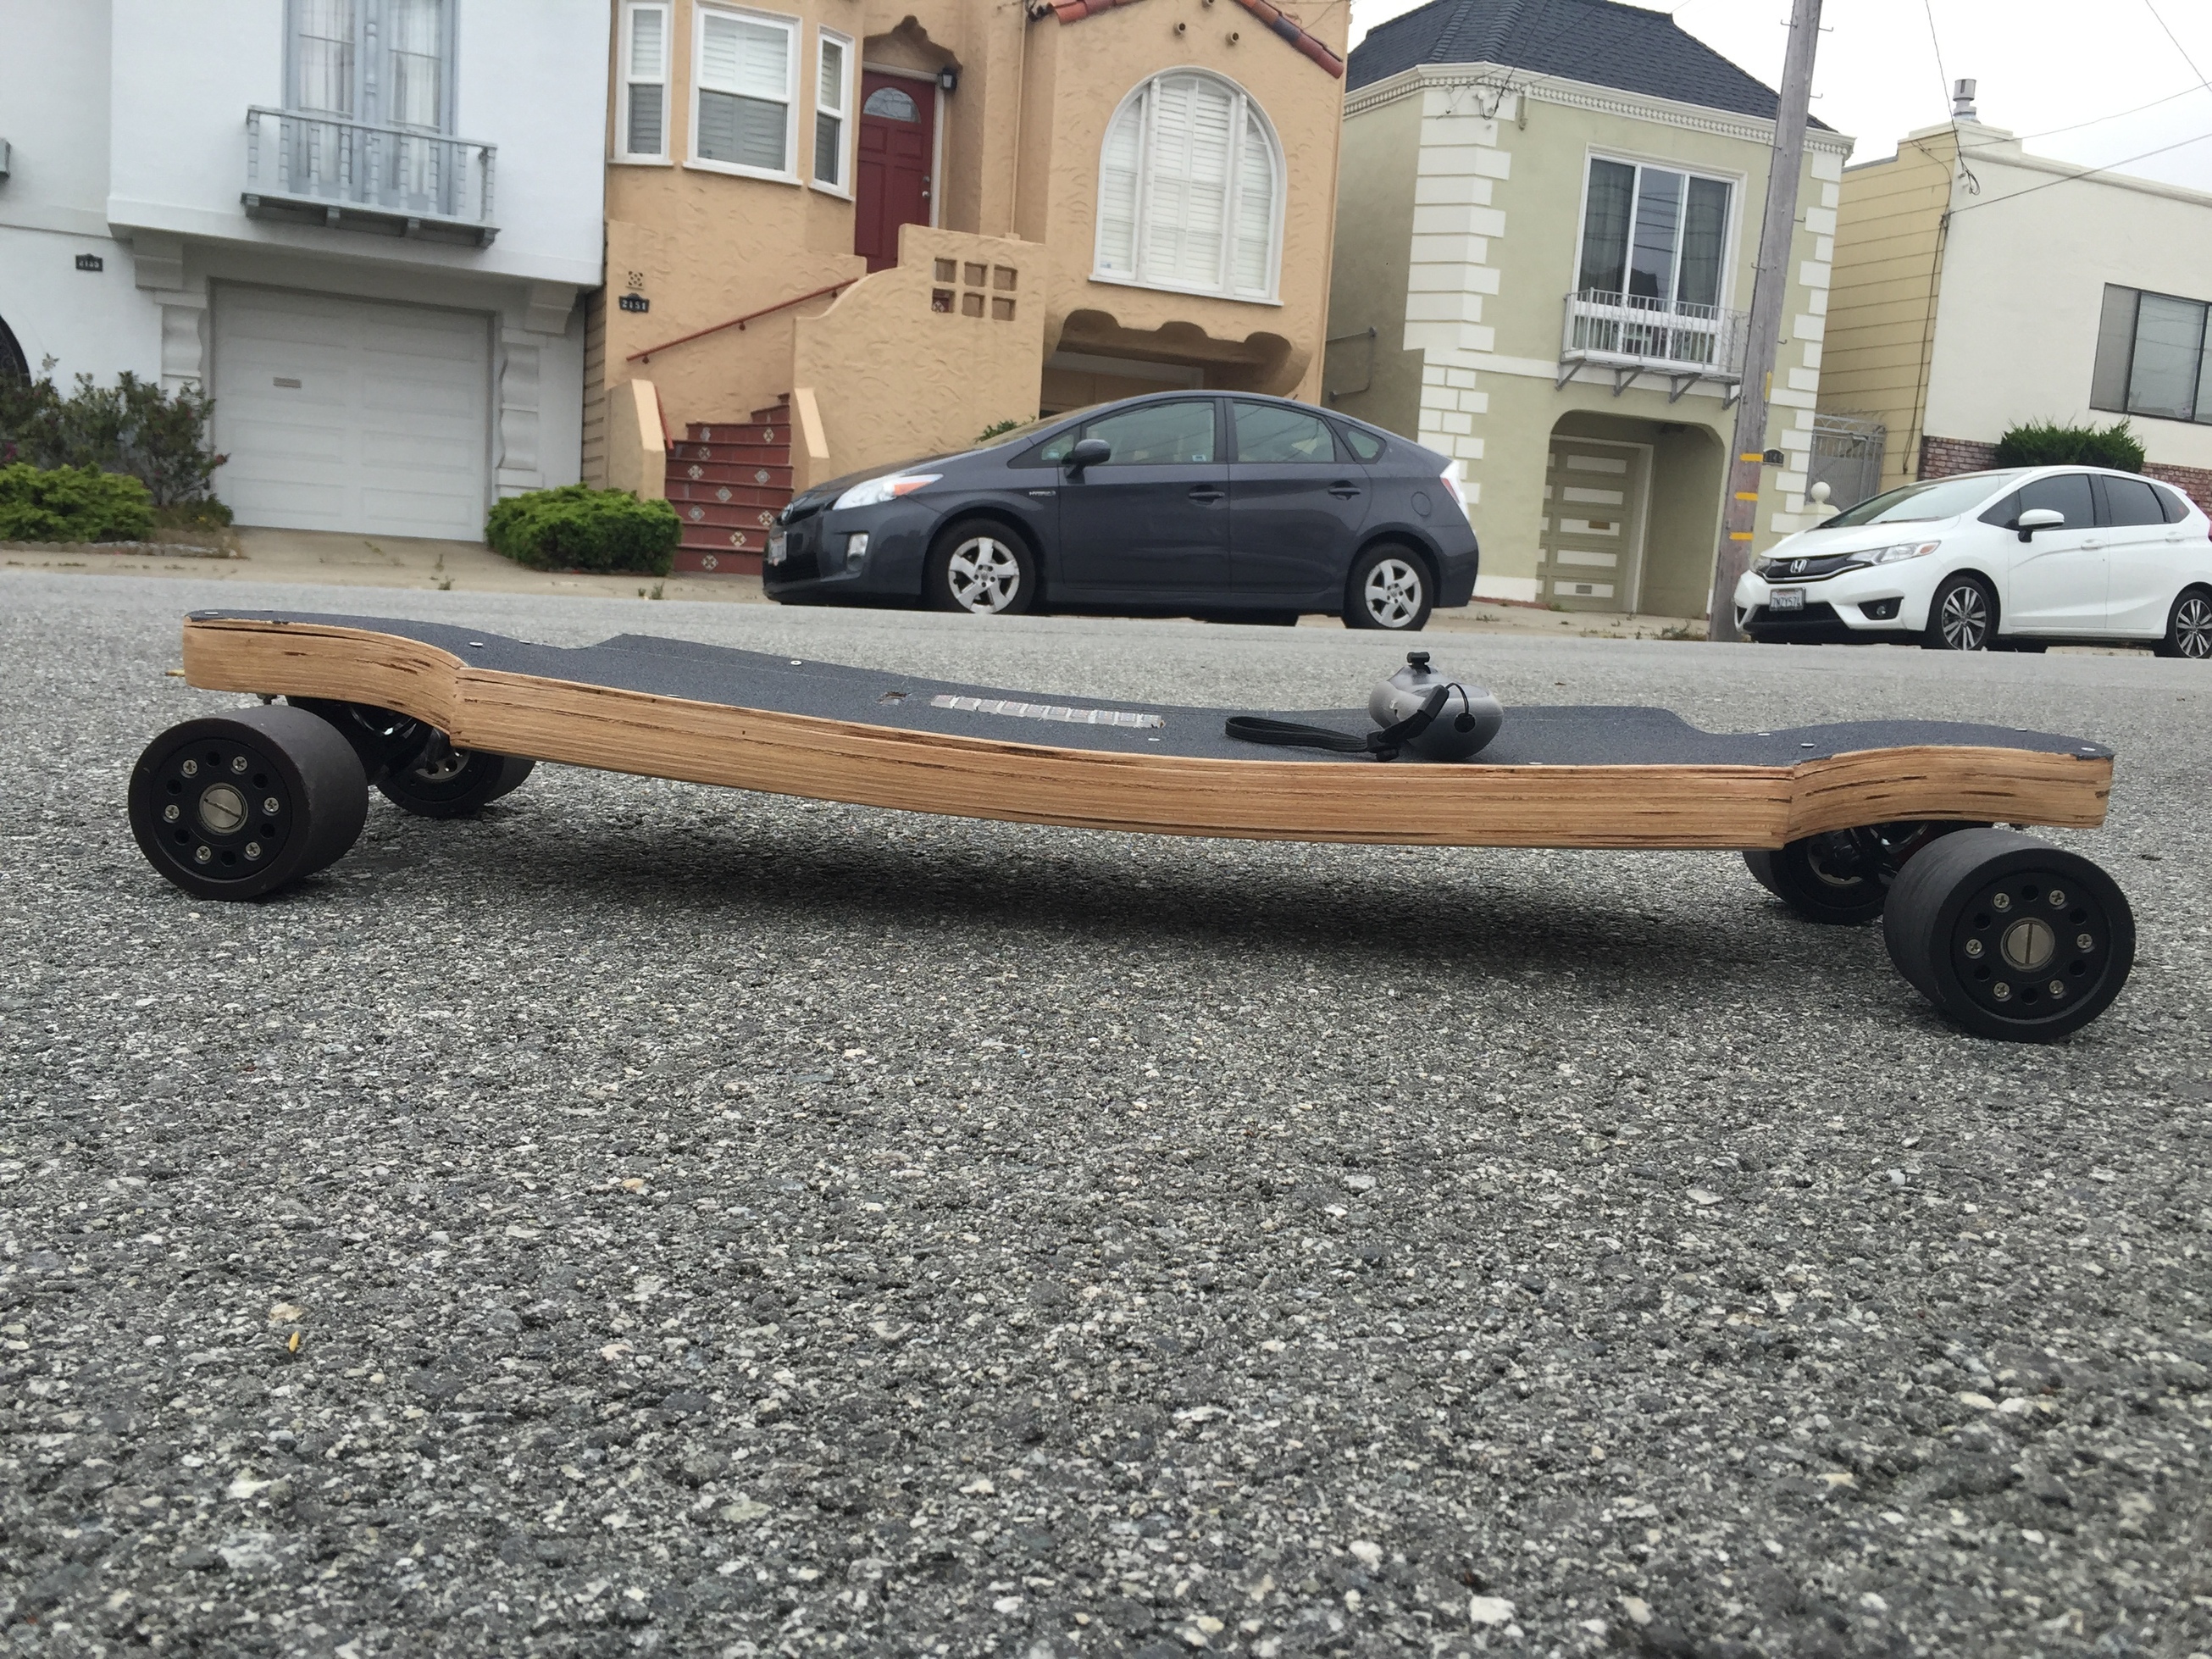
The board is 100% constructed from 1/16th inch Canadian maple veneers, imported from Canada. With a few layers of polycrylic, you can really see thee beauty of the wood with a bit of a shine.

I decided against going with a bms. This is mainly due to space issues, but from the tests I have done, cells don’t unbalance themselves very much per discharge cycle. I limit the battery to 32 volts, which means if they are all balanced, they will still have .4 of a volt left in them. This gives me some play room for when they do come unbalanced. From my tests, it seems they will need balancing every few charge cycles. But to keep an eye on whats going on, I have a meter between each cell and the negative terminal. Due to the sytle of these particular screens needed a seperate power source (I use the receiver), the negative of all need to be connected, and would short circuit if I connect them using the positive of the last screens as my next screens negative. Still you can see what’s going on pretty quickly.

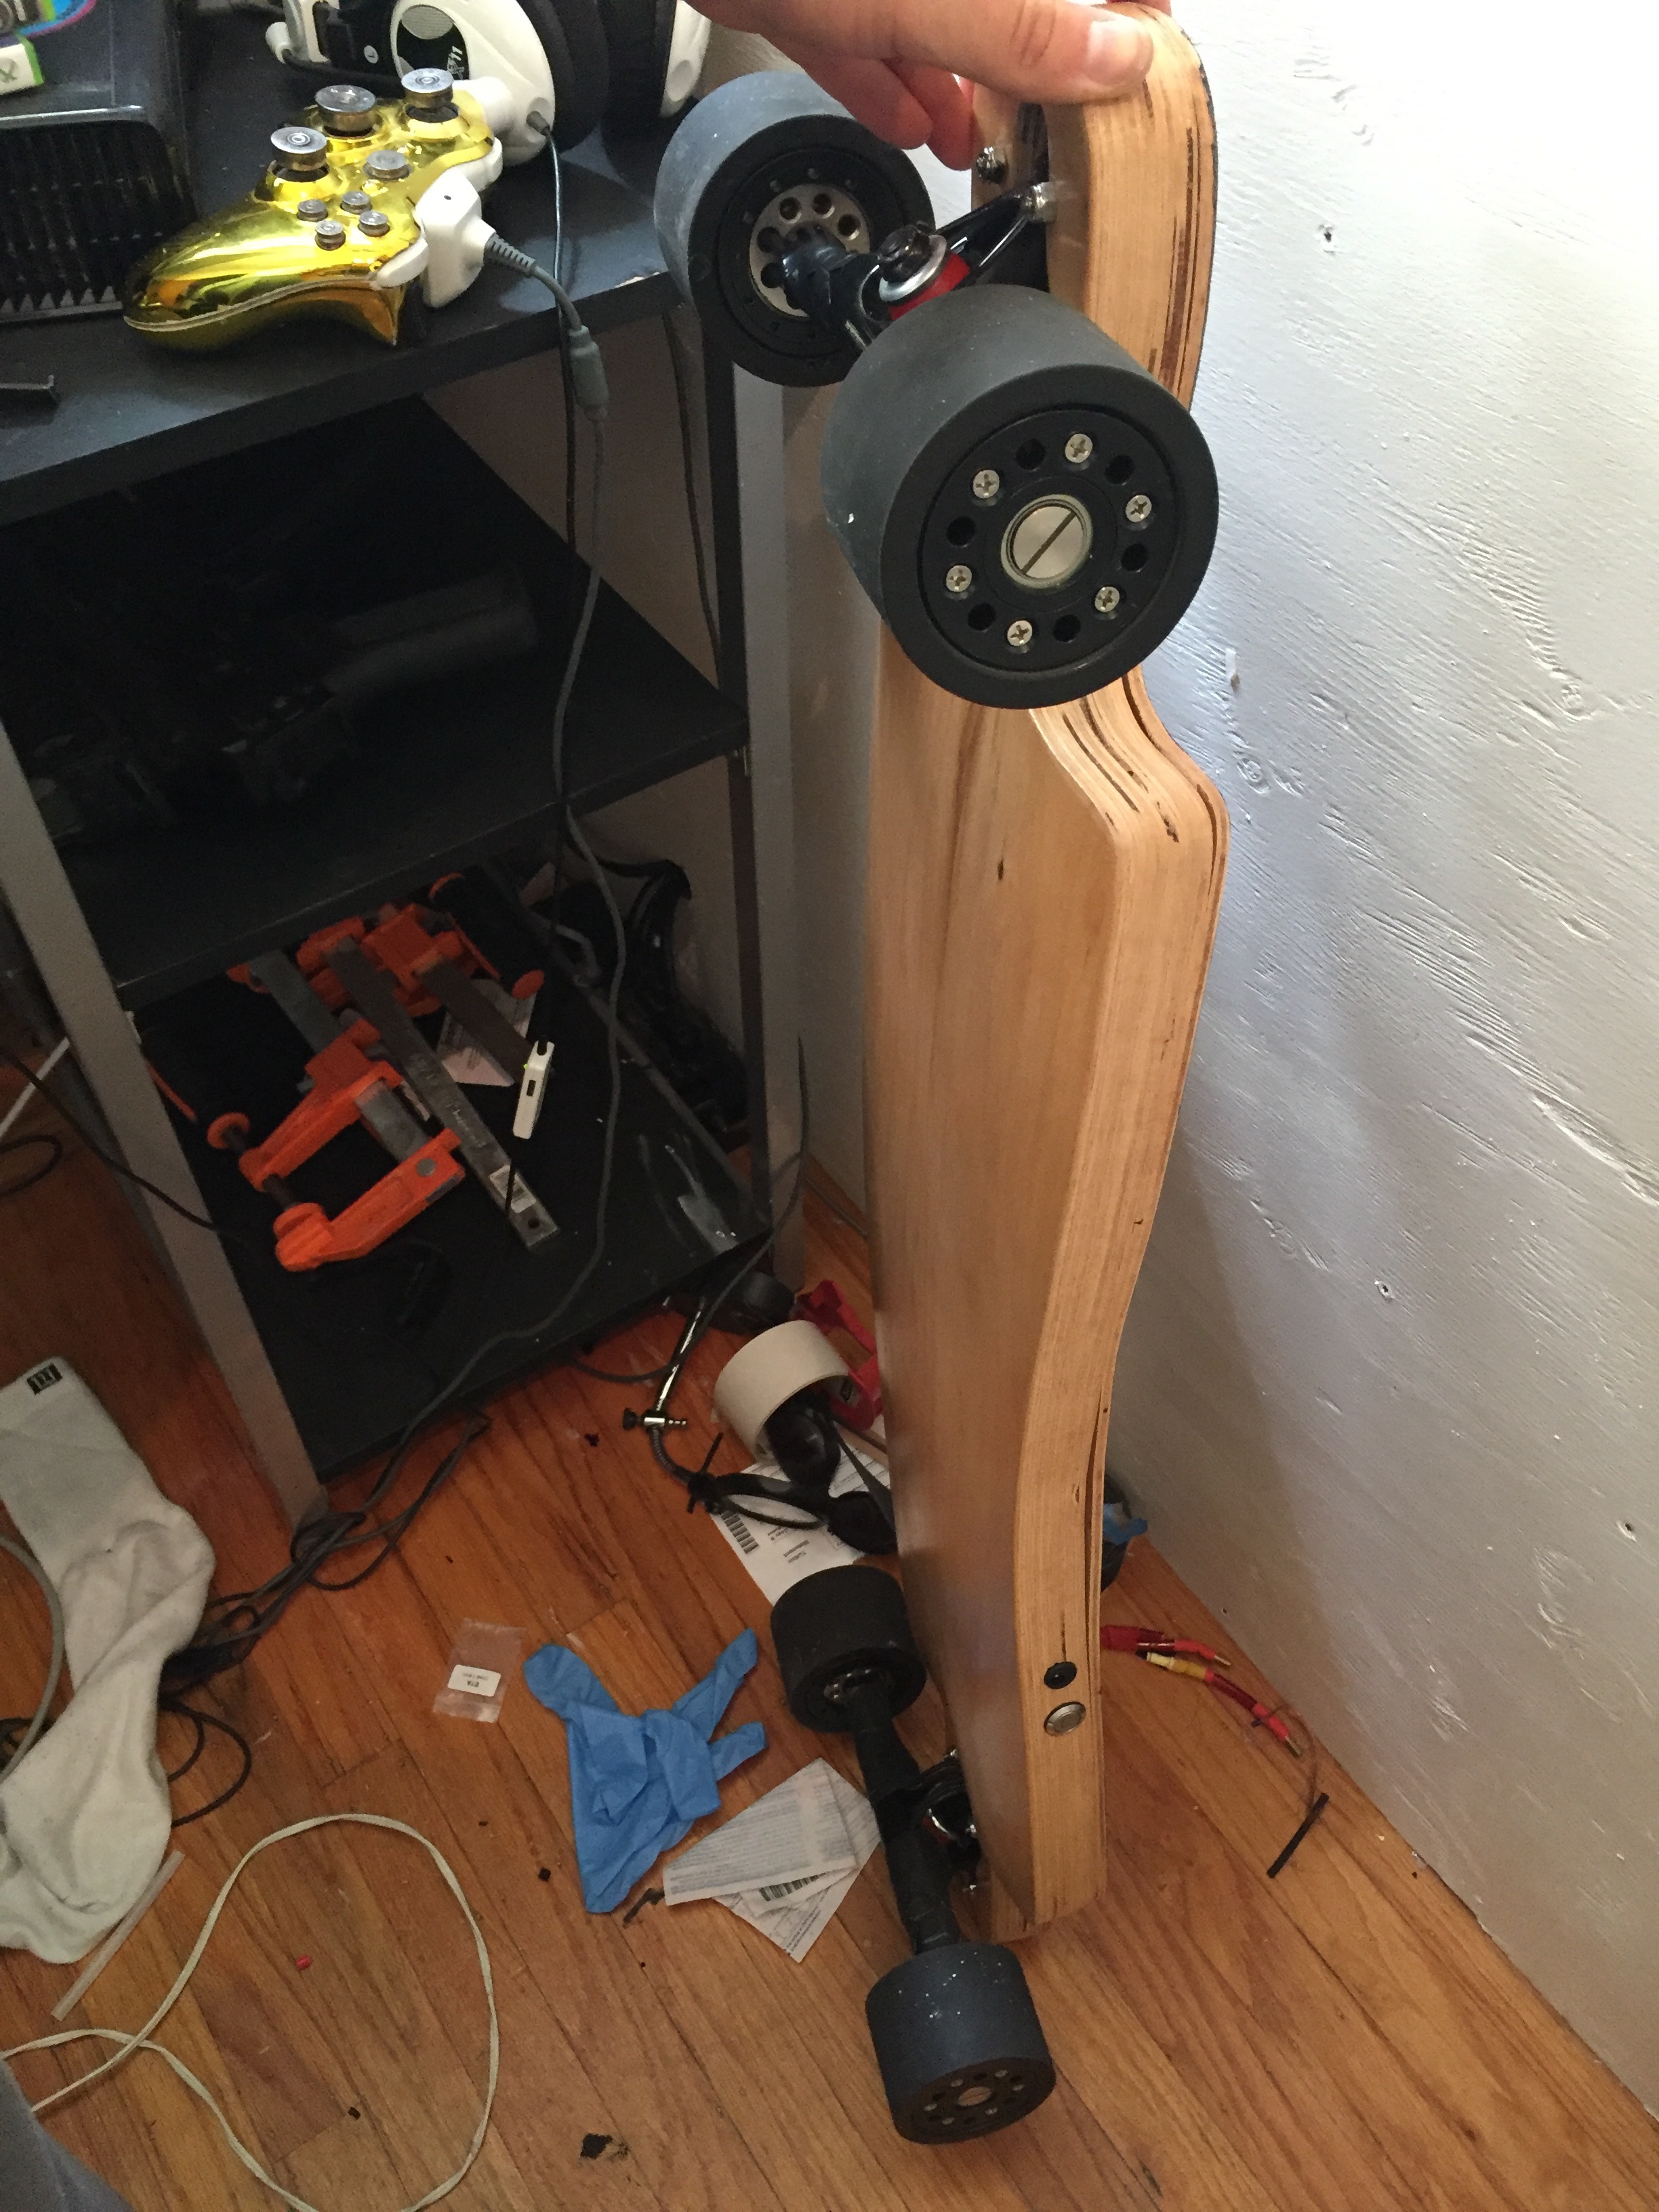
Now, the insides feature 2 large pockets, with a ribbed structure. This provides ample support, while providing a lot of space. The 18650 cells are soldered together using 8 AWG wire. I do not solder the wire in between the cells. This allows the pack to have an insane amount of flex. I could bend the entire pack to a 90 degree angle, maybe more even. So the aggressive curves of this deck are no issue with the battery. There’s a 7s4p in the one side and a 3s4p on the side with the vescs. Together, they create a 10s4p. I accidentally started carving out the wrong side for the motor wires, which you can see in the last photo.

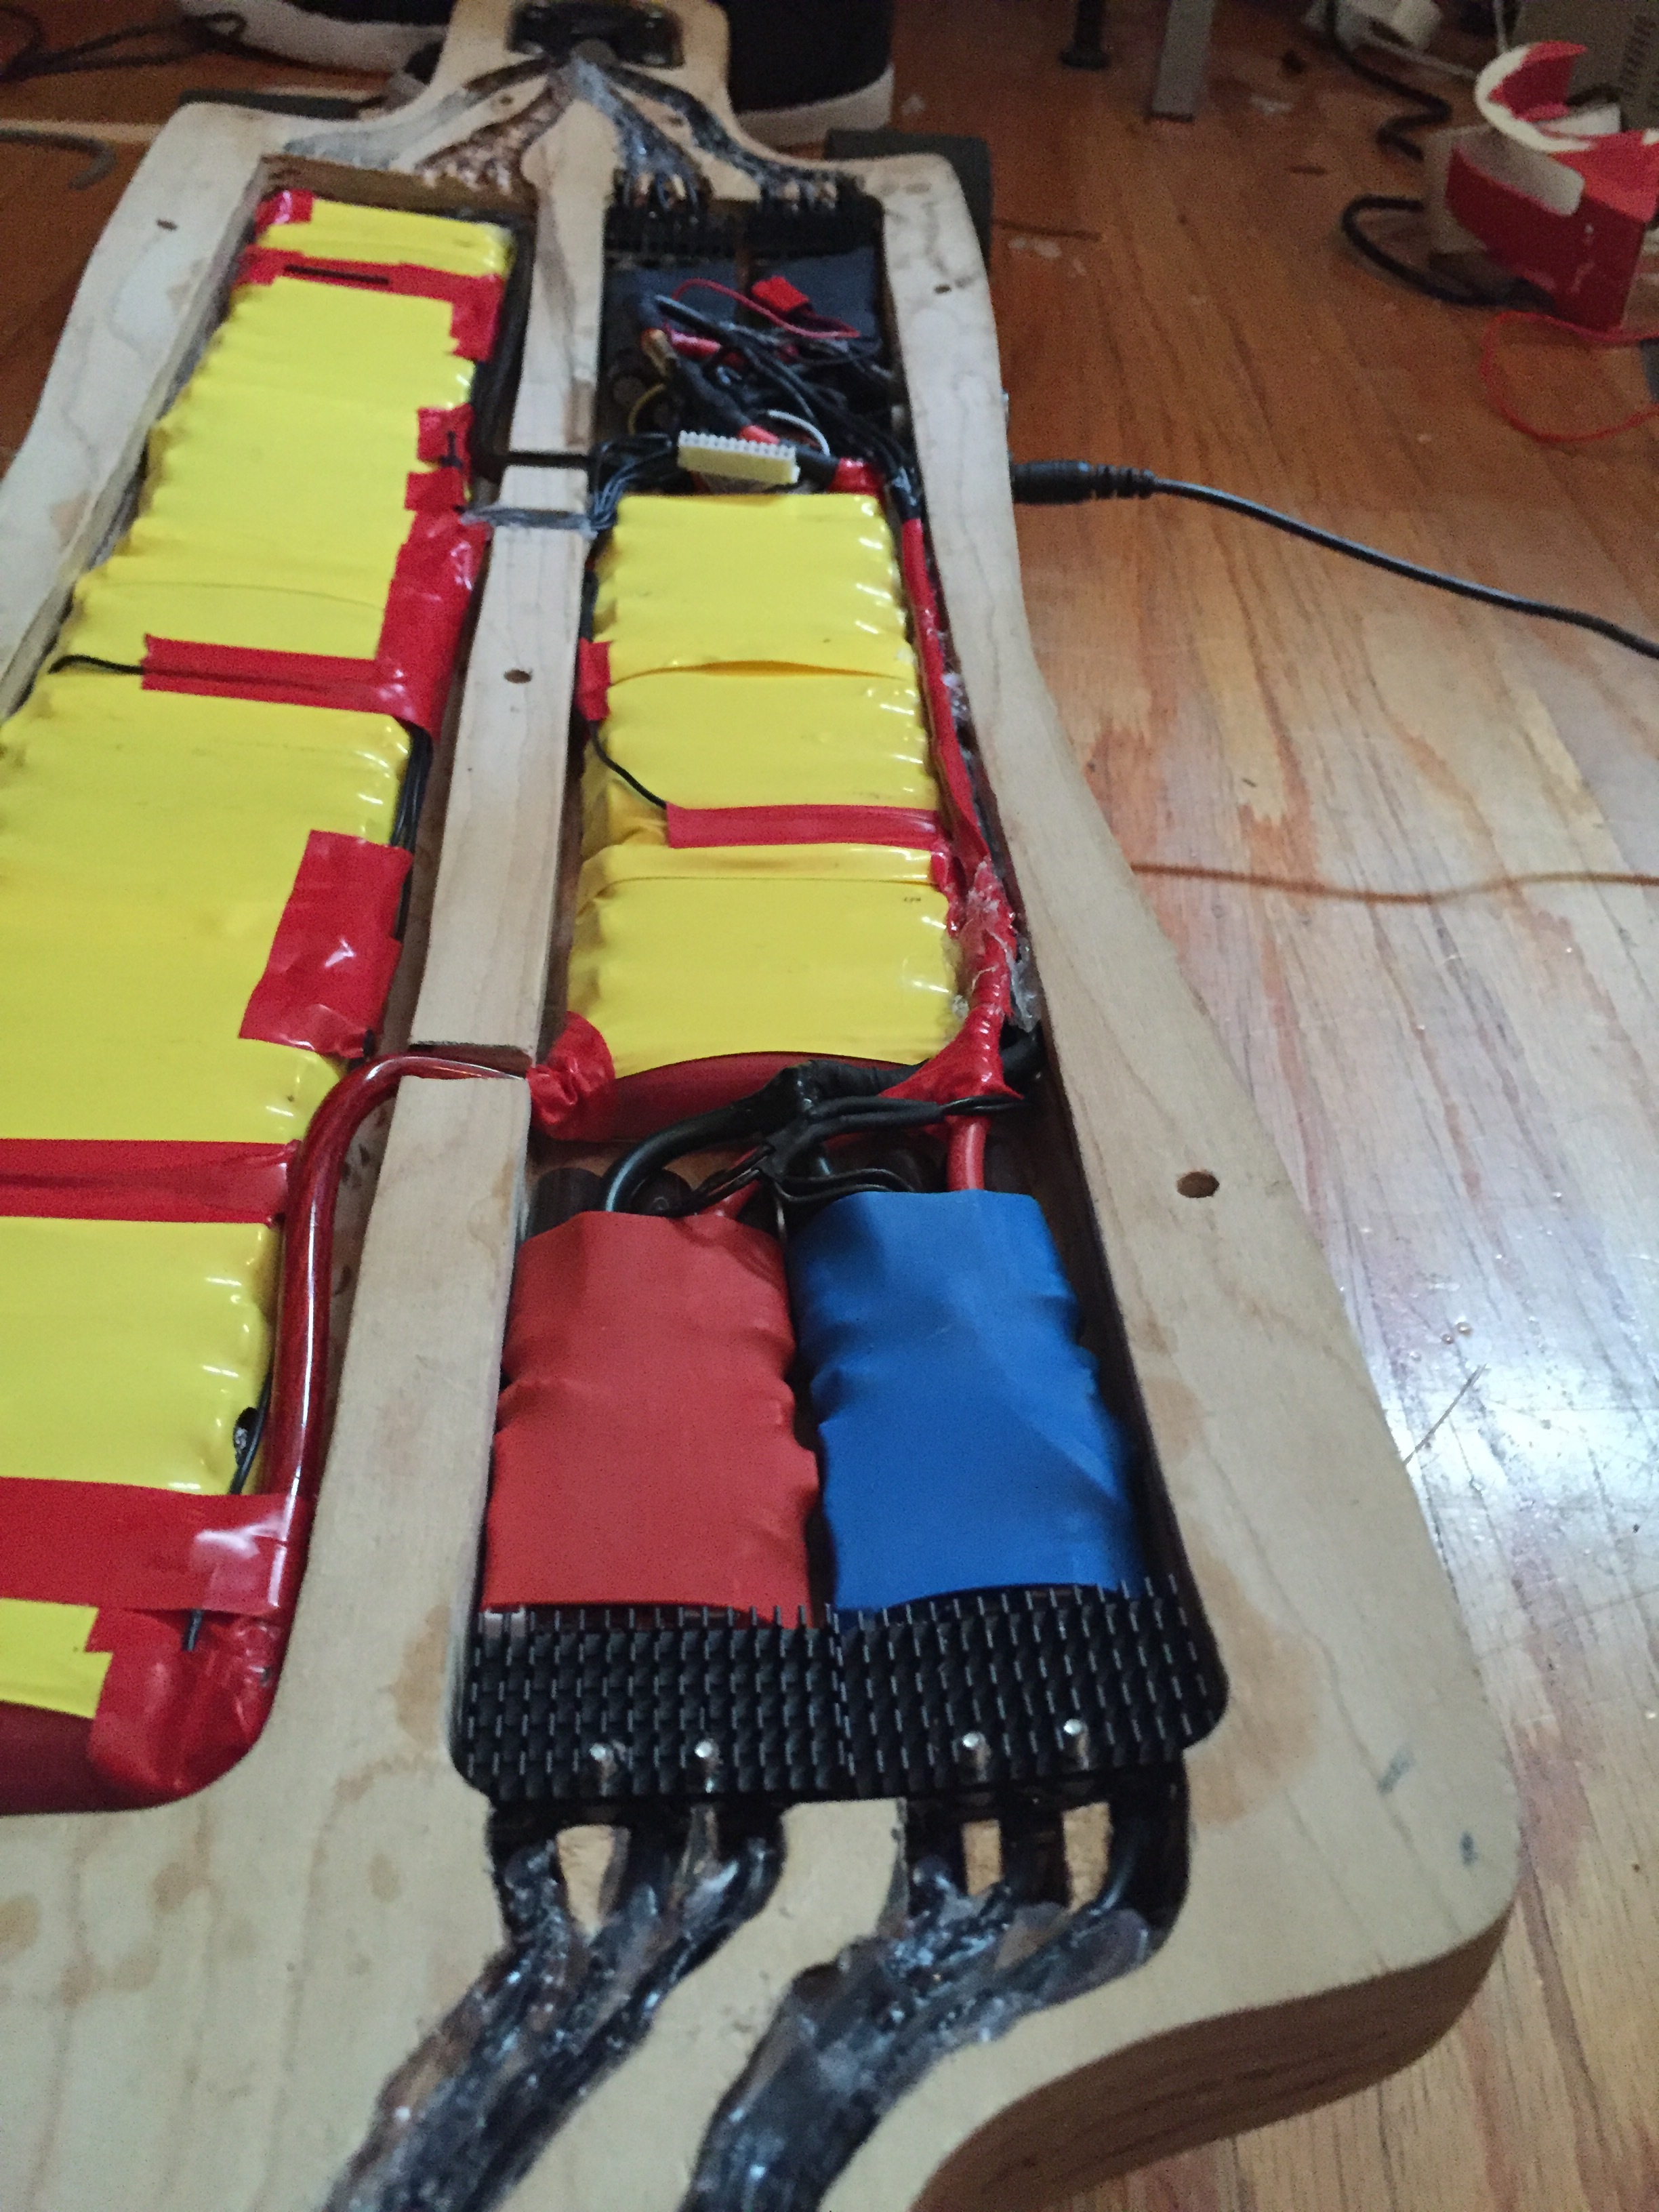
Overall, the goal was to create a beast board that can tackle the relentless hills in San Francisco with speed and no over heating, and get me to school (5 miles each way) and back every day. The vescs are set to pull 18 amps max per motor, this totals 72 amps max across the board. The cells are rate to 20 amps each, and with 4p, 80 amps max con. I can’t imagine the power it would have with 12s. I simply don’t have the space and is why I stuck to 10s.

STILL TO DO:

I need to hook up the power switch. My circuit board for the switch failed. Been waiting on Dexter to ship it out, hopefully it will be arriving in the next few days.

The lid also is not perfect. The vacuum bag’s seal broke after a few hours, and did not get the full 24 press. This is easy to fix, just make a new lid. But I have yet to to that.

FINAL NOTES:

Thanks for checking my board out. I am talking to some board manufactures and hope to have a profession board company make these decks for me. My goal is to produce these boards for production. This is likely at least a year away still, as I need to do way more testing, and finalize all parts used in the board. They will be sold as 4wd or dual drive options. Single motor with these motors get too hot. 2wd is good for flat and not extremely long rides and/or lighter rides. With me being about 200 lb, I need 4wd to get ride of heat issues in the motors.

37 Likes

See where ur going with it … Excellent work

This is sweet man! Haha I was impressed with the torque of dual steels, so I couldn’t imagine 4!

That’s gotta be the beefiest board I’ve ever seen!

1 Like

Thanks guys. A few others points I fogot to mention.

The boards with everything together weighs 22.8 pounds.

It’s composed of 18 layers (16 layers is 1 inch thick), with a 3 layer lid. So just over an inch in thickness. You can really get much thinner than that with vescs and 18650s.

It’s also about 40 inches long by 8.25 inches wide.

Nicely done, very clean.

Kind of reminds me of chaka’s free ride deck.

I had the idea of a deck constructed like this over a year ago. It took a long of time before I could figure out how to make a board like this. As far as I know, there’s never been an electric skateboard deck constructed from individually cnc milled veneers, and pressed with concave. Chaka’s is the closest, his deck is interesting. Theres some big defferences though. My deck is a recessed drop through (kinda like the evolve gt), and it has pretty steep concave. Chakas on the other hand has a much larger battery. His deck is also 2wd while mine is 4wd. His is a bit more polished than mine (I’m a bit lazy about every little detail and just want to ride already, haha) And he uses carbon fiber, while I keep 100% wood. They are both great decks IMO, and would love to see these kinds of decks on the market.

I’m impressed it’s only 22.x lbs! That’s a slick setup and definitely well thought-out and executed!

I’ve wanted to do similar and am still practicing CF before i tackle my v2 e-GBomb w/ enclosed electronics. I’m working on a Omen Chief now which is a double thick deck for bottom sunk electronics. Moving slowly as i learn/practice w/ CF:

The bottom is carved/routed out - reinforced the top w/ some 12k CF.

Hats off to making the deck yourself w/ the Roar kit! That’s a lot of work and well done man!

1 Like

Thanks man. I’m interested to see how your deck comes out. The idea of a bottom recess I think is interesting. I defiantly lose a slight bit of concave doing the top recessed (look at the curves on the bottom, and look at the curves on the top with the lid on and you’ll notice a slight difference). In my experience, carbon fiber is unnecessary. My deck is plenty strong, and has just a little bit of flex, which if anything, helps absorb vibrations.

@evoheyax thats sick build brah! :raised_hands:

That is insane, congrats! The acceleration is krazy, will want to know all about this and save a deck for me when you start to go production!!

This is awesome, glad to see some 4wd boards in the forum! Nice build so far!

extreme on all frontiers :astonished:

whats the advantage of “routing veneers first and then laminating” vs. “laminating veneers first and then routing”? the latter seems a lot simpler :confused:

I feel like routing first could result in an offset.

1 Like

As @michaeld33, you get offsetting. I would prefer to cut them all at once. But it is difficult to even cut a veneer with a CNC machine, they are very fragile, and you must use very precise settings. I know if I used better equipment, I could cut them in one swoop, and the day that happens, production for this board begins. I think finding a board company who have better tools could produce them faster. Just cutting the deck took 20 hours of cncing. Then, sanding took 5-8 hours. If I had better tools, I could cut sanding down to an hour and cncing down to 3-4 hours. That’s when I can produce this deck. But right now, I have a lot of hurdles to get over before that can happen, most of which is money needed for tools if I choose not to or can’t find a company to produce the decks for me.

The biggest issue is how a veneer is usually some what warped. You have to really clamped them down. Here’s a picture of what I’m doing and the warpness some sheets have.

The veneers often fall apart during cutting. Even with optimal settings, I wasted almost 50 sheets, and got 20 good ones… Most of those were testing settings to come up with the right ones, but I will still lose 1 out of every 6 or so to random cracking due to a knot or just weak spot in that particular sheet.

Basically, the cutting before is way more difficult that cutting after. But cutting after requires me to make a mold, not use a nicely concaved downhill deck. It’s also hard because I’m limited to less than 3 inches of cutting height. The ends of the board stick up more than 3 inches due to its sharp concave. Many professional cnc milling machines don’t have these kinds of limitations. I just don’t have 15k laying around to drop on one.

1 Like

I have been thinking about getting a thick piece of wood/ ply and just cutting the board from that piece using a band saw(&other tools), including the space for battery and VESC. What’s wrong with that approach if flexibility if not what I am after? Or I could ask why is a pressed veneers construction superior to just using a ply board/ wood slab obtained from hardware shop?

So I started originally with this idea. I made my first board from a bed board at home depot. The issue is, how do you bend a solid thick board? you can’t. So you look at plywood. Flexy Plywood has little strength. It doesn’t hold up to weight, it just craxks and breaks. I had my second board, which was slightly l had different than my first board, break in half on me while riding. It was made of pine, which is rigid, but it still broke after a few rides. So I decided I needed harder wood (pun INTENDED). Maple is what most skateboard decks are made of, so it seems like a no brainier. But how can you make a board bend and keep that shape? The only way to do that with wood is by using super thin sheets (veneers) and gluing them together while being pressed into a shape. The glue holds the sheets in the shape they where pressed in using tension forces.

Using plywood wood is just starting with a bad material. It’s hard enough to do with the right materials, and maple veneers pressed in a hydrolic press would be ideal. But a poor mans choice is the vacuum bag press.

You want a slight bit of flex, but a slight bit is maybe 1/10th of an inch down when stood on. plywood flexs much further.

Thick pieces will give you no concave, which feels unstable, especially at higher speeds.

1 Like

That whole setup looks incredible!! How did you link the 4 VESCs? Also, if I may suggest, maybe staining the deck? I think it would look really nice with Danish oil or a dark oak stain (just my opinion though)

I removed the canbus port and soldered wires directly too the vesc. I connected them in pairs of 2, then run cabling between the two. It was a pain to get soldered up.

1 Like

I thought about staining it. Again, I’m too lazy to wait. I’m actually really proud of myself for at least doing the polycrylic lol. I also having had a working board (tore apart old ones planning for this one and reusing parts) for a while, so I just wanted a working board. But that’s a great feature to offer to customers, so thank you for the idea :stuck_out_tongue: