thats the weirdest diagram - two anti sparks? Why not place them properly and have just one?
Actually 4 anti sparks😂
I am a new guy, do you know how can I do it? thanks
by reading forum threads - a lot!
Thanks. Yes I did it.
TIME FOR ANOTHER UPDATE!
This is gonna be a long post, so sit tight. 
Alright, so continuing the consistent use I have once again used my board for many many kilometers. Then winter came, and I had to put my board to sleep, since winters in Denmark would completely ruin your board (salt, wet conditions, snow and so on). But now, the spring/summer season is coming, and I needed to make the board ready for that. Since I got my FOCBOX’es and never got to installing them, I thought this would be the perfect time to do that as well. Commencing the refurb!
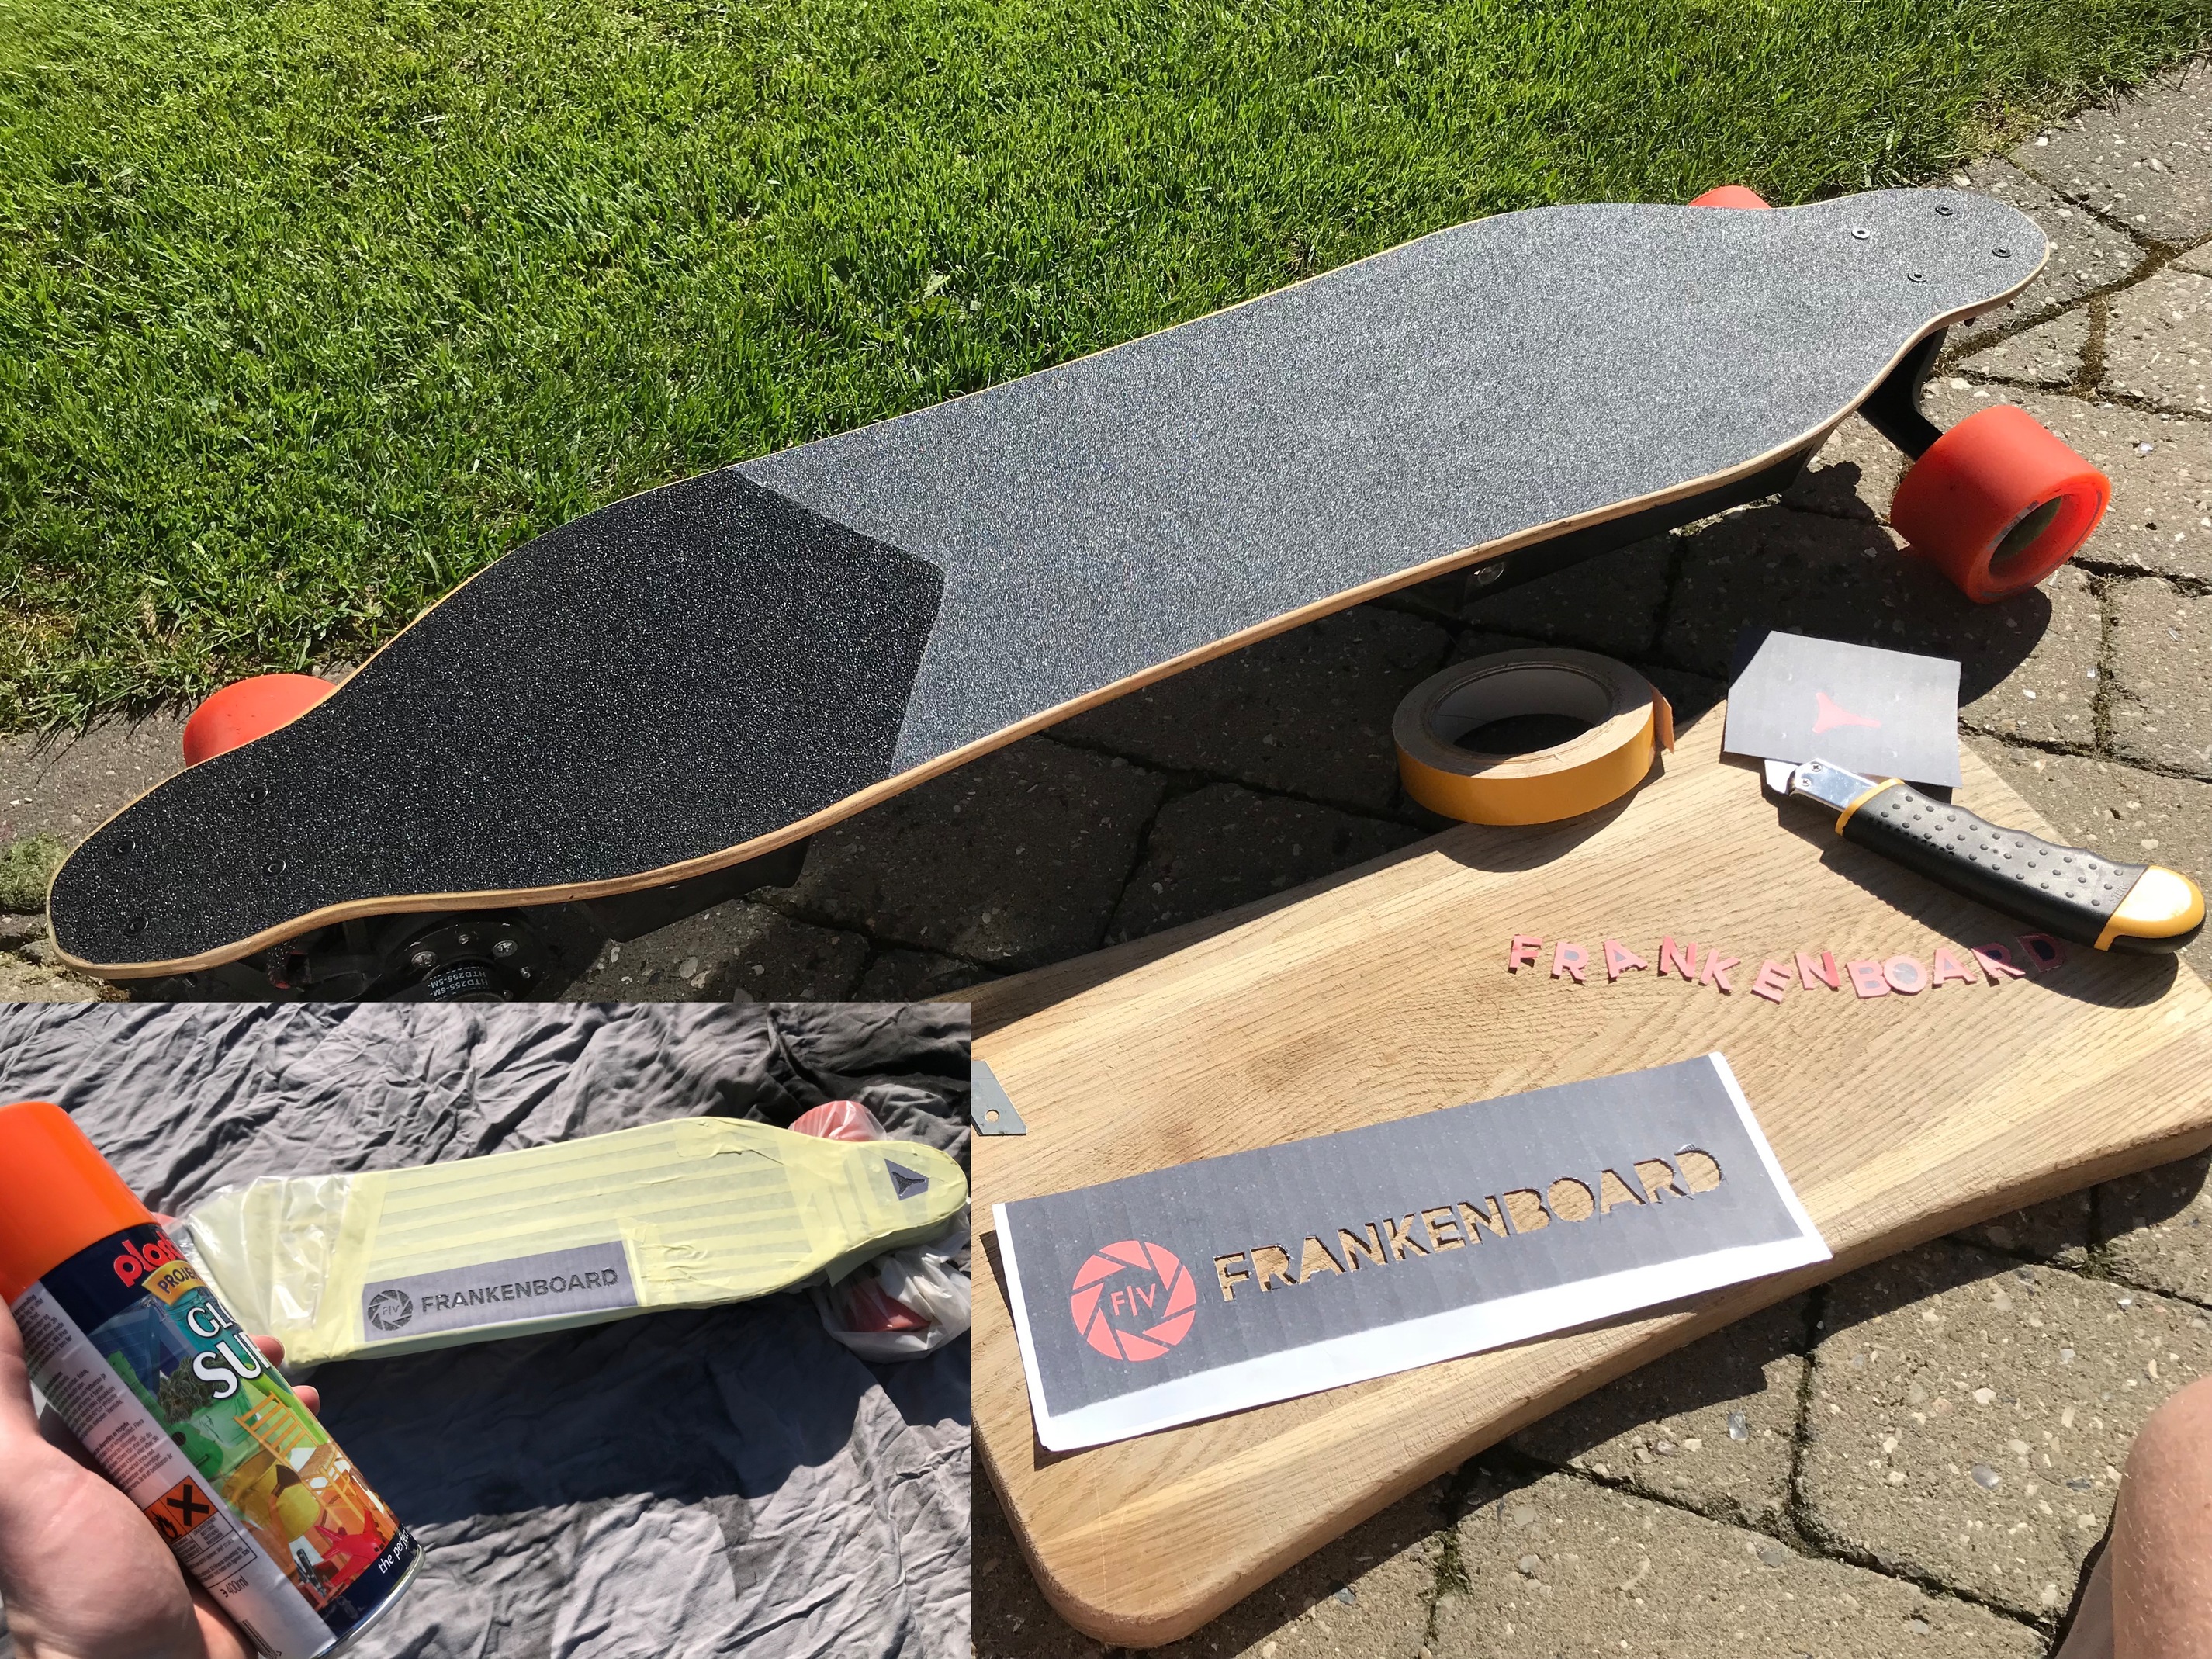
First off, I took off the grip tape, since I wanted to regrip it. I also re-painted the trucks, sanded the deck, made the wire channel a little bigger, and applied clear coat to the deck for better weather resistance.

Next up, I wanted to add lights to the front and back of the board, so I needed some extra wires in the wire channel, for the cleanest look possible. I’ll then be able to control the lights from the Nano-X.

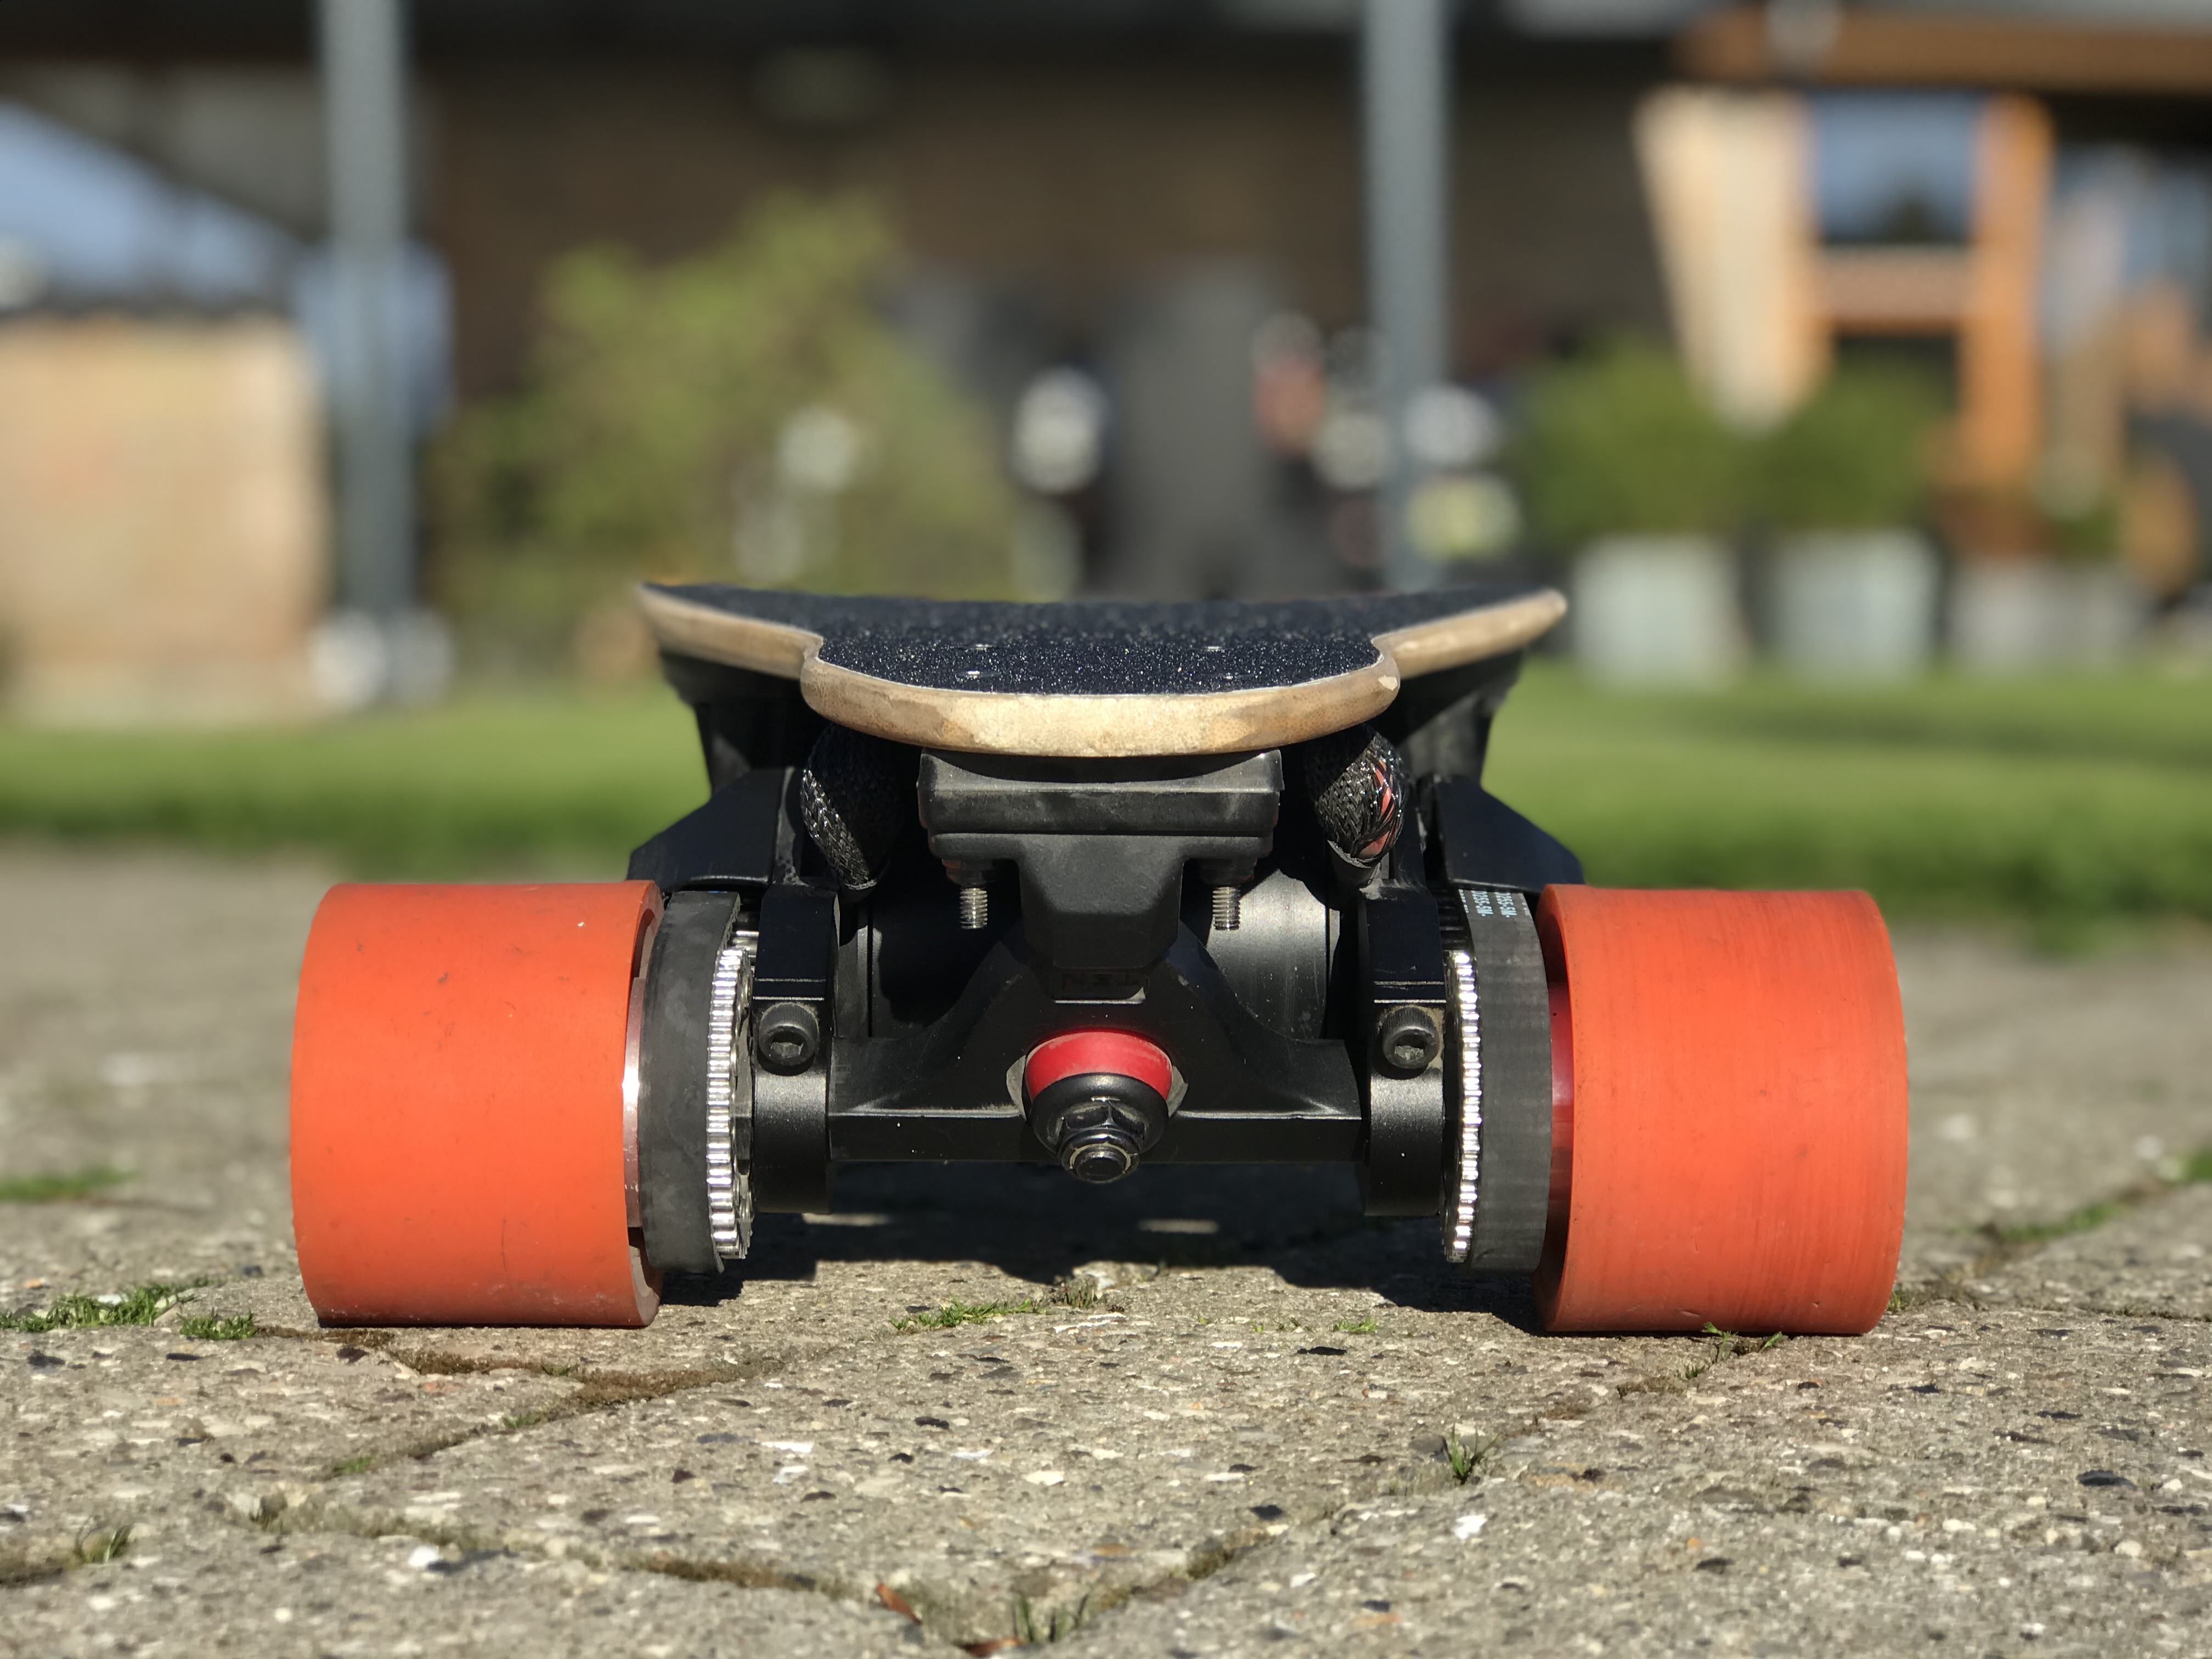
The motors were getting pretty worn, so I changed the bearings, and repainted the cans. That got rid of the APS logo and now they look extra crispy.

The motor mounts I used on this build did not have an option to get belt covers on, so I bought some BKB mounts (from @JLabs, designed by @JuniorPotato93, covers on Thingiverse also designed by the aforementioned) and they look amazing. Yes, I actually should be able to run dual 15mm, but for now I only upgraded it to 12mm. The pulleys were upgraded to 15mm though. (Damn that was expensive for some pieces of aluminium/metal…) Complete look:

Installing the FOCBOX’es instead of the Maytechs, fits perfectly with my existing enclosures. I still want to do a slimmer redesign though, since there’s extra space in the height.

I finally got a chance to make the two-tone griptape, and I think the result came out great! But then I needed to redo the logo and name, so back to the cutting board!
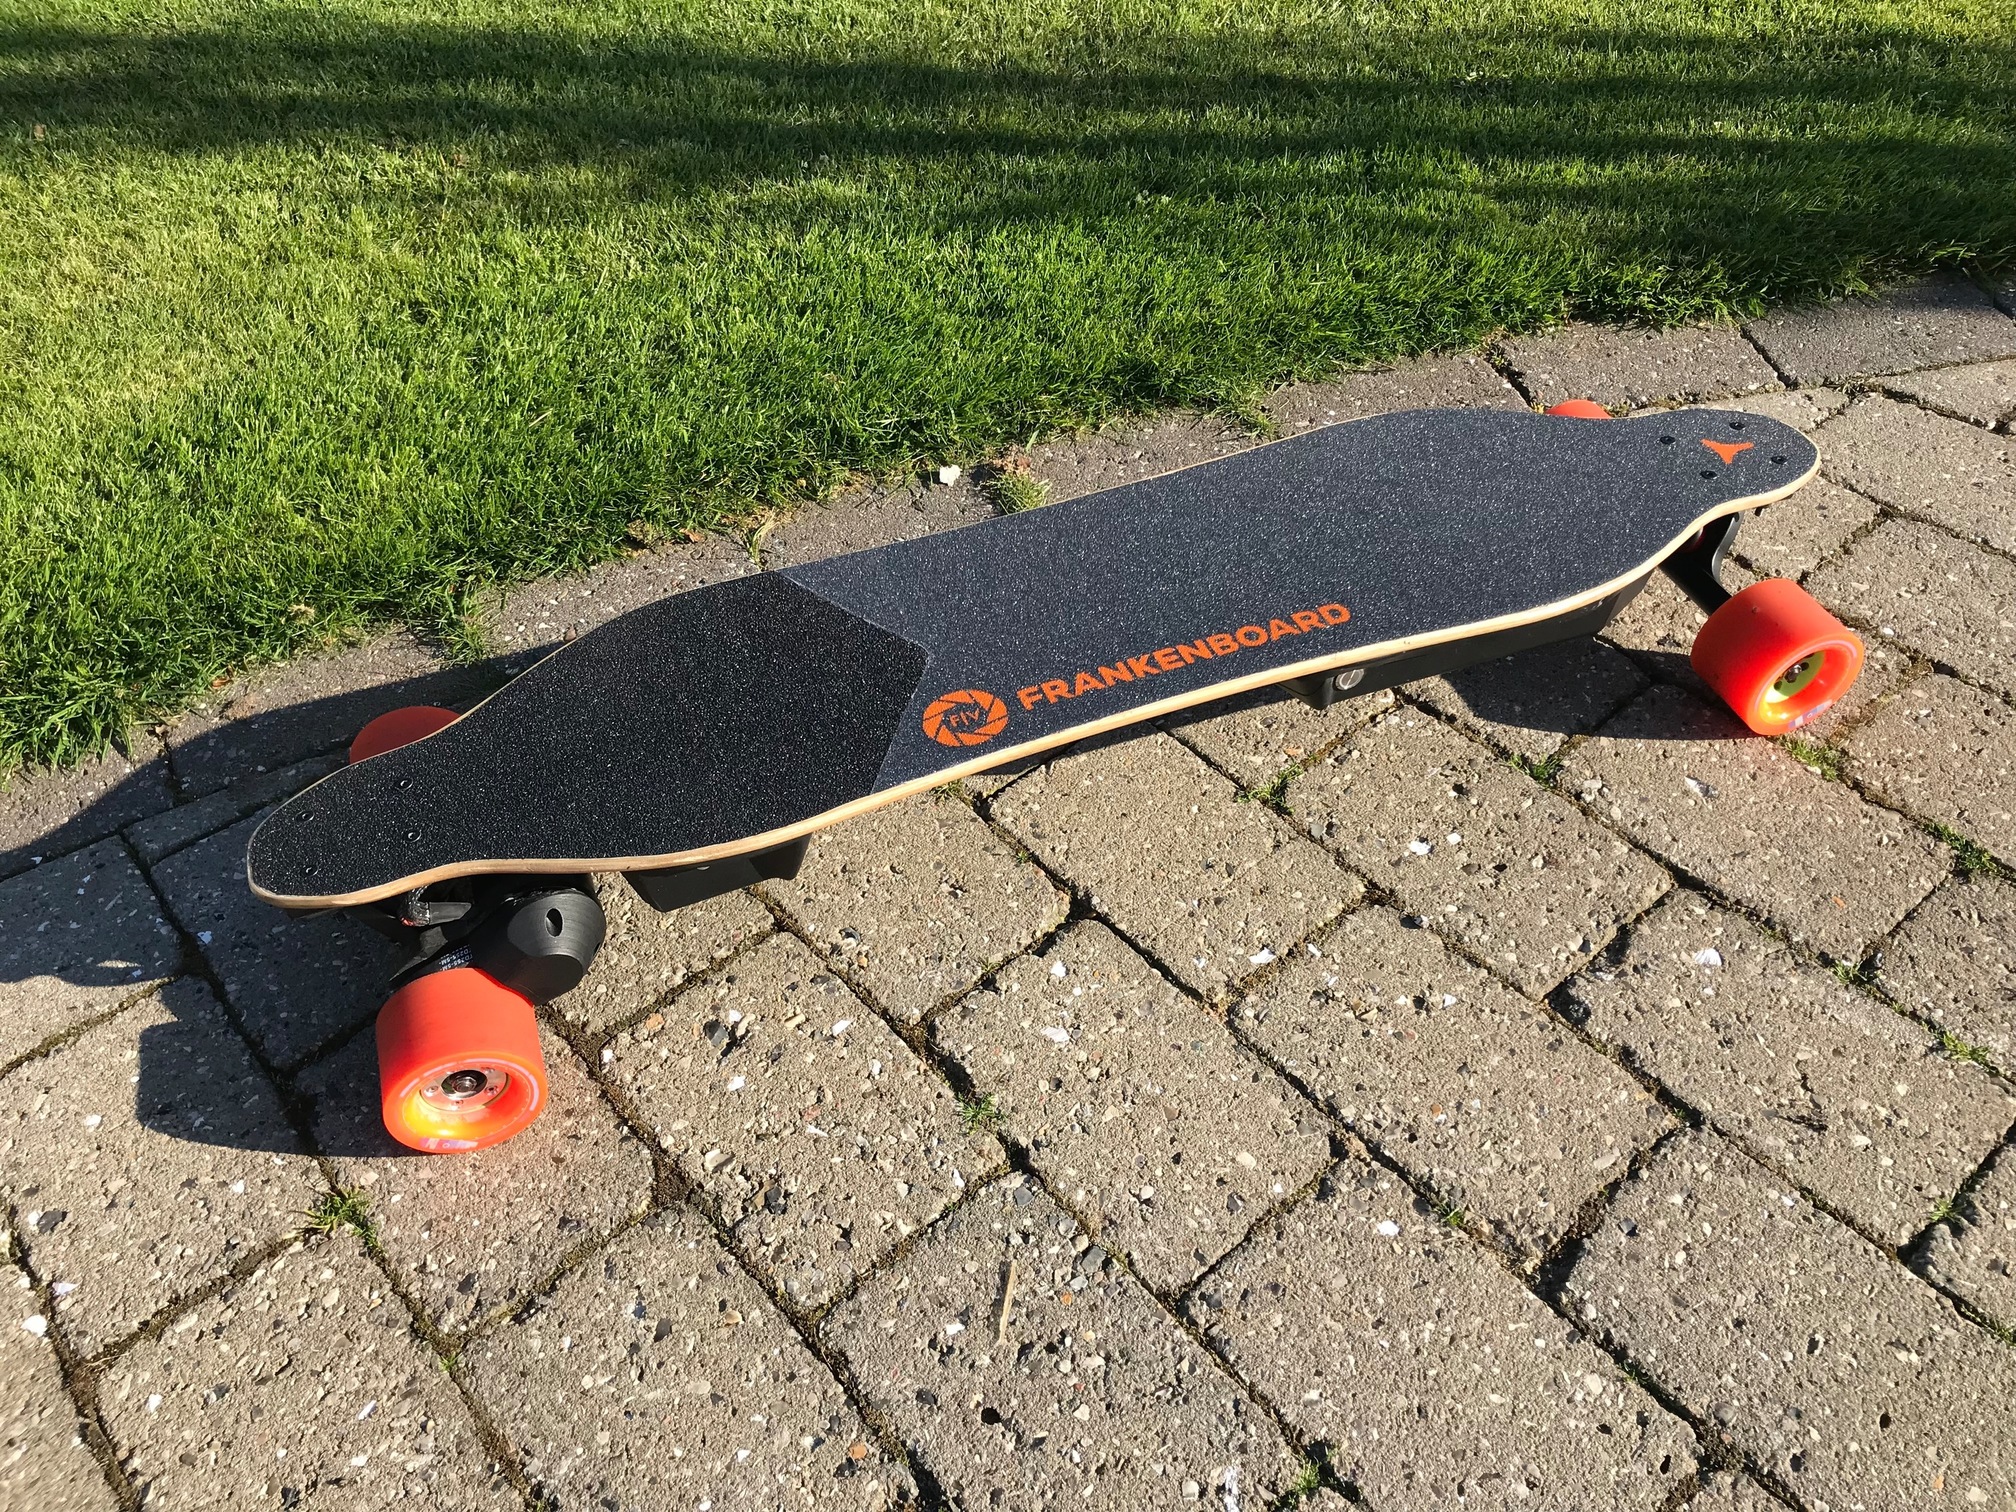
FINAL RESULT 
Thanks for reading, here’s some pics  Board now runs in FOC, and damn is it smooth!!


Things I still need to do:
 Add the lights, since the wires are now in place.
Redo the charging solution, into one connector.
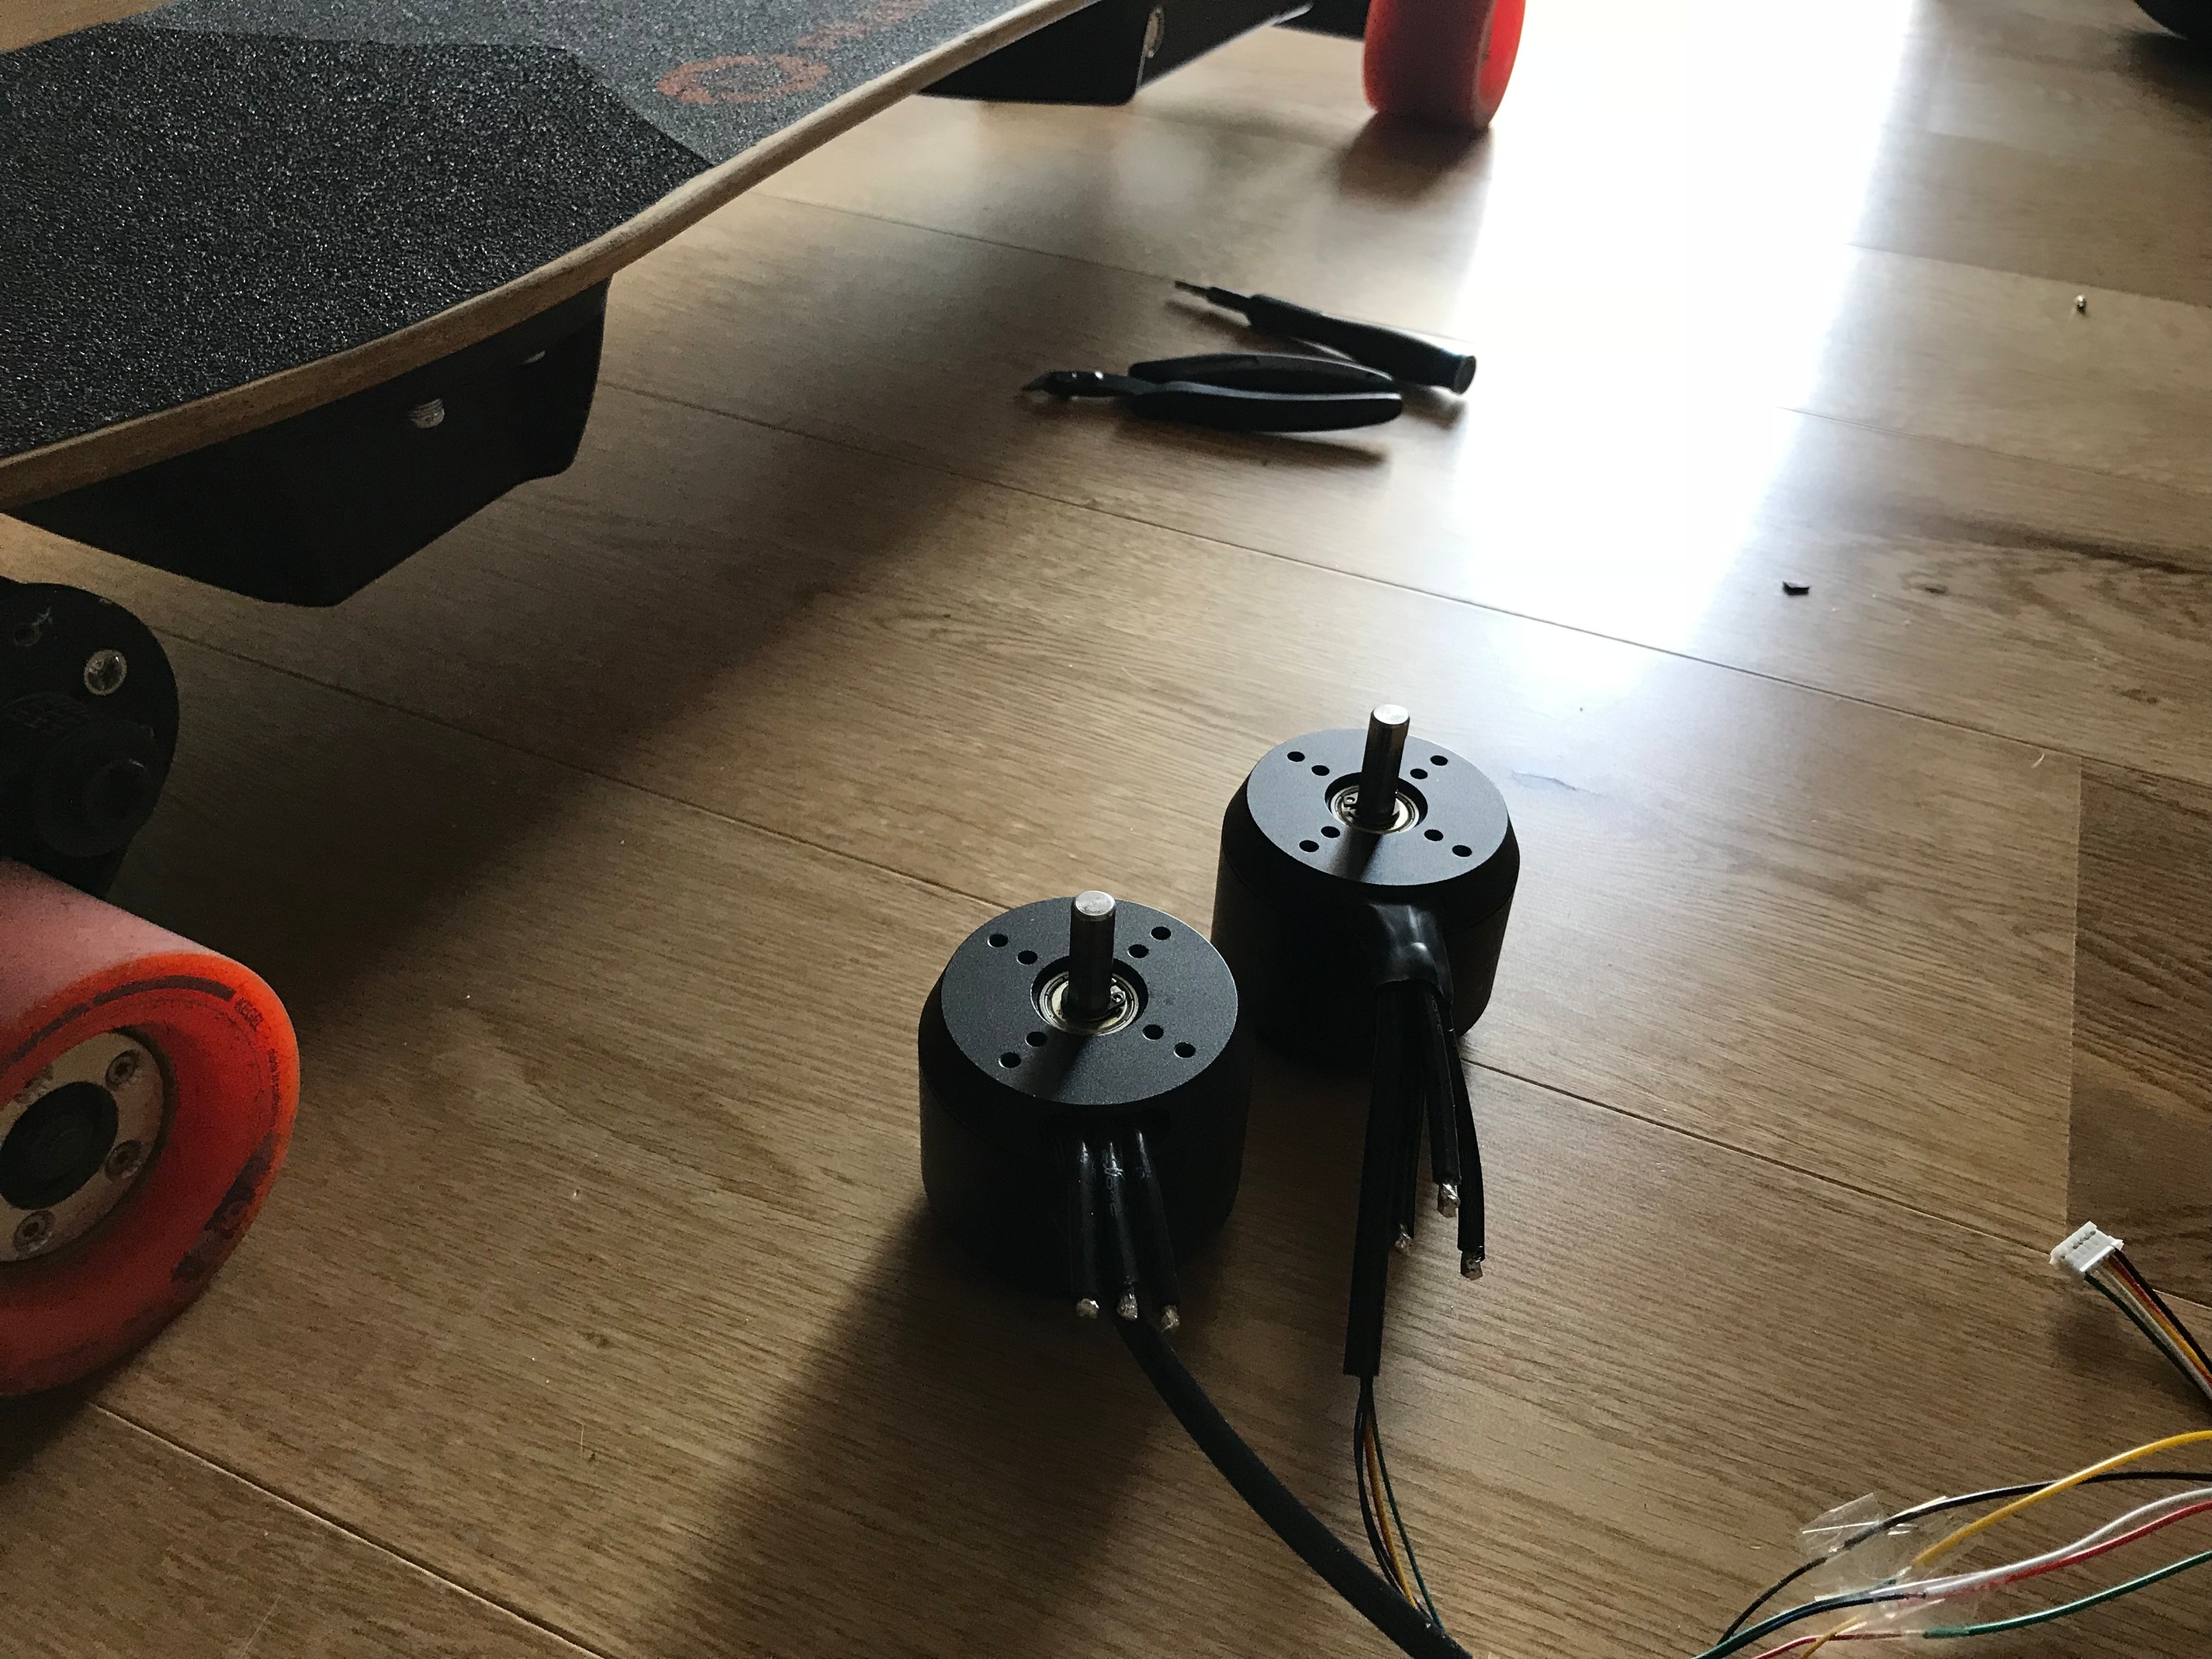
New sensored motors.
Redesign of the enclosures.
Add the lights, since the wires are now in place.
Redo the charging solution, into one connector.
New sensored motors.
Redesign of the enclosures.
18 Likes
15mm belts fits perfectly ![]() And now I also use the same belts on both my builds.
And now I also use the same belts on both my builds. ![]()
9 Likes
Looks great!
1 Like
Looks really good!! What do you plan on doing with your enclosures?
I want to make them a little slimmer, since there’s too much space left 
1 Like
that board looks legit man awesome job.
2 Likes
The sensored motors are in the house!  Now I just need 18t 15mm pulleys with 8mm bore, since these has a lower kv.
Ty @BoostedBuilder!
6 Likes
Noob question here, but what would be an advantage of sensored motors be? Loving the build, looks stunning!
Better startup torque / smoother startup / no need for a kick push / FOC.
2 Likes
Do you have a link for the belt cover?
1 Like
Not exclusively on sensored motors ![]() Sorry to revive this lol
Sorry to revive this lol
True, but FOC does perform better with sensored motors.
1 Like
Better how?
1 Like