wrote about that in the first post - under the gap segments there is a few millimeter pure resin which I can use to dremel gaps large enough for flat cooper wire. didnt actually do that yet, still need to build the battery … but in my head its all done!
Yes i was thinking about the actual wiring of the battery to bridge the Gaps. I guess you will need a 90 Degree Nickel strip that folds under battery on each Parallel Pack,…then from there a Flat copper Wire going to next Pack ?
there wont be any wire under the battery! Ill use nickel strips (4 ontop of each other for serial currents). at the right point it will extend by the width of my flat wire so that I can bend the strips by 90°. then Ill solder the flat wire sandwiched by 2 nickel strips each and the flat wire will bridge the gap between segments by forming a simple “U”-shape and the enclosure segment gap sitting in that U.
Im also organizing the battery in a way that “+” and “-” pole end exactly at the largest segment with the vescs - so there wont be any long wire running through the whole length of the battery.
Ill probably start working on it this weekend, then youll see what I mean with fotos!
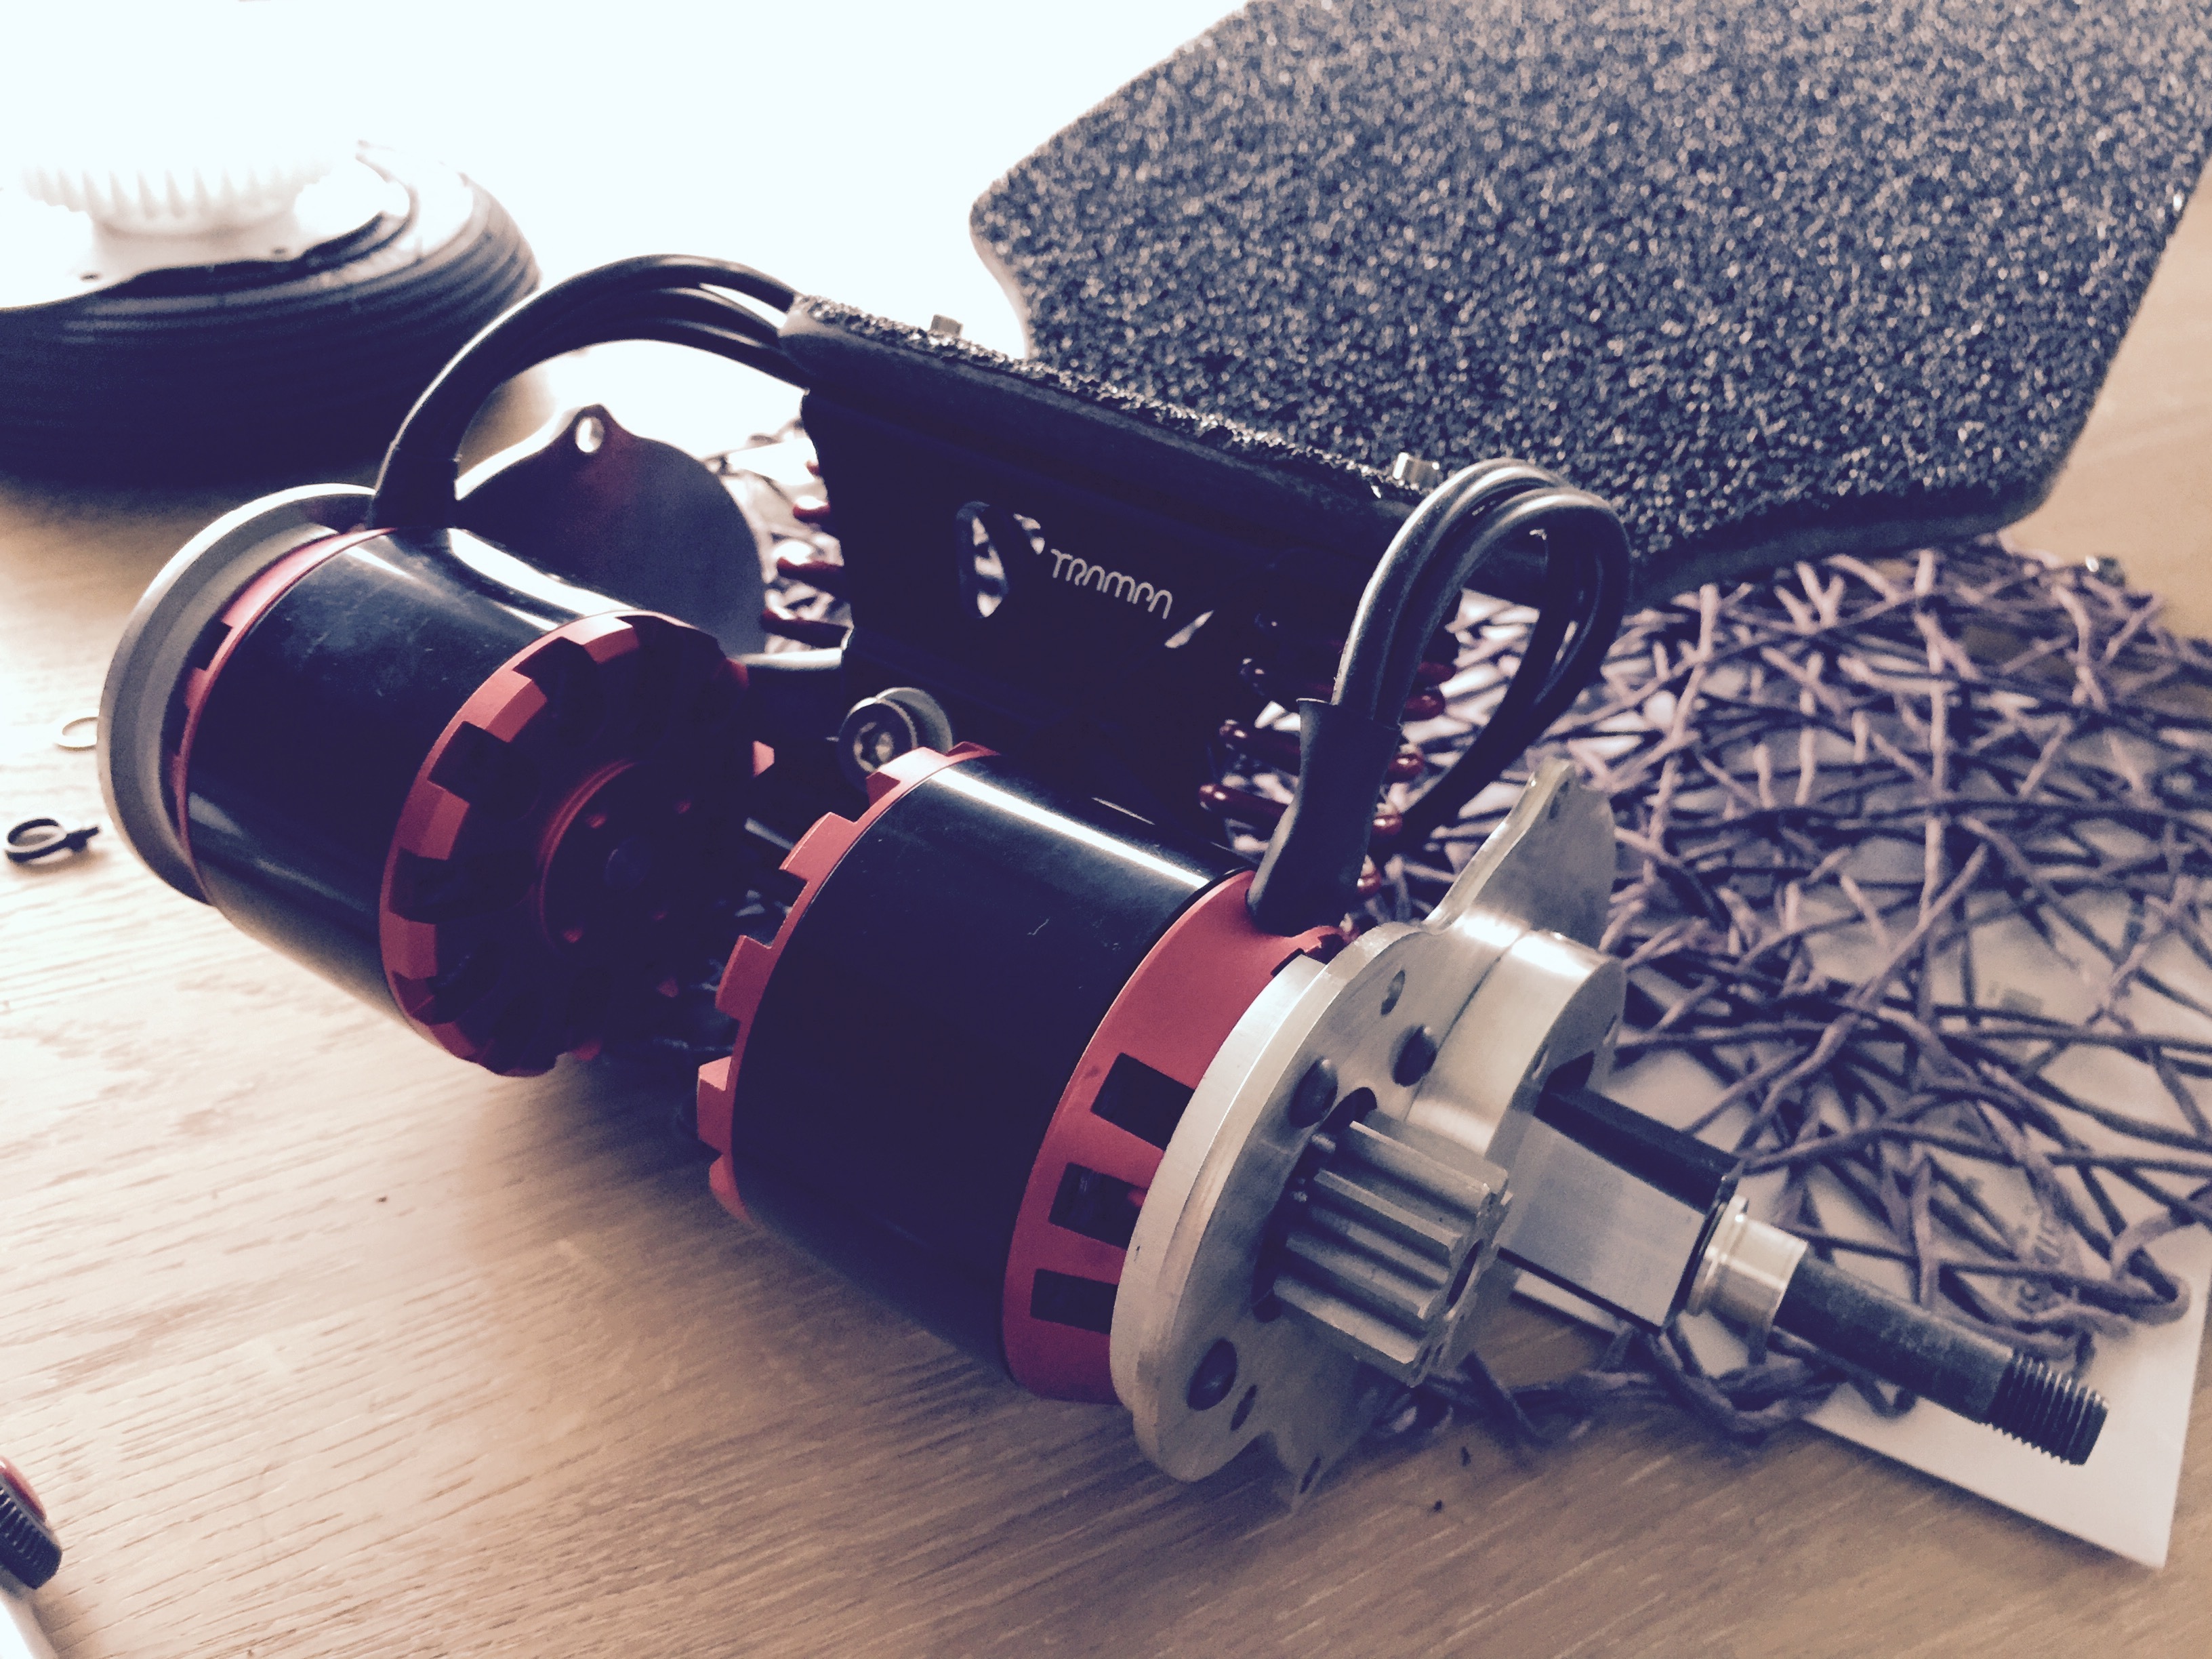
today the motors from @fottaz arrived - just 3 days from italy to germany. they look great and have no print, which I like. also I noticed they coast very freely - curious about how they will perform.
started to assemble @Nowind spur drive mini motor mounts with the 2x 6355 motors and Im really happy with the results. the spur drive coasts super well, looks really great and Im looking forward to the debris-free drive train.
Heyy @whitepony I’m happy you are satisfied with Eskating services, just let us know what do you think about the motors I have no words for your build! that’s super clean, wonderful!!!
It looks like you have room for 12s4p still i figured u were going to use one of the segments for a bms? And the larger one for dual vescs. This is awesome cant wait to see the battery build.
its 5 smaller segments for the battery (each segment can carry 2x 4 cells for a total of 10S4P, organized in 5x 2x 4P), and the larger segment for 2x vesc, loop key/electronik switch (probably not the latter, dont trust in these and they steal Wh), receiver and whatever else I can think of.
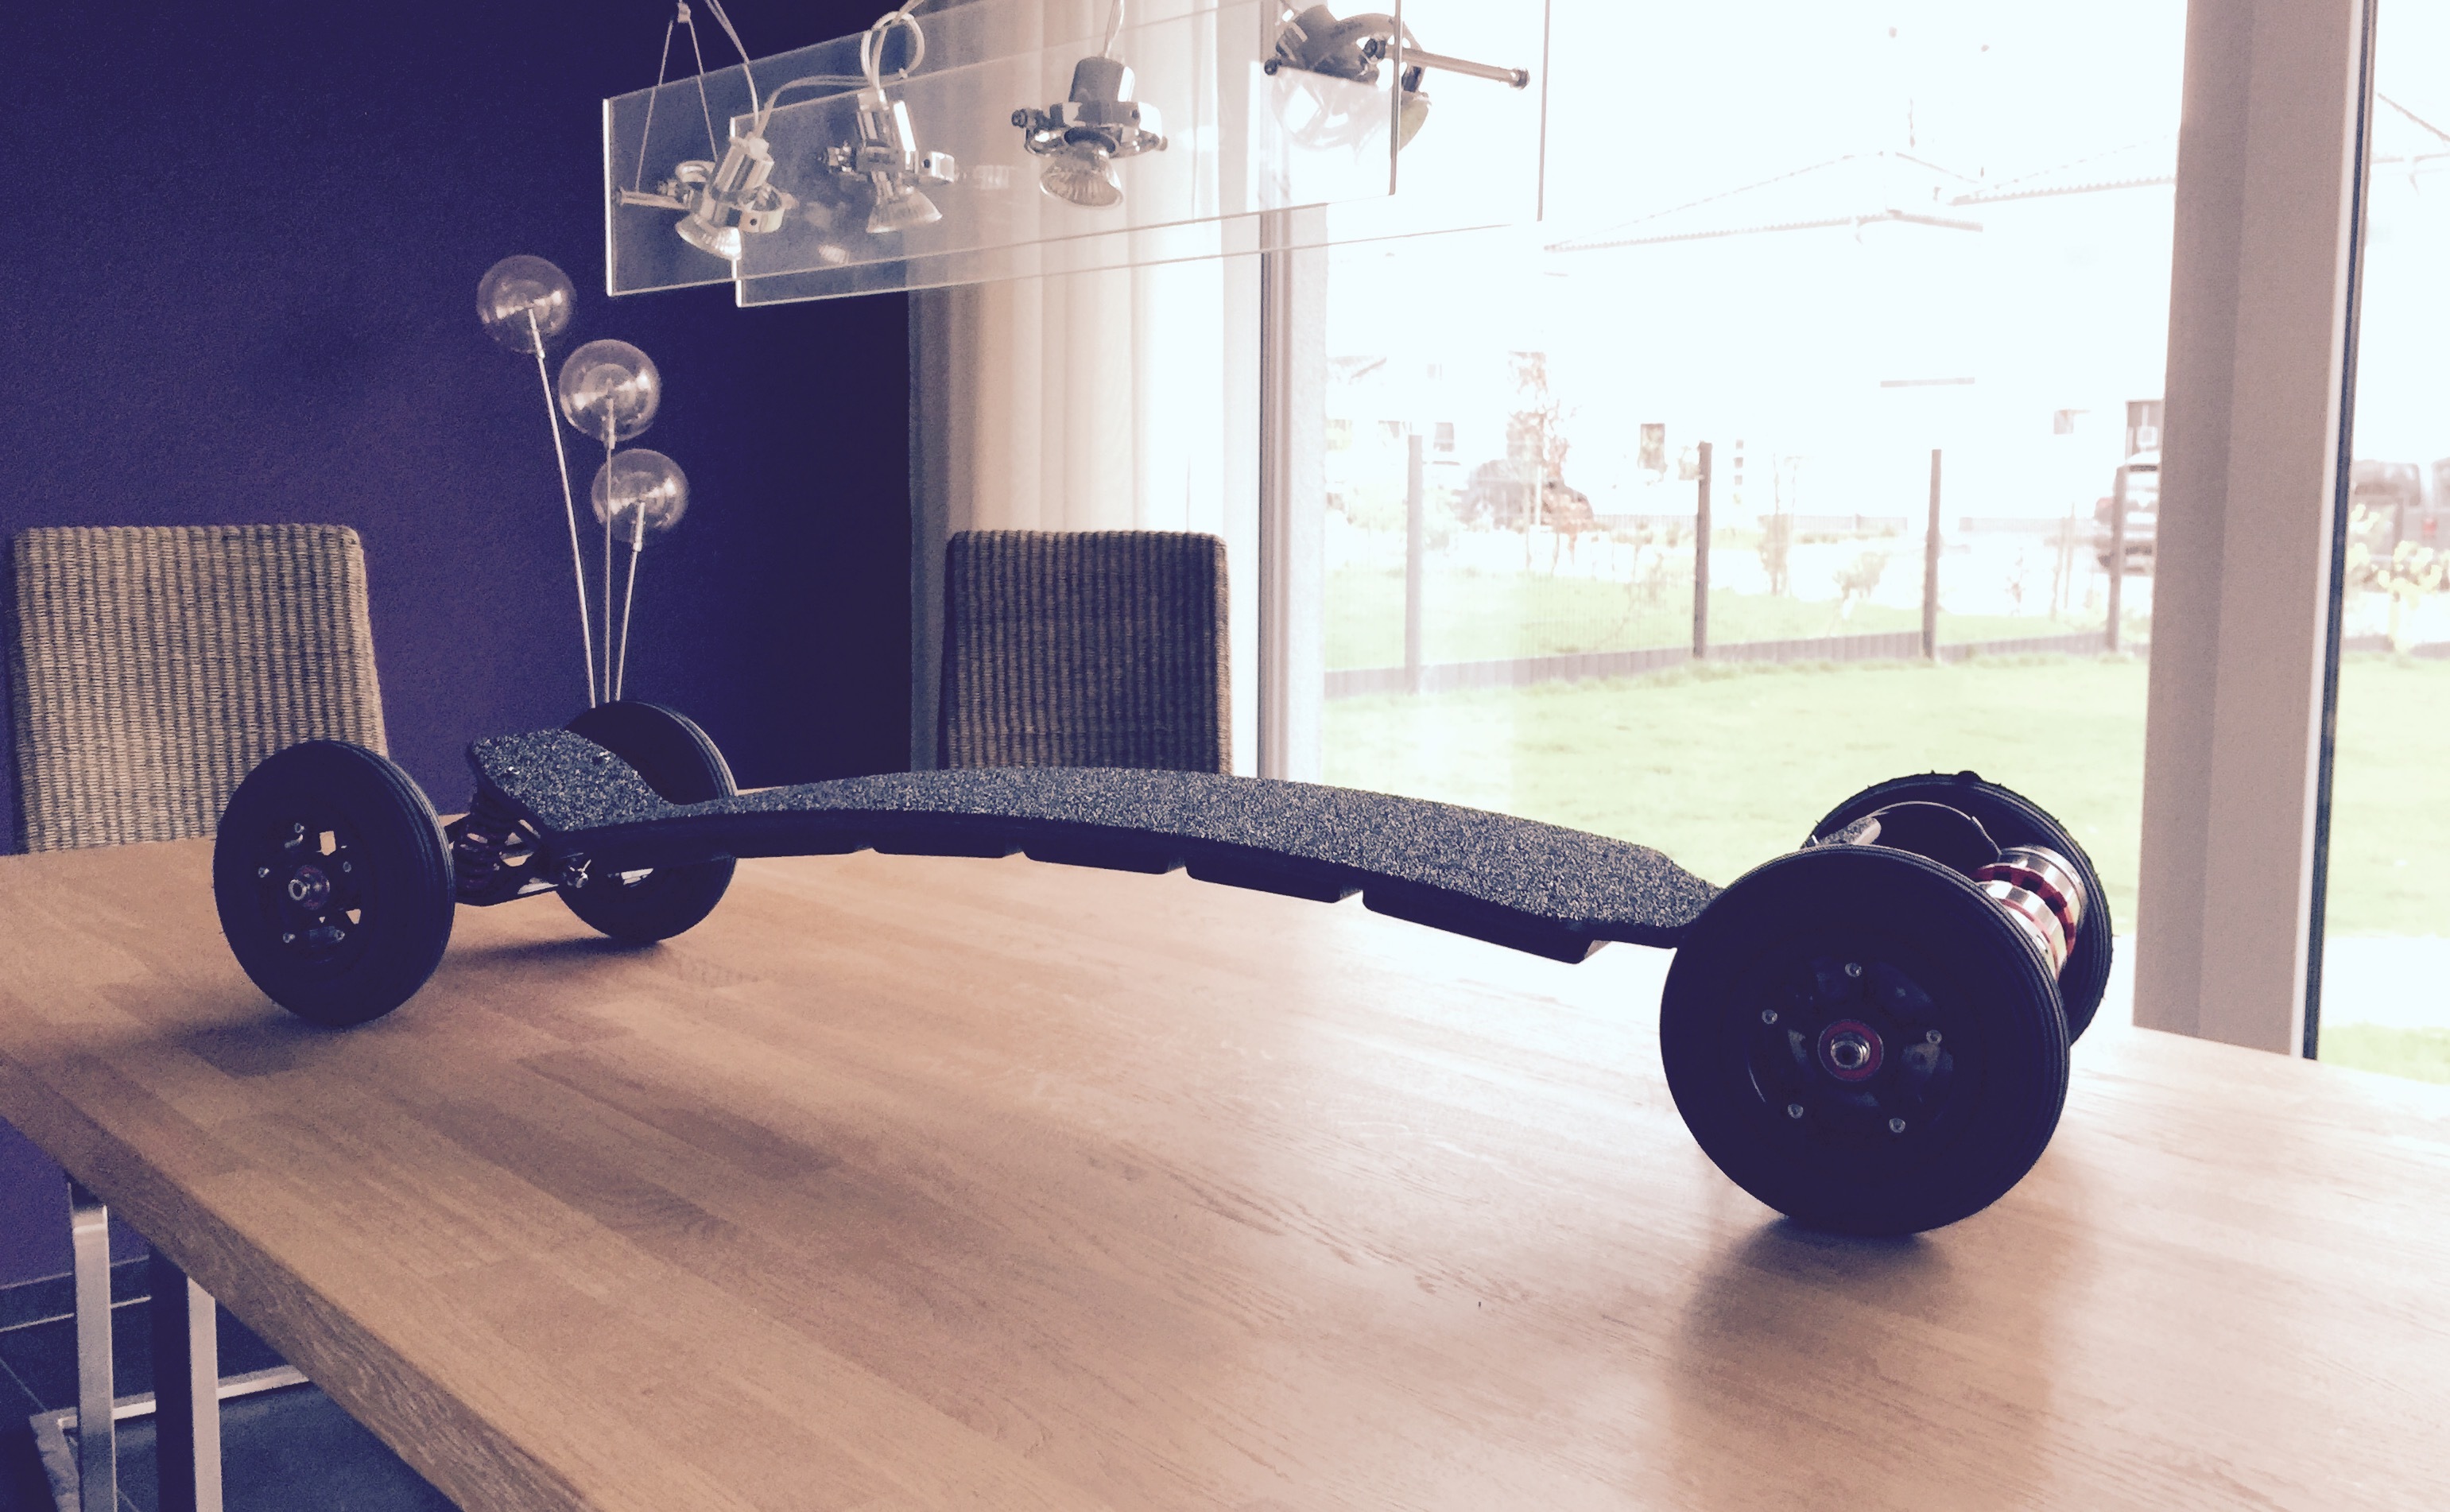
thats the layout - last segment can fit either 4.12 vesc or any of the new formats - thats why its slightly larger than necessary! that picture also illustrates how small a trampa actually is - its kinda hard to fit much more below it in a segmented flex layout!
well, its overexaggerated, but since these mosfests have a higher inner resistance than a 10awg wire, youll have some losses there … and extra heat. its just a handful watts either way.
there are other reasons for me though - I nearly lost one battery because a switch broke and its fallback was “always on”. bad weather, so 1 week later i checked the voltage and I hit 2.5V/cell.
from that day on I save the space, Whs, heat and money for a shitty switch and go hard on/off with a 10awg bullet connector loop key. it sparks, but I havent had any issues with it in 5000km on several boards
@whitepony I have several builds with switch, breakers, loop key and or electric switch. Loop key anti spark is the best! They didnt brake under water. Consume no energy. Cut off charges for sure. No current limits. They just rock solid. More important with a proper placement and a cable, it could be transformed into deadmans switch.
 for carbon finishing layers I use spread twill, because its already slightly flattened and makes for a smoother surface: http://shop1.r-g.de/en/art/190230-ST-100
otherwise just 200gr/m^2 twill: http://shop1.r-g.de/en/art/190230-NA-120
or any 200gr/m^2 unidirectional for craziest strength per layer. unidirectional is quite stiff though, youll need proper vacuum bagging to use UD carbon imo!
for carbon finishing layers I use spread twill, because its already slightly flattened and makes for a smoother surface: http://shop1.r-g.de/en/art/190230-ST-100
otherwise just 200gr/m^2 twill: http://shop1.r-g.de/en/art/190230-NA-120
or any 200gr/m^2 unidirectional for craziest strength per layer. unidirectional is quite stiff though, youll need proper vacuum bagging to use UD carbon imo!