Nice work, as usual from you! how much for the spare deck?
That is a shame.
Nice work and I still remember your old Topspeed thread on Endless Spheres.
I will have a go with it by making slits in Trampa’s battery compartment.
1 Like
That’s just EPIC!
1 Like
we all agree that this is a beauty ! but man that’s such commitment and dedication. Always bringing new stuff to the table… that’s “just” another @whitepony masterpiece ! awesome mate. This build will be crazy.
3 Likes
I am sure that some enterprising individual would be able to put together a cheaper version of this with a thin flexible thermoformed plastic such as PETG, like with a plastic coke bottle. I would get one!
As your enclosure is the same width as the deck, you might not need to drill holes through your deck to secure it. You could use pairs of compression clips/clamps around the edge, something like a Nalclip or a MoriClip (the latter is probably better).


Not sure what people’s thoughts would be about the aesthetics of something like this, or how many clips would be required, but as the trampa deck is significantly thinner, the full width enclosure opens up a range of options to secure an enclosure through using compression, as opposed to glue and/or bolts. It would also allow you to access the batteries, and potentially battery hot-swapping options.
3 Likes
i could do that, but aethetically thats a no go for me  ill make the enclosure just a little bit slimmer and use my typical screw combo.
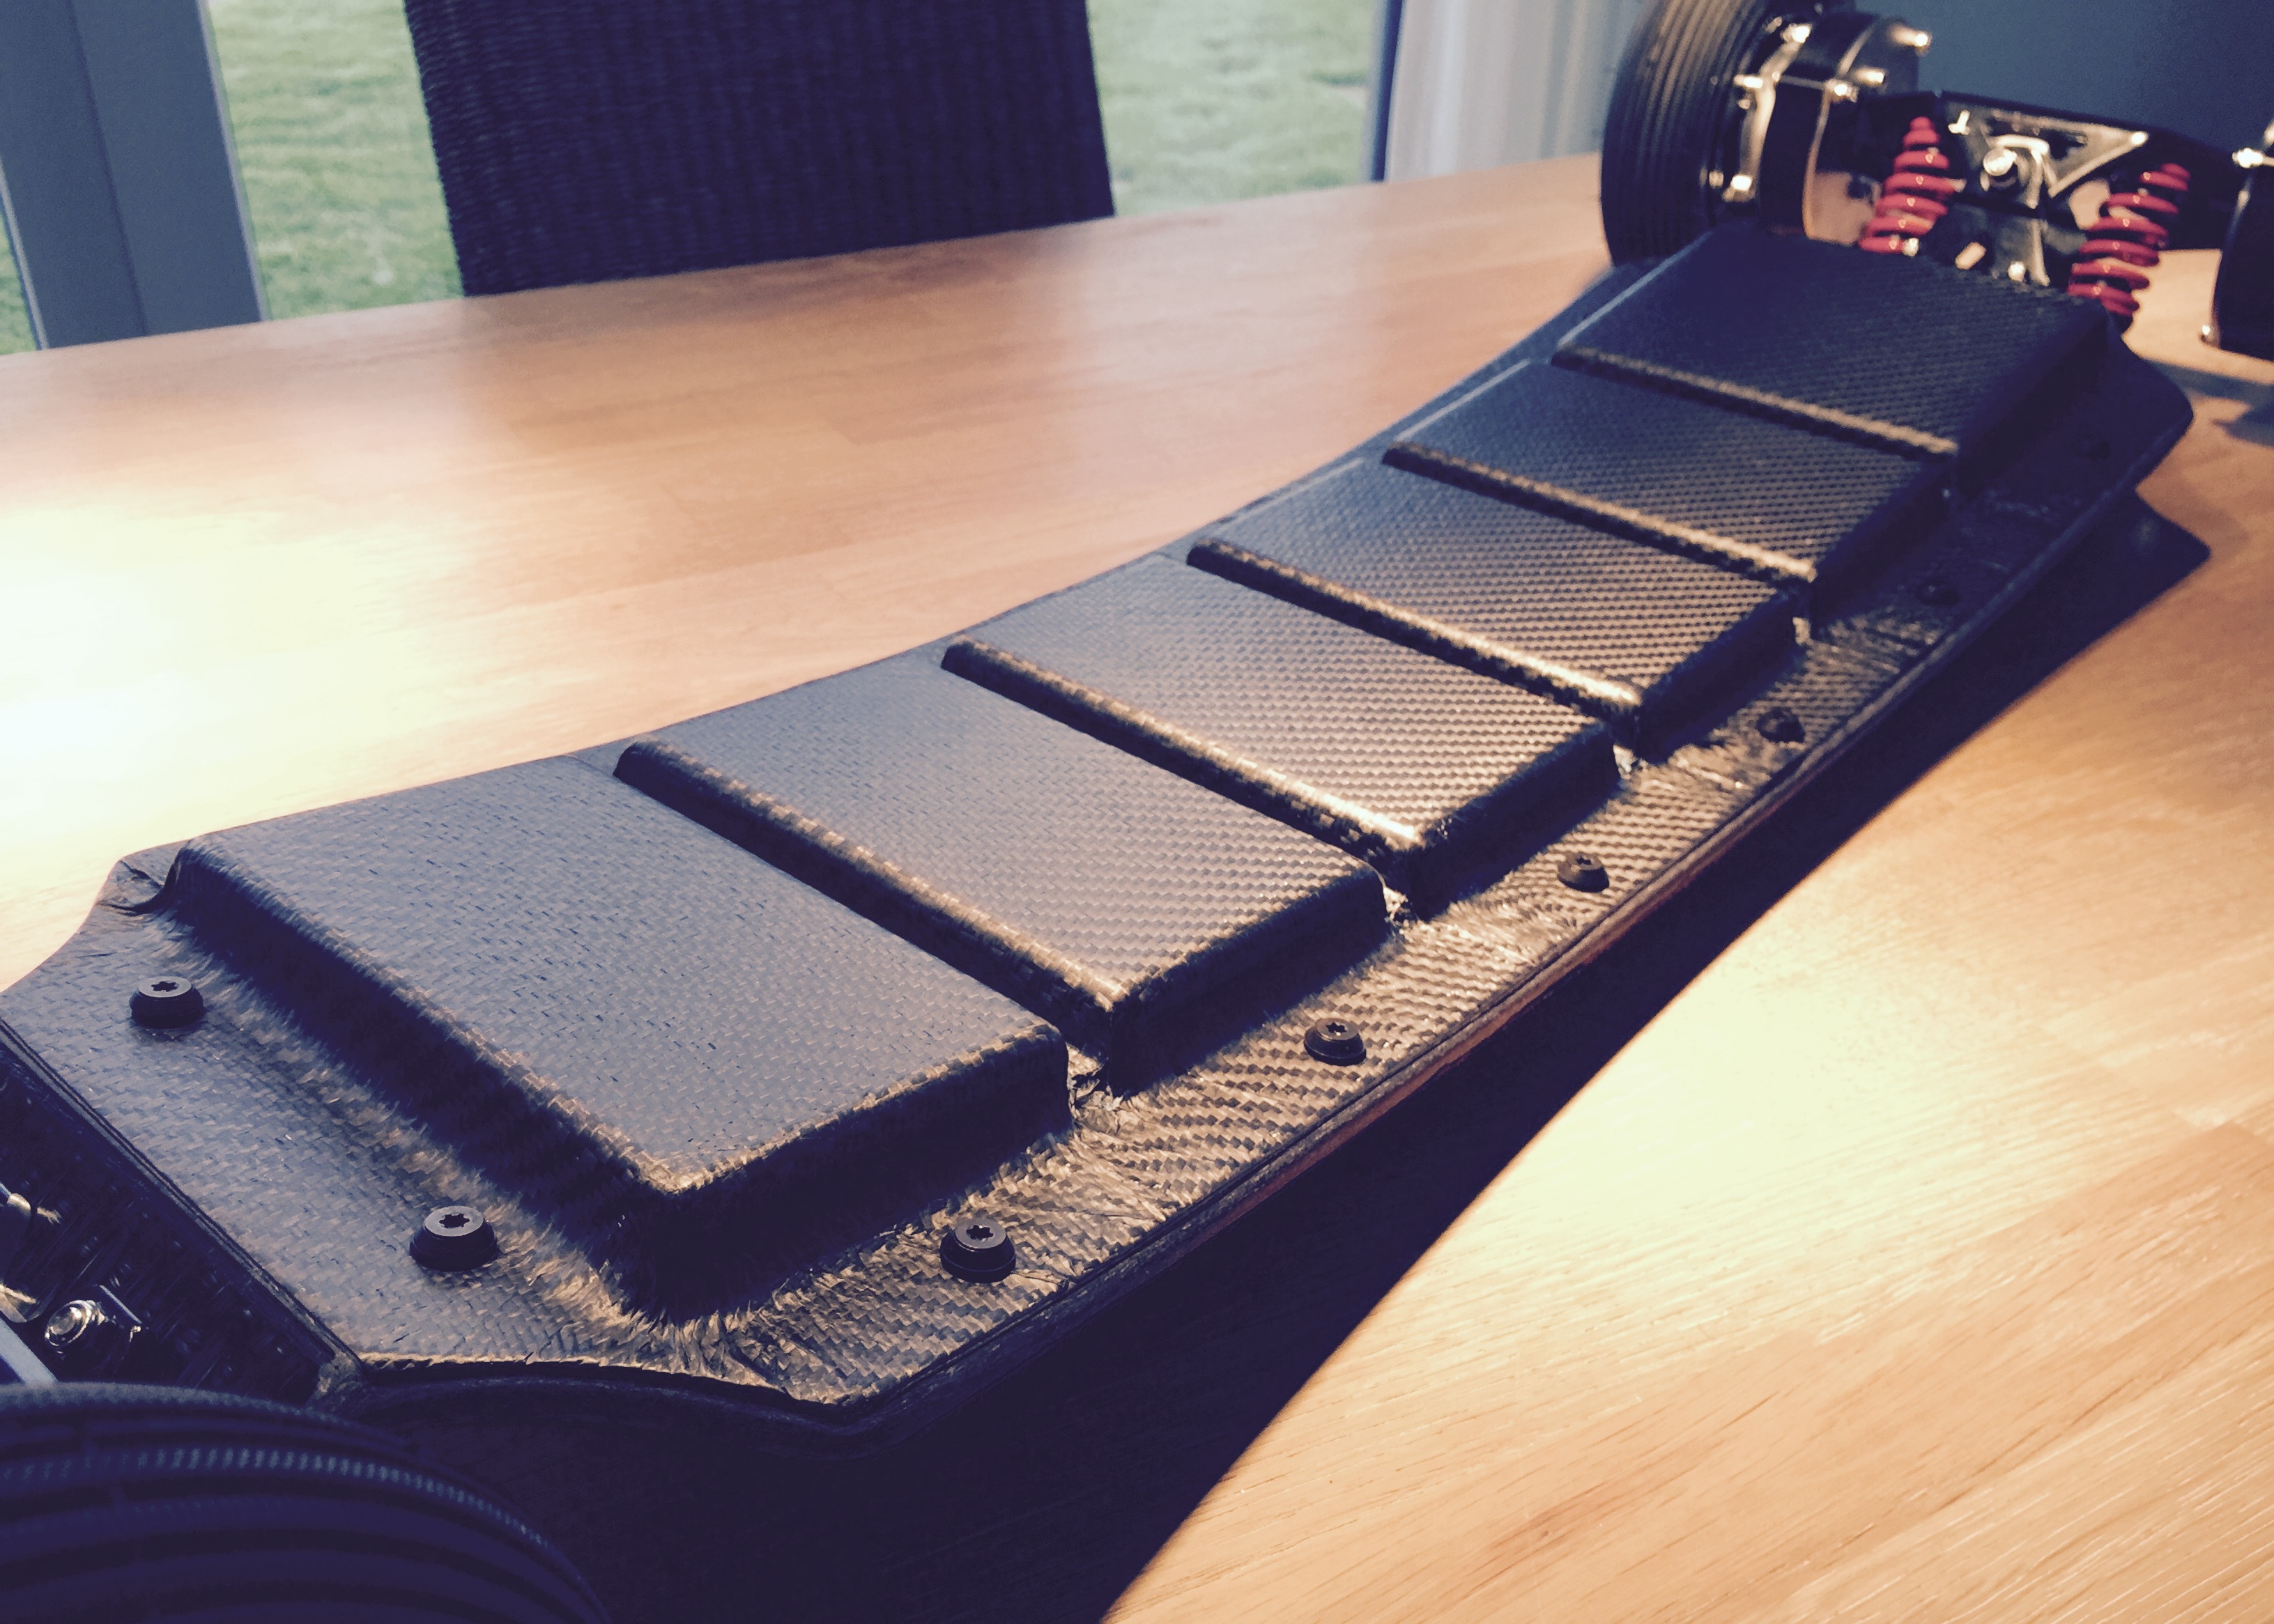
yesterday I drilled all holes but didnt have enough inserts. anyway, thats how this will look in the end:

9 Likes
problem is that these slits were so far always on the wrong side of the enclosure - it allows you to follow the boards curvature but at the same time its a solid piece of board layer 2cm above the original last layer. it will be under a lot of stress from flexing and most likely completely change your boards flex level to become a lot stiffer!
the closest to this fully segmented type of enclosure is @Kaly really nice kydex enclosures, which are pretty generic already. but their focus is bending of the middle area, not sure how that feels in practice. for example i dont like the feeling of split enclosures when there isnt enough wood between them. you can feel how only a small part of the board is flexing and the rest is stiffened up.
overall Im not too convinved by these trampa enclosures, as much as Id like to use a consistently looking material mix! problem of my kind of enclosure is, that its not very generic, so either you have a lot of versions or youll dictate the kind of electronics you want in there.
Where did u bought those ‘‘washers’’? I can’t find them anywhere from local hardware stores.
ebay - in germany you can search for “rosette” and find them: http://www.ebay.de/itm/Rosetten-SCHWARZ-fur-Senkkopfschrauben-Edelstahl-A1-fur-M3-bis-M8-NF-E-27-619-/400715400073?var=670260368435&hash=item5d4c7fc389:m:mqp4q5a75uKnuWe8dsCjTvg
below these washers, I usually have 2mm thick rubber washer to even out imperfections/curved surfaces a little bit. also screws tend to come loose less likely with these.
Are you intending to use anything as a waterproofer or contact sealant for in between the deck and enclosure?
If you are going to, try this out Black tack http://www.ebay.co.uk/itm/Black-Tack-Posing-Putty-wargaming-1-metre-length-/272605013698?hash=item3f788666c2:g:vg8AAOSwc1FXbu1K Its both easier to use and has a longer use life than silicone or rubber/foam padding and is a far better sealant for things with flex, also its very good at isolating vibrations, for me any builder wanting waterproofing or a tight seal should have this in the tool box.
If you think its a  idea my bad i just woke up all chatty and thought ide chip in
  ps very nice clean work, looks shuper shexy…
im using that tack stuff to seal vacuum bags, its indeed great to seal, but I bet you never ever get your enclosure off anymore. i actually want to use 1-2mm thick and 2cm wide neoprene band between enclosure and board to avoid the capillary effect of 2 really well fitting surfaces 
2 Likes
I use rubber automotive door molding in the edge, maybe not a great method with your matching materials but it works.
Here’s some t eBay, but you can get it at any auto supply/parts store.
1 Like
I was anticipating problems such as this, but since I got the battery compartment, may as well give it a shot.
I ordered a different board from Bustin and am expecting to recieve it tomorrow of which I will use instead if it does not work too well.
Will be going ABS plastic molding with the Bustin board.
True a partial vacuum bond can be almost impossible to get apart if you dont break the vacuum first but if theres no vacuum it releases a lot easier, i know a few UK and EU Evolve riders are now using it after the GT and Carbon lid seals have failed in wet conditions, i dont know if Evolve used a neoprene inlay probz not tho!
had like 8 inserts only, but I attached the enclosure to the board anyway to test flex - and it feels largely unaffected, maybe just slightly stiffer, but if so, the difference is so small that I cant really tell for sure. maybe it will be more noticeable when all screws are fixating the enclosure, but I dont actually think so. 


24 Likes
Looks so badass
1 Like
frikkin beautiful…I wish I had that skill, or you owed me a favor, or something
2 Likes
because I was asked Ill give a quick update on the inserts and how I do it:
basically I put a lot of effort in exactly measuring the spots where I want inserts BEFORE I actually make the enclosure - I then predrill the holes in order to create small bumps that are visible after Im done with laminating. by that I know exactly where to drill the holes in my enclosure.
when the enclosure is done, i drill m4 holes for my screws, then position the enclosure again on the board and use a marker to mark the holes through the enclosure holes on the board again. it can always be that, while drilling the holes in the enclosure, you are just slightly off and you can correct that by slightly correcting the holes in the board.
then I drill with an 6mm drill bit through the board. why through? well, my inserts are either 8mm or 10mm long, so thats pretty much the thcikness of the board. if you think you might manage without drilling through fine, but most likely youll break through on a few holes anyway or dont manage to get enough depth and while sinking in the inserts, you actually create bumps on the other side cause you didnt drill the holes deep enough.
anyway, sticking the drill bit all the way through. then I use clear tape on the boards top side and cover all holes. turning the board around again and dripping 1-2 drops of thick resin (actually 2 component glue) into the drilled holes to have absolutely crazy fixated inserts later.
then Im screwing in the inserts into the resin - the whole thing will look like this now (from the boards road side):

curing 12 hours and turning the board around youll now have resin on the bottom of the inserts covering the holes you drilled through the board AND at the same time youll have perfectly fixated inserts. picture shows how I remove the clear tape and you can see the slightly yellowish/transparent dried resin:

and in a close up:

finally I tested all screws and attached the enclosure - a perfect fit thanks to the very thorough procedure:
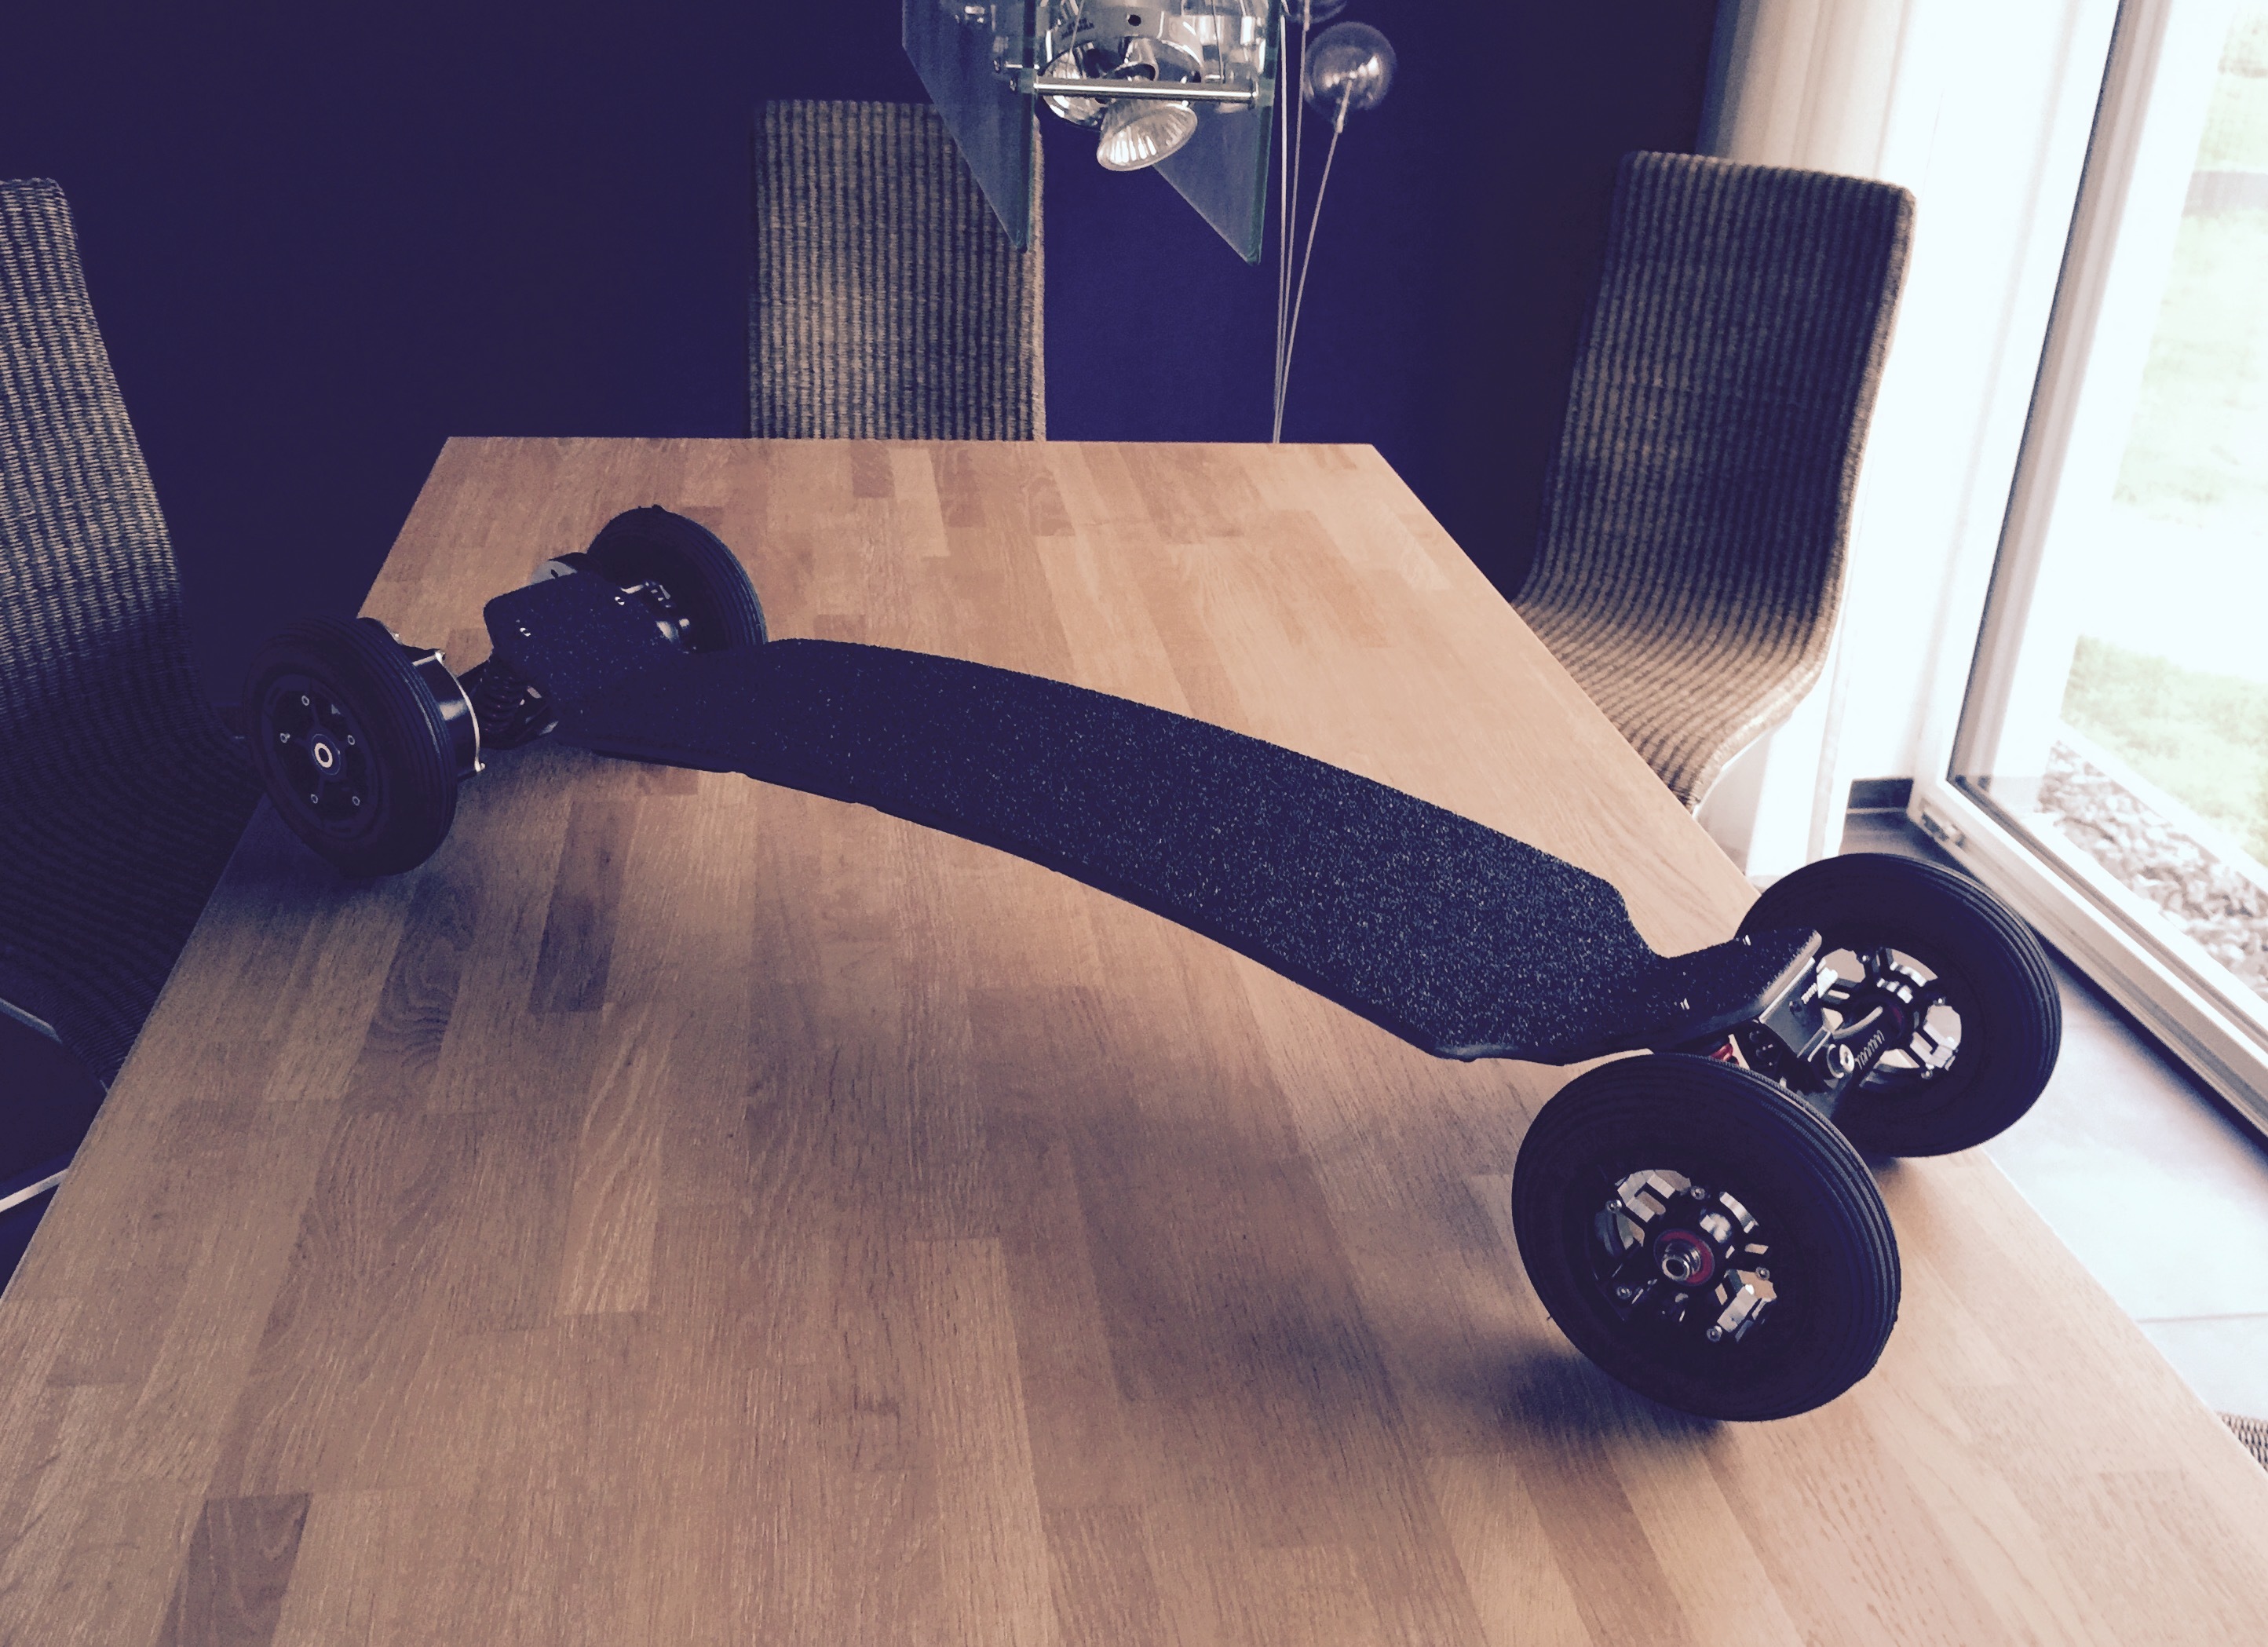
the board is really super slim and after I added vicious grip tape it looks quite vicious

can barely see the enclosure anymore from this perspective. the small spur drives from @nowind look crazy good too - super compact. 
25 Likes