Hi E-Skate addicts,
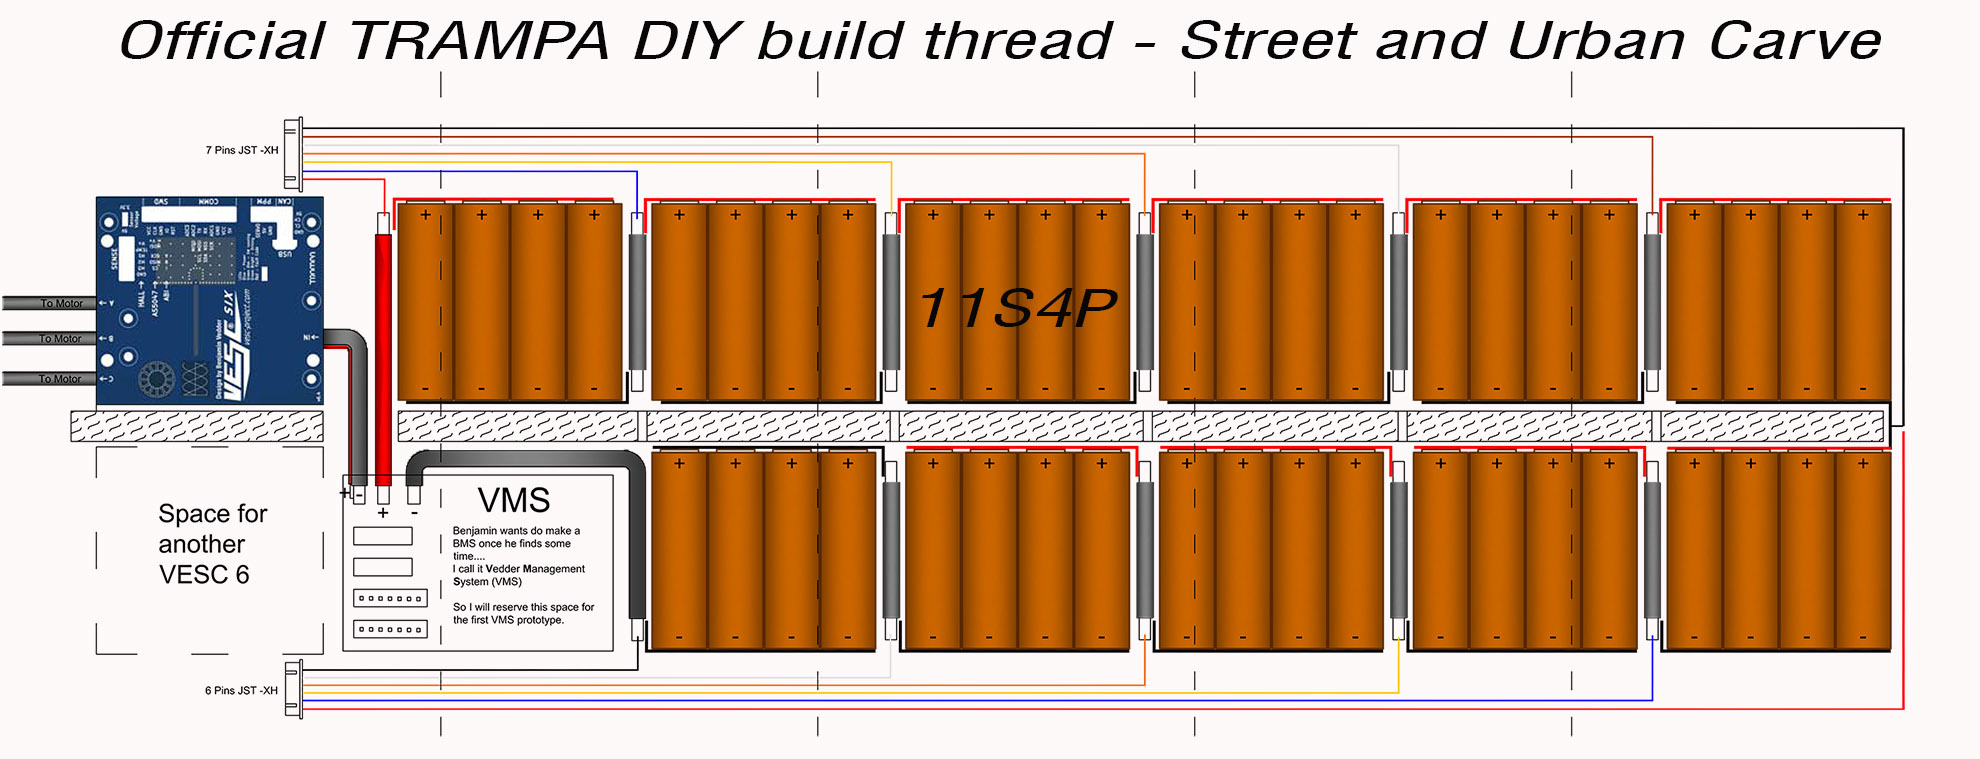
this is the official TRAMPA DIY thread showing how we build our own boards for our personal private use. Basically I want to build a Urban/Street Carver with the battery box below the deck, 11S4P, single 118KV motor and VESC 6. I don’t want the Battery Box to affect the flex and I want the board to take me pretty far. I made a simple model from cardboard to proof that the slitting pattern, I want to cut into our super sturdy fibre reinforced battery boxes, works. These are made of the same material we use for our unbreakable decks. Its a impact resistant material, not splitting apart, whatever you do. Pretty good to protect 18650 lithium cells! Ted and I always said we need something sturdy rather than an enclosure being more or less a protection against water, dirt and critical looks. So we invested into a mould to make these super sturdy panels, which are pretty generic (shape wise) and can be used with all sorts of skate decks.
The downside is that they do not like to bend into the curve of our MTBs and Carve Boards. So I will show you how to tweak them.
This post will always be updated, so keep an eye on the first post if you can. I will try to use only basic tools and I will show exactly (down to the detail) how to achieve what we achieved.
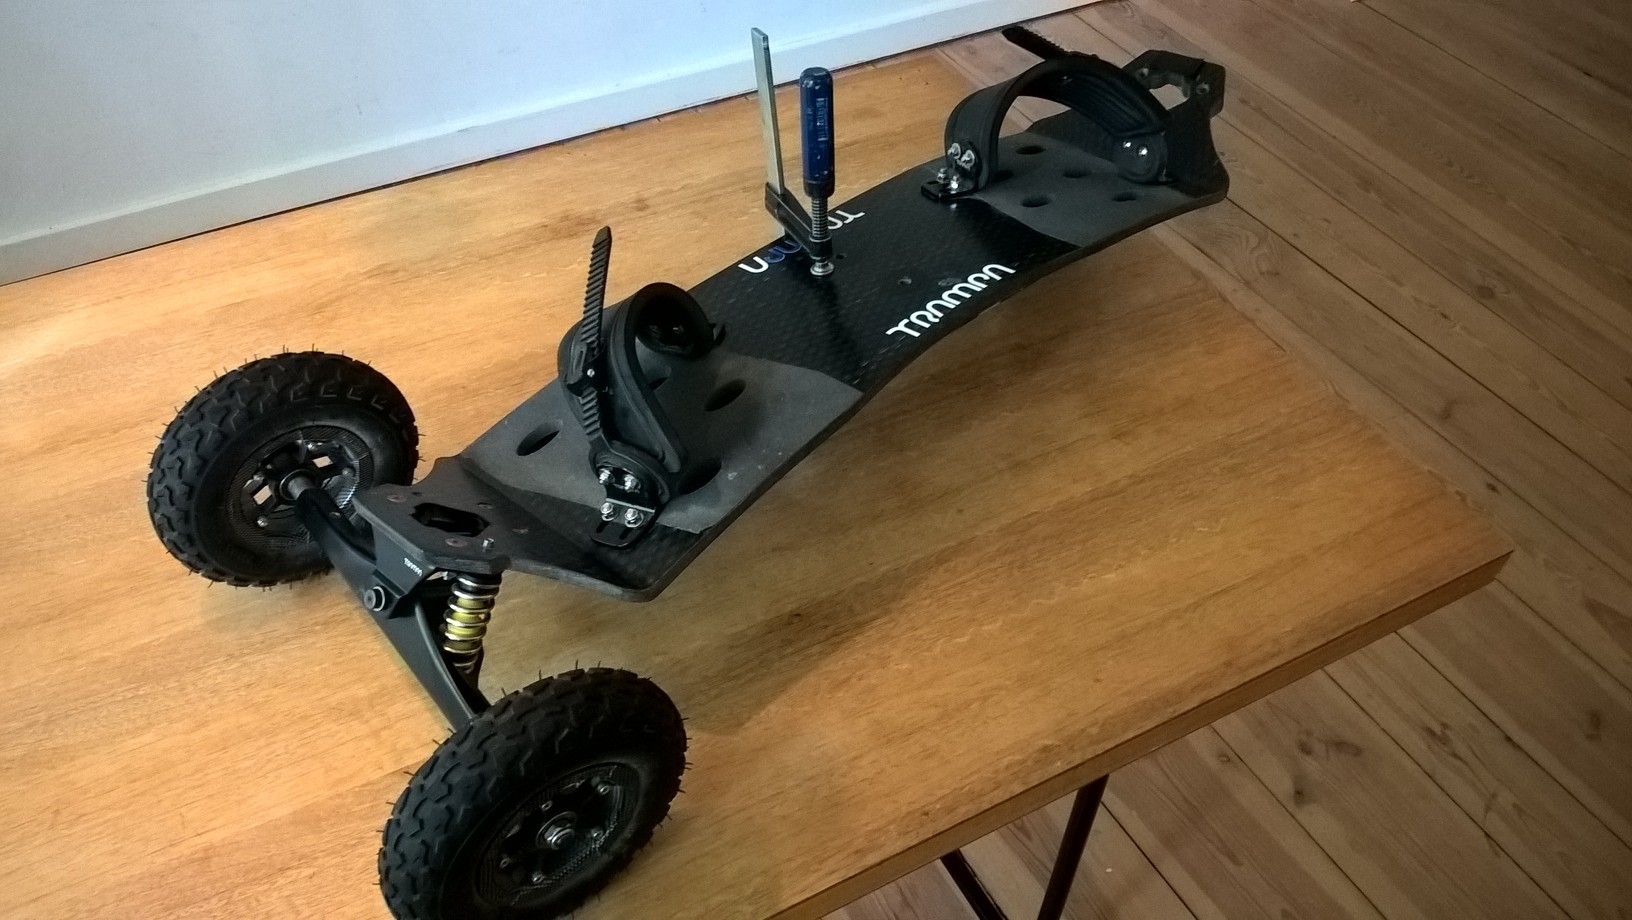
We will build up an Urban Carver first. I will start using this delicious board:
First thing we will do is is having a look at my cardboard model. Two slit patterns will allow the box to flex up and down and will release all the strain from the material while bending.

Now we try to replicate that, using our 70cm long Battery Box Panel, 4 or 5 Ply:

The following images will show how to cut the box precisely. I made a tool from old chunks of wood to do the Job:
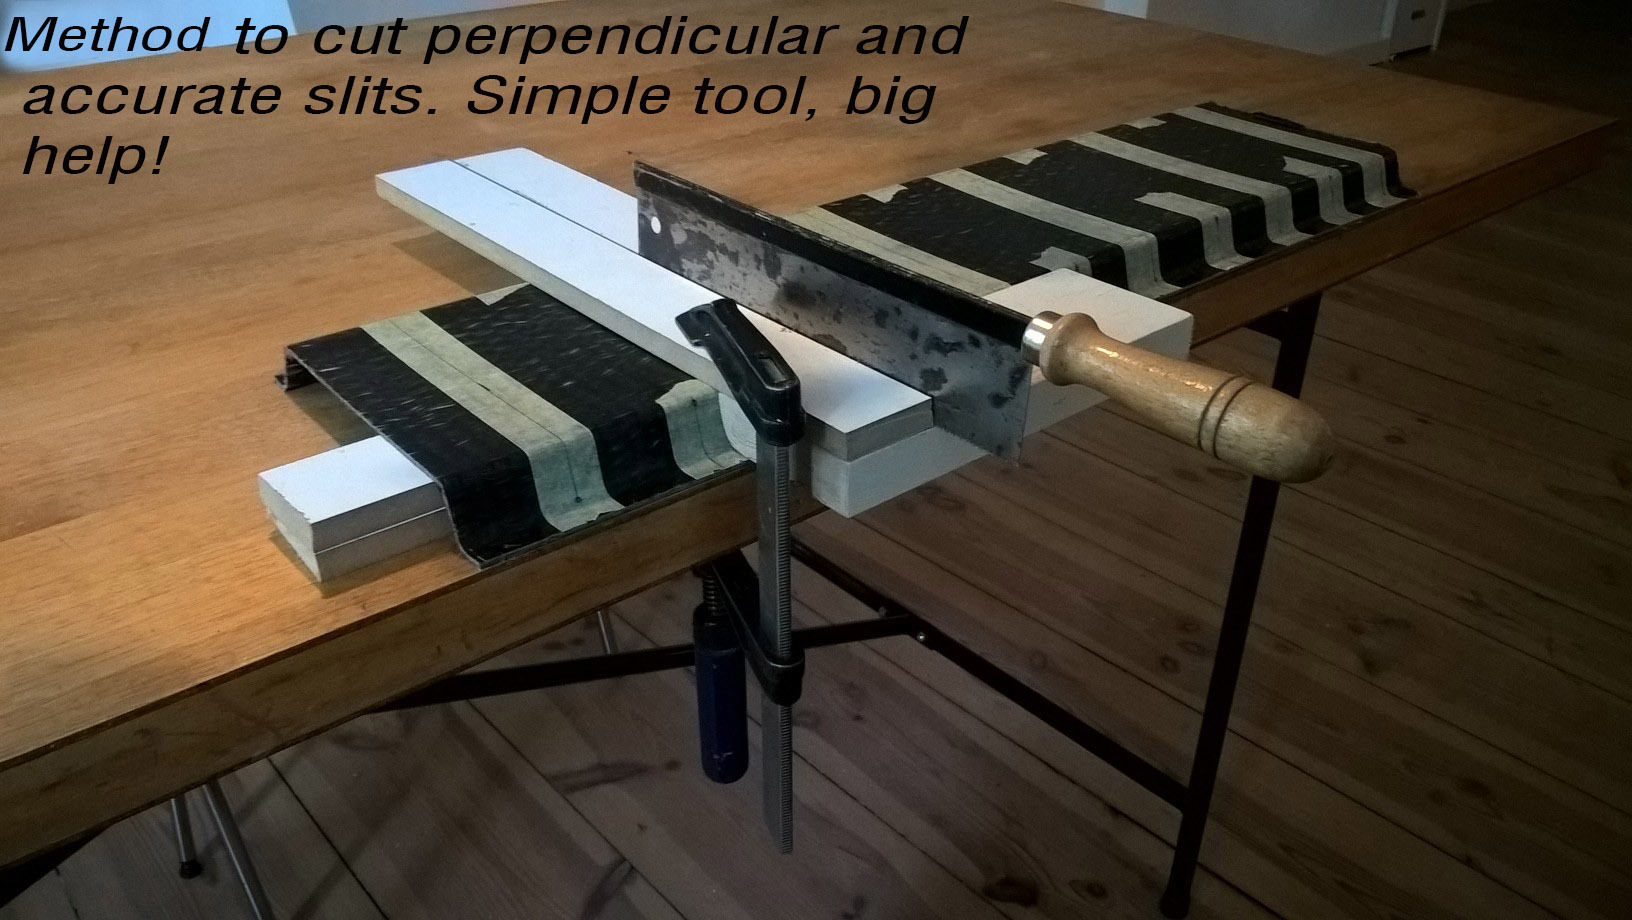

Before cutting the first Slits we drill the 6mm holes, we want the slit to end in. I start using a 2mm drill and follow with a 6mm drill, then use a sinker to smoothen the edges. As you can see my Battery Box looks quite terrible on the inside. This is a single side moulded prototype and not the nice and need one you will get (shown below).


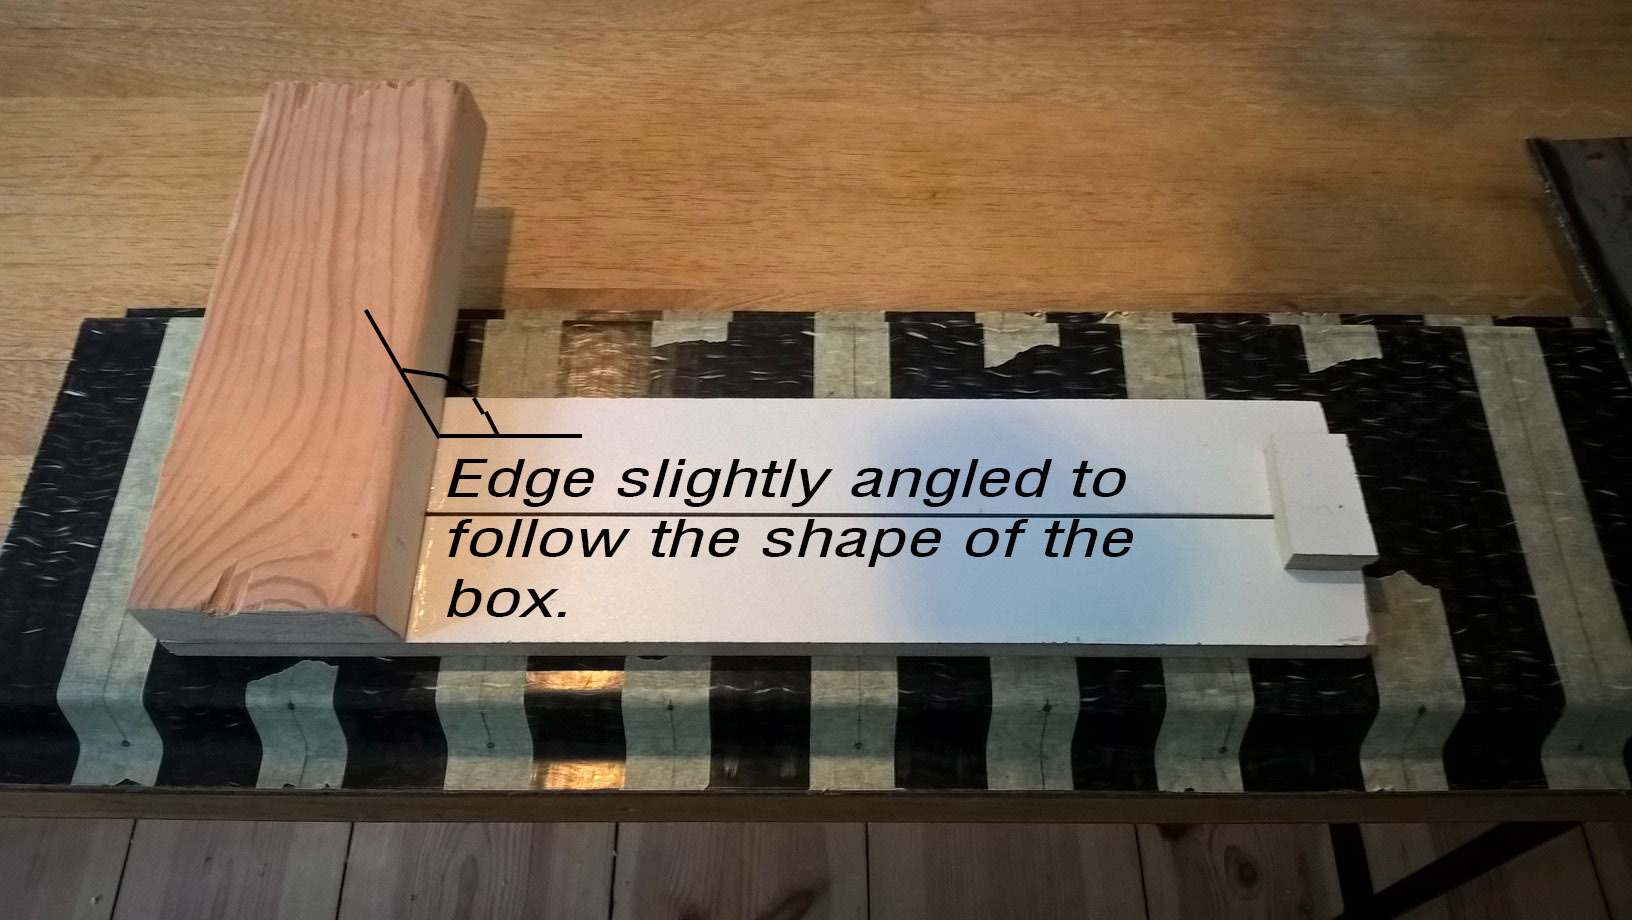
I only cut the short slits for the now, since I want to try out how the battery box will perform without the other slits. I took a 35° Holy Pro to give it a try: http://www.trampaboards.com/685e-electric-mountain-board-on-vertigo-trucks-superstars-wheels--ratchet-bindings-gunmetal-p-13845.html

If you want to build a Mountainboard with a stiff deck, I would only cut the slits on the side. We want to try out how our cardboard model will perform in real world, so I will continue and finish the job.
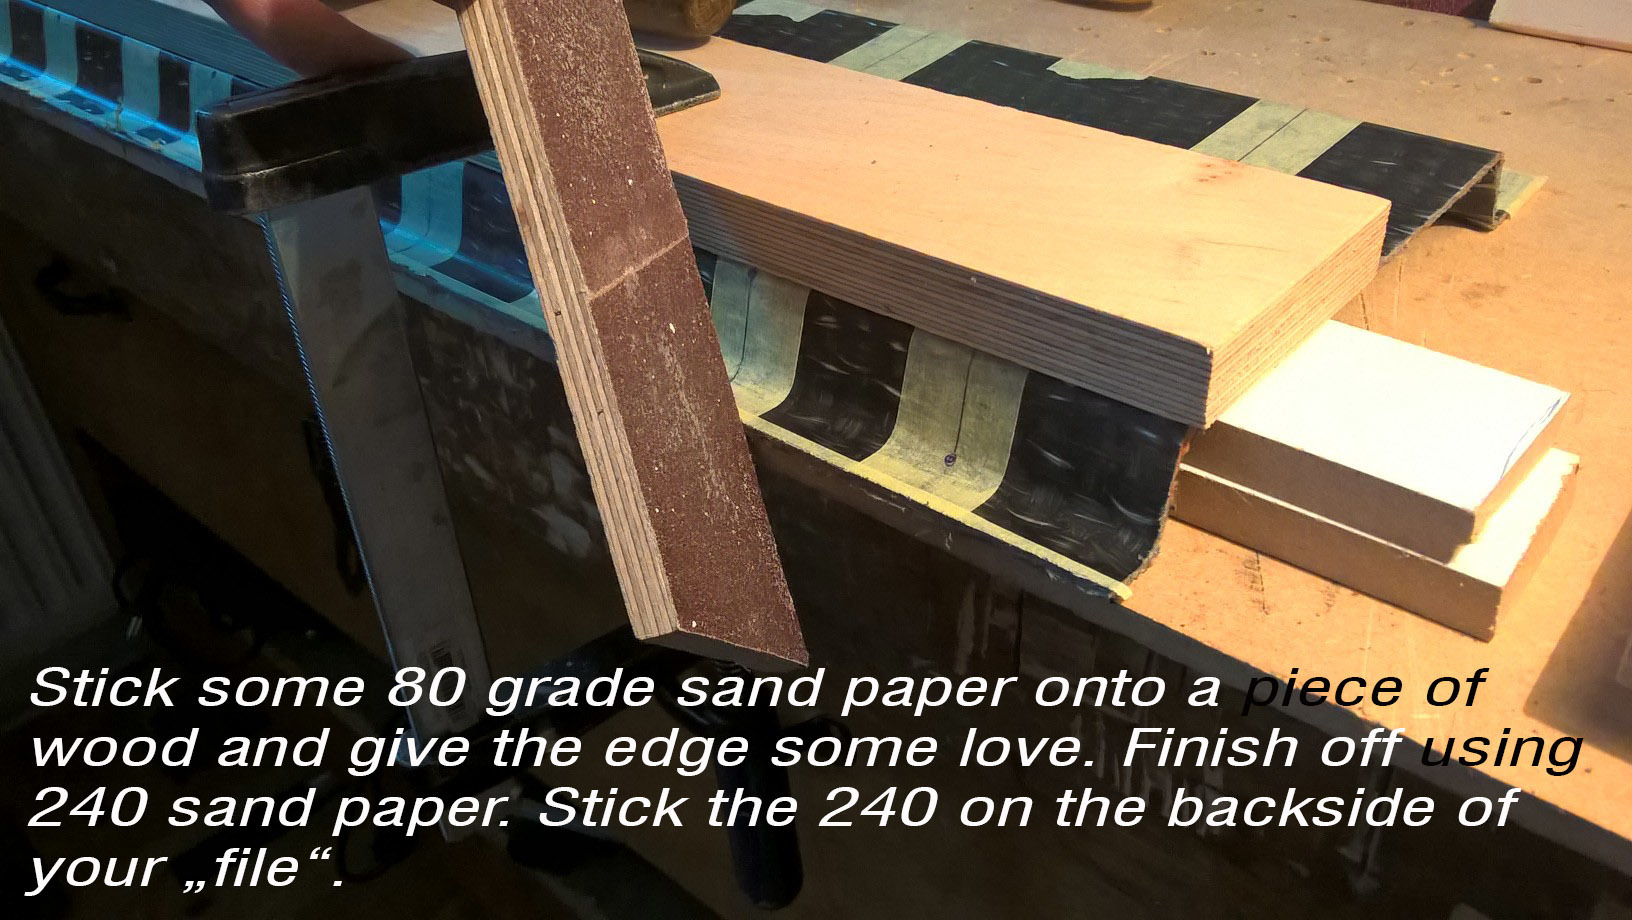
Works a treat!

lets fit the box to the deck! I pre-drilled some 2mm pilot holes in the edges of the box to transfer the hole position to the deck accurately. A Trampa under board vinyl sticker sits waiting to be attached to this beauty.

This is the best method to ad in nice stainless threads into your deck. We want M4 repair threads! I use a drop of epoxy glue to secure them in the deck. Do not apply the grip tape untill you have finished off your entire board! Its the last thing to do!

Now we want to close off the ends of the box and ad in a silicone membrane against dust and water. We cut up a 16 Ply 35° long to show a section of the deck-battery-box assembly. God forgive us!
I use the following materials to continue my work on the box and the battery pack. You can buy everything here: https://www.modulor.de/en/ Great shop having almost everything you can imagine.


I use the double side sticky 2mm neoprene foam to stick the l-profile to the deck. Sticks to your board like xxxx to a blanket! That 10mm neoprene strip is glued with Pattex.

Still waiting for my LG Cells to arrive (need 20 more to make the 11S4P Pack). So lets use the time and work on the 118KV Trampa E-Skate Motor. Its expensive but of full spec and really a piece of art using high spec copper, bearings and magnets, featuring a hardened axle shaft, hall sensors, a fan for cooling and double keyway (front and back). Crazy spec motors! They come a lot cheaper when you buy them together with a board.
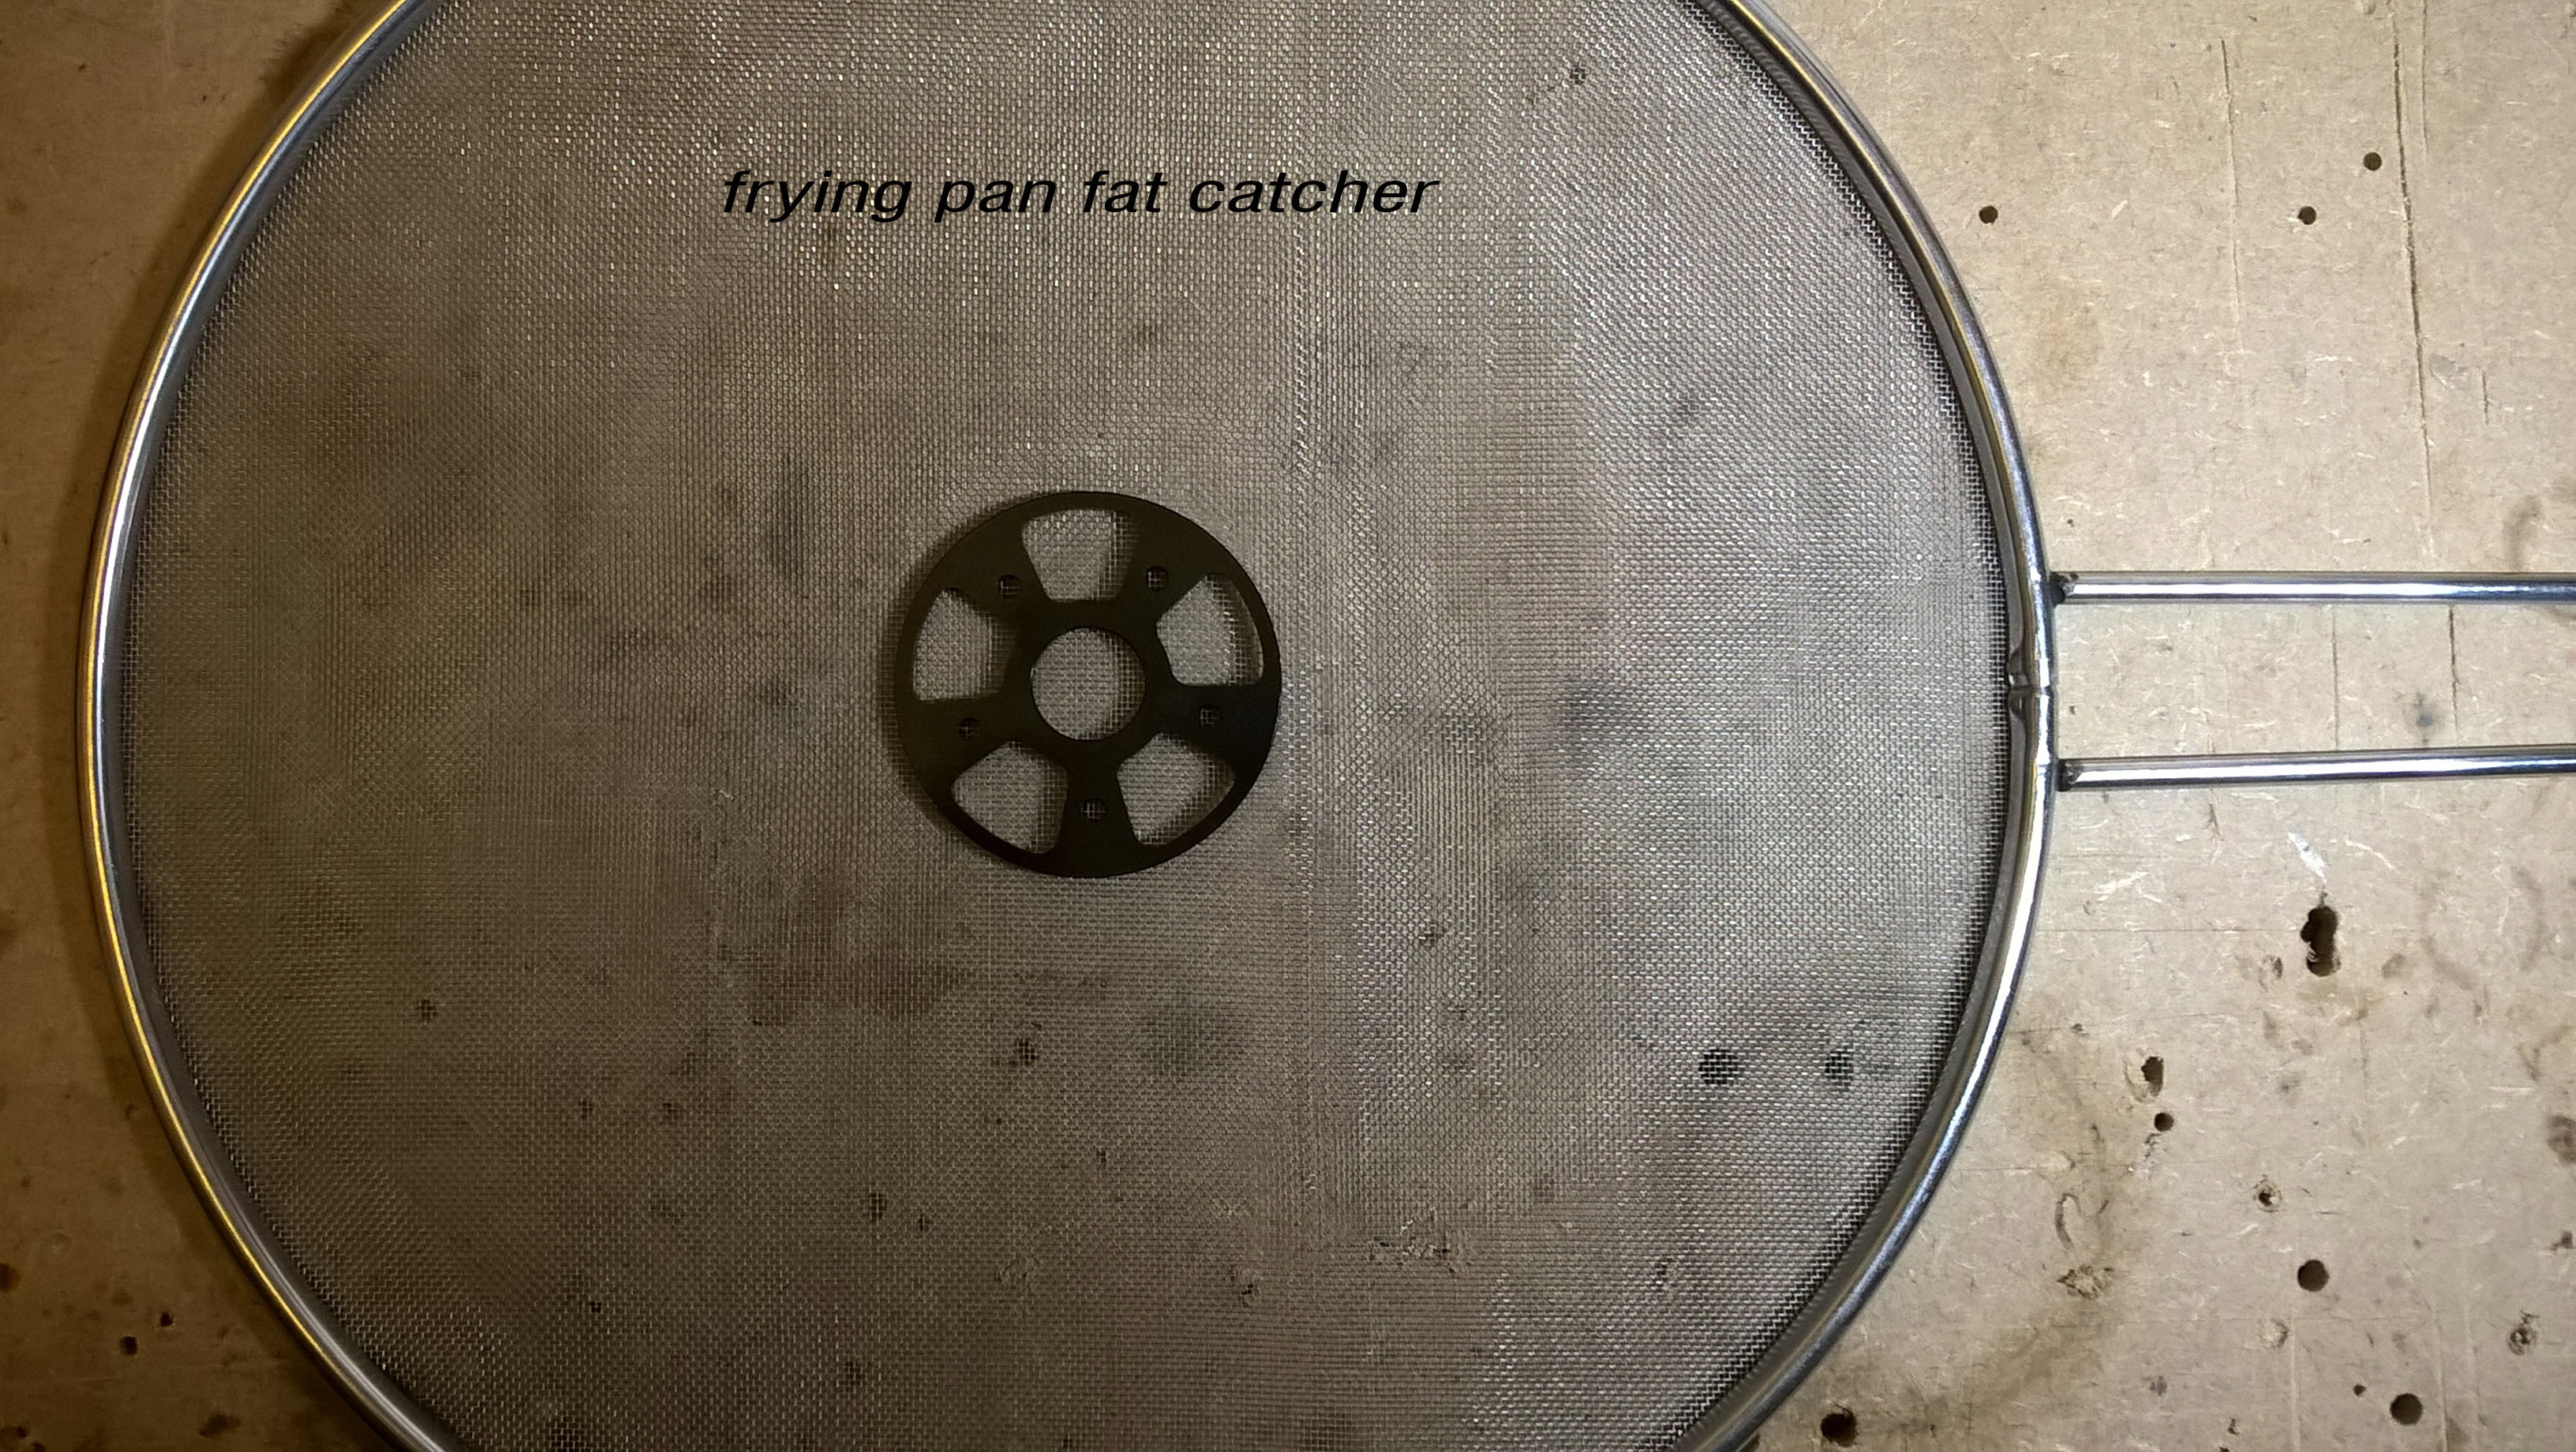
We want them beauties to stay alive under the harsh conditions of e-skating. So we will attach some nice mesh metal filters. I found a frying pan fat catcher the other day and thought: Lets recycle it! If your partner asks where the hell the fat catcher is: “I have no clue” is the appropriate answer. Be fair, get a new one the next day and hide your board away for a while.
Best way to do the Job: Stick the filter disc to the mesh, using double sided tape. Nick the kitchen scissors (you know how to deal with the issue…) and cut out the filter. Put your motor away, since the fine metal chunks love the magnets!
Hardest bit is cutting out the centre. I use a cutter knife and some patience.
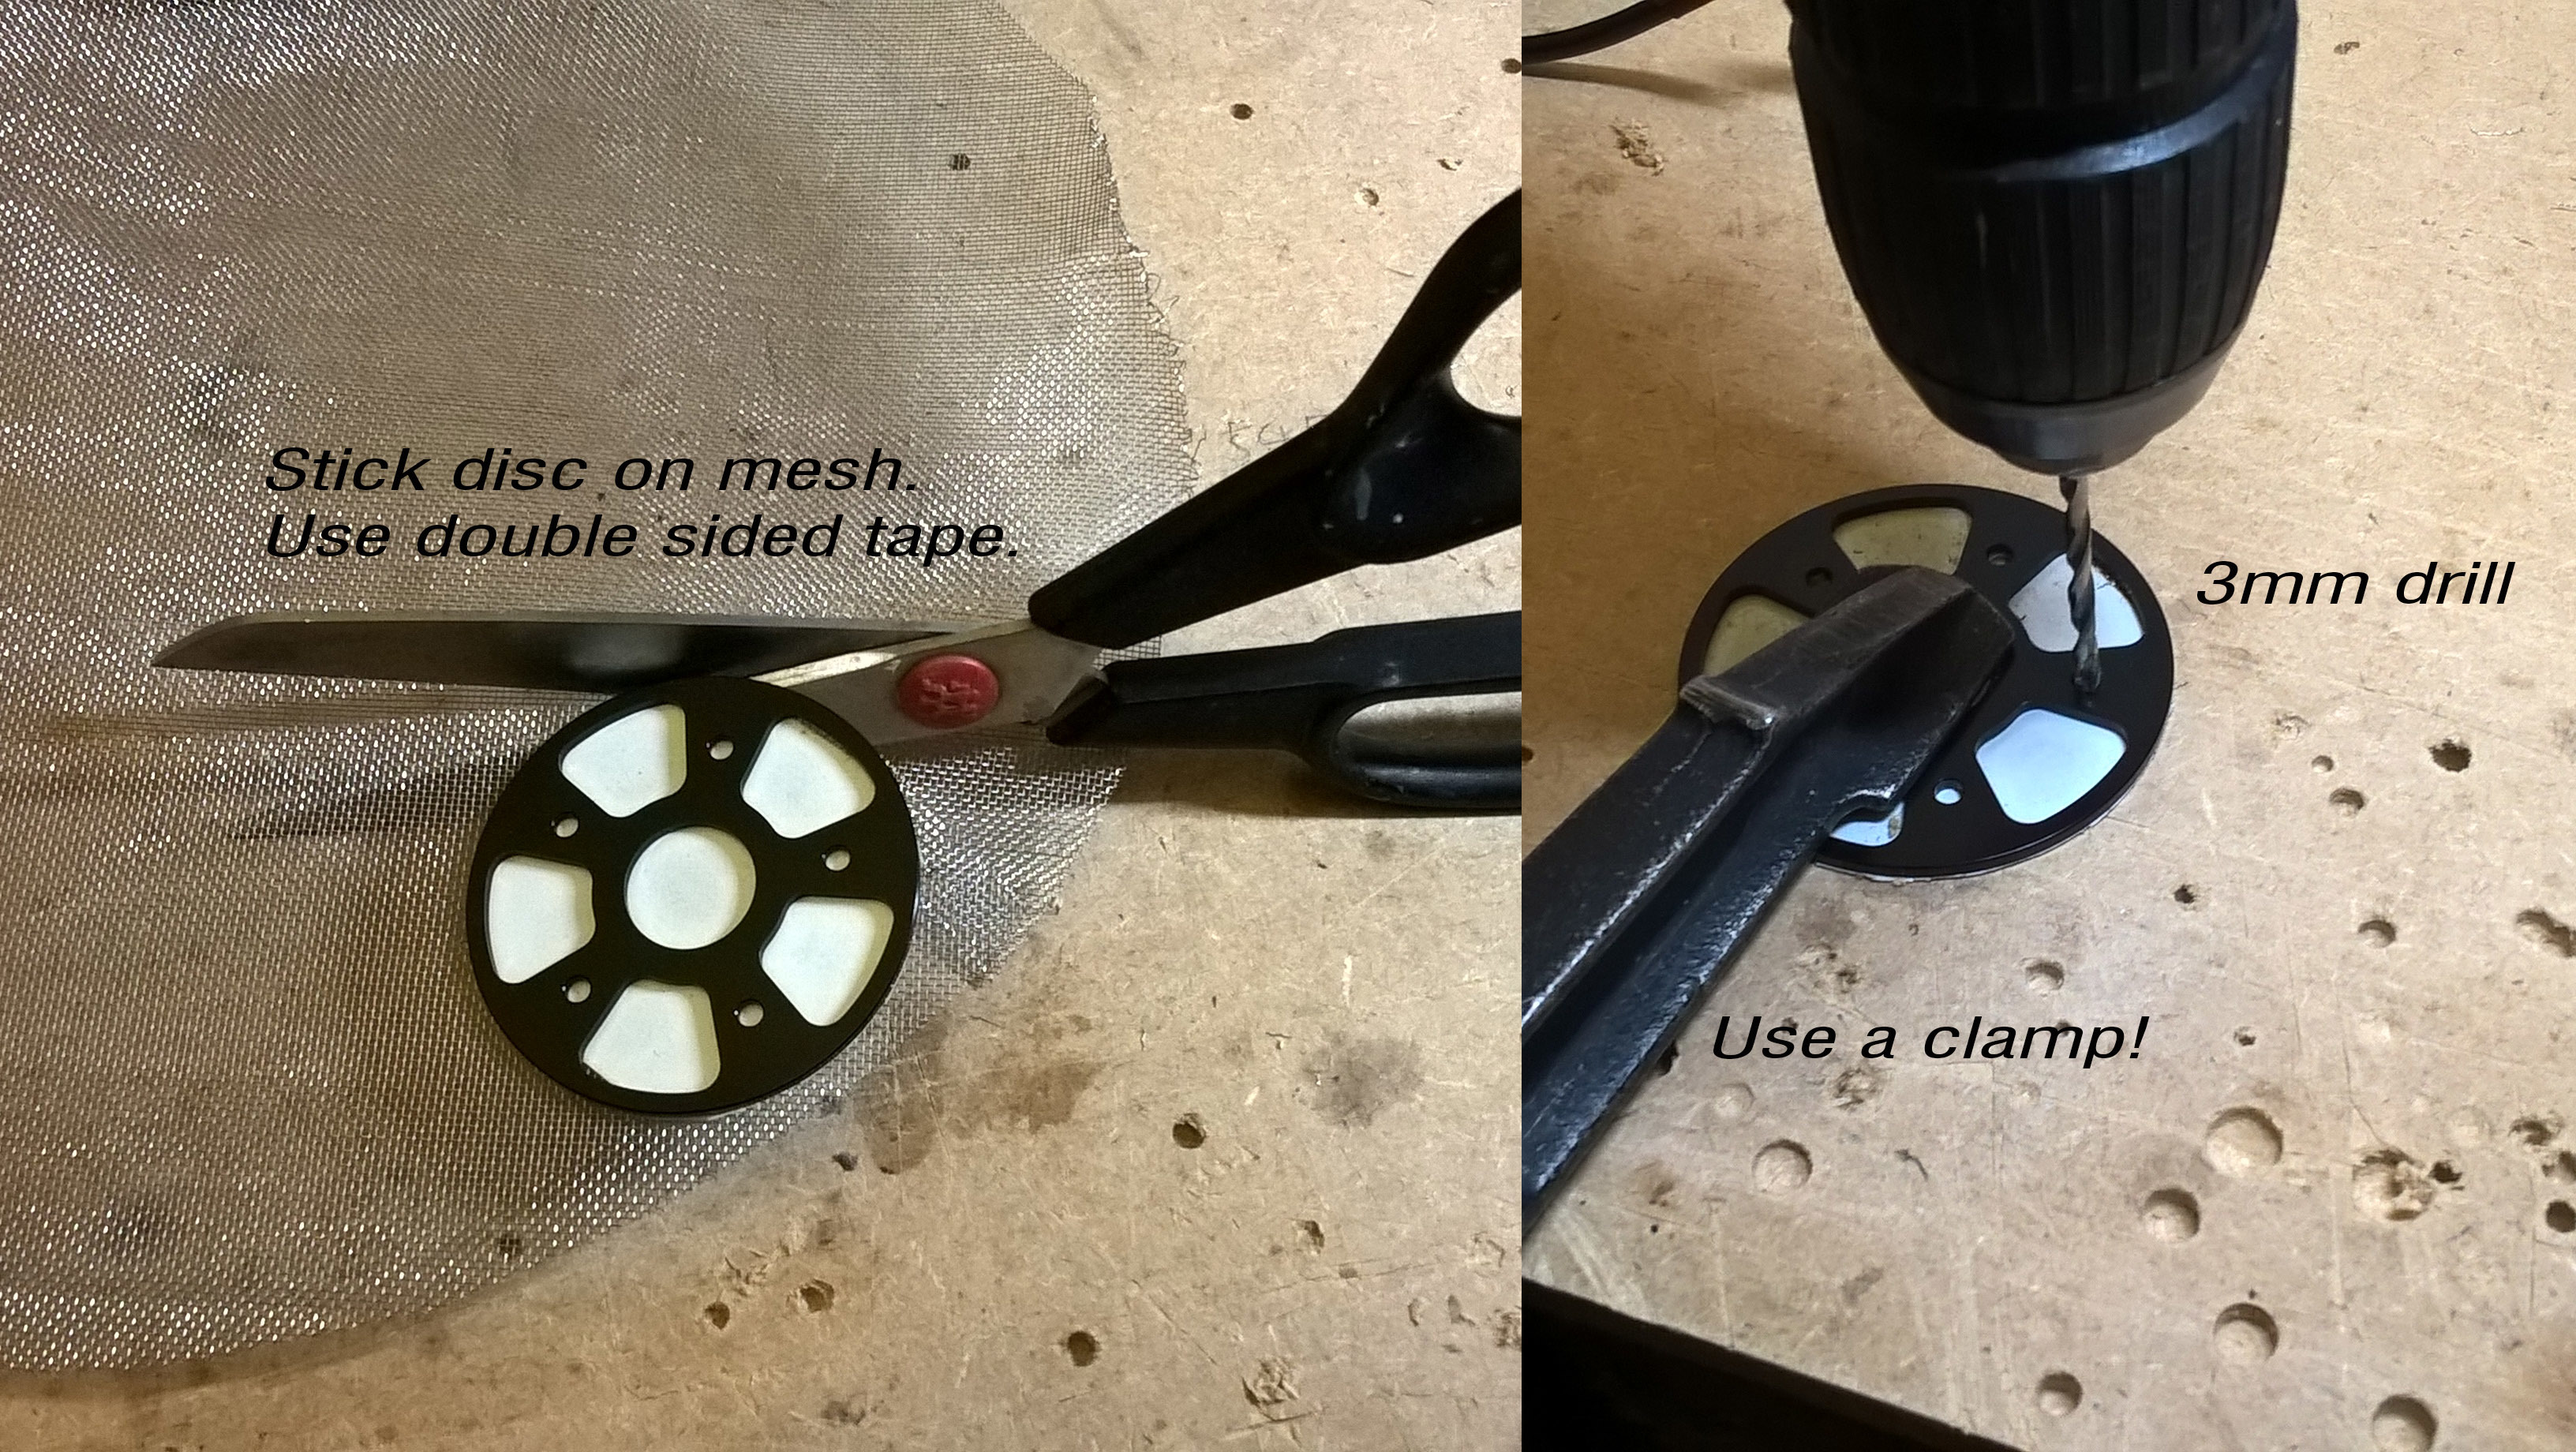


Now we focus on the front side. I made a drawing for your convenience: Again, when cutting the metal, put your motor away and clean the desk frequently with a vacuum cleaner.


I hope that my Cells will arrive the next days and we can continue to finish off this board.
I think I will use the time and tell something about the battery pack I will make: Why 11S4P? I want to ad in as many cells as possible and 44 cells would still leave some air to fit a fuse and other stuff. Everyone thinks you need to go for 6,8,10,12S. You could also go for 7,9,11S. It doesn’t matter!
People ask me about batteries all the time and here are some answers.
A cell is basically rated by:
- capacity (mAh),
- nominal voltage (Volt),
- maximum continuous discharge current (Amps)
- maximum charge current (Amps)
You could dig deeper - but lets keep it simple for the now.
I compare batteries to bottles, containing a liquid having a certain percentage of alcohol (3.7V). What we want is a big bottle containing a certain percentage alcoholic drink + you should be able to empty it fast. Unfortunately, the big bottles seam to have a narrow bottle neck, so you can’t drink fast enough. Only the very good cells feature a wide bottle neck and a nice volume. (high max. discharge current and high capacity) Usually cells having a wide bottle neck can also be filled faster (max. charge current).
You will find some rebranded cells advertised with fantastic values. That is only fooling you around. They confuse the max. continuous discharge with the max. discharge (for a short period of time). Stick to the big Brands ( Sony, Samsung, LG, Panasonic, Sanyo etc). As soon as a cell has a funky branding and uses graphics on its perimeter be sceptic.
A good 18650 Lithium cell would currently have:
- 2500-3000 mAh
- 3.7V nominal Voltage
- 20-35 max. continuous discharge current
- 5A max continuous charge current
Battery packs are made from single cells. You would read something like “10S2P Sony VTC6 setup” on the forums… 10S2P means: You put 2 cells in Parallel ( + to + and - to - pole, side to side) II You take 10 of these parallel assemblies and connect them Serial (always + to-) = = = = = = = = = =
What happens is the following: Putting cells in Parallel will double up the capacity. Tow bottles, each containing 1L, 3.7V alcoholic drink side by side = 2L, 3.7V alcoholic drink. You double up the capacity, easy to understand. If you put the cells in Series a funny thing happens. Tow bottles, each containing 1L, 3.7V alcoholic drink, stacked on another (one feeding its content into the others bottom), will result in a bottle assembly having still 1L of content but 7.4V alcohol content.
By putting cells in Parallel and Series, we can adjust our pack to have the right Voltage and Capacity. I will build up a 11S4P pack from LG INR18650-HG2. Maybe there are better cells existing but I still had some and wanted to use them. Rating: 3.7V, 3000mAh, max. continuous discharge 20A, max. charge 4A.
https://www.nkon.nl/rechargeable/18650-size/lg-18650-hg2-without-warning.html
11S4P will result in a pack having 12000mAh (4x3000mAh) capacity and 40,7V nominal Voltage (11x3,7V) 12000mAh = 12Ah. The pack will store 488 Wh (12Ah x 40,7V) of energy.
What happens to the other values (max. discharge and charge). These simply multiply with the amount of Parallel Cells (4P in this case) 20A max. continuous discharge per cell will give us 80A (4x20A) max. continuous discharge for the pack (11S4P). Same thing applies to the max. charge current: 4x 4A =16A.
Day Two: Cells arrived, lets make the pack.
This is my Layout - its always wise to make a drawing of what you want to make before you start!
We will make 4P packs and group them to be a 11S setup. Since I want my Pack to flex without adding stiffness to the deck, I designed something special. We also want to ad a centre spine, so that impacts would not harm the cells. You don’t want a 488Wh pack to go up in flames below your feet, despite the deck being bullet proof. This is how it looks in real life:

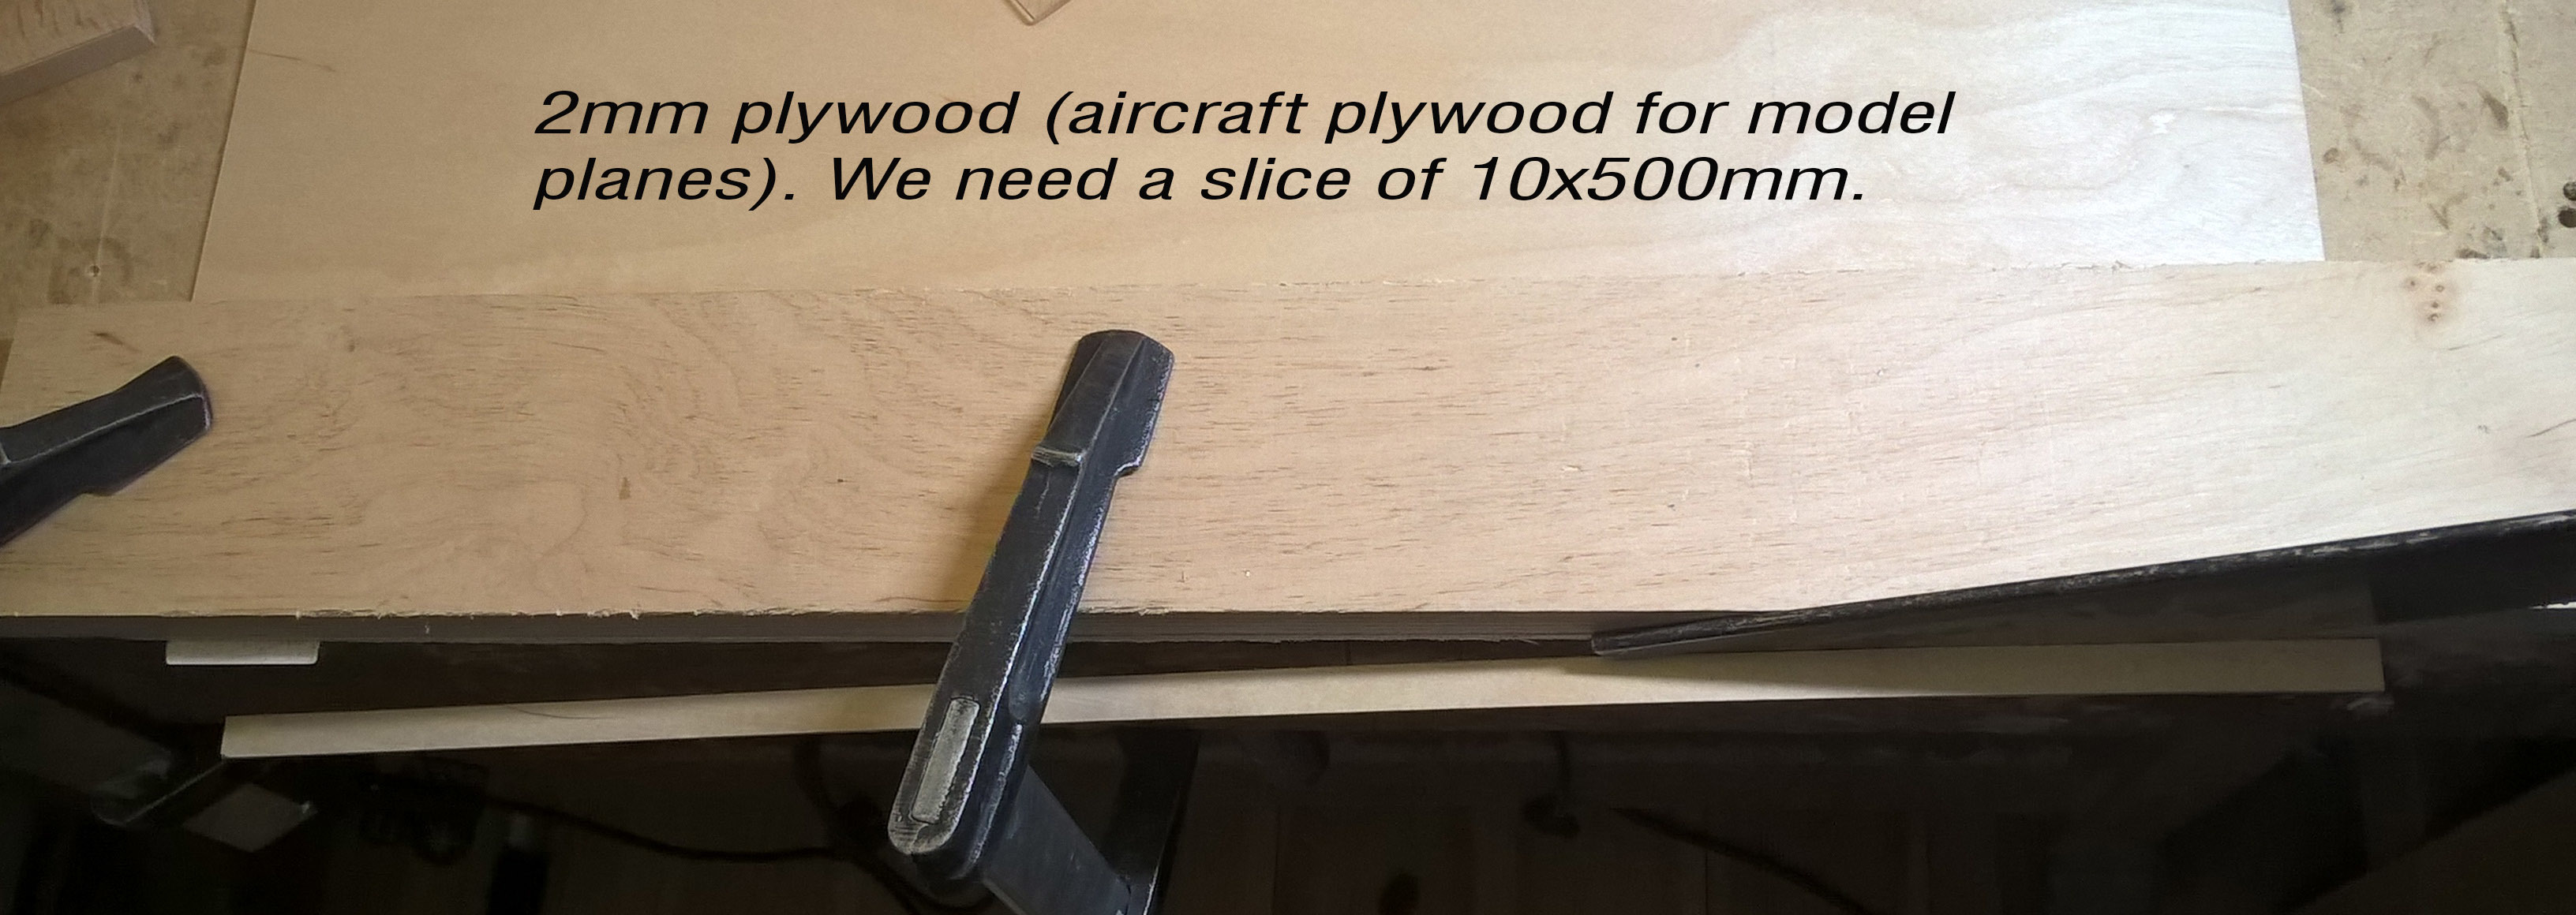
Now lets go in the details: We need - a sheet of 2mm Tufnol and - a sheet of 1mm Tufnol, - a hard wood profile (10x20) - and some thin plywood.


I use ply wood, but you could also just use the 2mm Tufnol!


No spot welder in the post today, so we have to wait a bit longer…


 Thanks for all the work you are putting into this, so every beginner can see clearly from the pictures how its done the right way. Looking forward to see that build finished. You will definitely have a lot of fun with it.