No-clever-name build | Dual 6374s | 12S6P | homemade deck | SuperFlys | 218mm trucks | custom machined parts | carbon fiber

Hey, everyone. A couple years ago, I never would’ve imagined I would be building an electric skateboard (or even own one), but here I am going full bore into a build. The wheels arrived in the mail yesterday, lots more is arriving today, and more will continue to trickle in over the next few weeks (and beyond). Here’s the synopsis.

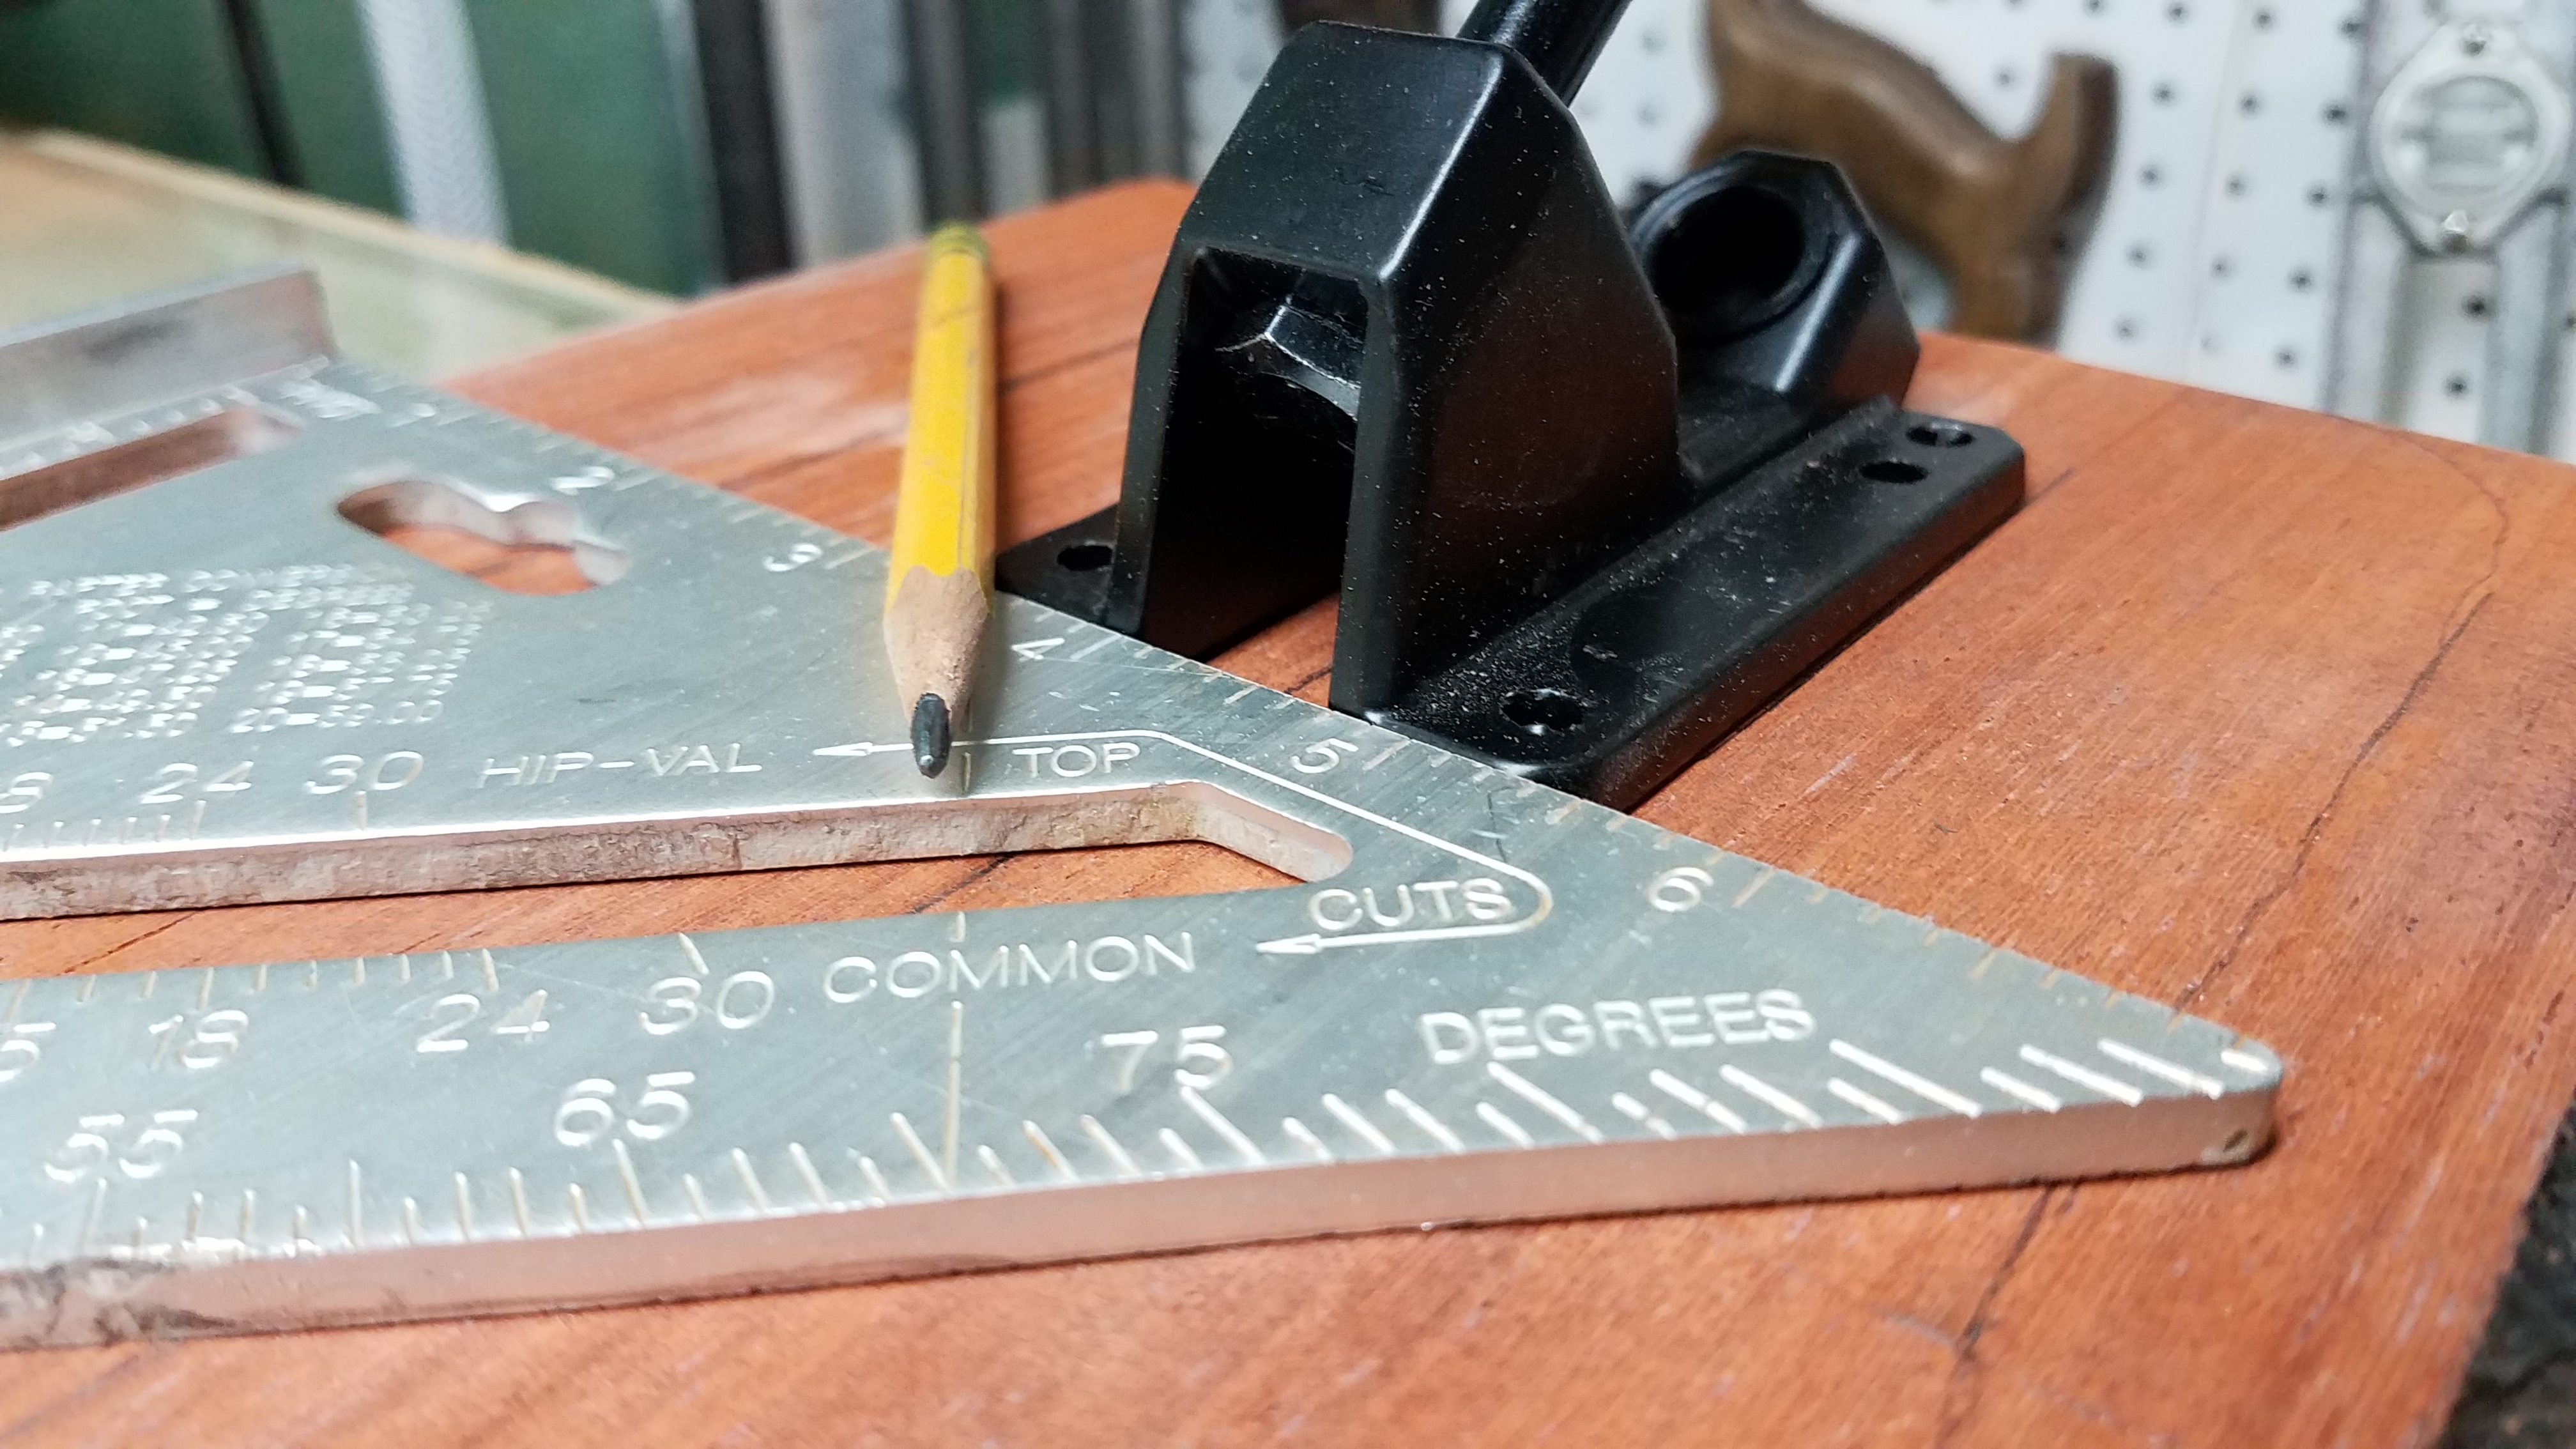
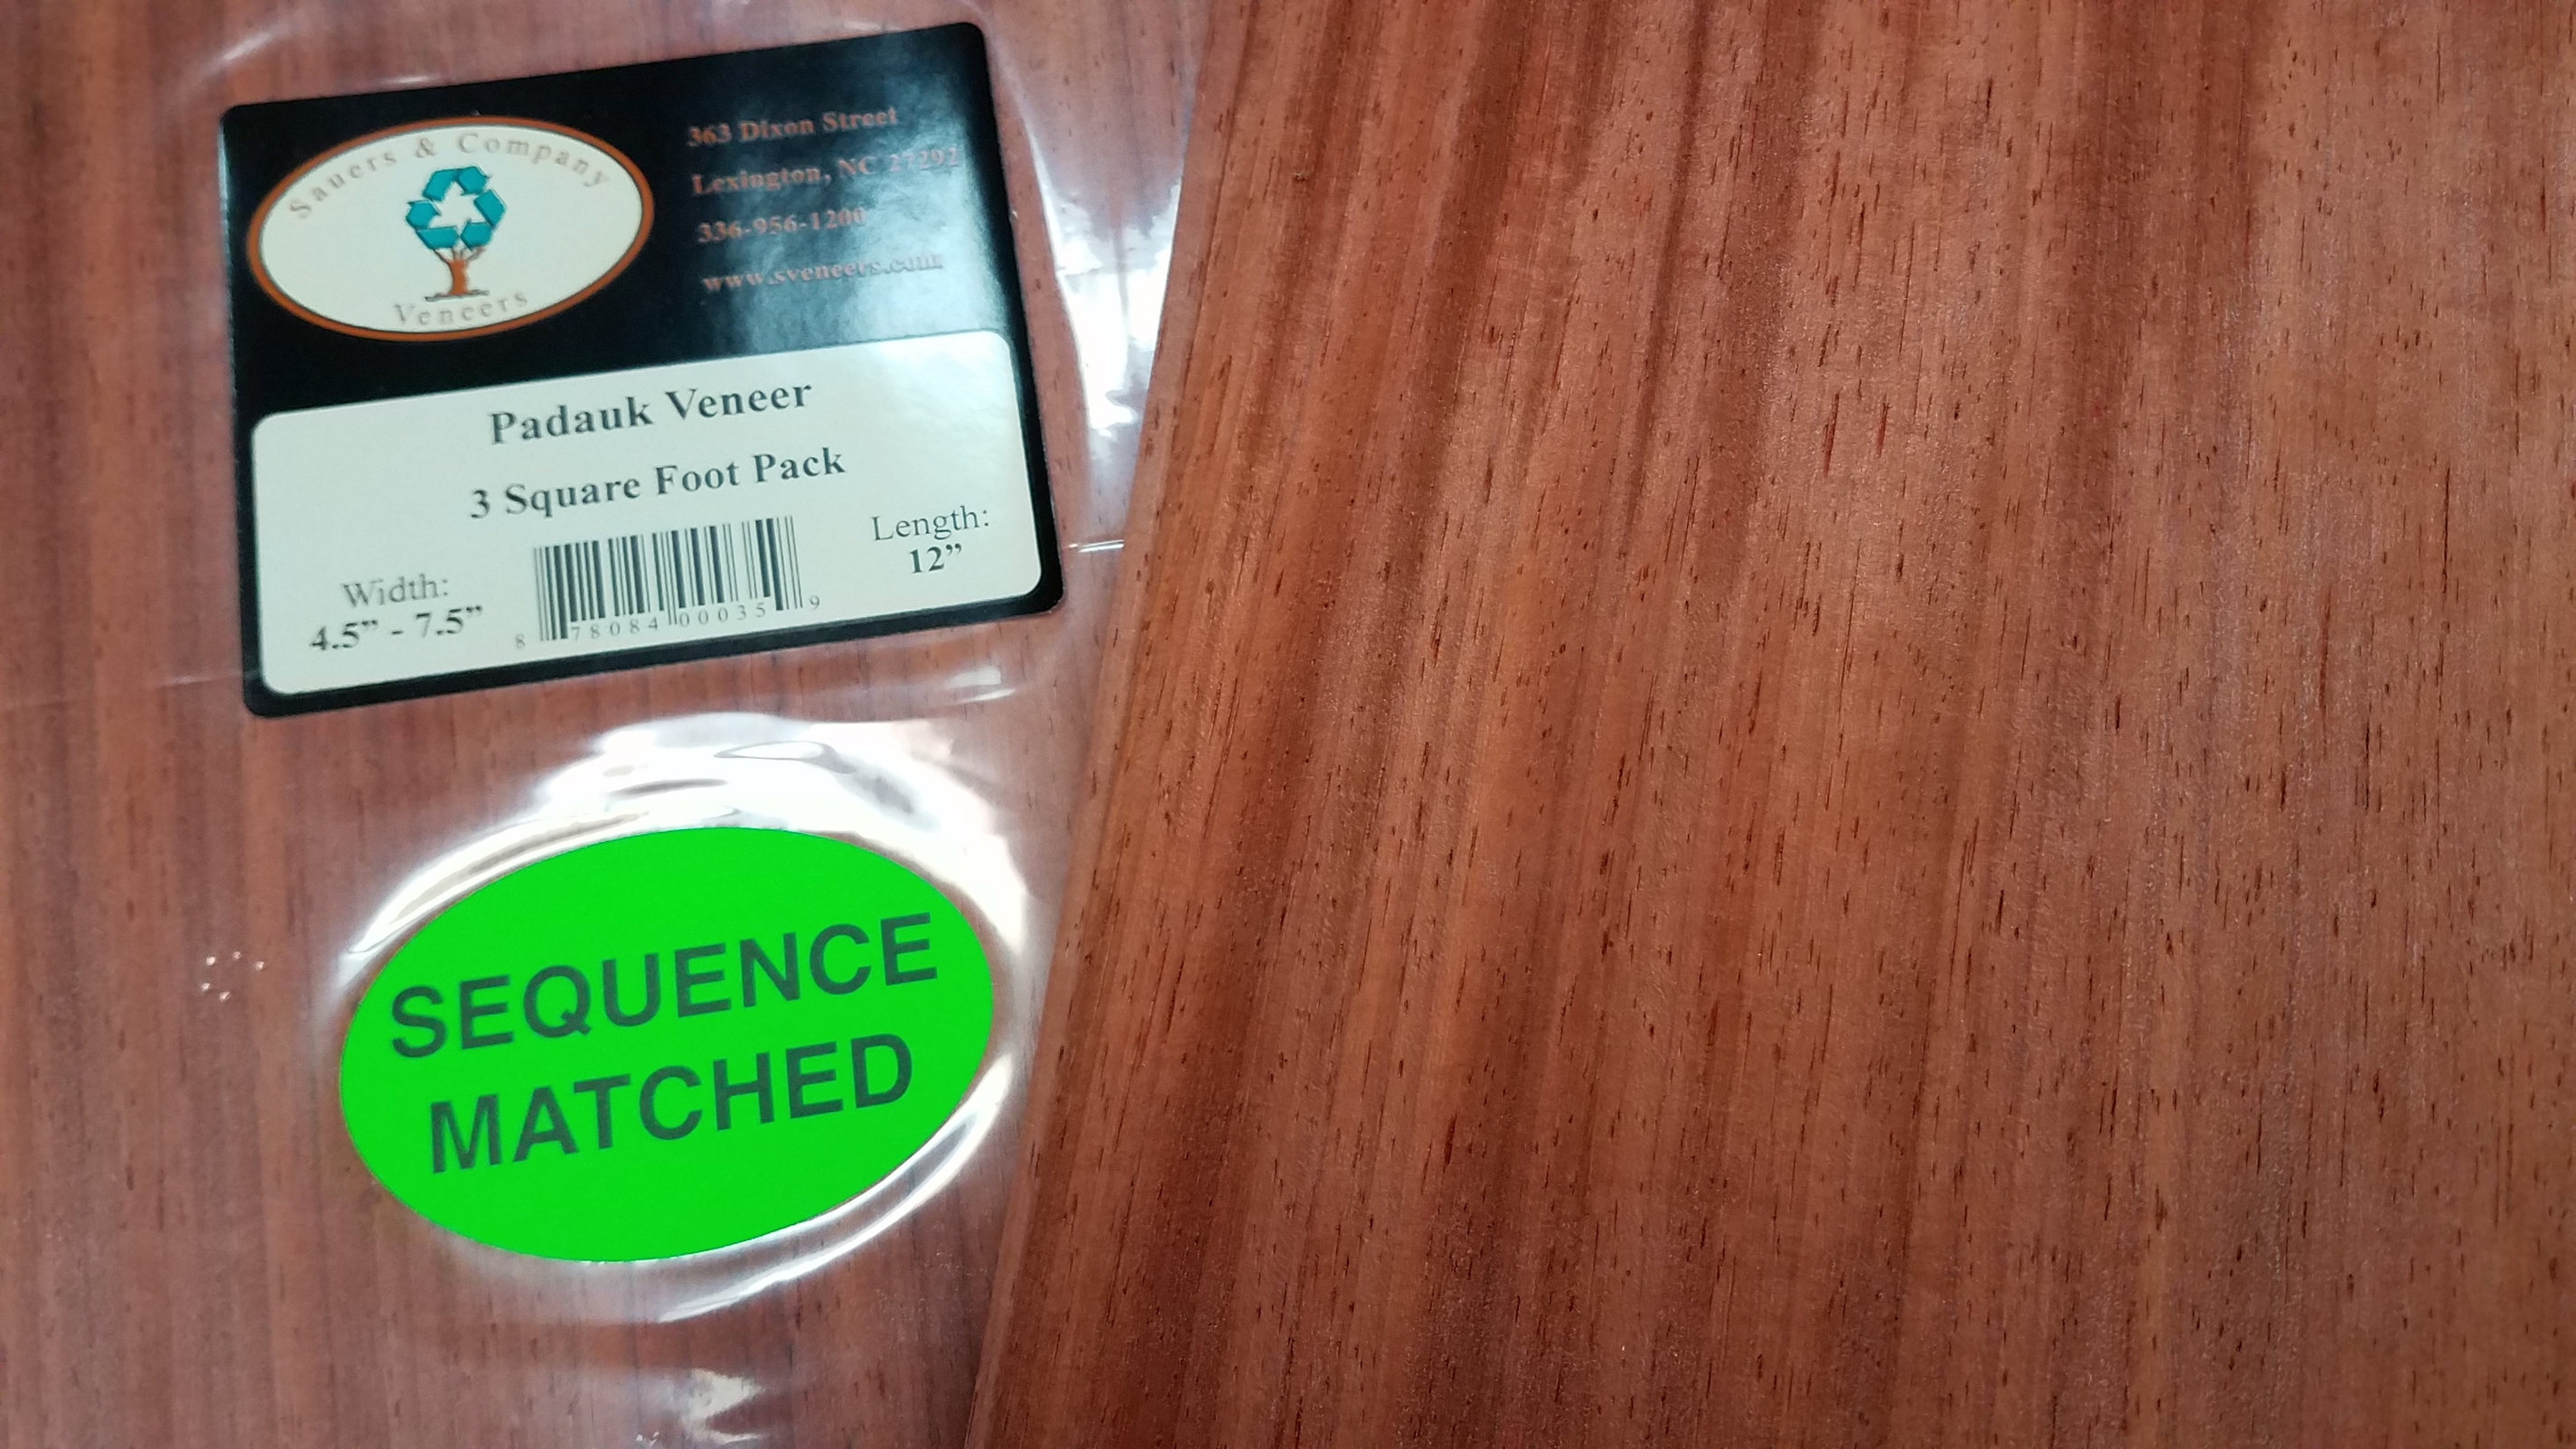
  • Longboard—I will construct this myself. Multiple plies of 1/8" Baltic Birch, carbon fiber, Purpleheart veneer on the top and bottom (not my first choice, but it’s what the local supplier had), epoxy, vacuum bagged, strips of black grip tape on top, enough for grip, but showing the veneer between strips. The board will have dual cutouts. I’ll need to take some measurements after I have all the parts, but I’m leaning towards cutting drop throughs just so I don’t plummet to my death if I fall from an excessively towering board. Also, would like the extra stability from being lower. We’ll see if that works out.
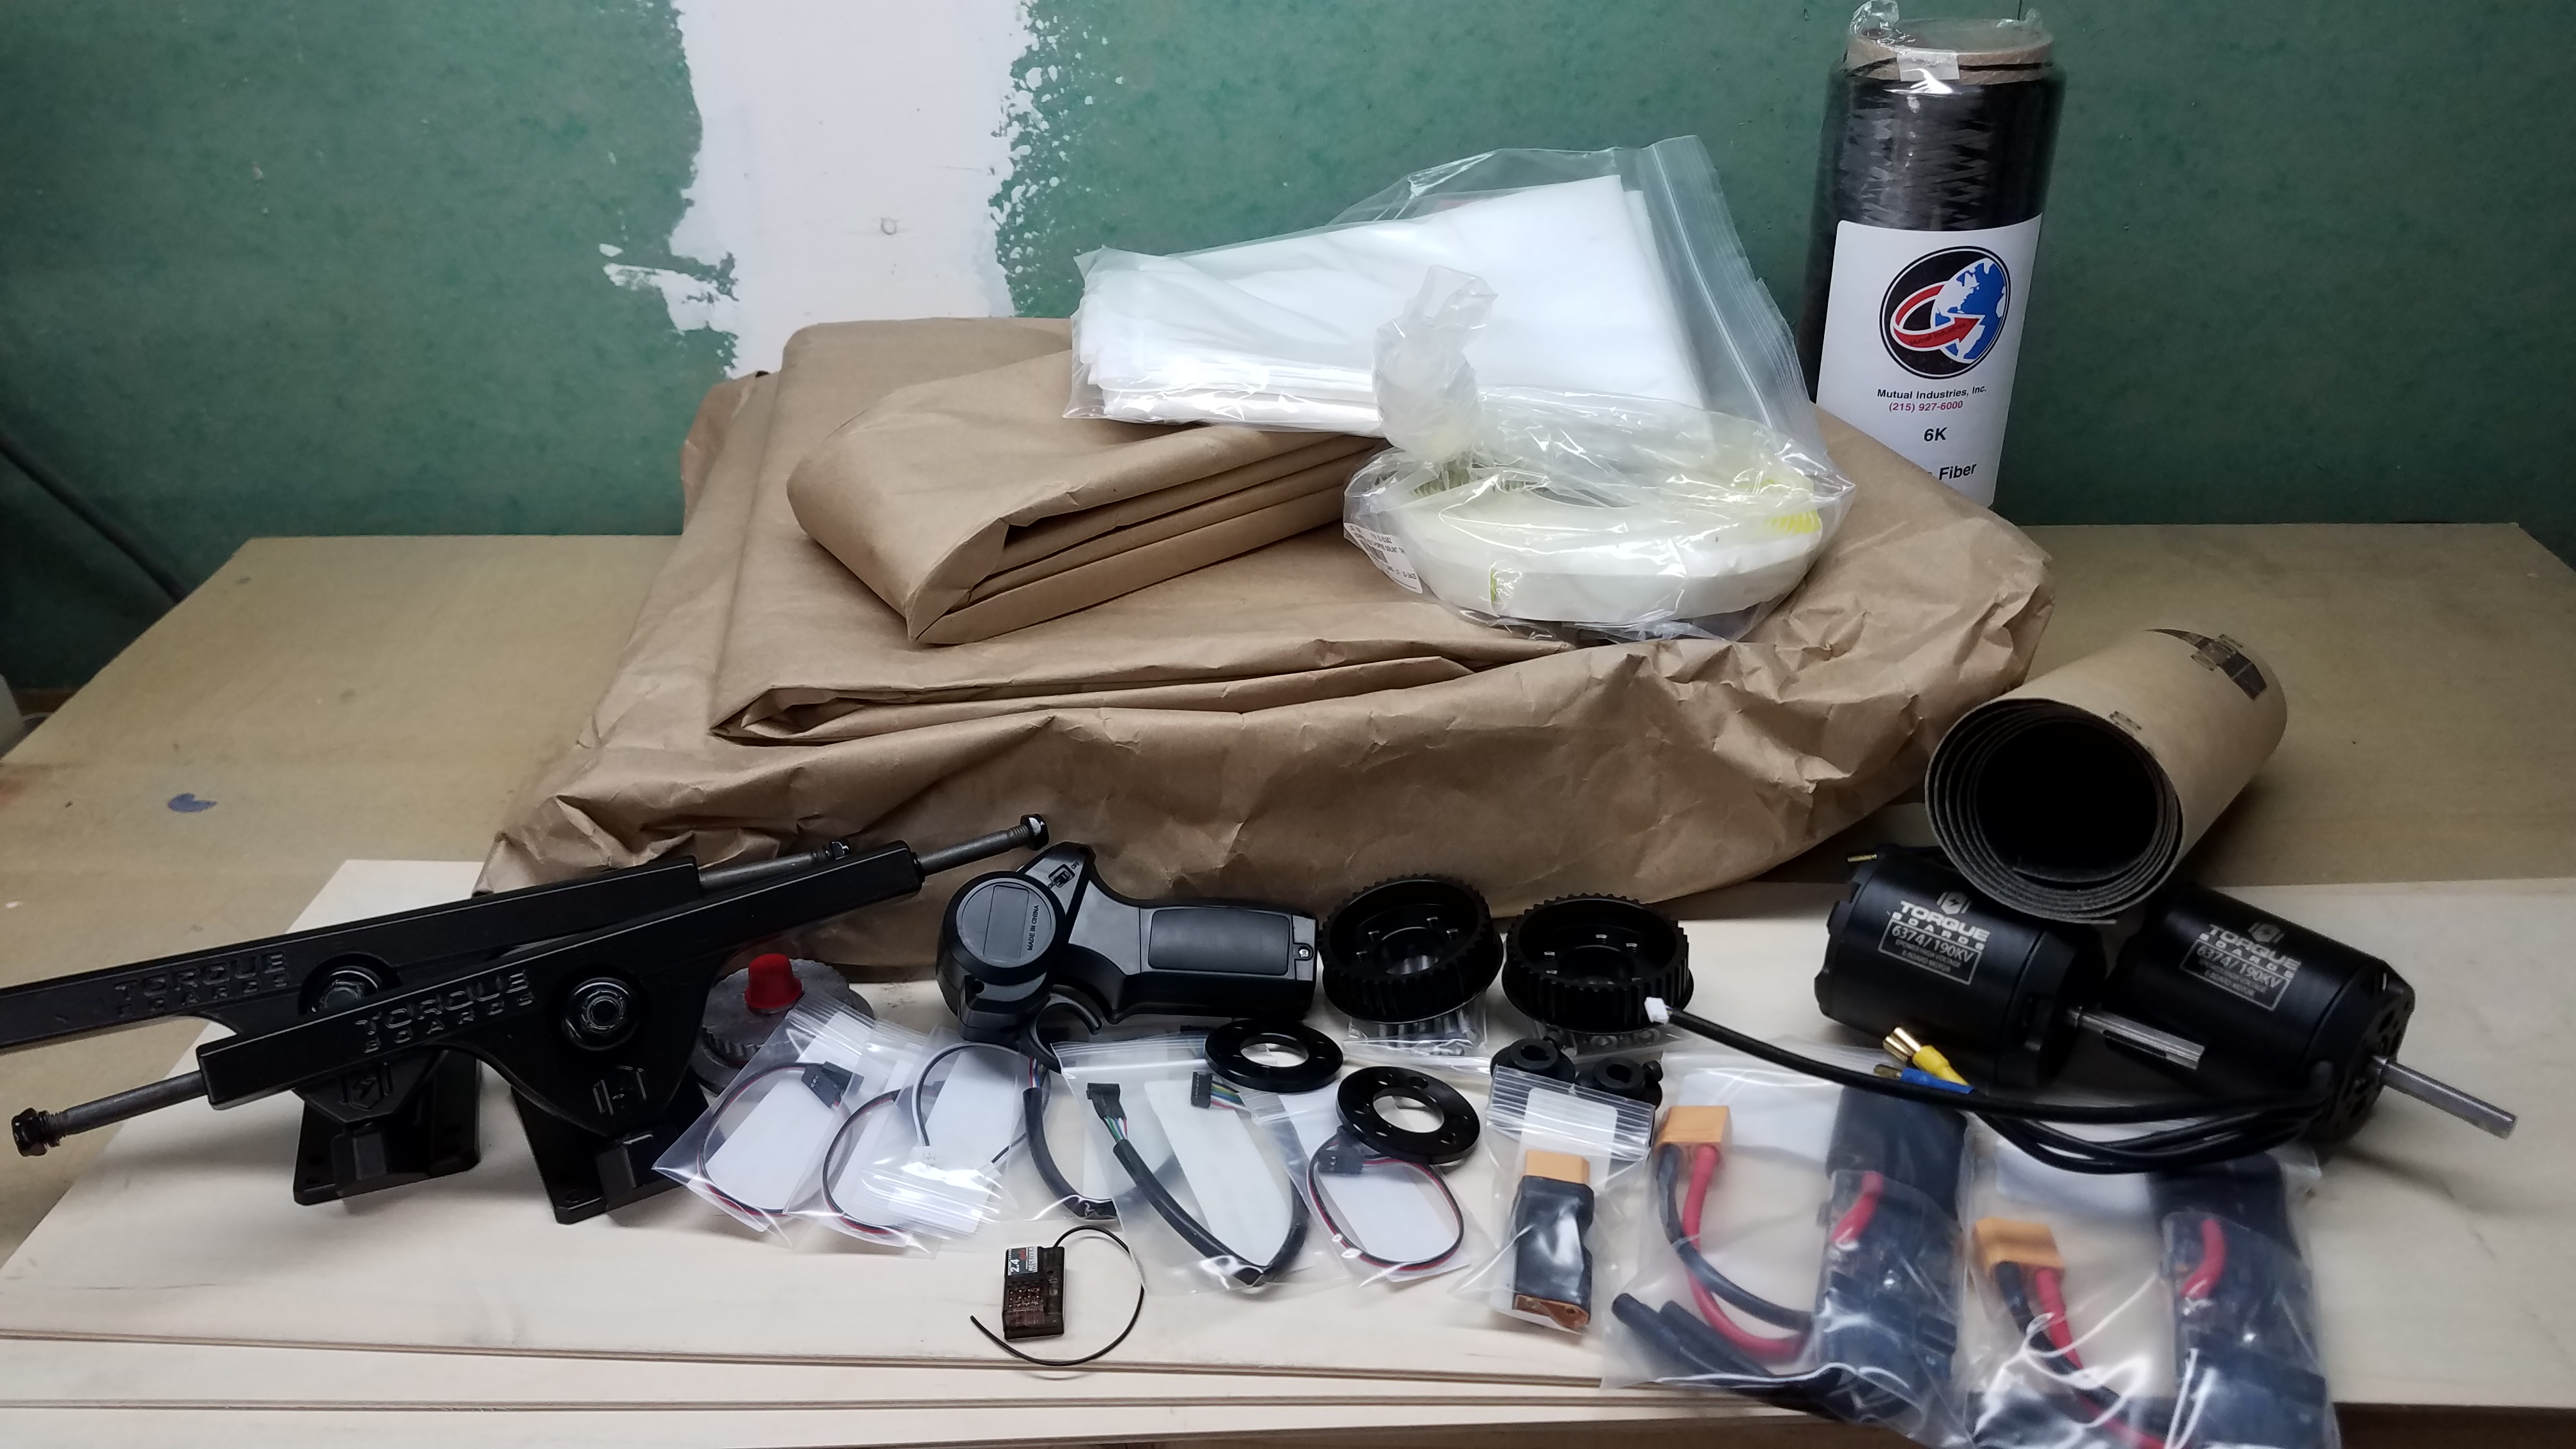
  • Ordered lots of parts from DIY Electric Skateboards—218mm TorqueBoard trucks, two 6374 motors, two VESCs, the TorqueBoards 2.4GHz remote. I’ve actually ordered the 3D printed case and all other parts for a DIY Arduino remote (found on this very site), but am in kind of a time crunch and so won’t build that for a couple months. Besides, I’ll have my hands full just building the board, so better to use the factory remote to start out with.
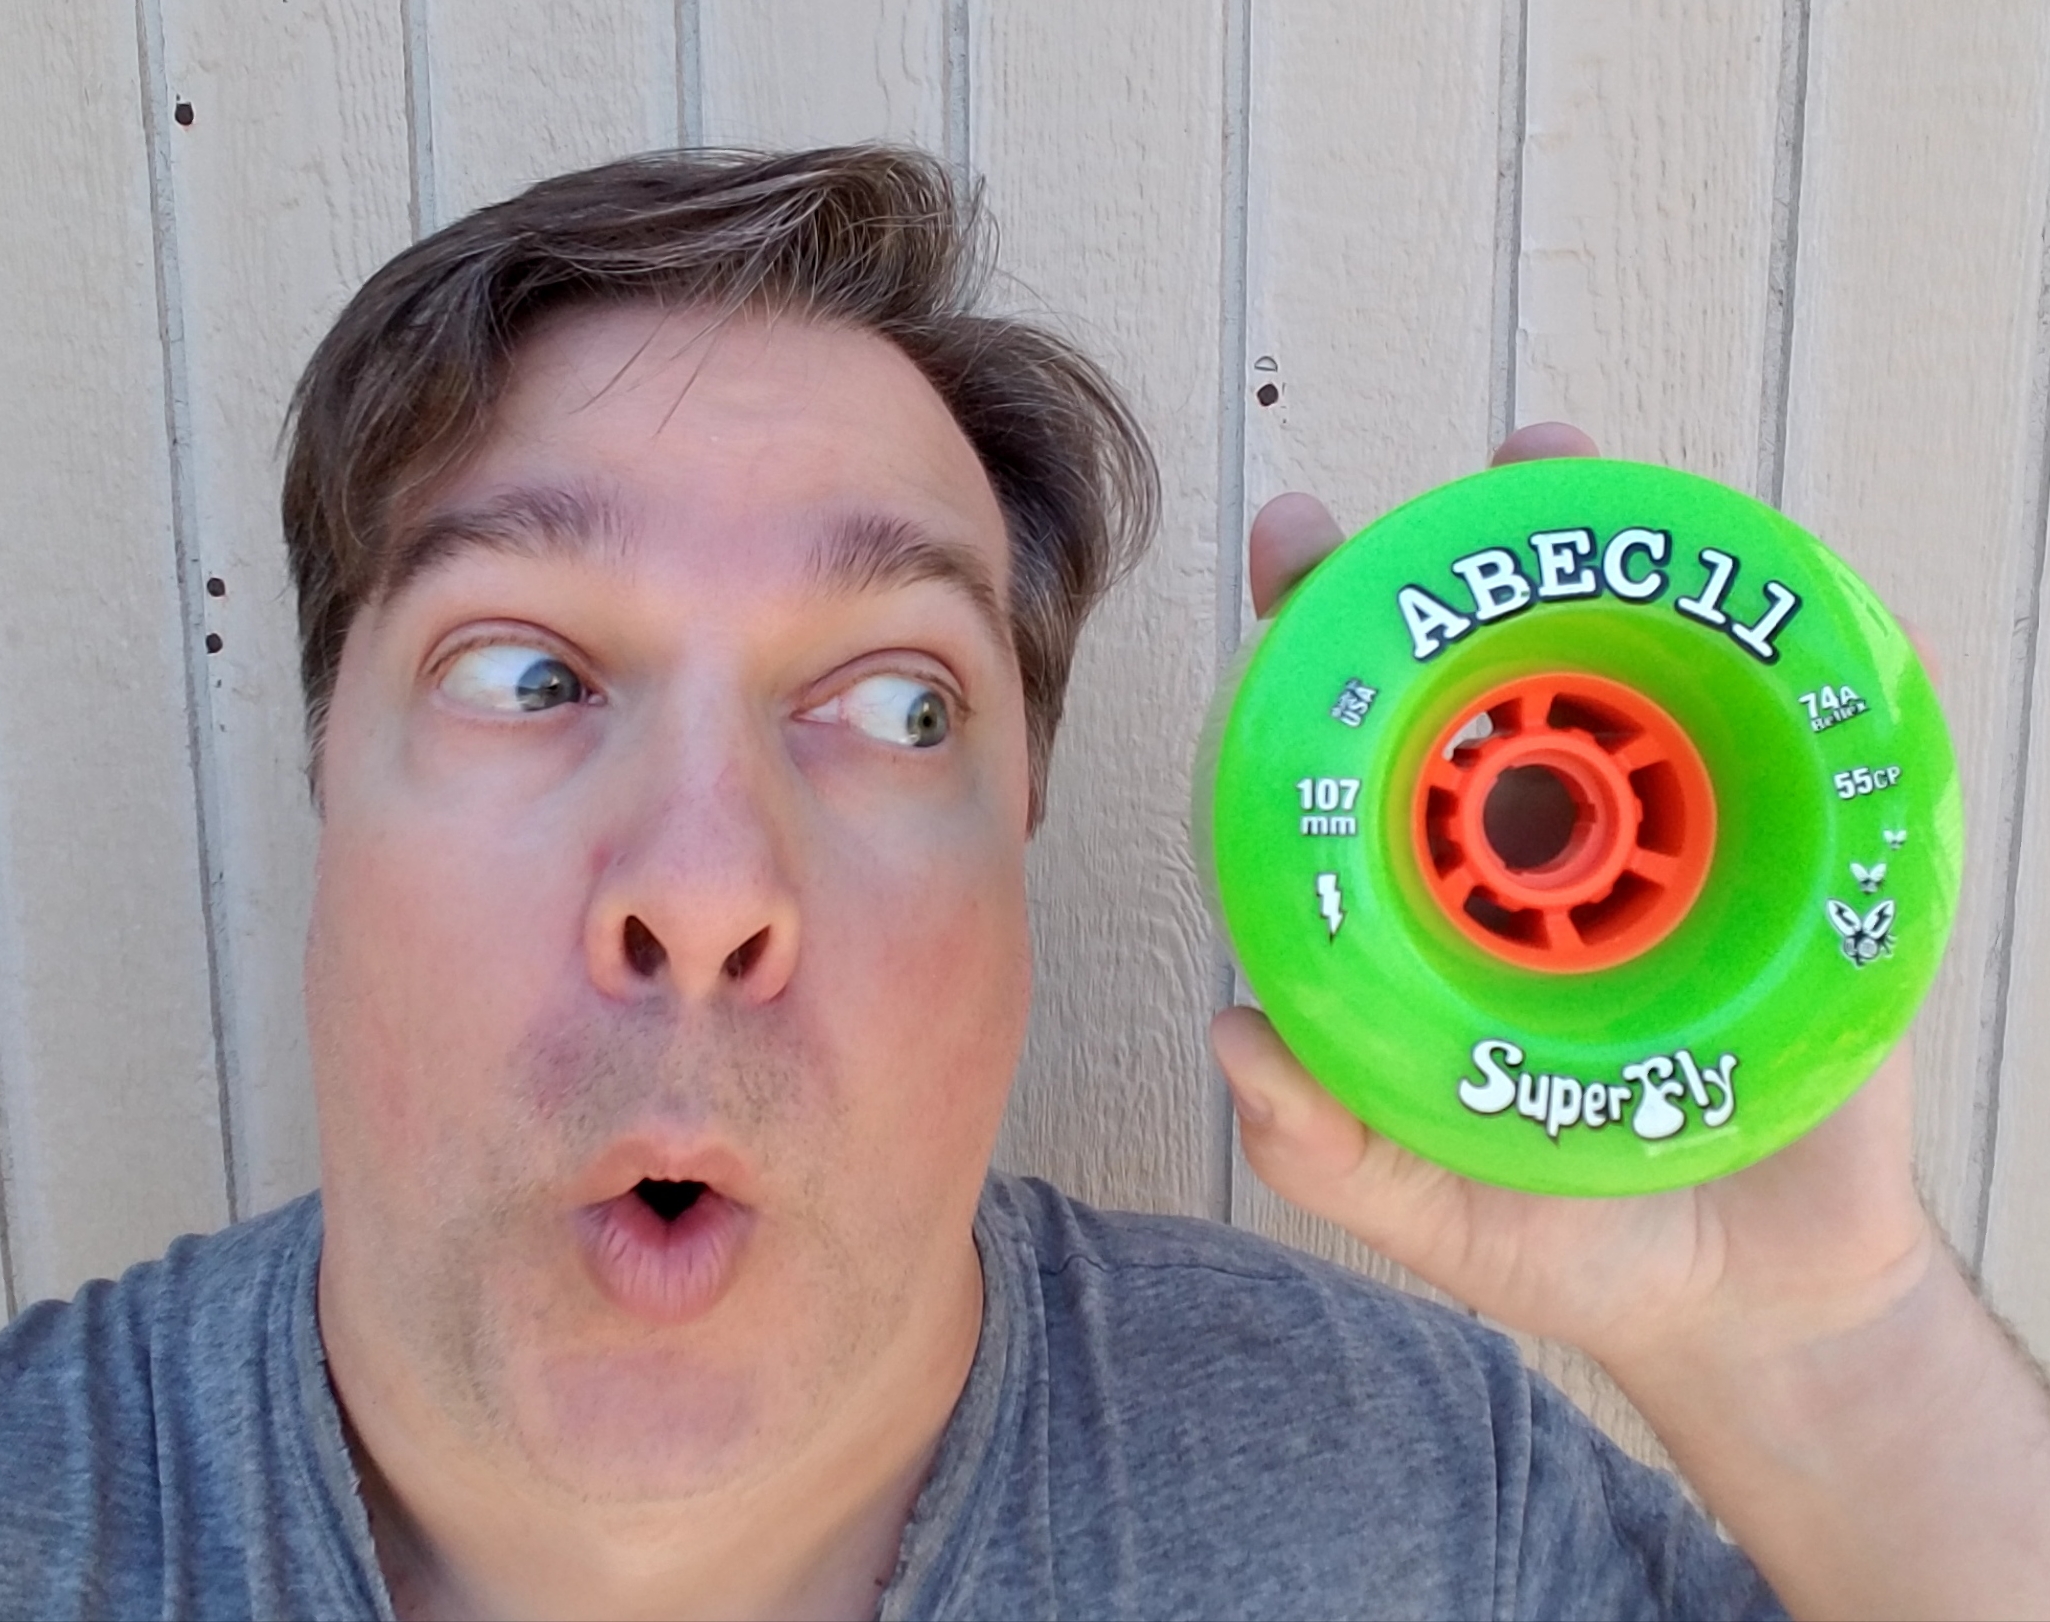
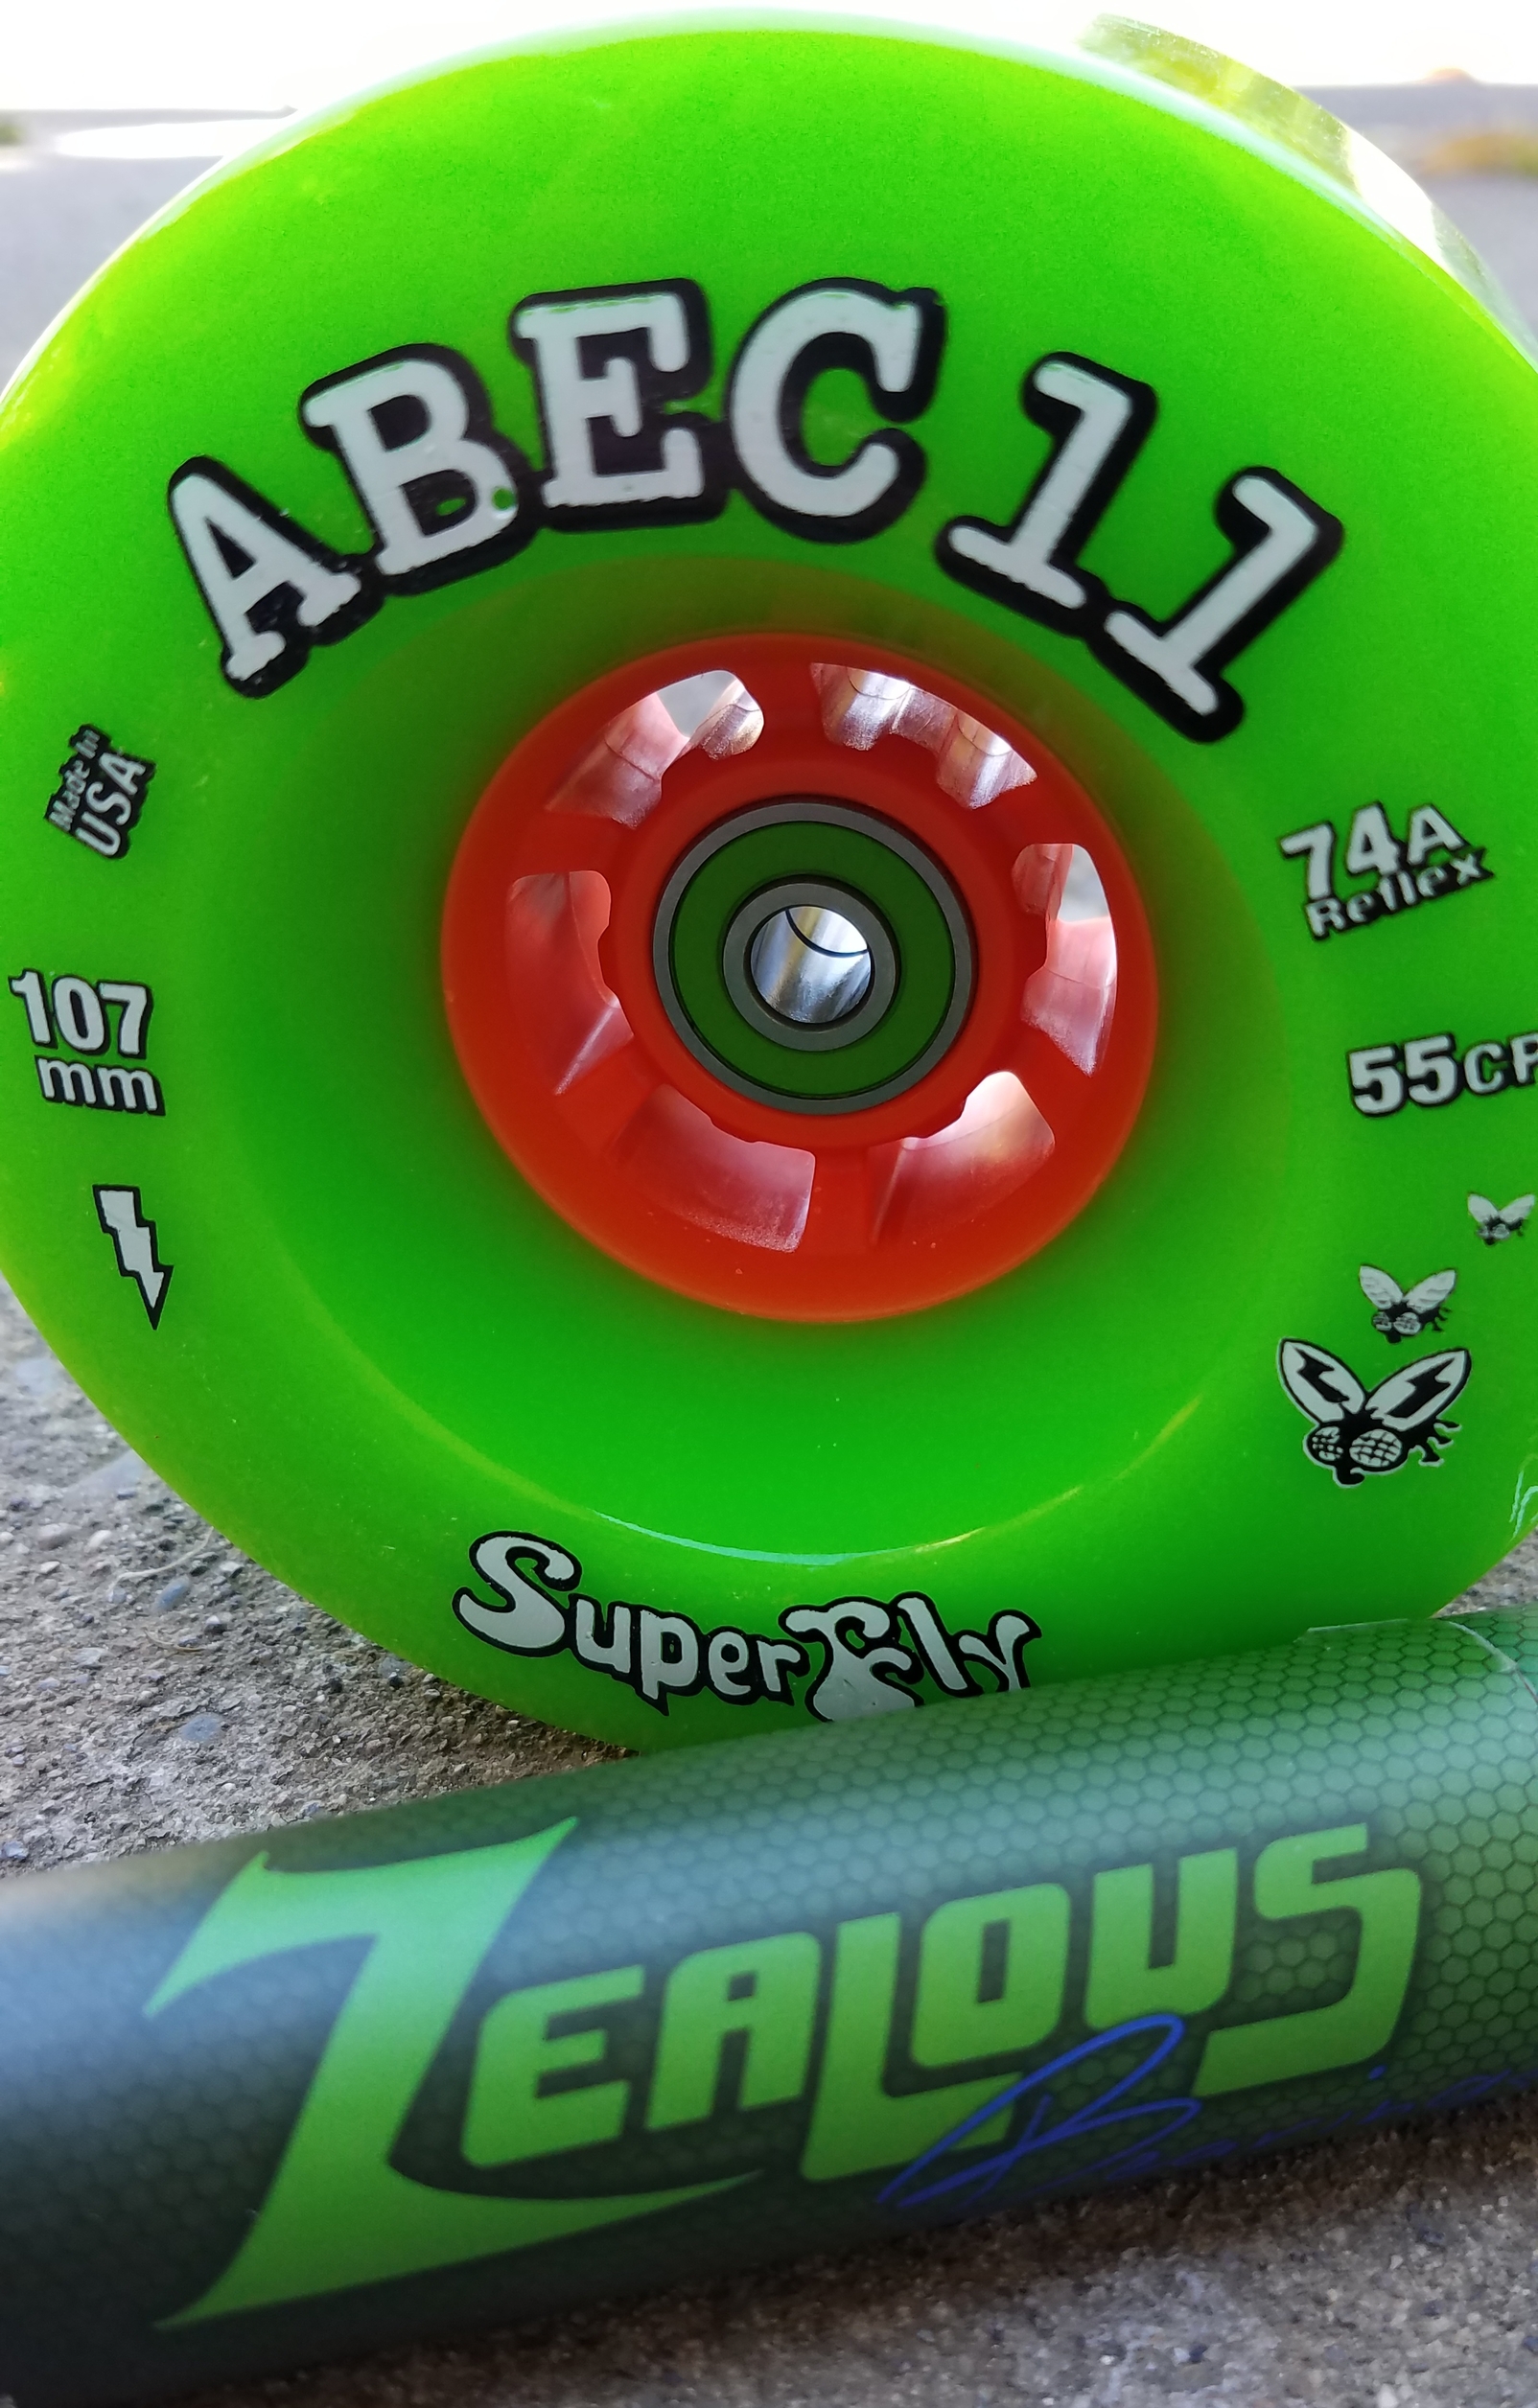
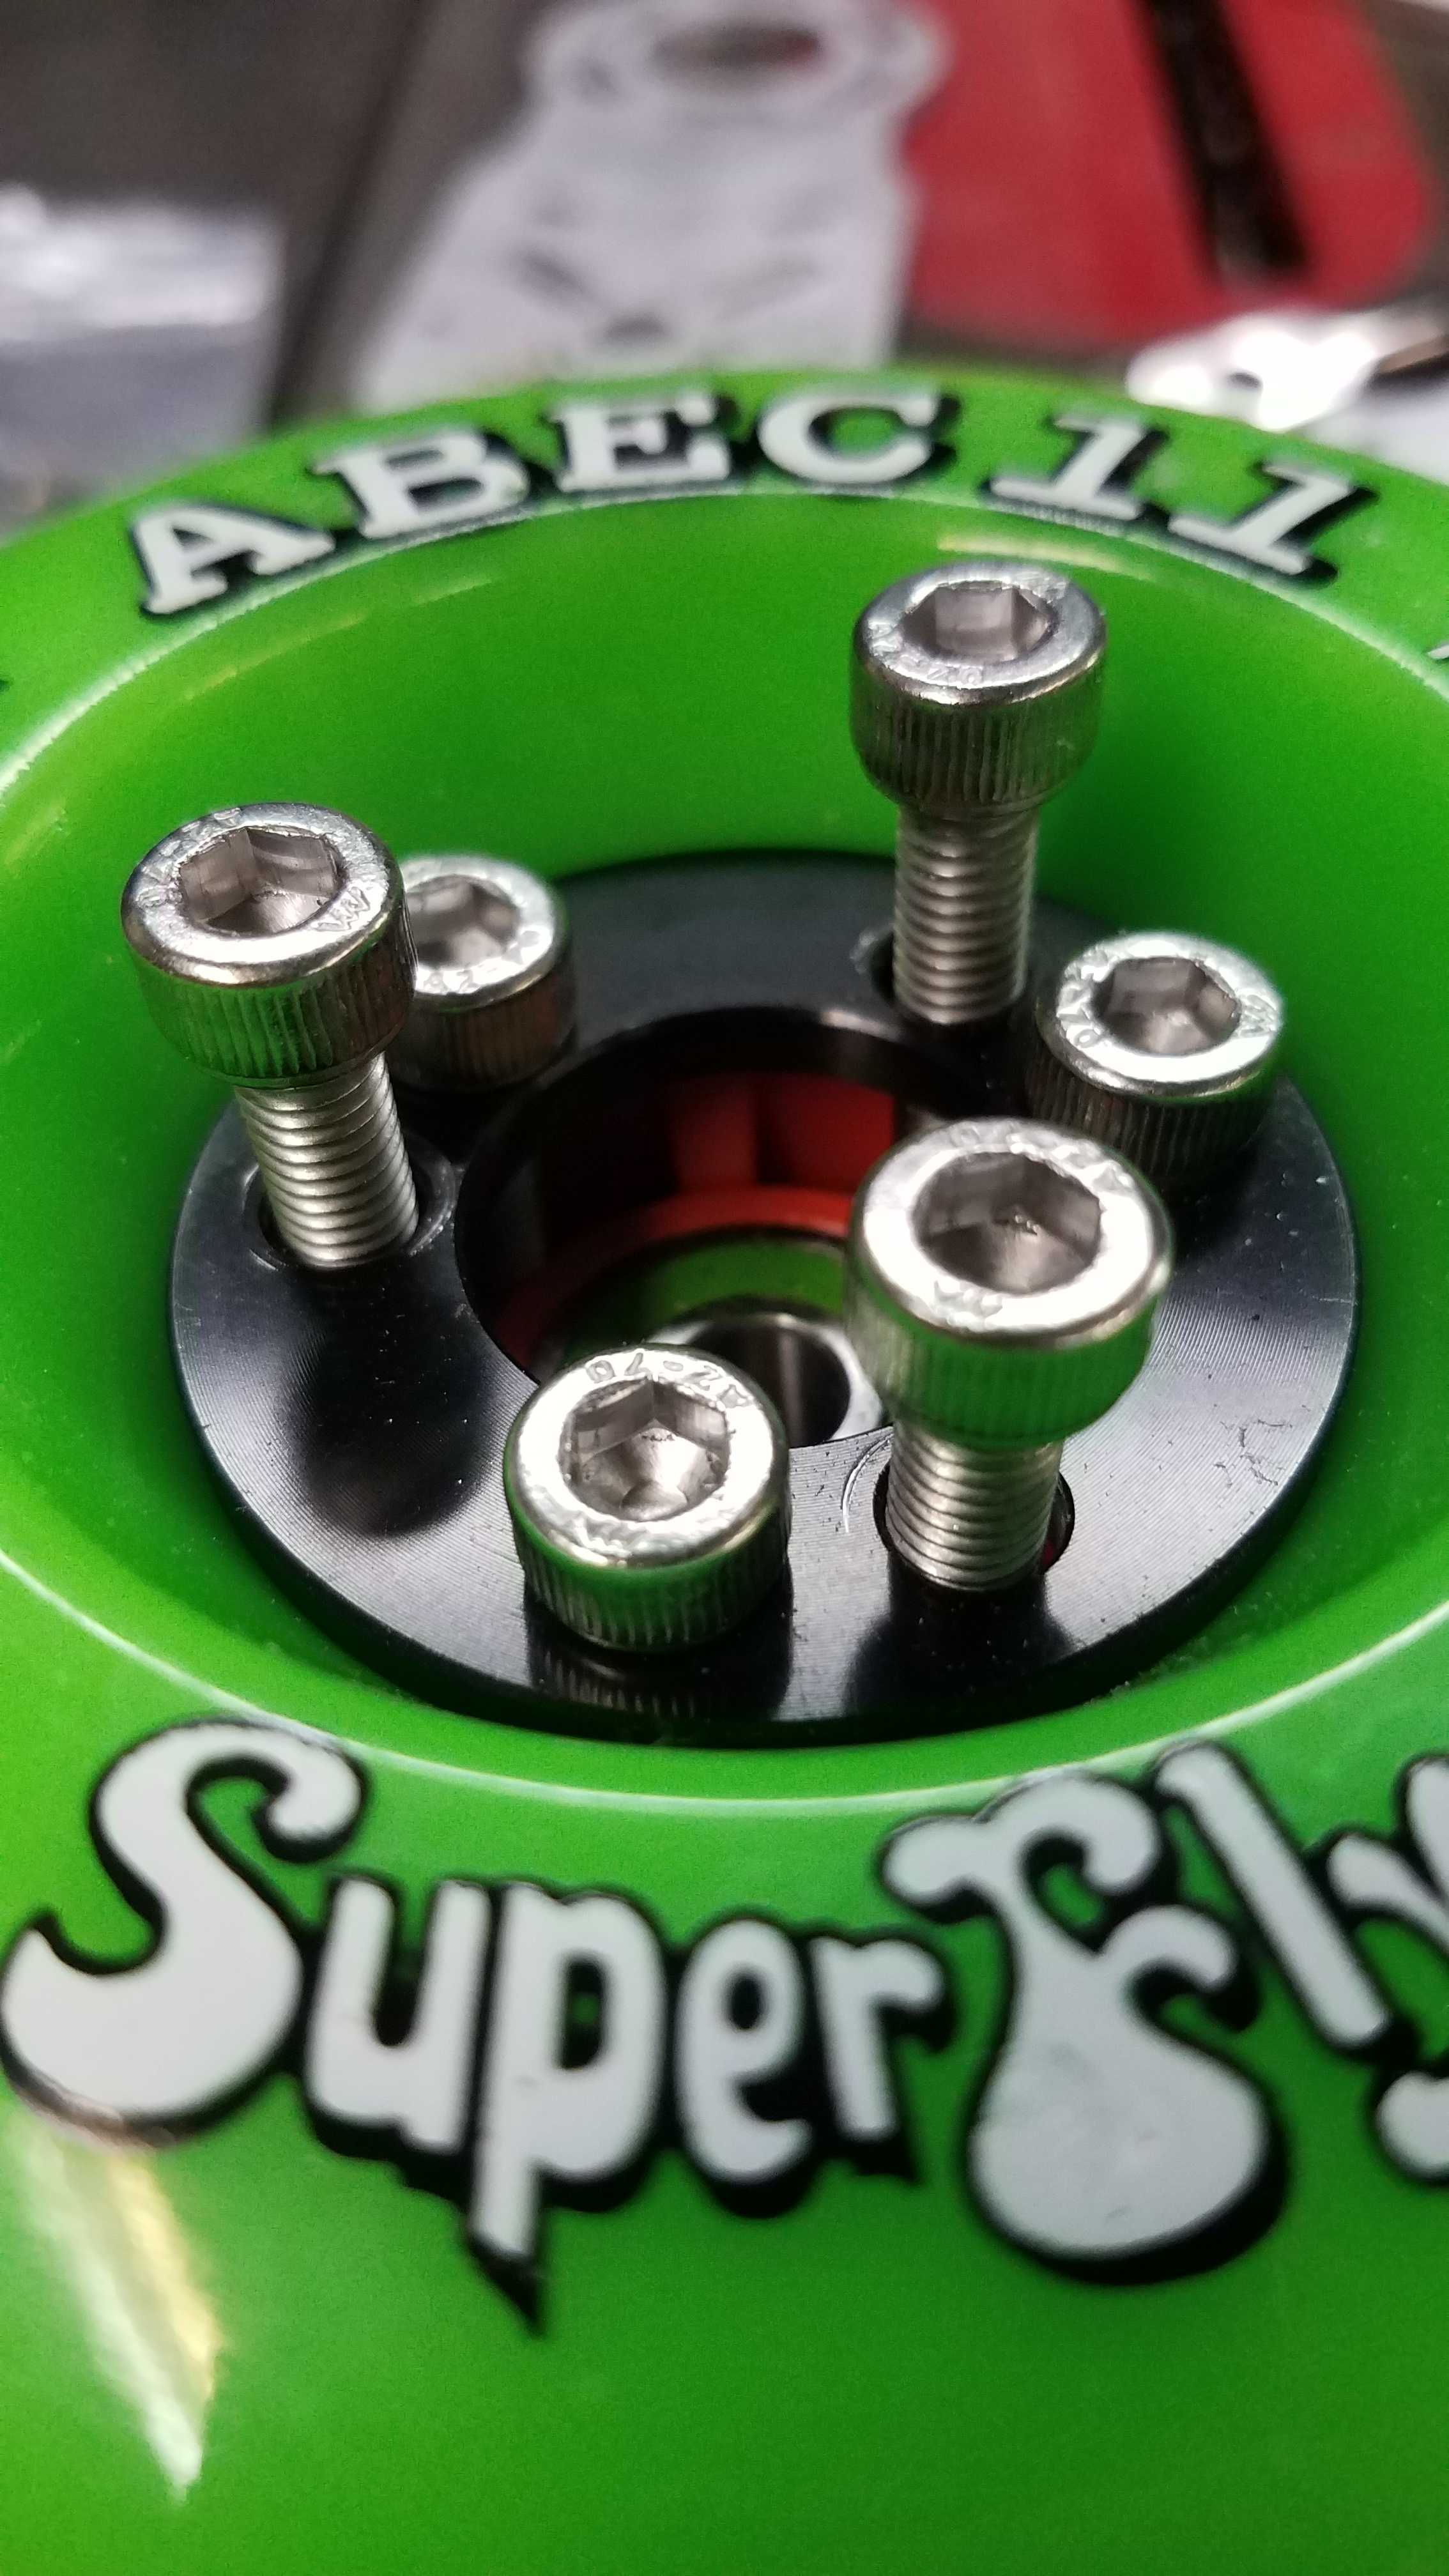
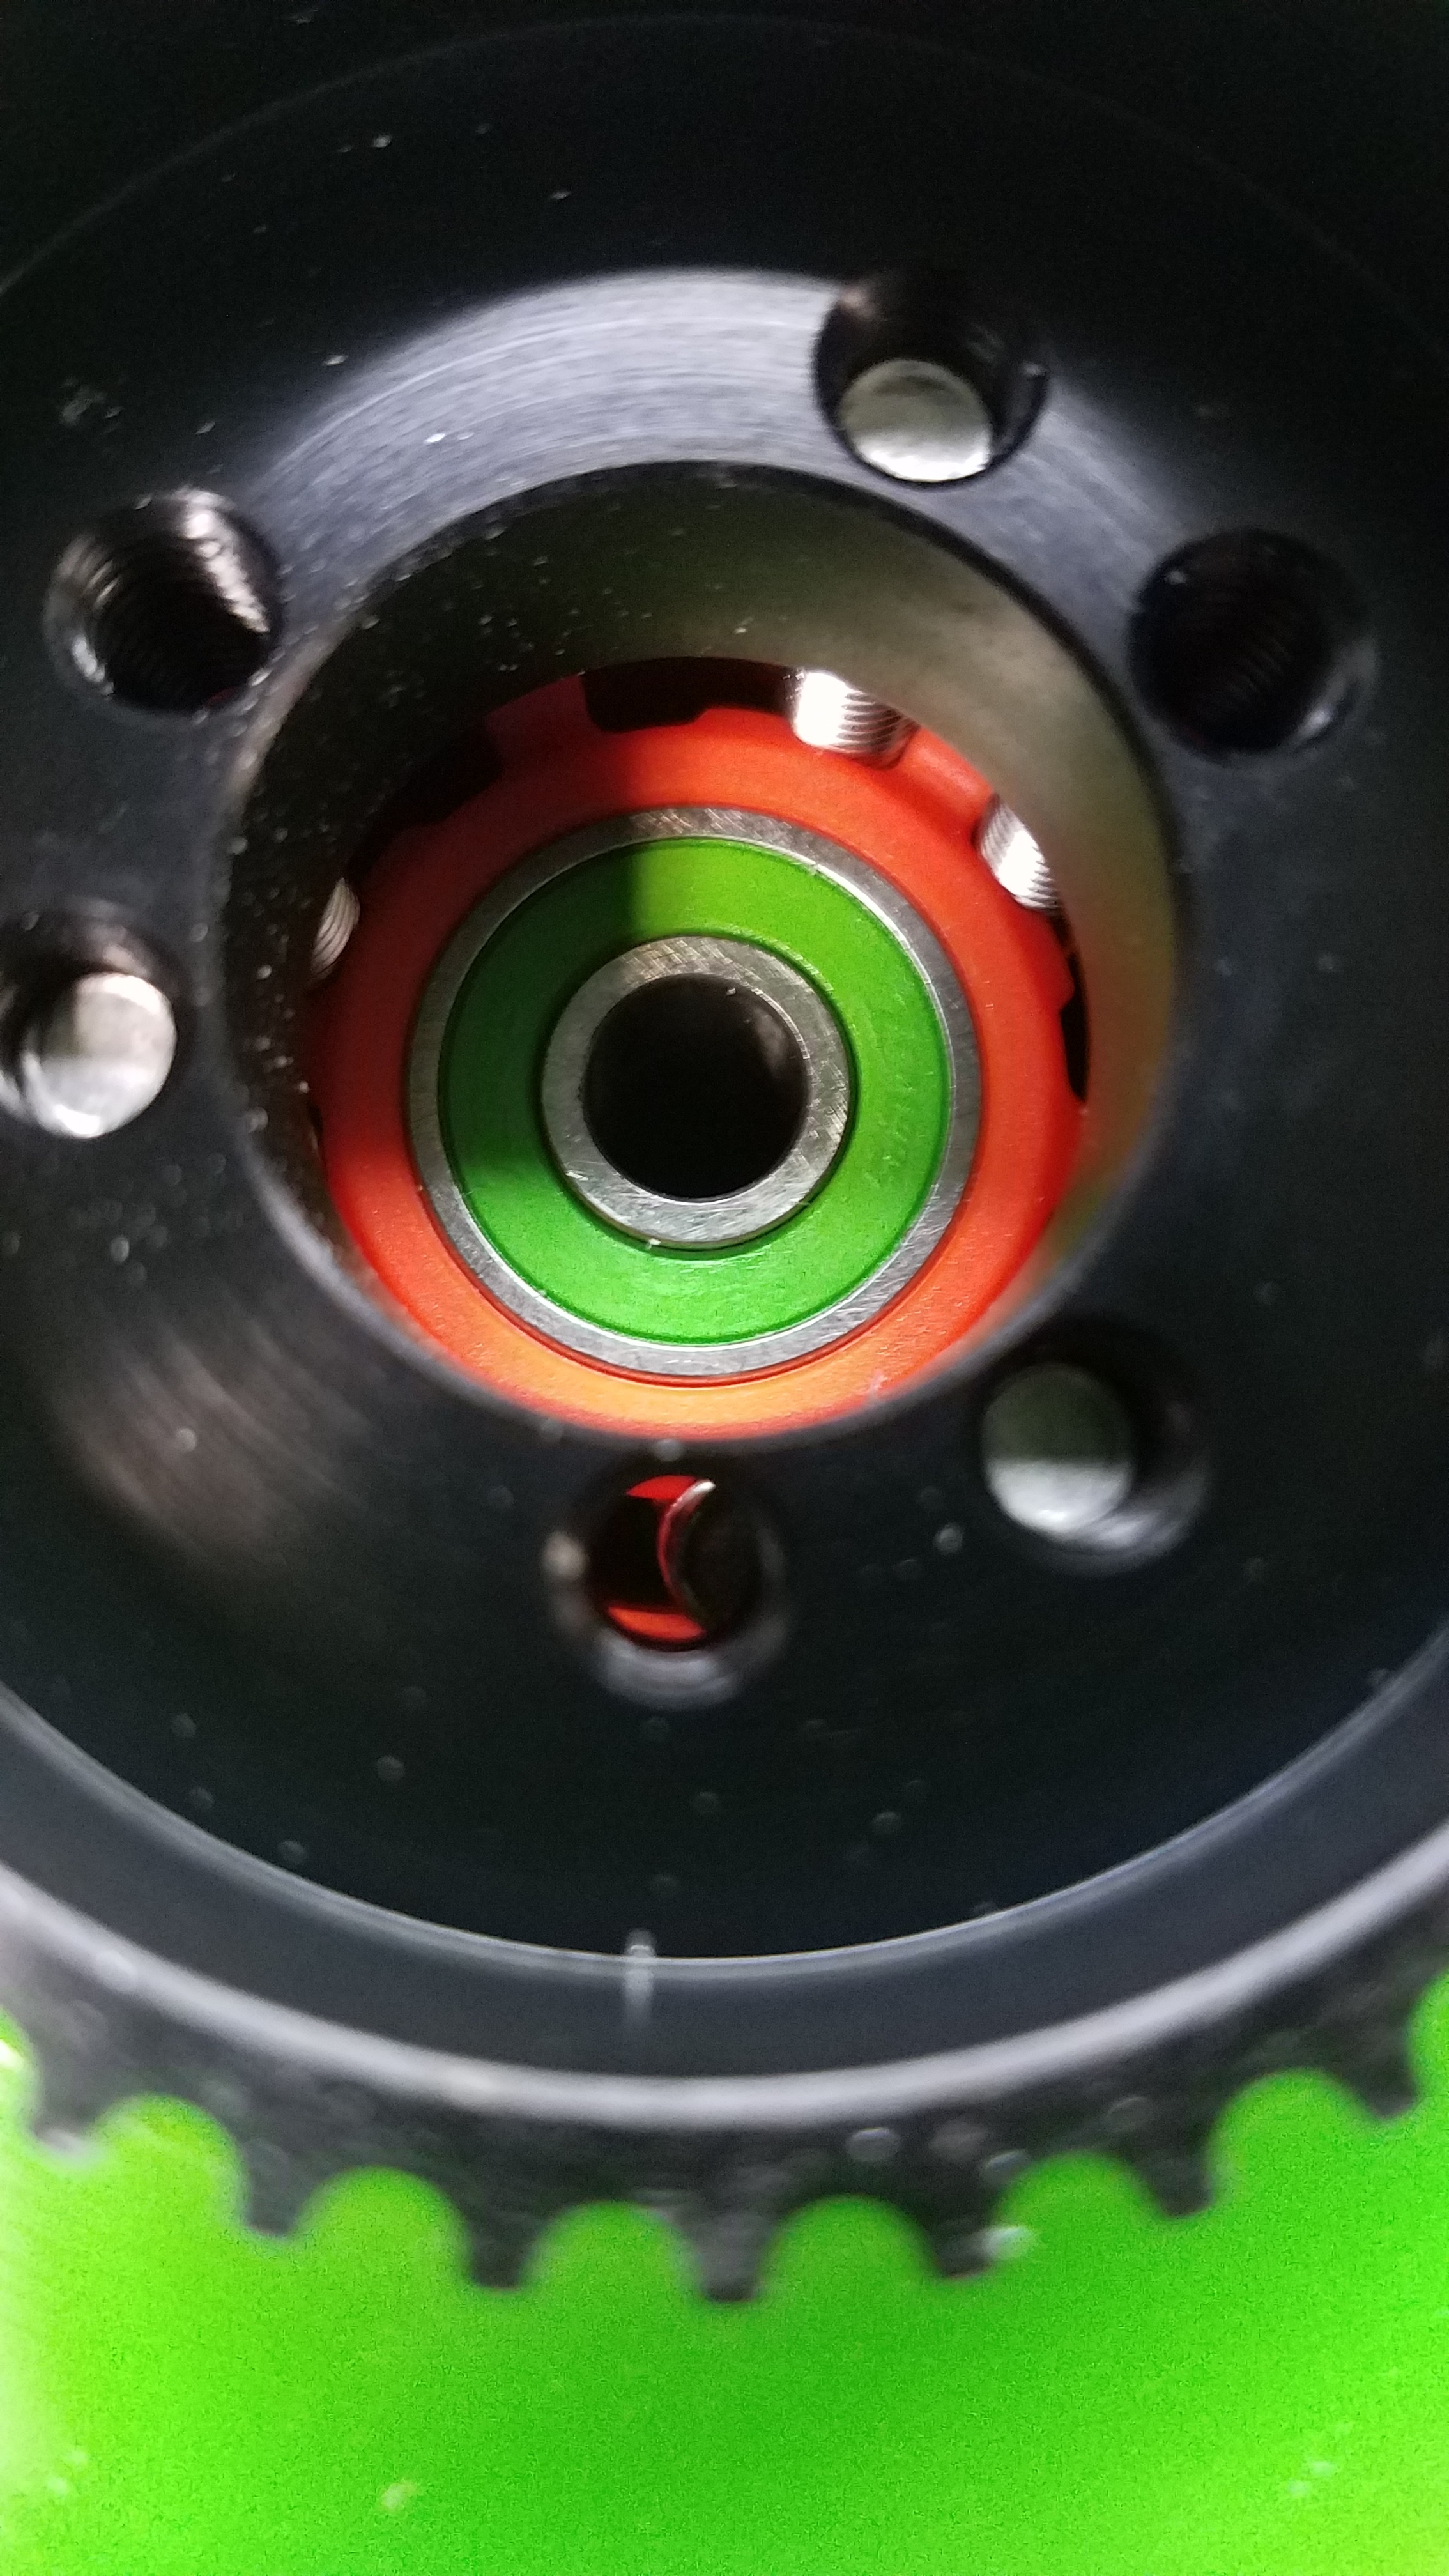
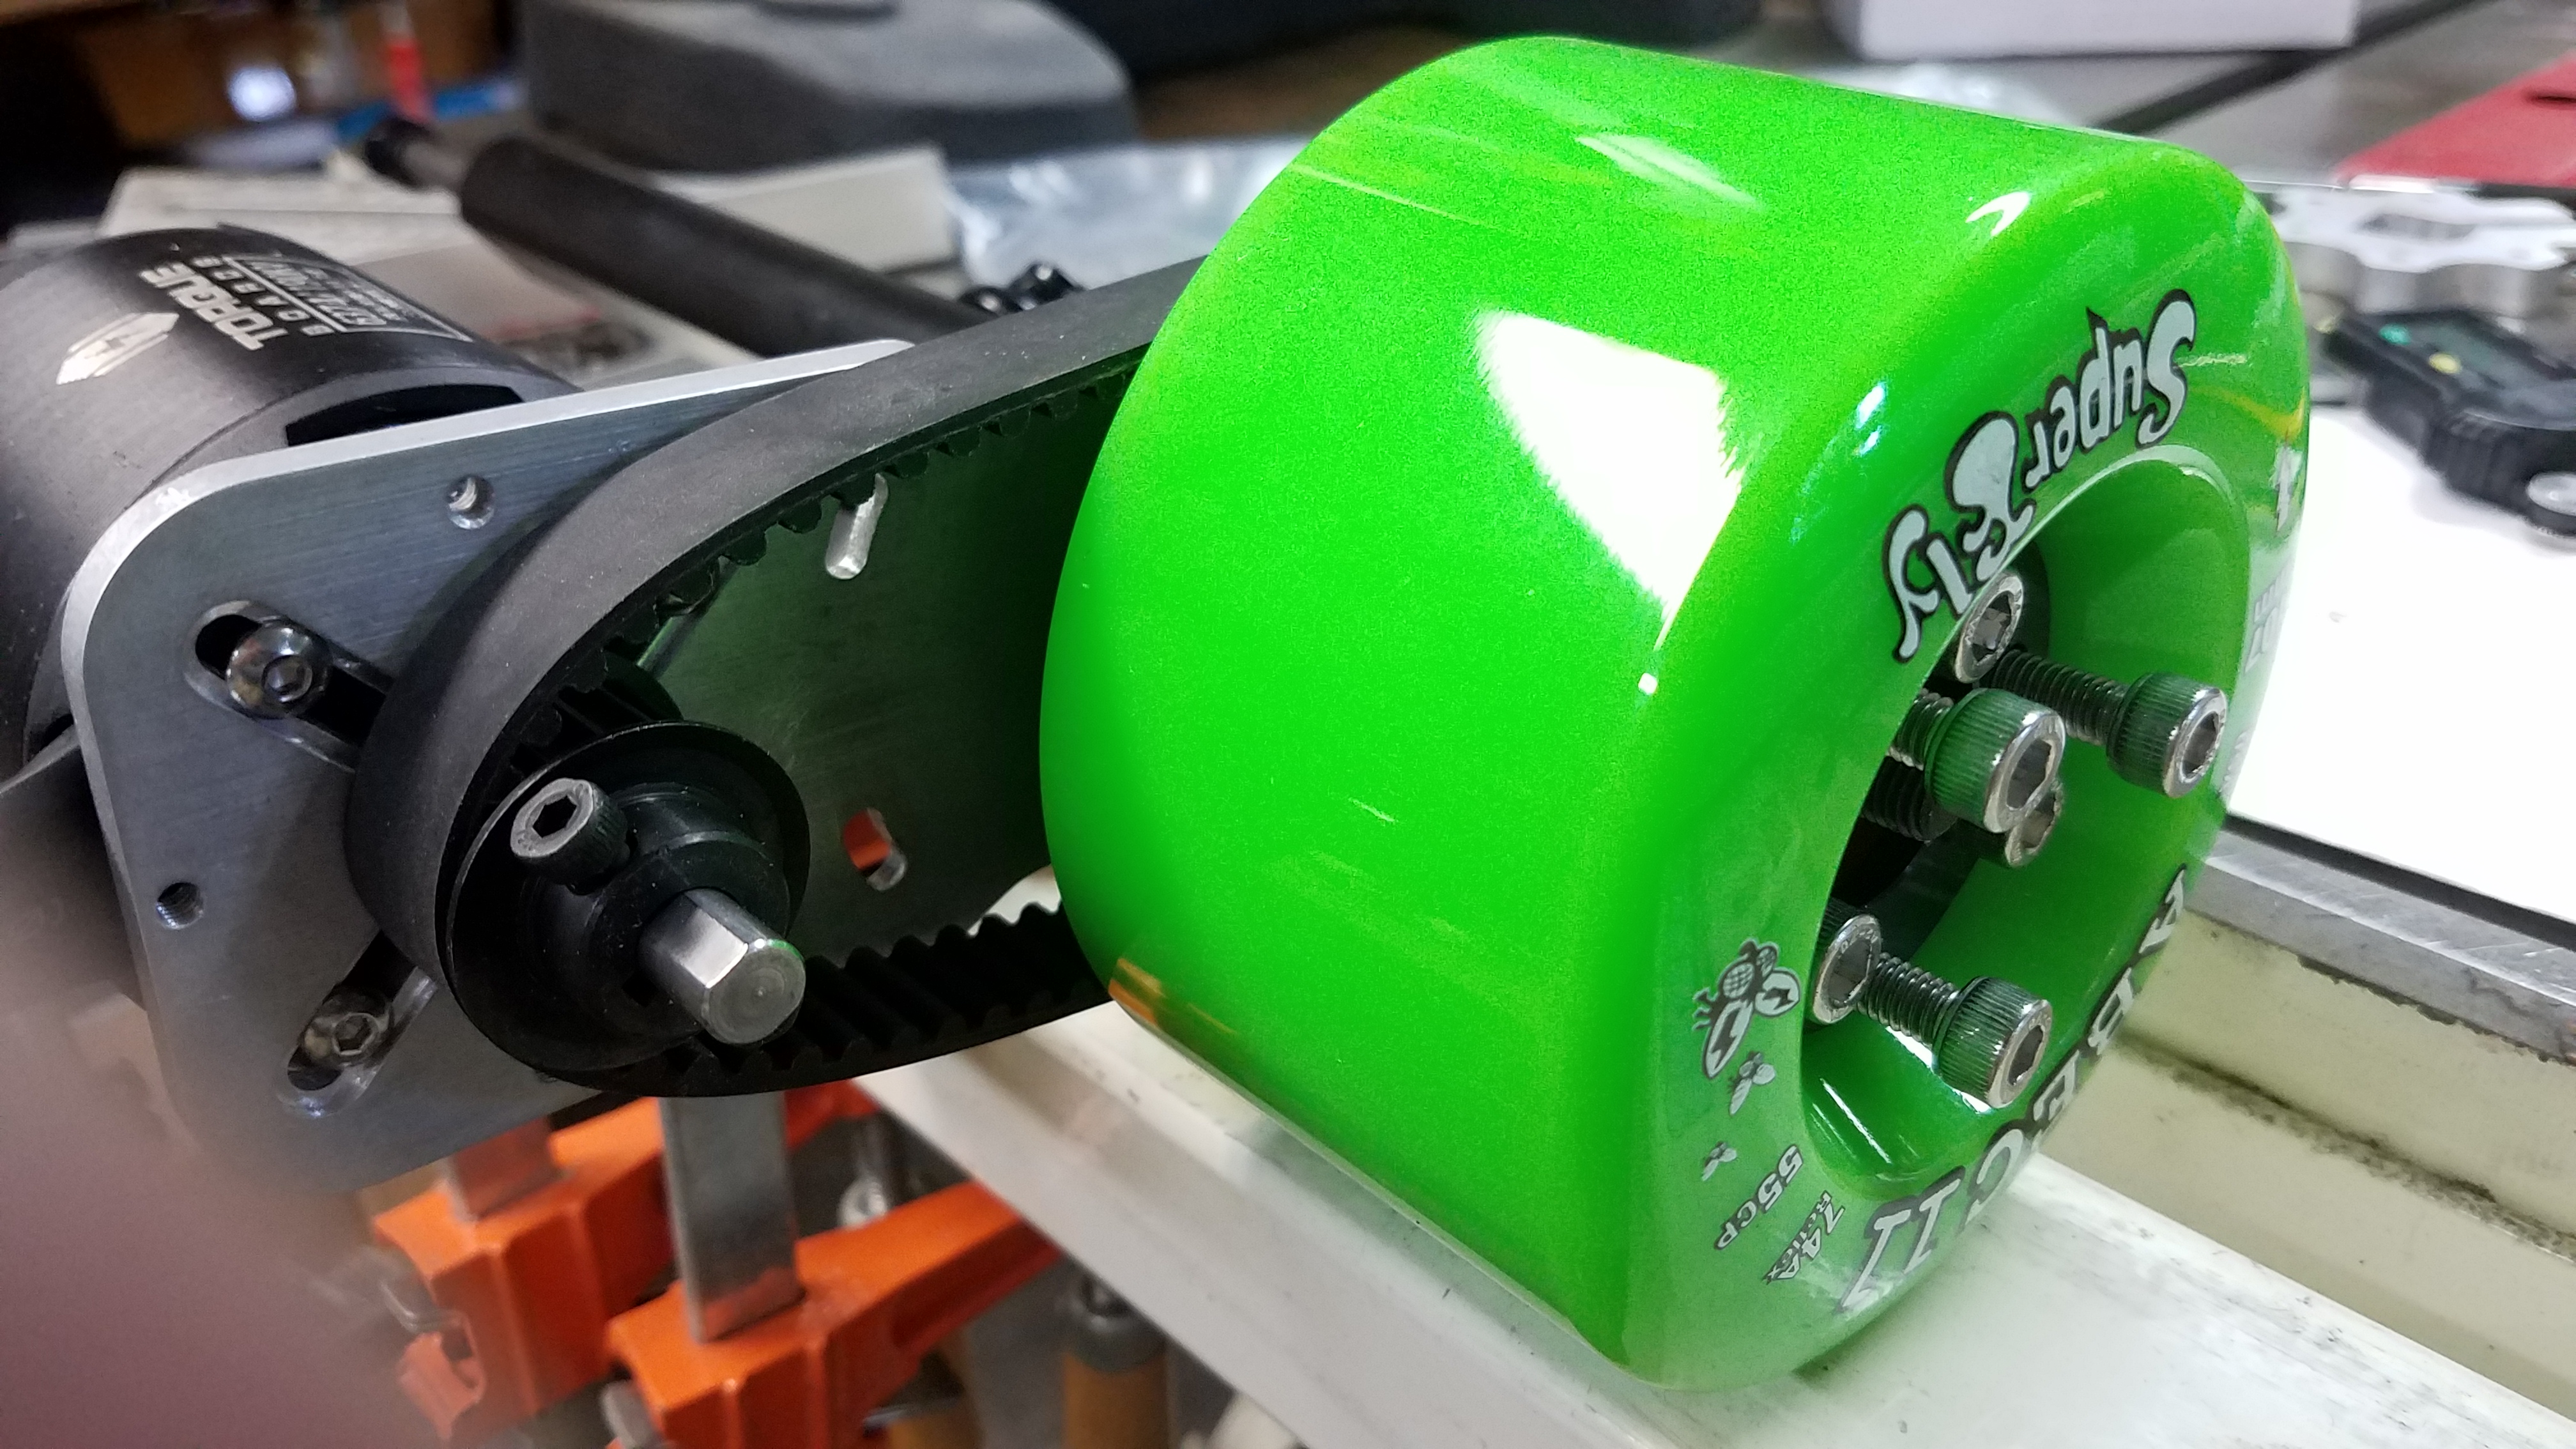
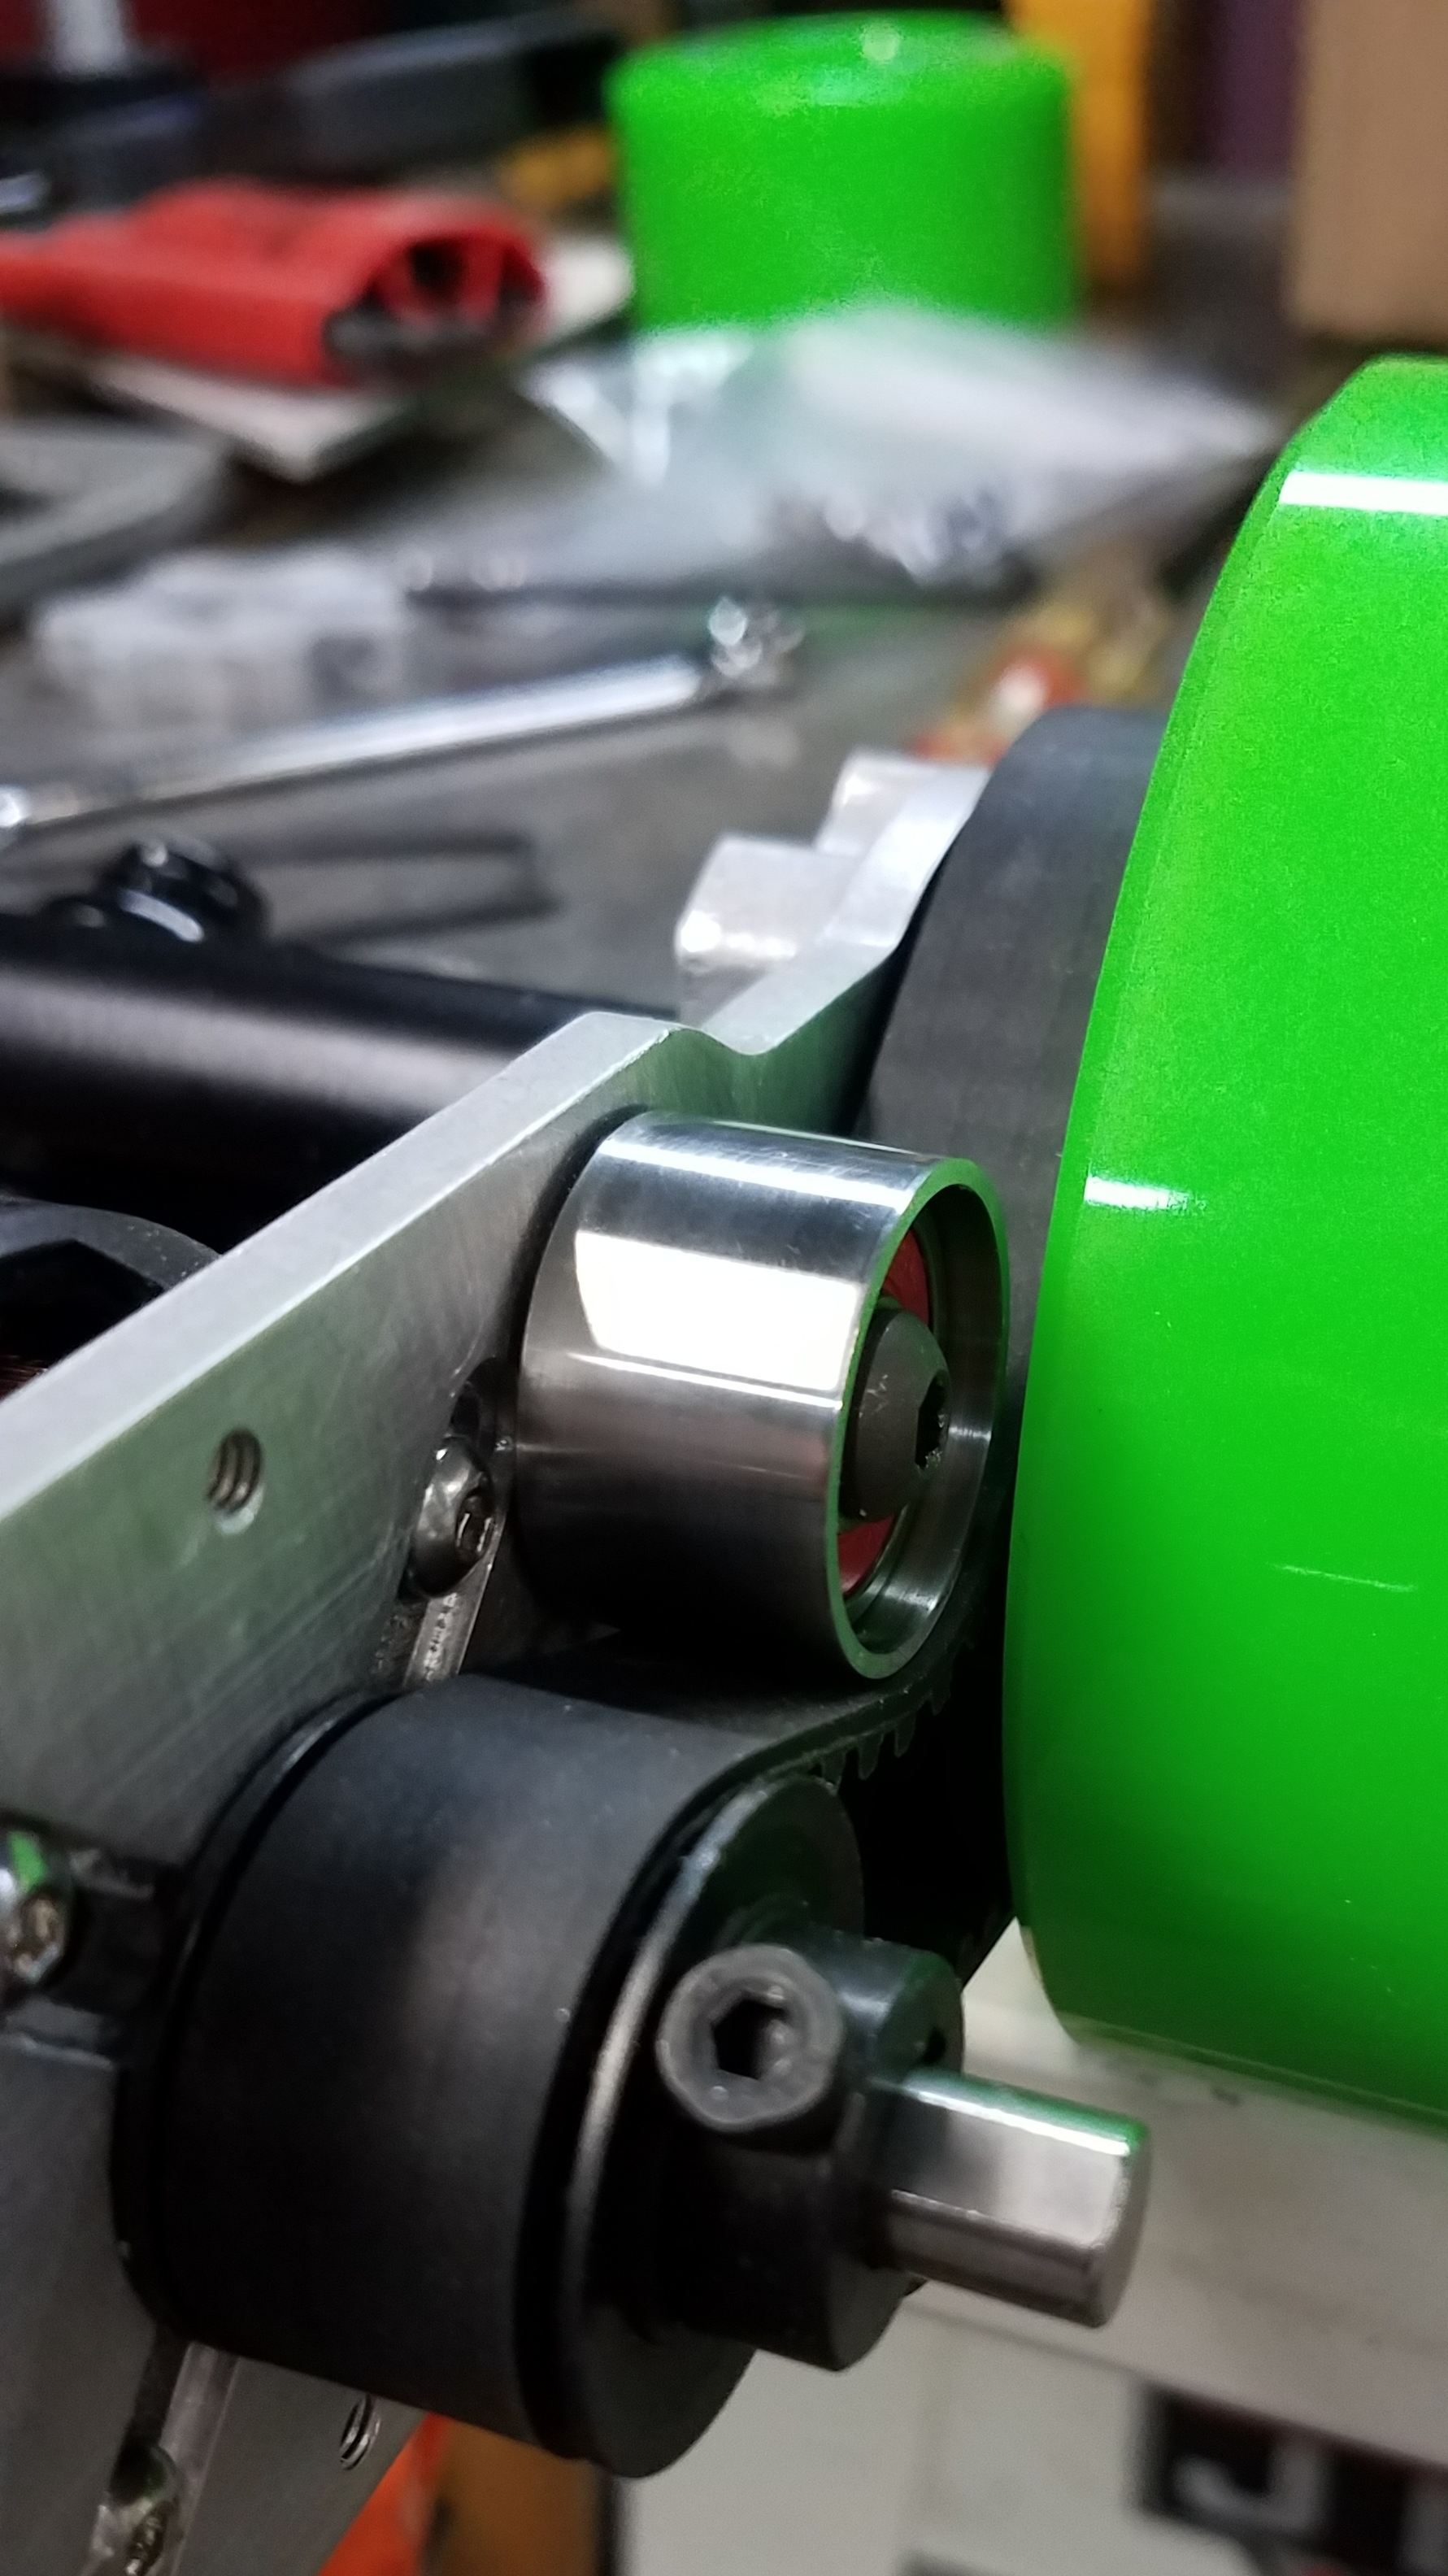
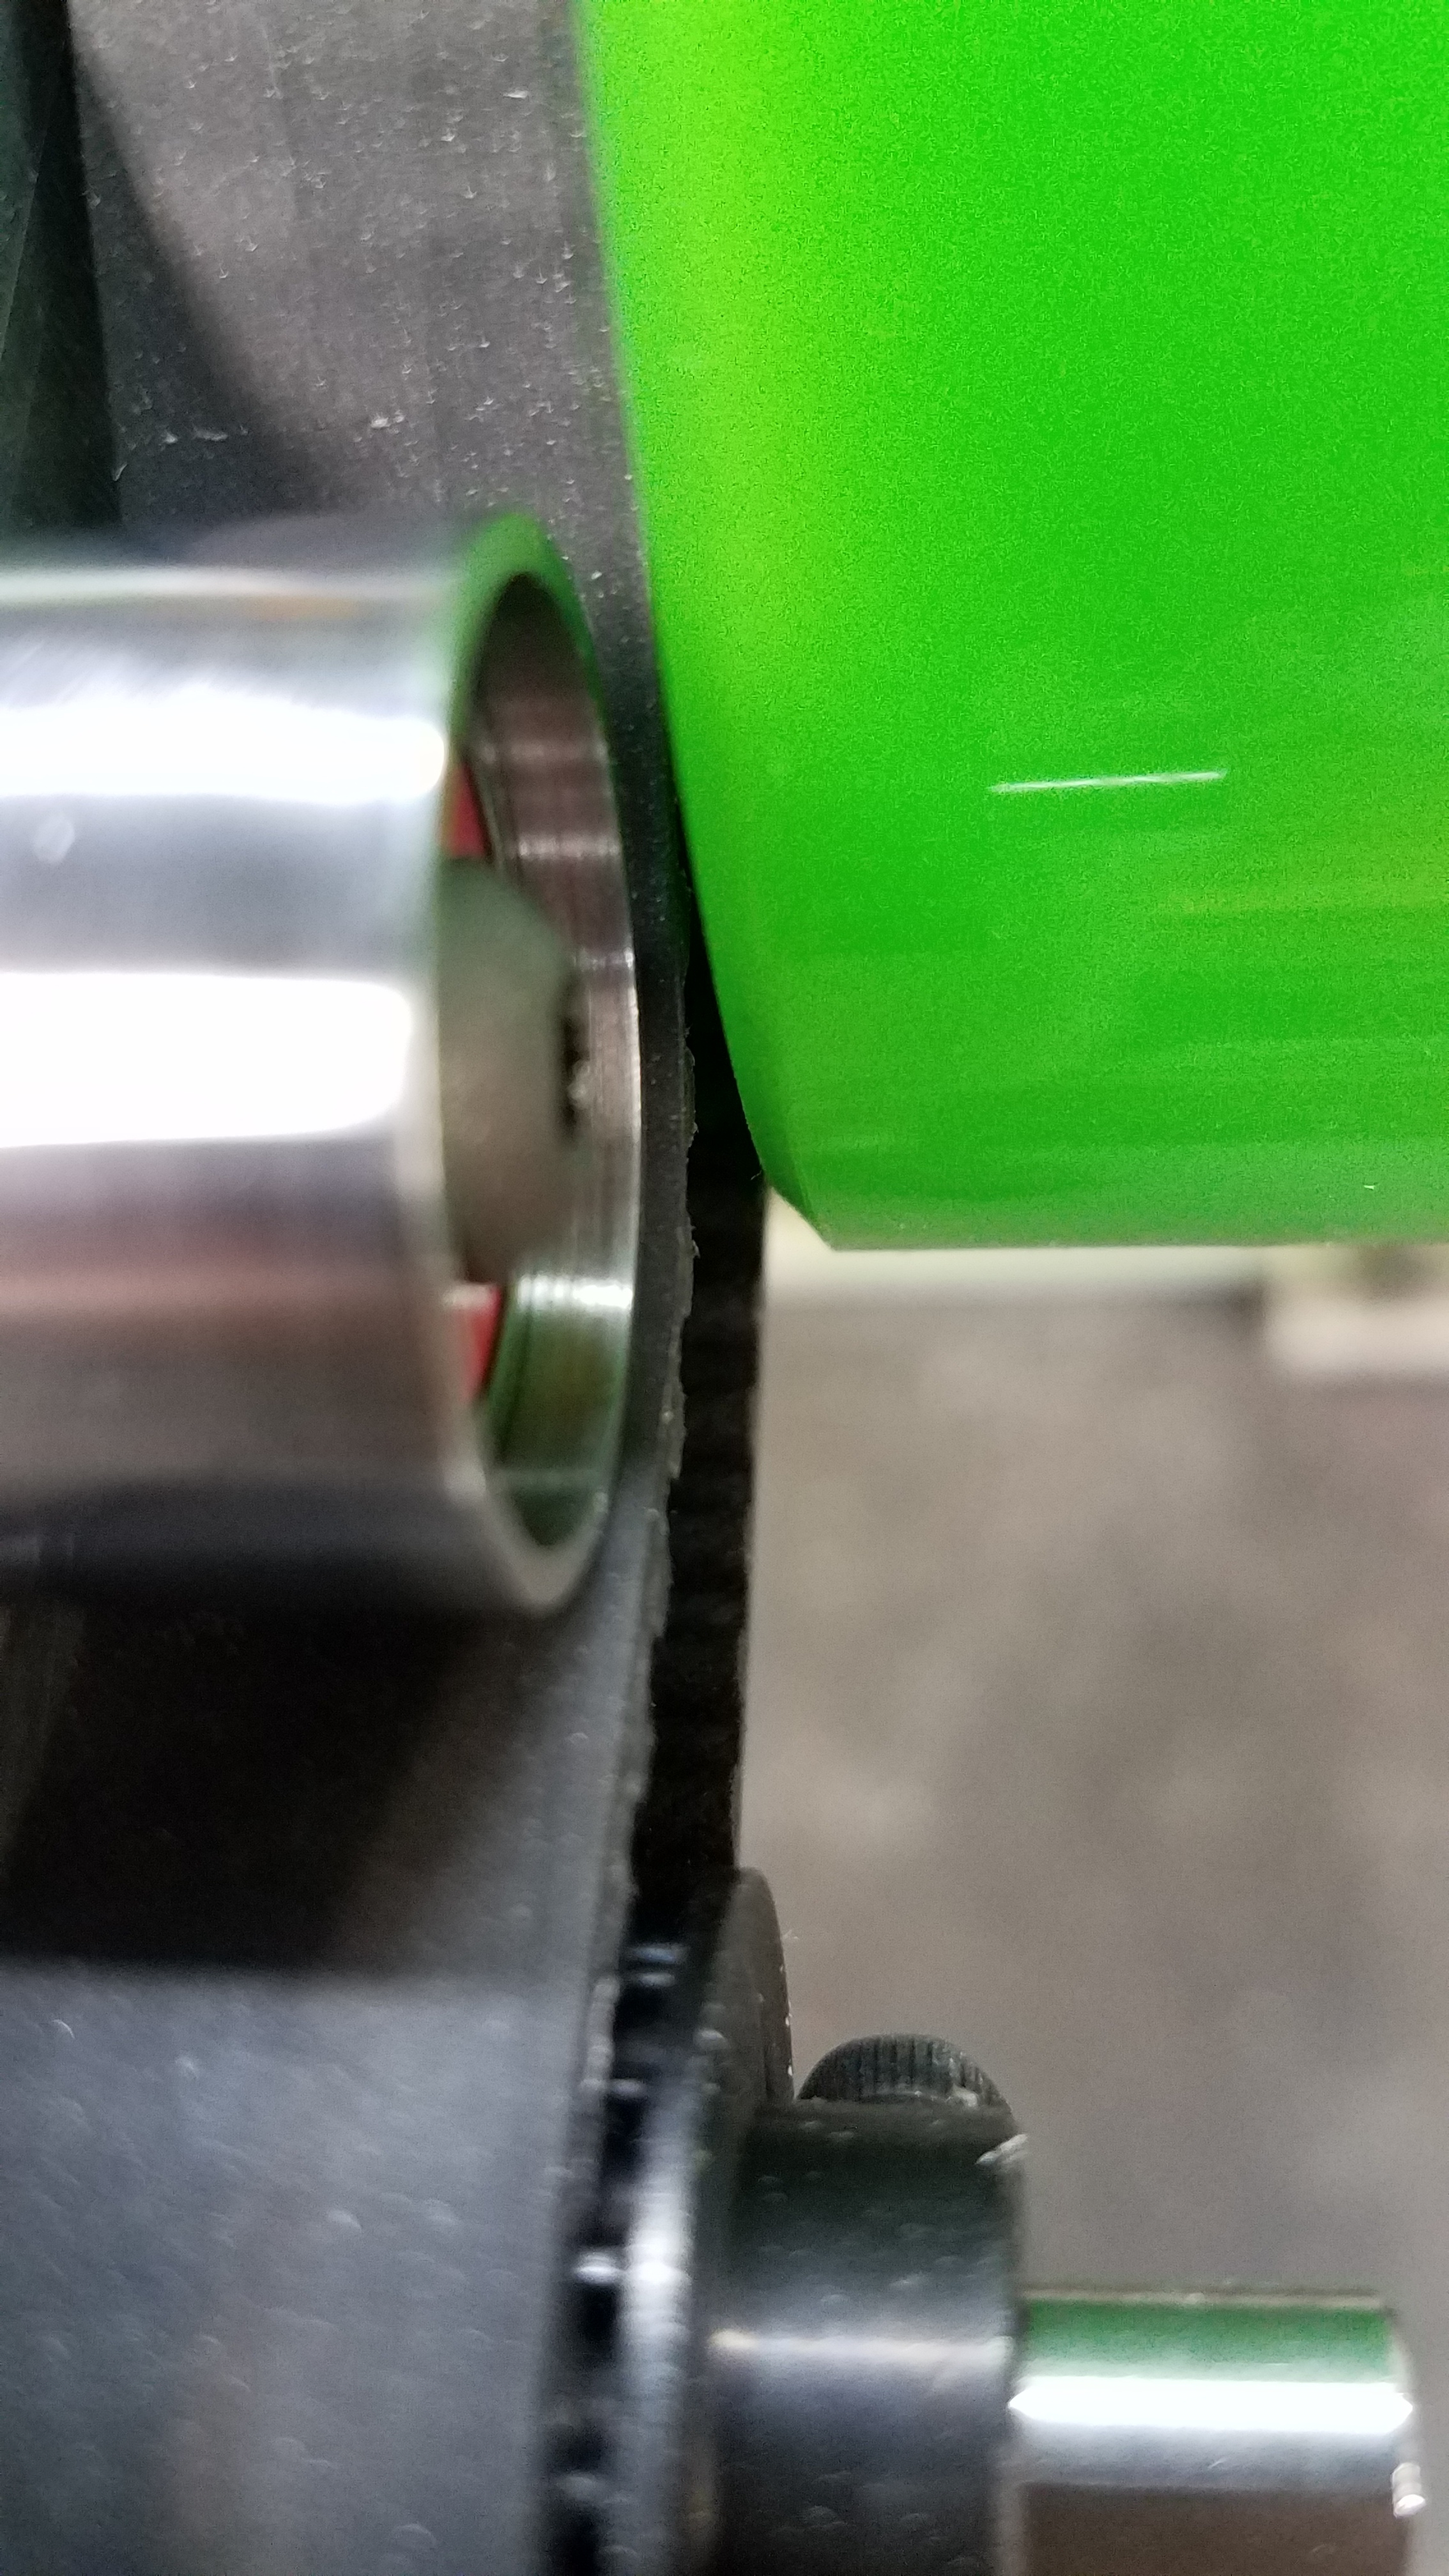
  • Wheels—107mm Abec11 SuperFlys. Got them in the mail yesterday. Holy guacamole they are huge! I’m really looking forward to the smooth ride they should provide though.
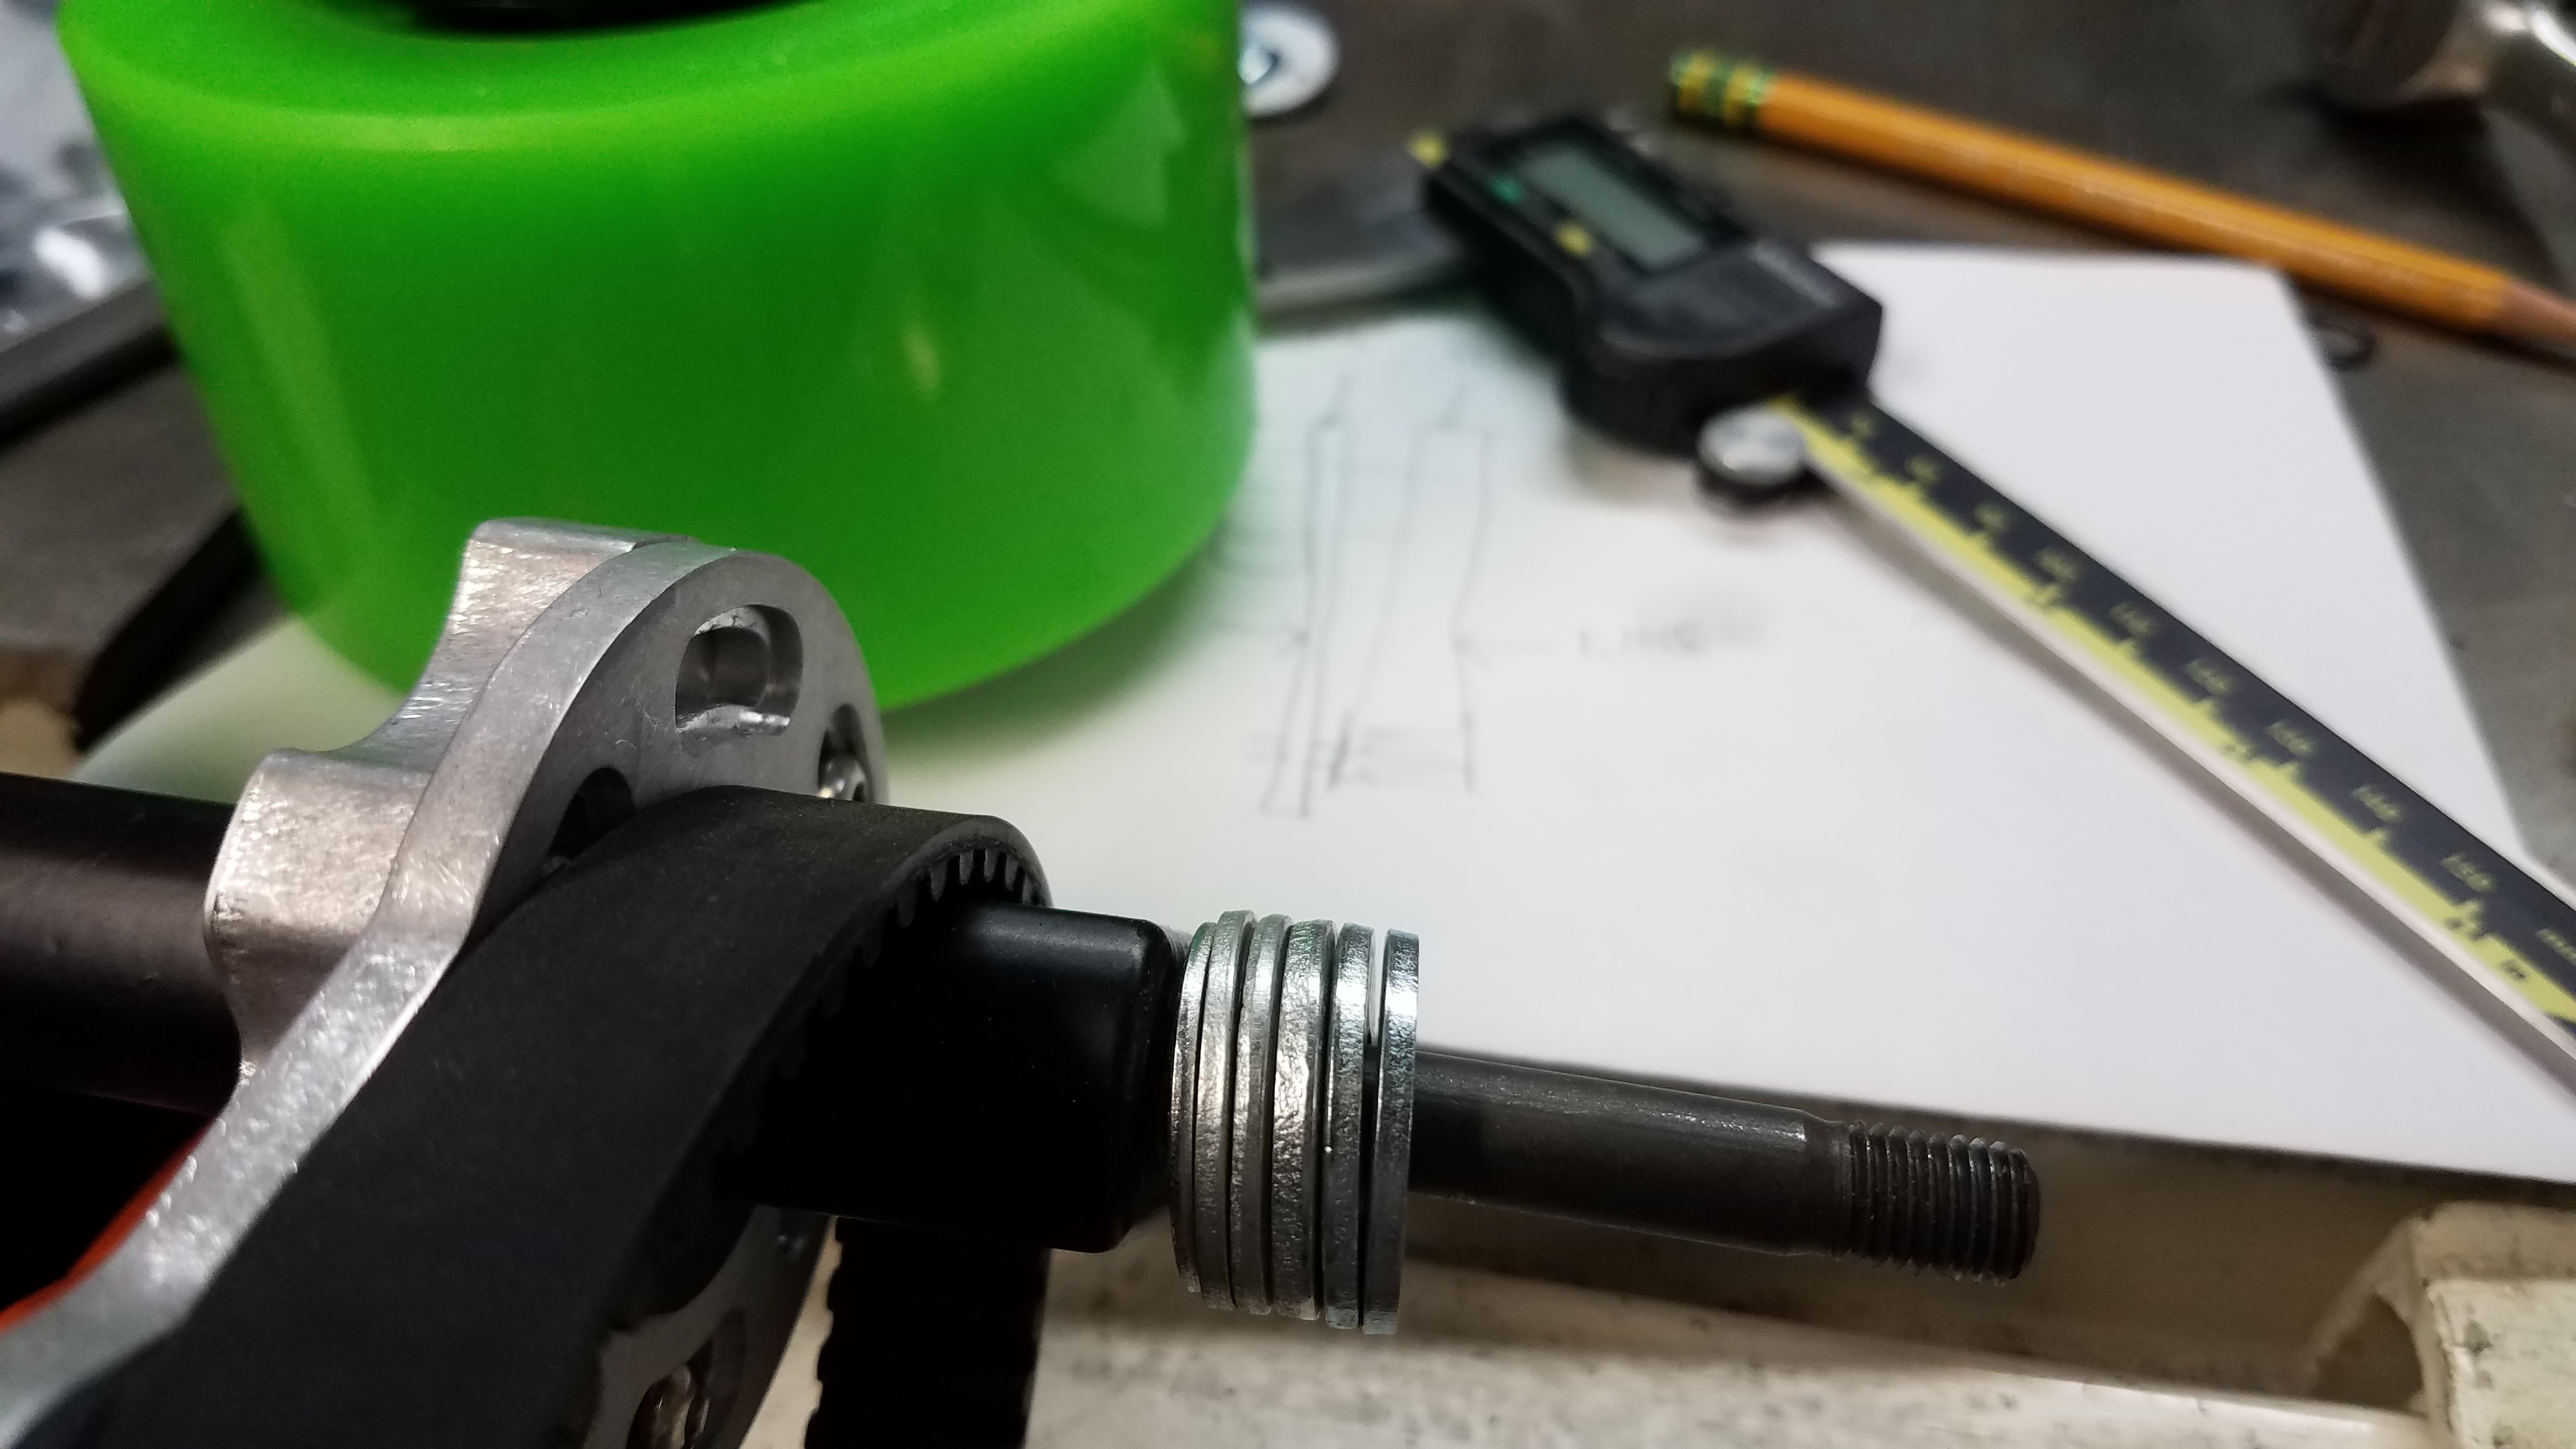
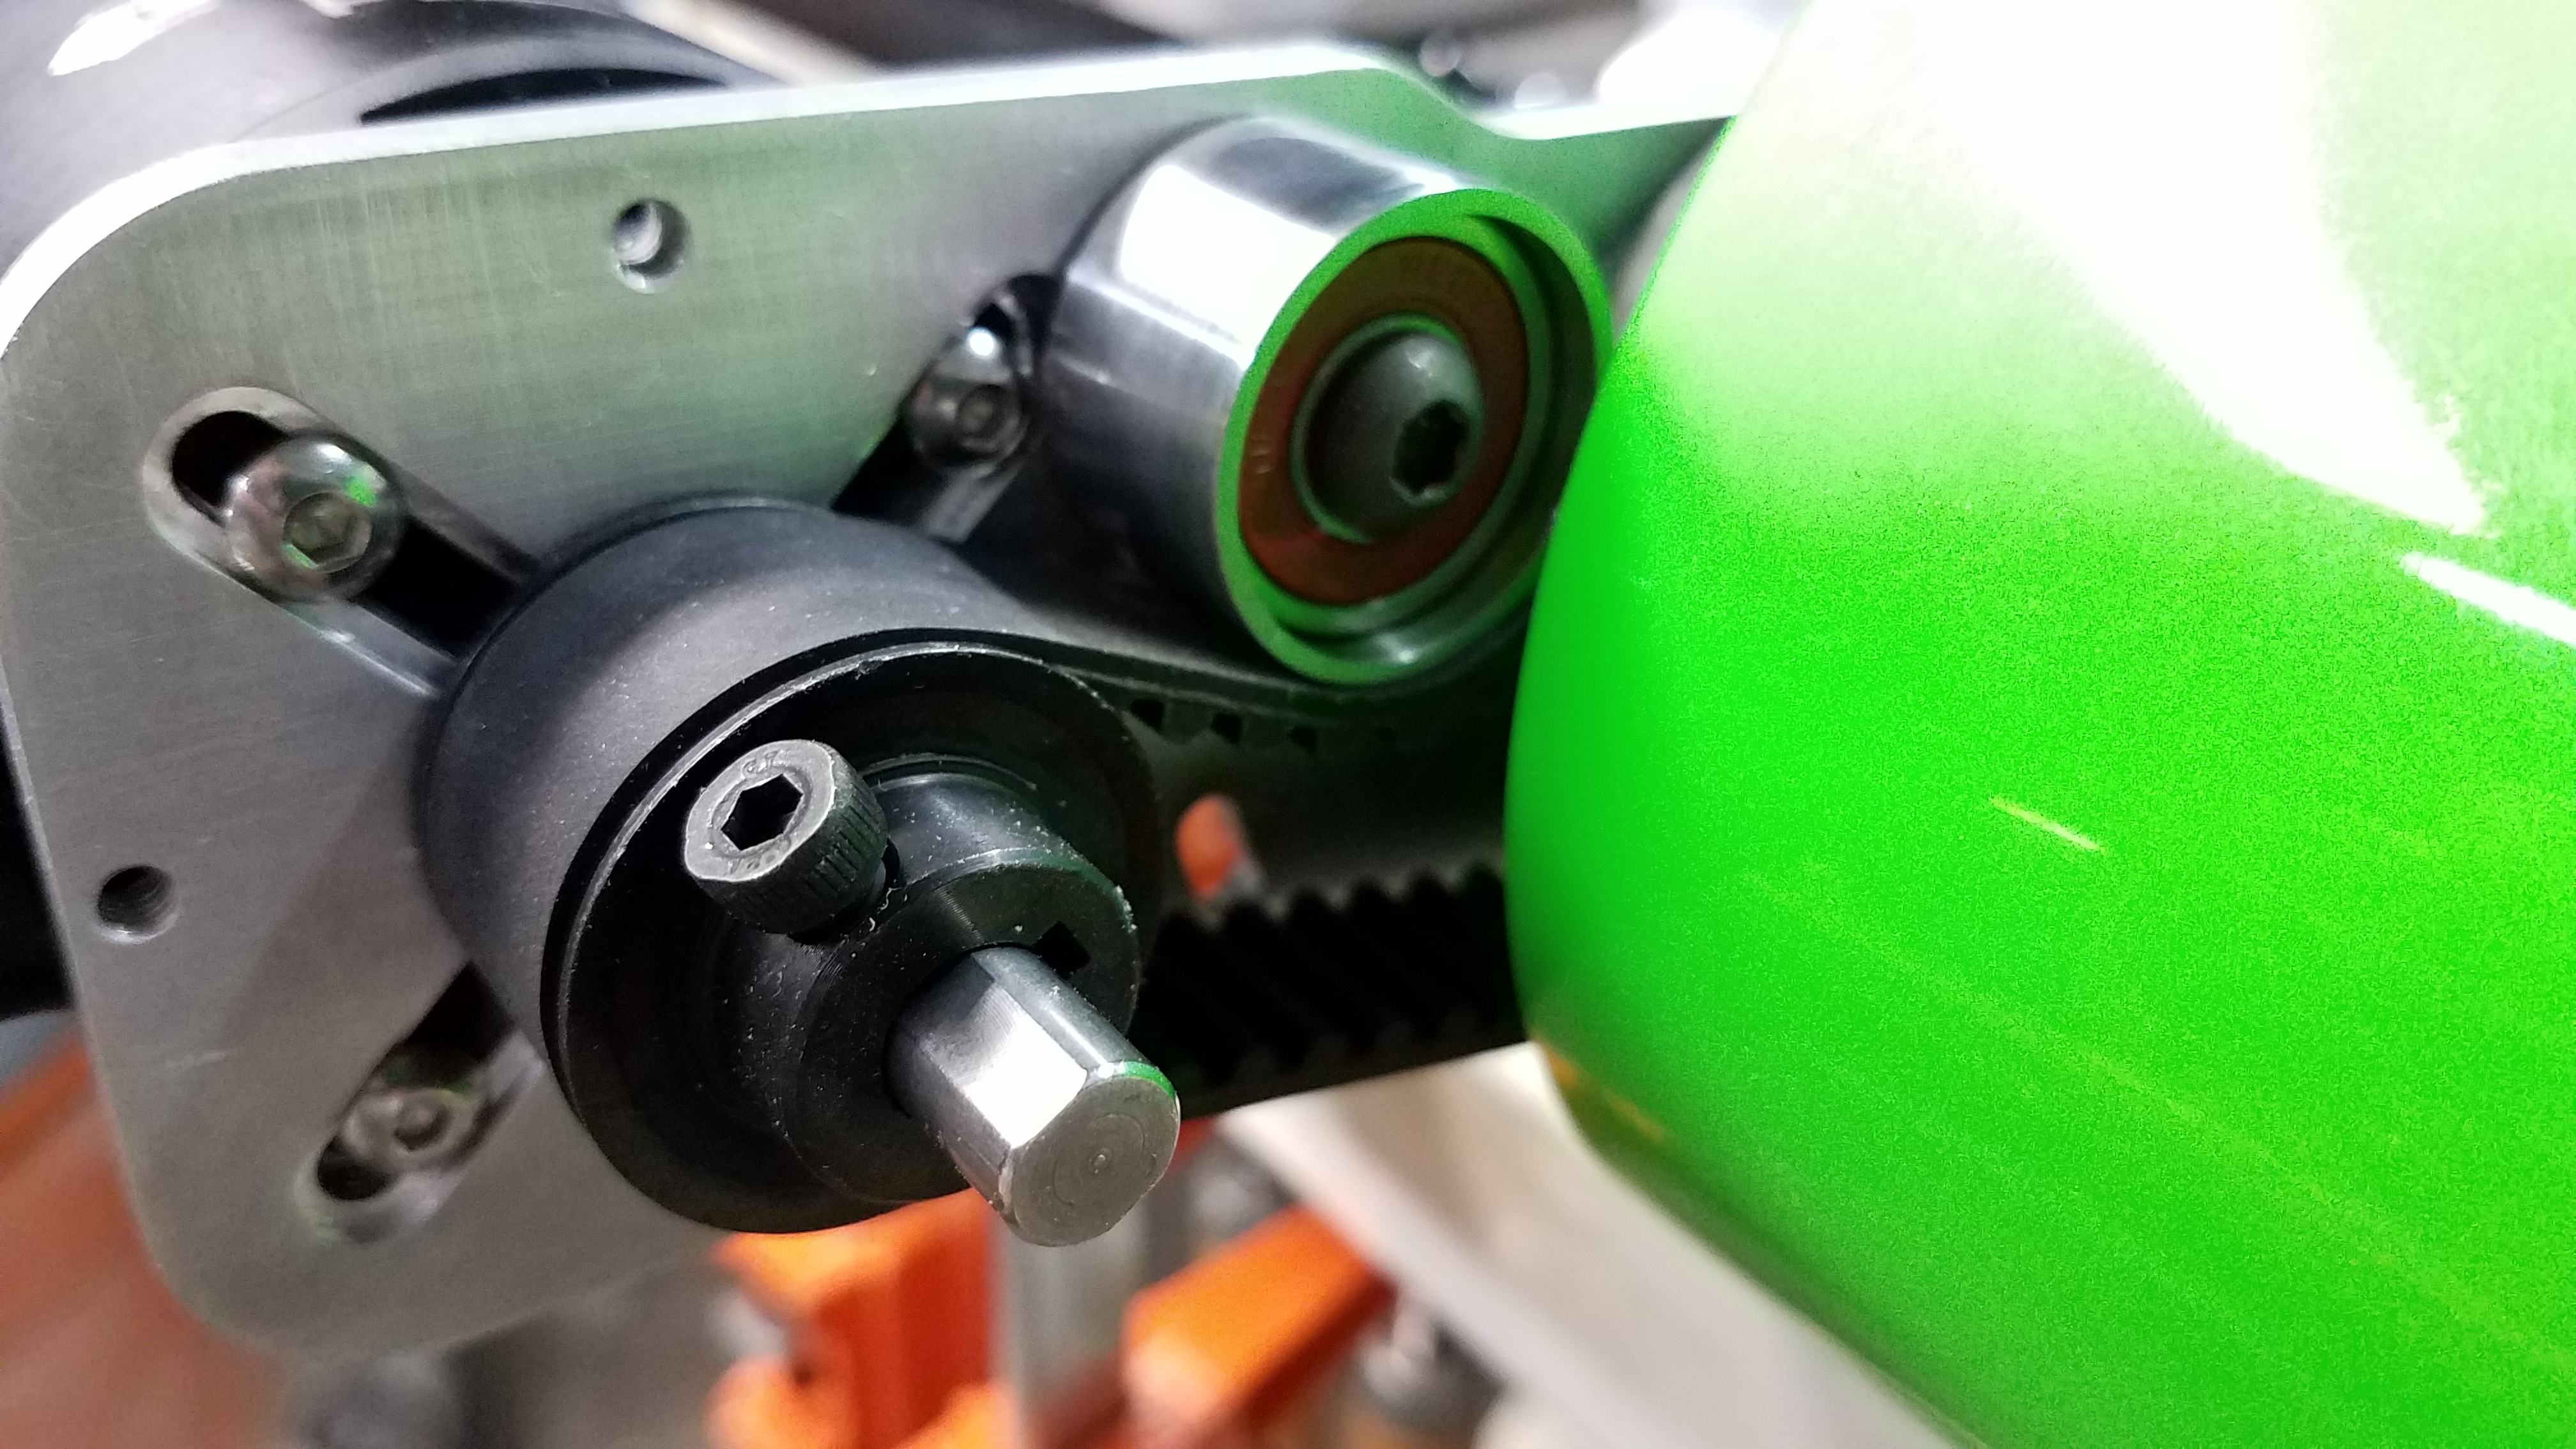
  • Motor mounts are from our very own Marc. I’m planning on making some minor modifications to them, but they look like great mounts.
  • Batteries—I’ll be using Sony VTC6 18650 batteries. They’re rated at 3Ah and 15 amps continuous, but 30 amps continuous until reaching 80° Celsius. I’m going to build individual 12S packs joined with multiple strips (4-5?) of pure nickel wire. 10 gauge silicone wires will come out of each pack with 5.5mm bullet connectors on the ends. I’ll build up multiple 12S packs each of which will be wrapped in heat shrink tubing so I can just plug ‘n’ play as many of them as I want. I’ll start out with 6, for a 12S6P pack. If I want more juice in the future, I can just build up more packs and plug them in. I would need to build a new cover, though. (Some say that 12S is a bit too high a voltage for a 190KV motor, but the DIYElectricSkateboards.com told me there are many people running their motors on 12S with great success. Also, I know some say you should build up P first, then S. However, there is also the other side who say S, then P, or that it doesn’t matter, so that’s my choice.)
  • No BMS.
  • For the bottom cover, I plan on making a mold and vacuum bagging carbon fiber.

Did I leave anything out? Probably, but I’ll post more as I get going. I’m also planning on putting videos of the build on YouTube when I’m done.

By the way, my big motivation for building this board is to tow a wagon around at Oshkosh (one of the biggest aviation events in the world, the entire last week of July). I figure I may go 20 miles in a day, or more—towing a wagon with my camera gear, drone, lawn chair, umbrella, etc., in it. Should be interesting.

Jay

8 Likes

Sounds like a neat build ! Looking forward to seeing the progress, and of course the finished beast !

:+1::+1:

2 Likes

We need pictures otherwise it’s like reading porn! :crazy_face:

5 Likes

Okay. I don’t want anyone merely reading porn. That would be torture. Here are a couple pics. The brown paper contains carbon fiber cloth. The roll on the right is carbon fiber tow. Still waiting on motor mounts, batteries, and various and sundry other items.

20180615_141035

I’m pretty self-conscious, so enjoy this rare photo of me.

20180615_141158

Jay

20 Likes

Just picked up bearings. The guy at the skateboard shop didn’t try to sell me the Bones Ceramics. He sold me ones he uses and likes himself. I couldn’t believe how cheap they were ($14). He doesn’t know how the company makes money on these, but he really likes them. I have nothing to lose. If I don’t like them, I can spend more. However, it’s almost a certainty I wouldn’t know the difference, as long as they’re not junk. And they match!

20180615_153437

Jay

6 Likes

i think you will be the show.

i was looking at the event’s website and you can fly in…unfortunately not allowing for any diy vehicles.

1 Like

stoked man, this should be a sick build like the zealous :smiley:

1 Like

I use zealous on all my builds. Best bearings ever period.

5 Likes

Like how you match the bearing colour to the 'thane.

Naturally my bearings are black/gold :joy:

1 Like

Zealous bearings (the ones you have) are pretty great in that they are extremely durable and remain quiet even after a lot of use. A majority of DH longboarders in my area ride on Zealous.

I wouldn’t fall into the trap of believing more expensive bearings = more speed. In fact I’ve seen/had ceramic bearings powder up after hitting a significant upset in the road. They’re just not worth it.

4 Likes

The motor mounts arrived today. Pretty quick shipping. Less than a week since ordered. I have a few comments.

First, they look solid and seem well designed. I wouldn’t discourage anyone from buying them. However, there are a couple things that I think are worth mentioning.

First, I’m going to have them anodized. As they come, the finish is not high quality. They’re pretty raw. In fact, I would say their appearance isn’t professional (not machine work, just finish). In my opinion, they need a fair amount of elbow grease (sanding with multiple grits—enough to make me sweat) to prepare them for anodizing. No doubt if Marc offered them anodized, the hand prep plus anodizing would increase the cost. I’m sure Marc knows the market and is selling them for what he can.

In this first picture, you can see the difference in finish between how they came and after some cleanup on my part.

DSC02820

Second, when I first handled the mounts, one of the idlers wiggled around a little bit. It felt “soft.” I suspected a soft bushing (plastic or rubber) and that’s what I found (see picture below). I don’t believe that’s optimal, but I don’t really care that much, because I intend to modify the idlers substantially, although I’m still working out the details. Again, a different kind of bushing would probably cost more, so it’s a trade off.

DSC02823

So, these are just some thoughts, not a serious criticism.

Jay

2 Likes

Did some setup with a wheel, motor, belt, motor mount, and truck. Just trying to figure out spacing, if I’ll need wheel spacers, and dimensions for my replacement idler pulleys and the bushings/spacers they’ll use.

The hubs on the SuperFlys don’t allow the bolts to go through correctly, so I had to open up those areas slightly with a drill. 20180617_163134

You can see the misalignment in this photo. 20180617_163153

Everything is in place and adjusted to be square. When I turn the wheel by hand, the belt seems to be in a nice, neutral position. I’m happy with that spacing. 20180617_174556

20180617_174627

20180617_165911

I actually removed a couple more of these washers. I’ll turn spacers of precise dimensions on the lathe. 20180617_171458

This is a sneak peek at one of my replacement idler pulleys. Each motor mount will use only one. The bearing is one of the ones that came with the motor mounts and which acted as the idler pulleys themselves. If they turn out to be of poor quality, they’ll be easy to replace. There are a few more upgraded components involved which I will show in a subsequent post. Idler%20Pulley

2 Likes

8mm is just a hair under .315". However, a .319" gage pin fits about half way into the bearings that came with the motor mounts. Then it would hang. So, the IDs of these bearings is oversize and of very poor finish. These bearings are junk. 20180620_202744

So, I picked up a pack of Bones Reds. 20180620_202858

A .315" gage pin wouldn’t fit (barely), but a .314" pin fits nicely, just as expected. The bores are very consistent on the Bones bearings. Smooth and precise, unlike the others. 20180620_202834

I’m still doing some tuning, but I think my idler is going to work nicely. I’ll be using only one per belt. I think two are unnecessary. It will be mounted on the bottom, so as to avoid the force imposed during acceleration. 20180620_202814

These are the spacers which will go on the axles, used to get the motors moved outboard slightly. InnerSpacers

Here’s the first mounting of the new idler and the spacer. I had to open up the slot in the plate for the 6mm bolt of my new idler. Just checking alignment of everything. Although the spacer may seem small, remember that it must come into contact only with the inner bearing race. 20180620_194238

Looking pretty good. 20180620_195751

I like it. 20180620_203110

Here, you can see that the outer edge of the idler doesn’t quite come to the edge of the belt. I’ll need to make another bushing/spacer for the idler, with the spacer portion of it being maybe .020" to .030" wider to get better alignment on the belt. 20180620_195851

Here’s the first bushing/spacer I made for the new idler. The scrapes on the upper part (which is the bushing) are from the bad fit inside one of the old bearings. I need to increase the lateral dimension of the lower part to push the idler out a hair farther to achieve better alignment with the belt. BushingSpacer

Phase one of the deck, consisting of two layers of carbon fiber tow and three pieces of 1/8" Baltic Birch. 20180620_204307

Here you can see the 5 layers. Next will be carbon fiber cloth on the outer surfaces followed by wood veneer. Clear coat on top of that. 20180620_204318

5 Likes

So, after trying to cut veneer from a board of Purpleheart on my tiny bandsaw, I gave up on that idea. No way it was gonna work. I bought a couple packs of small pieces of Padouk (more along the lines of the wood I wanted, anyway) and will glue them together into sheets for epoxying onto the board. Ideally, I would’ve gotten a single sheet for each side, but I couldn’t find that size and wasn’t willing to spring for a 4’ x 8’ sheet of veneer.

20180629_084131

The hardware that came with the motor mounts was button head cap screws which use a smaller and shallower head, making them easier to strip and more difficult to get them tight. I’m going to replace them with socket head cap screws which use a larger Allen wrench and have a deeper head. 20180625_184138

Done with the core of the layup. Just need to assemble the veneer into sheets large enough to cover the board and do one more vacuum bagging. This board is about 7/16" thick and should be just over 1/2" after the veneer is applied. Attach4928_20180628_182611

5 Likes

Looking sharp! Nice build :slight_smile:

1 Like

Is that deck just completely flat or are my eyes not seeing it? Can you post a pic of the “curvature” of the board? This is looking good!!

1 Like

Your eyes are not deceiving you! :grinning: 
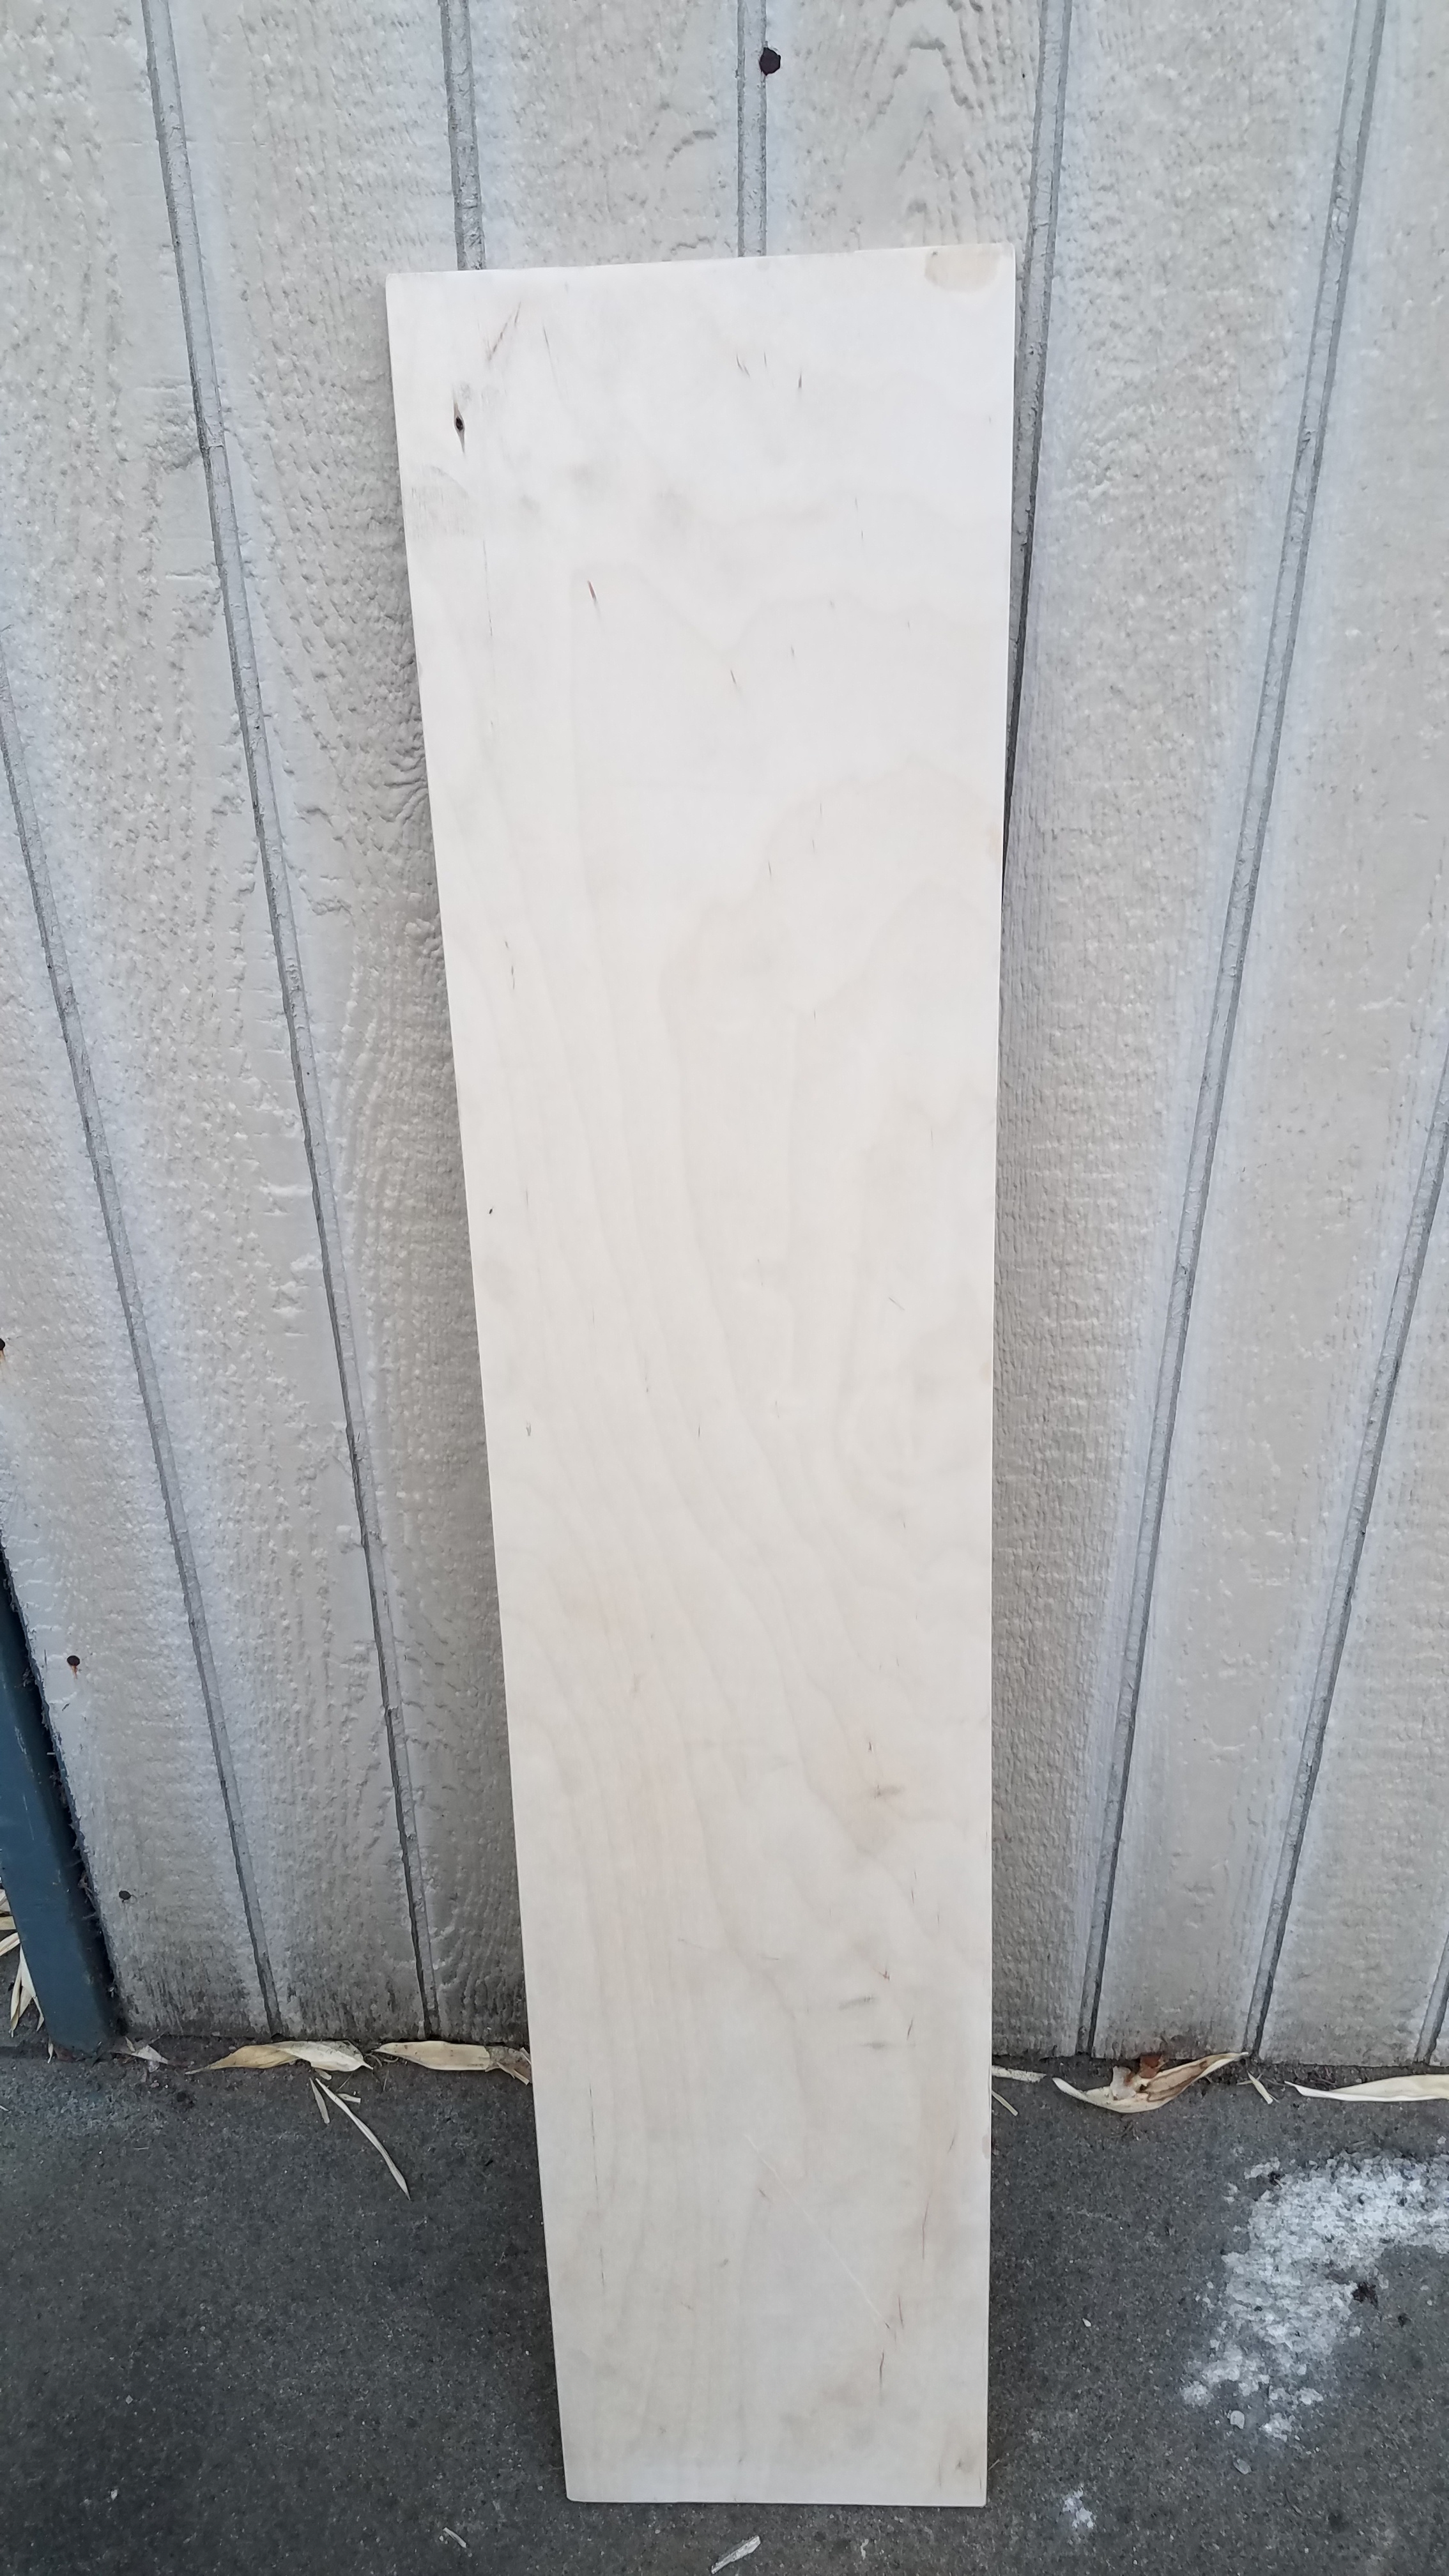
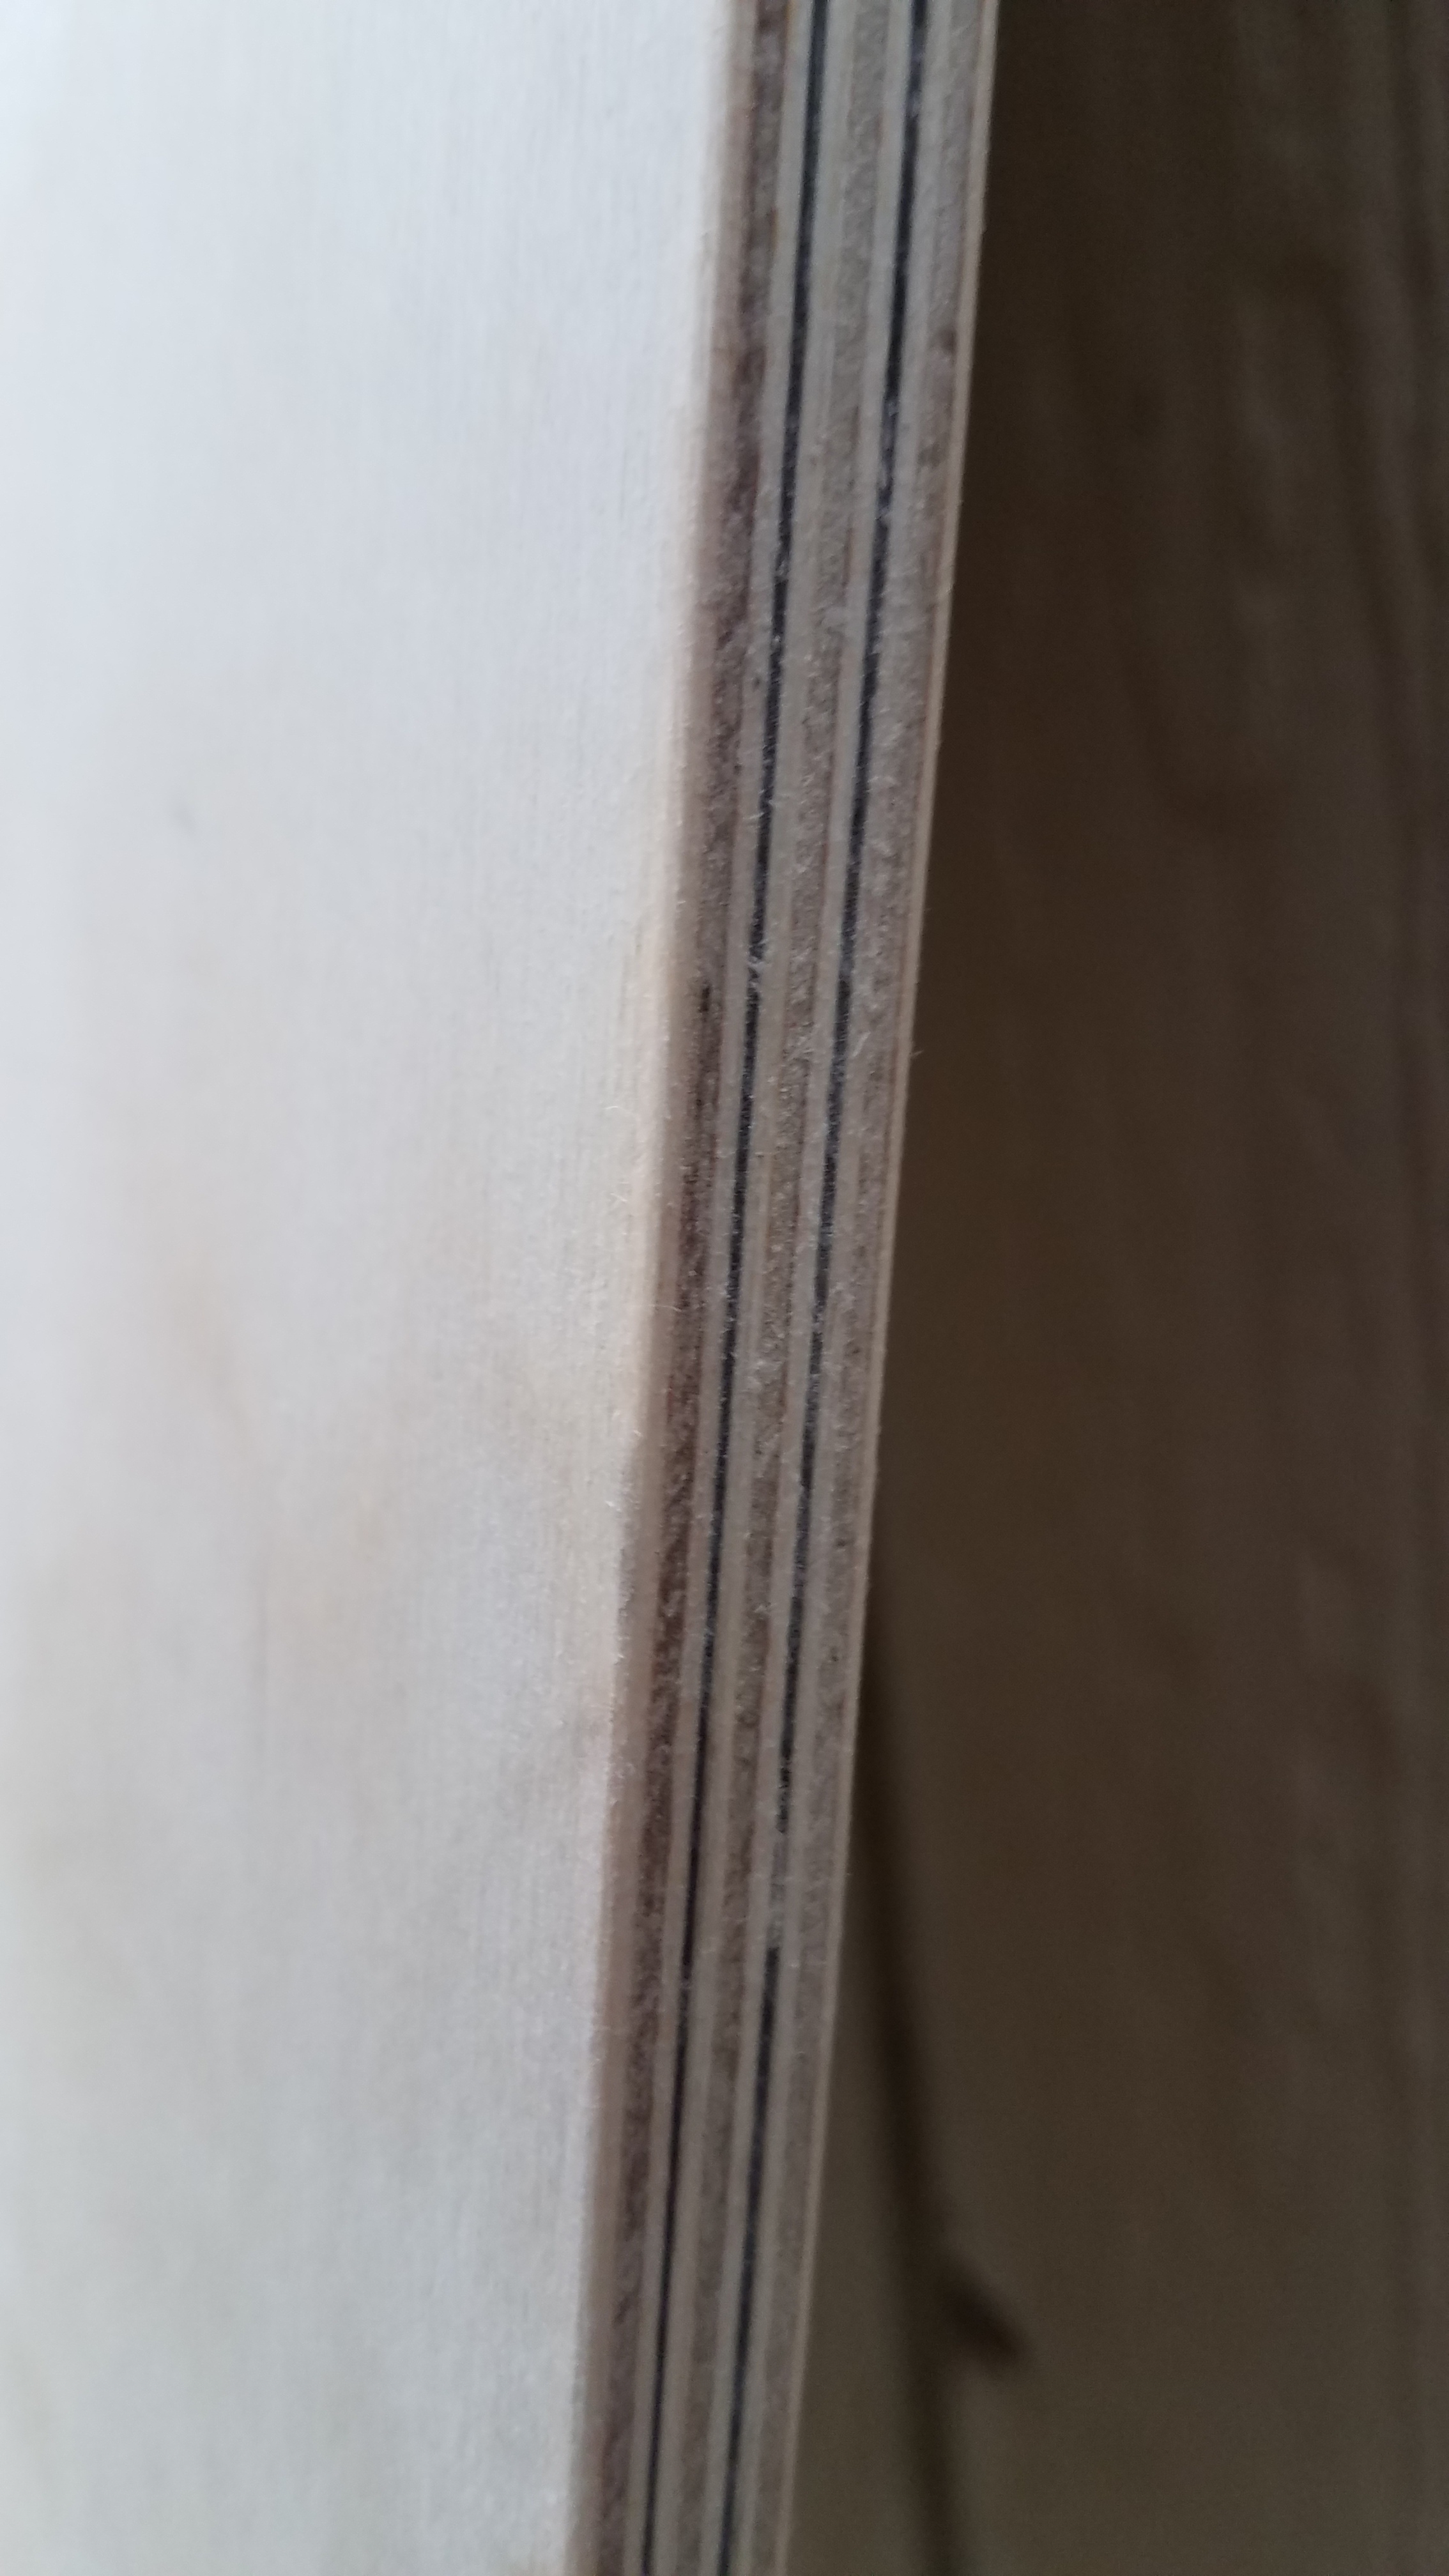
This is my first build and I’m going pretty simple (although three layers of plywood, four layers of carbon fiber, and veneer on the surfaces might not really be all that simple). Anyway, I’m not really experienced enough to know what kinds of curves I might want, so I figured I couldn’t go wrong with flat. Once I get some experience on the board, I can make a new deck with curves if I want, and just bolt on the trucks and electronics.

Jay

I found that ene having just a bit of a “tub concave” helps with controlling the board. Just gives you a little lip on the sides of the board for your toe and heel.

Here’s an easy diagram and article about it

But all in all, your build looks solid man! I’m excited to see it all wrapped up!

1 Like

Thanks for that info. I never get tired of learning. After I get some experience riding this build, I’ll have to consider building another deck, fine-tuning it based on what I’ve learned.

Jay

Making headway on the deck. I’m going to try and make it work as a drop-through with motors inboard. I made the cutouts on the rear of the board extra long to make room for the motors during turns besides the wheels. We’ll see if that works. If not, no sweat. I’ll just bolt the trucks on the bottom. I’m happy with how it’s coming along.

20180629_213210

20180629_213235

20180630_105900

1 Like