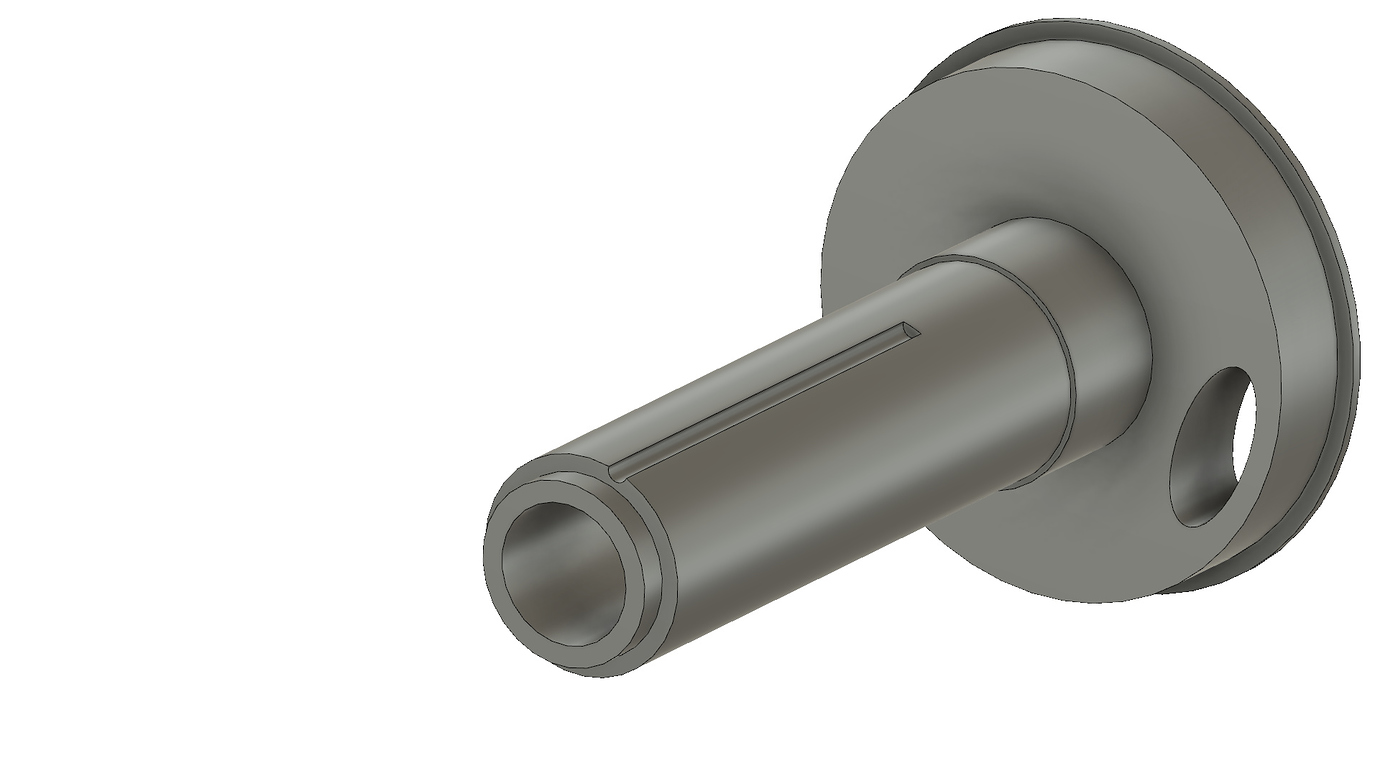
The inner stator has already cut out for former keyway. I am going to reproduce at the CNC the other side on the outer pipe. Plus I will also add loctite or high temp epoxy to further secure the stator. Both should be fine.

The inner stator has already cut out for former keyway. I am going to reproduce at the CNC the other side on the outer pipe. Plus I will also add loctite or high temp epoxy to further secure the stator. Both should be fine.
That should hold
Loctite has a guide that describe what retaining fluid is better for a given situation and all the steps to calculate the maximum torque suported if you were to go without the keyway
I will go for both. Yes I have the right loctite looked few times ago Like 648 or something like that. Made to stop two cilindric parts from rolling. Tempersture up to 150 degree if I remebe correctly and it also give an extra 0.1mm thickness. I also have a high temp epoxy that should be more similar to what I have found when I unmounted the motors.
You could make a thread and use a nut to secure the stator.
What do you mean? I couldn’t visualize your solution
Make a thread on the end of the stator pipe to put on a nut, then you an tighten it down to stop the stator moving
ah ok got it, yes it is a possibility. What I will probably do it is a key way and loctite or epoxy for the stator, then grub screw from the stator pipe to the axle and screw that connects the rear stator pipe to the truck. In this way should be really solid.
U have a lot of bare space on the hub part. Maybe too late this time but u could have the motor case like half an inch smaller. The stator is far far from the wall on the back. That little lip on the hub seems helpful but is limiting where the stator will go along. I like to get it all the way touching the back wall as it can turn transfee from copper straight to that wall (yours aluminum especially would be greasy to transfer the heat. Maybe motor so big it’s not important). But that big space of pure pure air in the motor!
That would be the case for non sensored motors. The space there is what I need for the sensor pcb. Otherwise yes that would be possible. Without sensor 9mm shorter


 That’s a giant pcb.
These are pics of how flipsky put their sensor. I don’t put a sensor in and u can see how tight. I don’t know if uve tried without sensors but good enough to me and rather have it filled with motor. The Vesc was designed to give good control n tortque at startup without sensors and I think he did a great job
A lot of people squeak sensors in without any room individually. Tons of work though. And they always seem to break.
I thought that air left is not that bad. It’s really the closest I can go without touching the pcb. Do you advice to use special loctite, I think it was 648, or a high temp epoxy glue to secure the stator to the pipe? The motor came with epoxy glue.
Well let’s say 5mm is the pcb, the rest Is the 3 motor oahse wires that are not positioned really well. Maybe I can try to heat it up and fold them a bit more but I thought it would be safer like that.
If you see the picture with the motor in the late you see the thickness taken by the pcb and the wires. So there is 5mm left for sure. The problem that the motor phases wires are really thick and I don’t want to bend them too much
You really soak the stator pipe in glue before secure the stator. Is it glue the white surface I see or it’s a different type of coating? The pcb is not to big my problem are the motor wires that are made to stick out from the side and I moved them to the back. I will see better. Maybe I can fold them better and save overall 1cm.
I do wye and the wye bundle and the three magnet wire phases leave the motor and then add the leads. Safer as the connection between them and all the beehive with them is a risk. You’ll have to get some good high temp thin epoxy to put on all the magnet wire while covering the shafts, as in my pic they’re covered w silicone. I haven’t found a better way not as hugely time consuming but all the wire inside has to be fixed solid or will short really quickly
I have an interference fit with the stator on the hub which I really like. Pressed. No keyway complication. There’s a keyway slot on hub n stator n gets resin vacuumed in when also coating all the magnet wire.
No glue until one time in the pot n vacuum. The resin is translucent. That grey-white is the silicone protecting the shafts and inside the hub. And a bit of kapton tape is there too to take off the resin as it catches at bottom of the teeth
I see. Why the wires should short so quickly? Due to vibrations or what? I was thinking to cover the back with high temp epoxy to secure in place all the motor phase wires (I think they are delta), then secure it to the stator pipe. I mean the whole central part is not gonna rotate
Just vibrations they will short to the hub or maybe themselves. The insulation gets worn. Without resin holding, Ive heard of it being done with a hub motor and shorted in moments. The old motors I had made all were mechanically good with the only problem ever happening was the shorting of magnet or phase wires inside. More than any other reason that why I make them now. I put silicone hose coming out of the motor and the magnet wire goes through and outside of the motor and then solder the leads. Safer. No rubbing wires as they come out. That’s how more motors broke than any other way even with three layers of shrink. And then it’s a paperweight.
Never thought about it. That makes sense. I never saw a motor made with this principle but indeed it’s a issue. I have bought a high temp silicon like 200 degree. Do you think it’s better. I could squise it inside the motor phase wire to damp vibration
There’s a lot of variation in silicone and don’t know but generally you’d want an epoxy for this specific use. There’s places that specialize in it (epic resins) but I don’t know the details of what makes it unique and I’m sure you could get away with some more standard thin unfilled epoxy. I use a one-part I bake in but two-part stuff can be good. I like the single envelopes for 20$ from Omega.
Ok thanks I will go for the 2 parts epoxy. And try it before to see how thin it is. Most of the product you have aceess in US are not present in EU. I have to search for a replacement. Thanks for the advice. Really appreciate
If u heat the two separate epoxy parts will thin them. Then mix n get on there quickly. Huge mess potential. Worth getting some silicone for mold making to cover shafts.