Don’t screw it up for the rest of us, insulate your P’s and fuse your positive terminals on your cells!
One fire is too many. Maybe if most of us were riding down desolate highways it would not matter but when we see a board go up in smoke in the town square it makes me worry. I worry that overly strict regulations will form or worse…
If you do not want to go through the trouble of fusing a pack at the very least you should be isolating the paralleled cells from the next group of cells with a strip of fishpaper and insulate the edge of the positive terminal if you are bridging cells with nickle strip.
Edit: Over the course of the next few days/weeks I will be adding photos and tips for cell level fusing. Handling bare cells is extremely dangerous and I do not recommend using any of my techniques. DO NOT TRY THIS AT HOME!
Step 1.
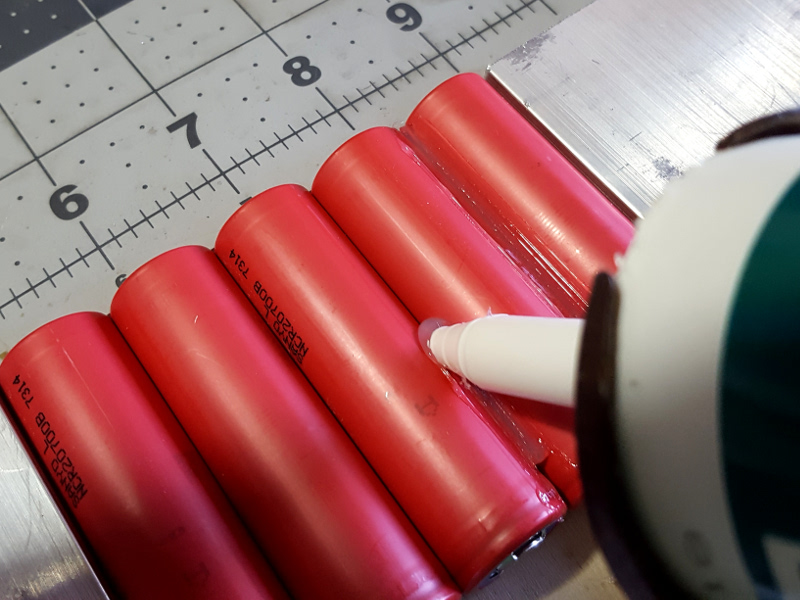
Build a gluing fixture. It can be two block of anything, in the photo I am using some scrap aluminum blocks but wood or other non conductive material is better. I am holding the blocks down with a few spring clamps. You also need a straight edge to align all the cells before running beads of silicon to hold the cells together. Use “natural cure silicon”, I use Dow Corning 737. It is non acidic and will not harm electronics are cause corrosion like the common acid based silicon. There is a reason that stuff smells like vinegar.
When applying the silicon between the cells be sure to push the caulking gun not pull. This forces the silicon into the gap and leaves a nice concave behind, no need to smooth it out with your finger. Trust me it works. much easier to do it without holding a camera too! After a few hours, to allow the silicon to cure, you can flip the group of cells and repeat the processes on the other side.
`` Step 2.
Cut insulation strips using the adhesive backed fishpaper and apply them to your cells. Pre-fold the strip that goes on the positive side to protect the negative ring that surrounds the positive terminal. Make sure the strips are long enough to wrap around the end of the cell group, more on this later.

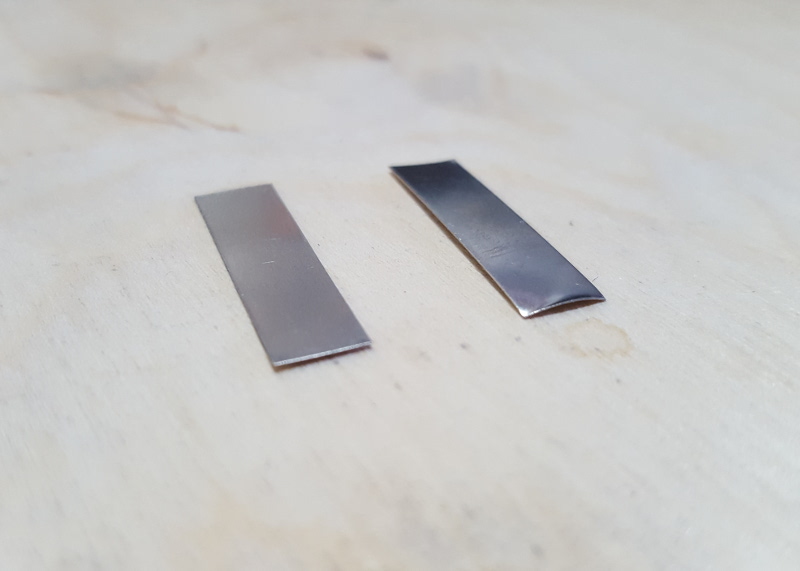
Prepare your tabs. They need to be flat, cutting can curl the edges. Pressing them between to flat surfaces flattens them nicely.
Step 3.
Spot weld your cells gradually. Do not hit one cell with 8 spot welds all at once our you will heat it up more than if you had used a soldering iron. Do it in several passes. Also notice that we to not fold the insulation over the edge of the negative terminals.
First pass.

Final pass.

Now we weld a bussbar to the tabs. Be sure to provide enough of a gap to allow the strips to bend around the edge of the cells.

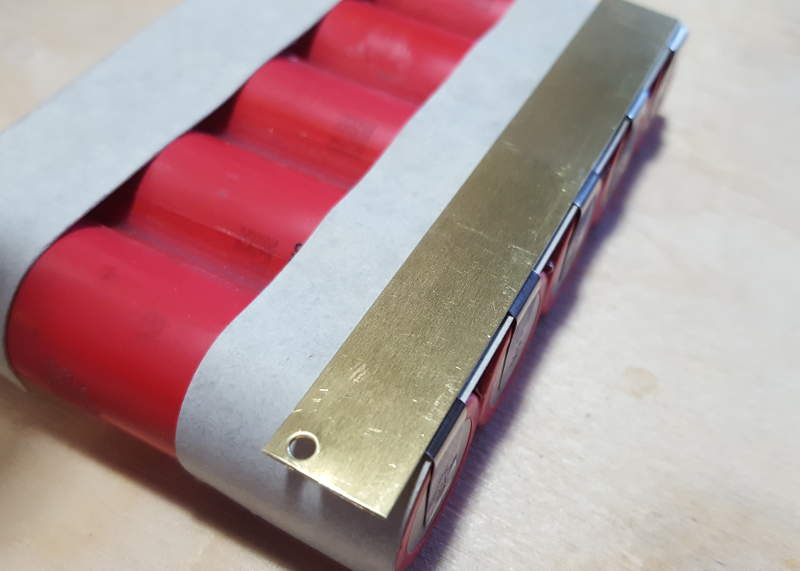
We weld thinner gauge strips to the positive terminals and fold them over. These provide strain relief and allow us to solder our fuse wires without heating the cells.

 reliability improvement for Li-ion spot welded...")
