Yes that’s called ArduinoISP I think. Possible, but I had the USBasp stick so it’s just easier…
1 Like
Could anyone build one of these for me? I would be willing to pay.
I showed up this Sensor… I use it in my FeatherRemote and it works great. Range goes from 790 to 275. Good range on 3.3v
That’s about range I am getting too for the 3.3V hall sensor.

Rode 25km with the new remote without any issue… now to wait for the better 3D print from my friend…
2 Likes
Looks cool! I would love to put my code into this thing 
1 Like
Sure why not… My code is super outdated now… Still works so I haven’t bothered to change it…
1 Like


I am hoping to get rid of the LC filter and cap that I currently use to clean up the 5v from the ESC. So I incorporated some of it to the new Rx PCB.
One big caveat… I don’t really know if I am doing this right… But so far it seems to connect so that’s a good step.
3 Likes
Was planning to give it a go soon… No idea if it works for now
1 Like

Building my second remote for a friend… Damn this is so much easier than the old version! I was done with the main PCB soldering in about an hour…
 This time I laid the NRF module flat against the PCB… Previously it was lifted by the pin holder plastic things. What I didn’t realise was the antenna plug would make it too thick to fit properly into the remote… Laying it flat should do the trick.
Any idea when you will release the new version? 
Few more changes to the design and I should be all good
2 Likes

Latest version uses M3 screws to reinforce the weak parts
4 Likes
Capacitor array seems to work, I can do without the external LC filter it seems…
Telemetry also works with the latest VESC firmware (Ackmanics not tested)…
1 Like

Sent these for print only to change the design after… Now have to reprint the new design… Groan…
BTW the new version with the M3 screws has been tested… So far so good…
5 Likes

Close up look at the use of the m3 screws to beef things up…
2 Likes
@ervinelin Thanks for the guide and the parts! Mine’s finally, finally done. Made some mods:
- 128x64 screen instead of 128x32
- Pot from junk rc remote control instead of hall sensor
- Arduino Fio I had lying around
- Screen orientation is different for both left and right hand usage
- Shape is different, the flatter shape lets you hold it with wrist guards comfortably
Also changed the code around a bit, each packet transmission is done with timer ISR at ~50ms intervals now.


10 Likes

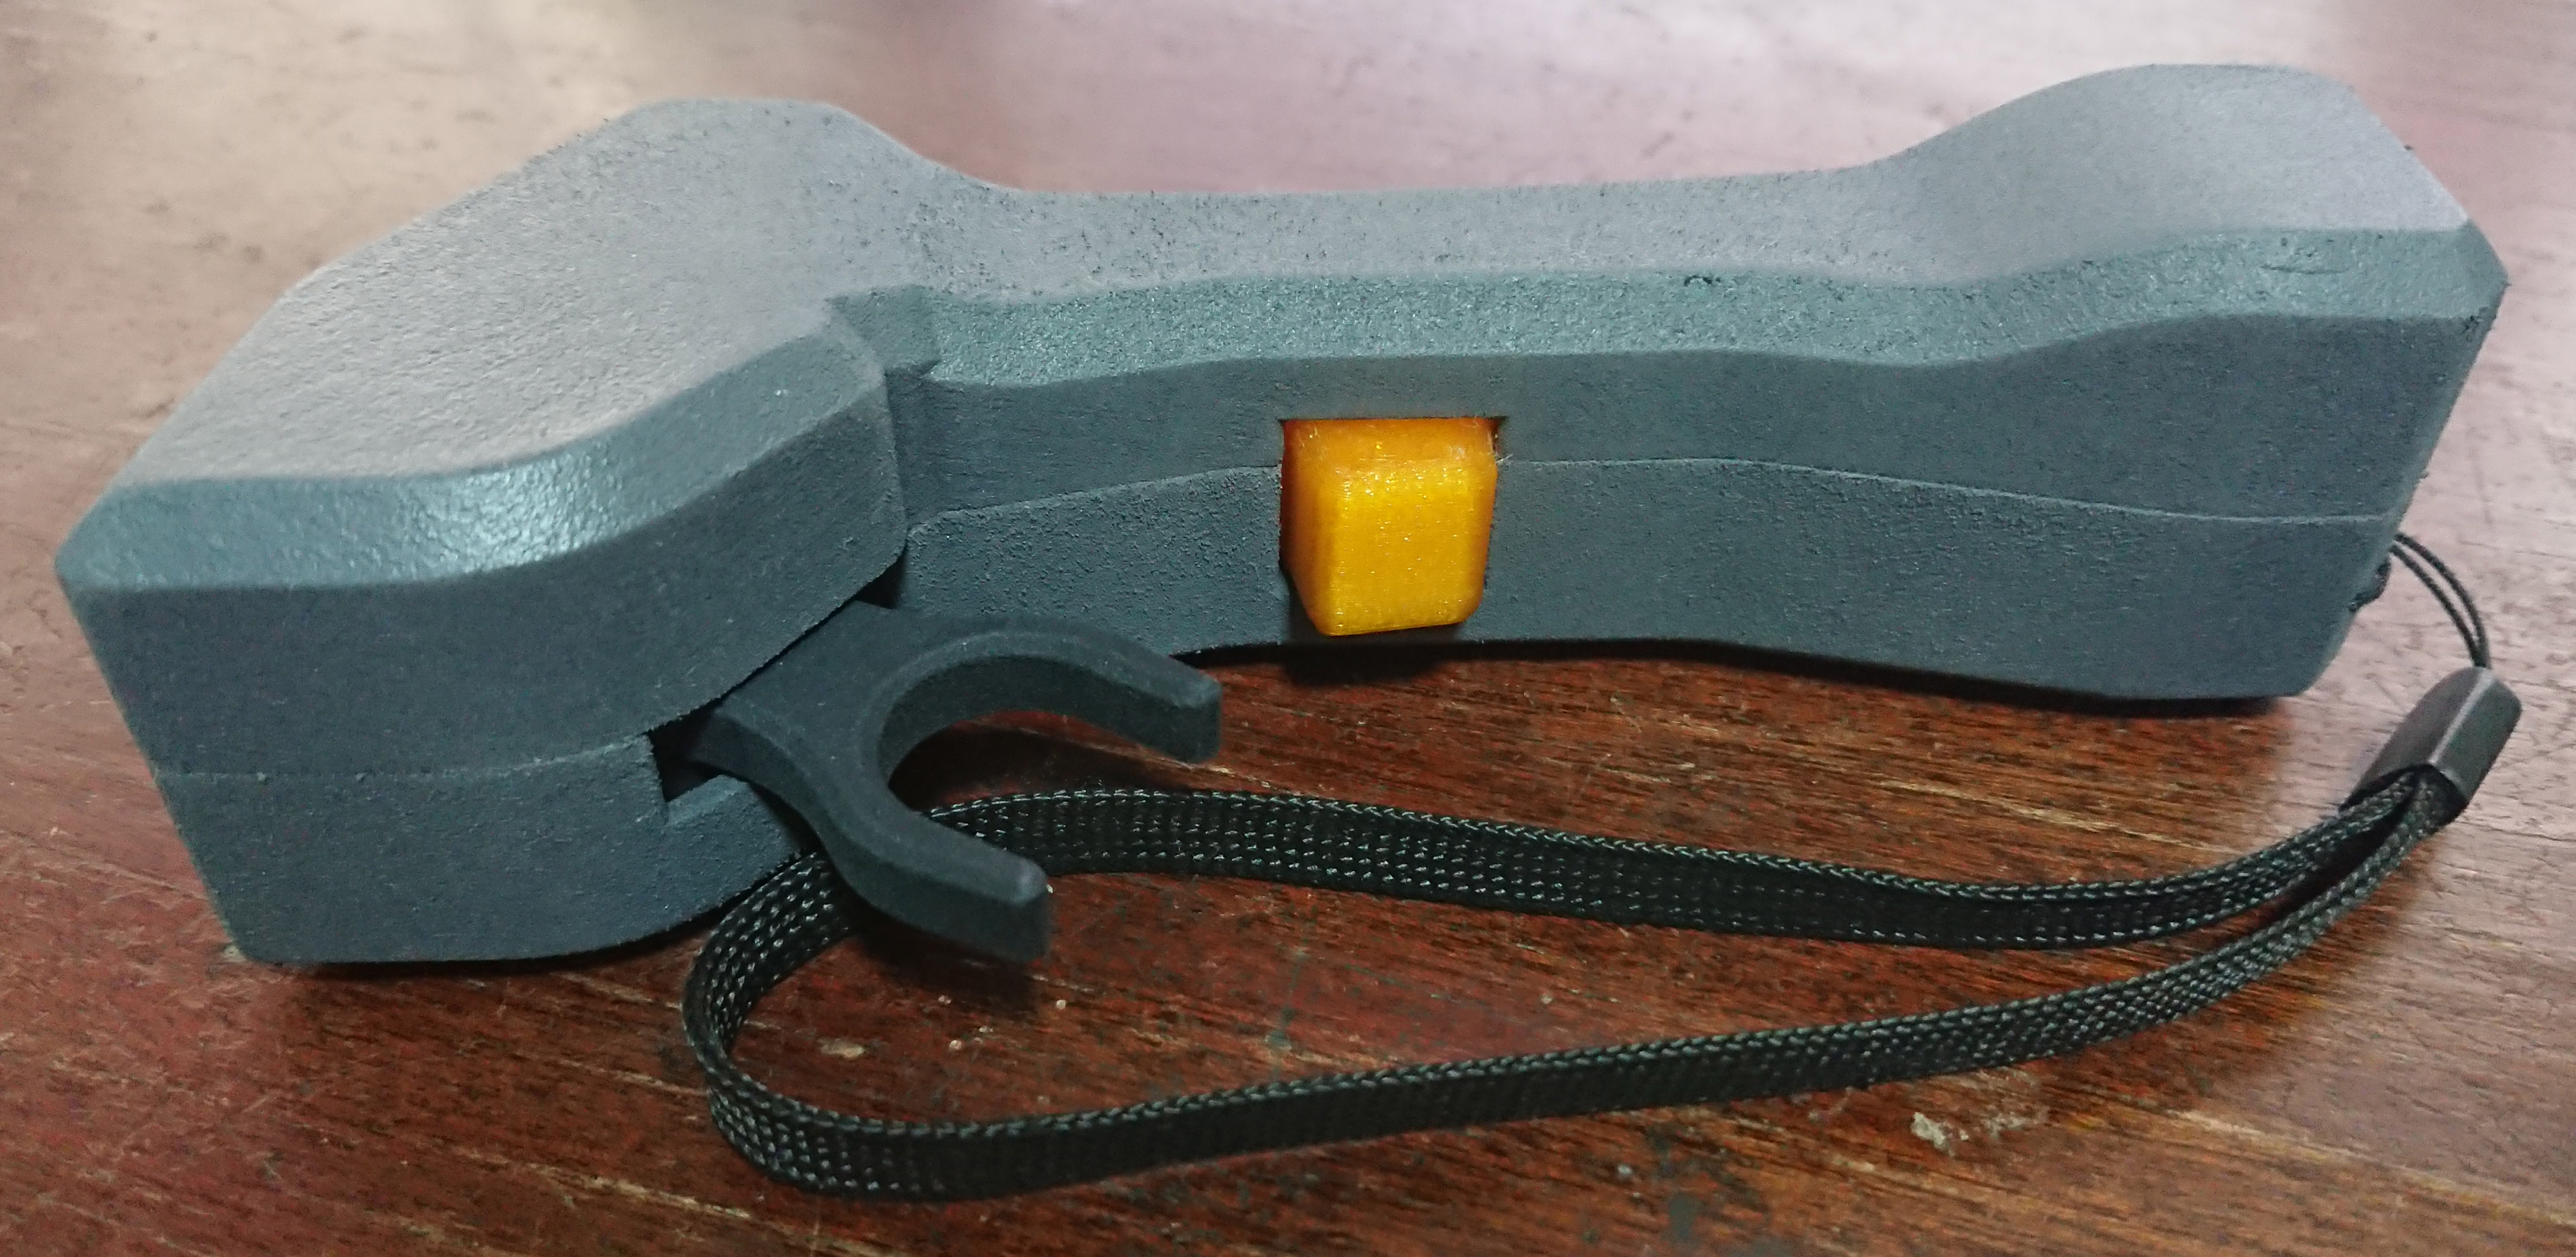
Transplanted my electronics into the new casing only to realize I made a small mistake with the wrist strap attachment area… Had to file in a small depression for it…


Sprayed some 2 part epoxy truck bed liner in hope of creating a more robust casing… Not sure if I like the speckled texture just yet…
It doesn’t scratch my hands, adds somewhat of a nice grip but looks a bit too rough…
8 Likes

Redesigned the receiver to be enclosed in a printed casing instead of just heat shrink.
6 Likes
 t
t
Tried to print some text to show the pinouts… Not super clear but I suppose good enough…
 Case is held together by 4 screws which in turn also holds the PCB down.
1 Like