Photo? I can’t imagine it.


You can see that one has the gap.
I have frozen one part of the rim to ease the removal of the bearing.
I pulled all of my bearings out by using a printed PLA “puller”.
All you need is a M8 bolt, preferably on the long side, nut, and a wide metal washer, might be not needed.
I can upload the STL if it is needed.


Best part, it did not hurt the bearings at all. Next print will be a seater/press for sure. 
Bearing stats: 3 on the verge of locking up, complete trash 3 spin harder but tolerable 2 spin perfectly
8 Likes
This is awesome. Please do share the files. It will be very useful. BTW, what’s the price of the bearings?
3 Likes
Here in Lithuania, bearings cost from 0.10€ to 43€ per. I will try to find out what kind of brand I should get. Generally I will try to keep around the price of 2.50-3.00€ per bearing.
I will upload both STLs when the press is designed and printed.
Okay, press is done and was way easier than I thought. It presses way better than I thought and eliminates the gap no problem.
Long instruction post ahead!
This is all you need to use the “tools”:
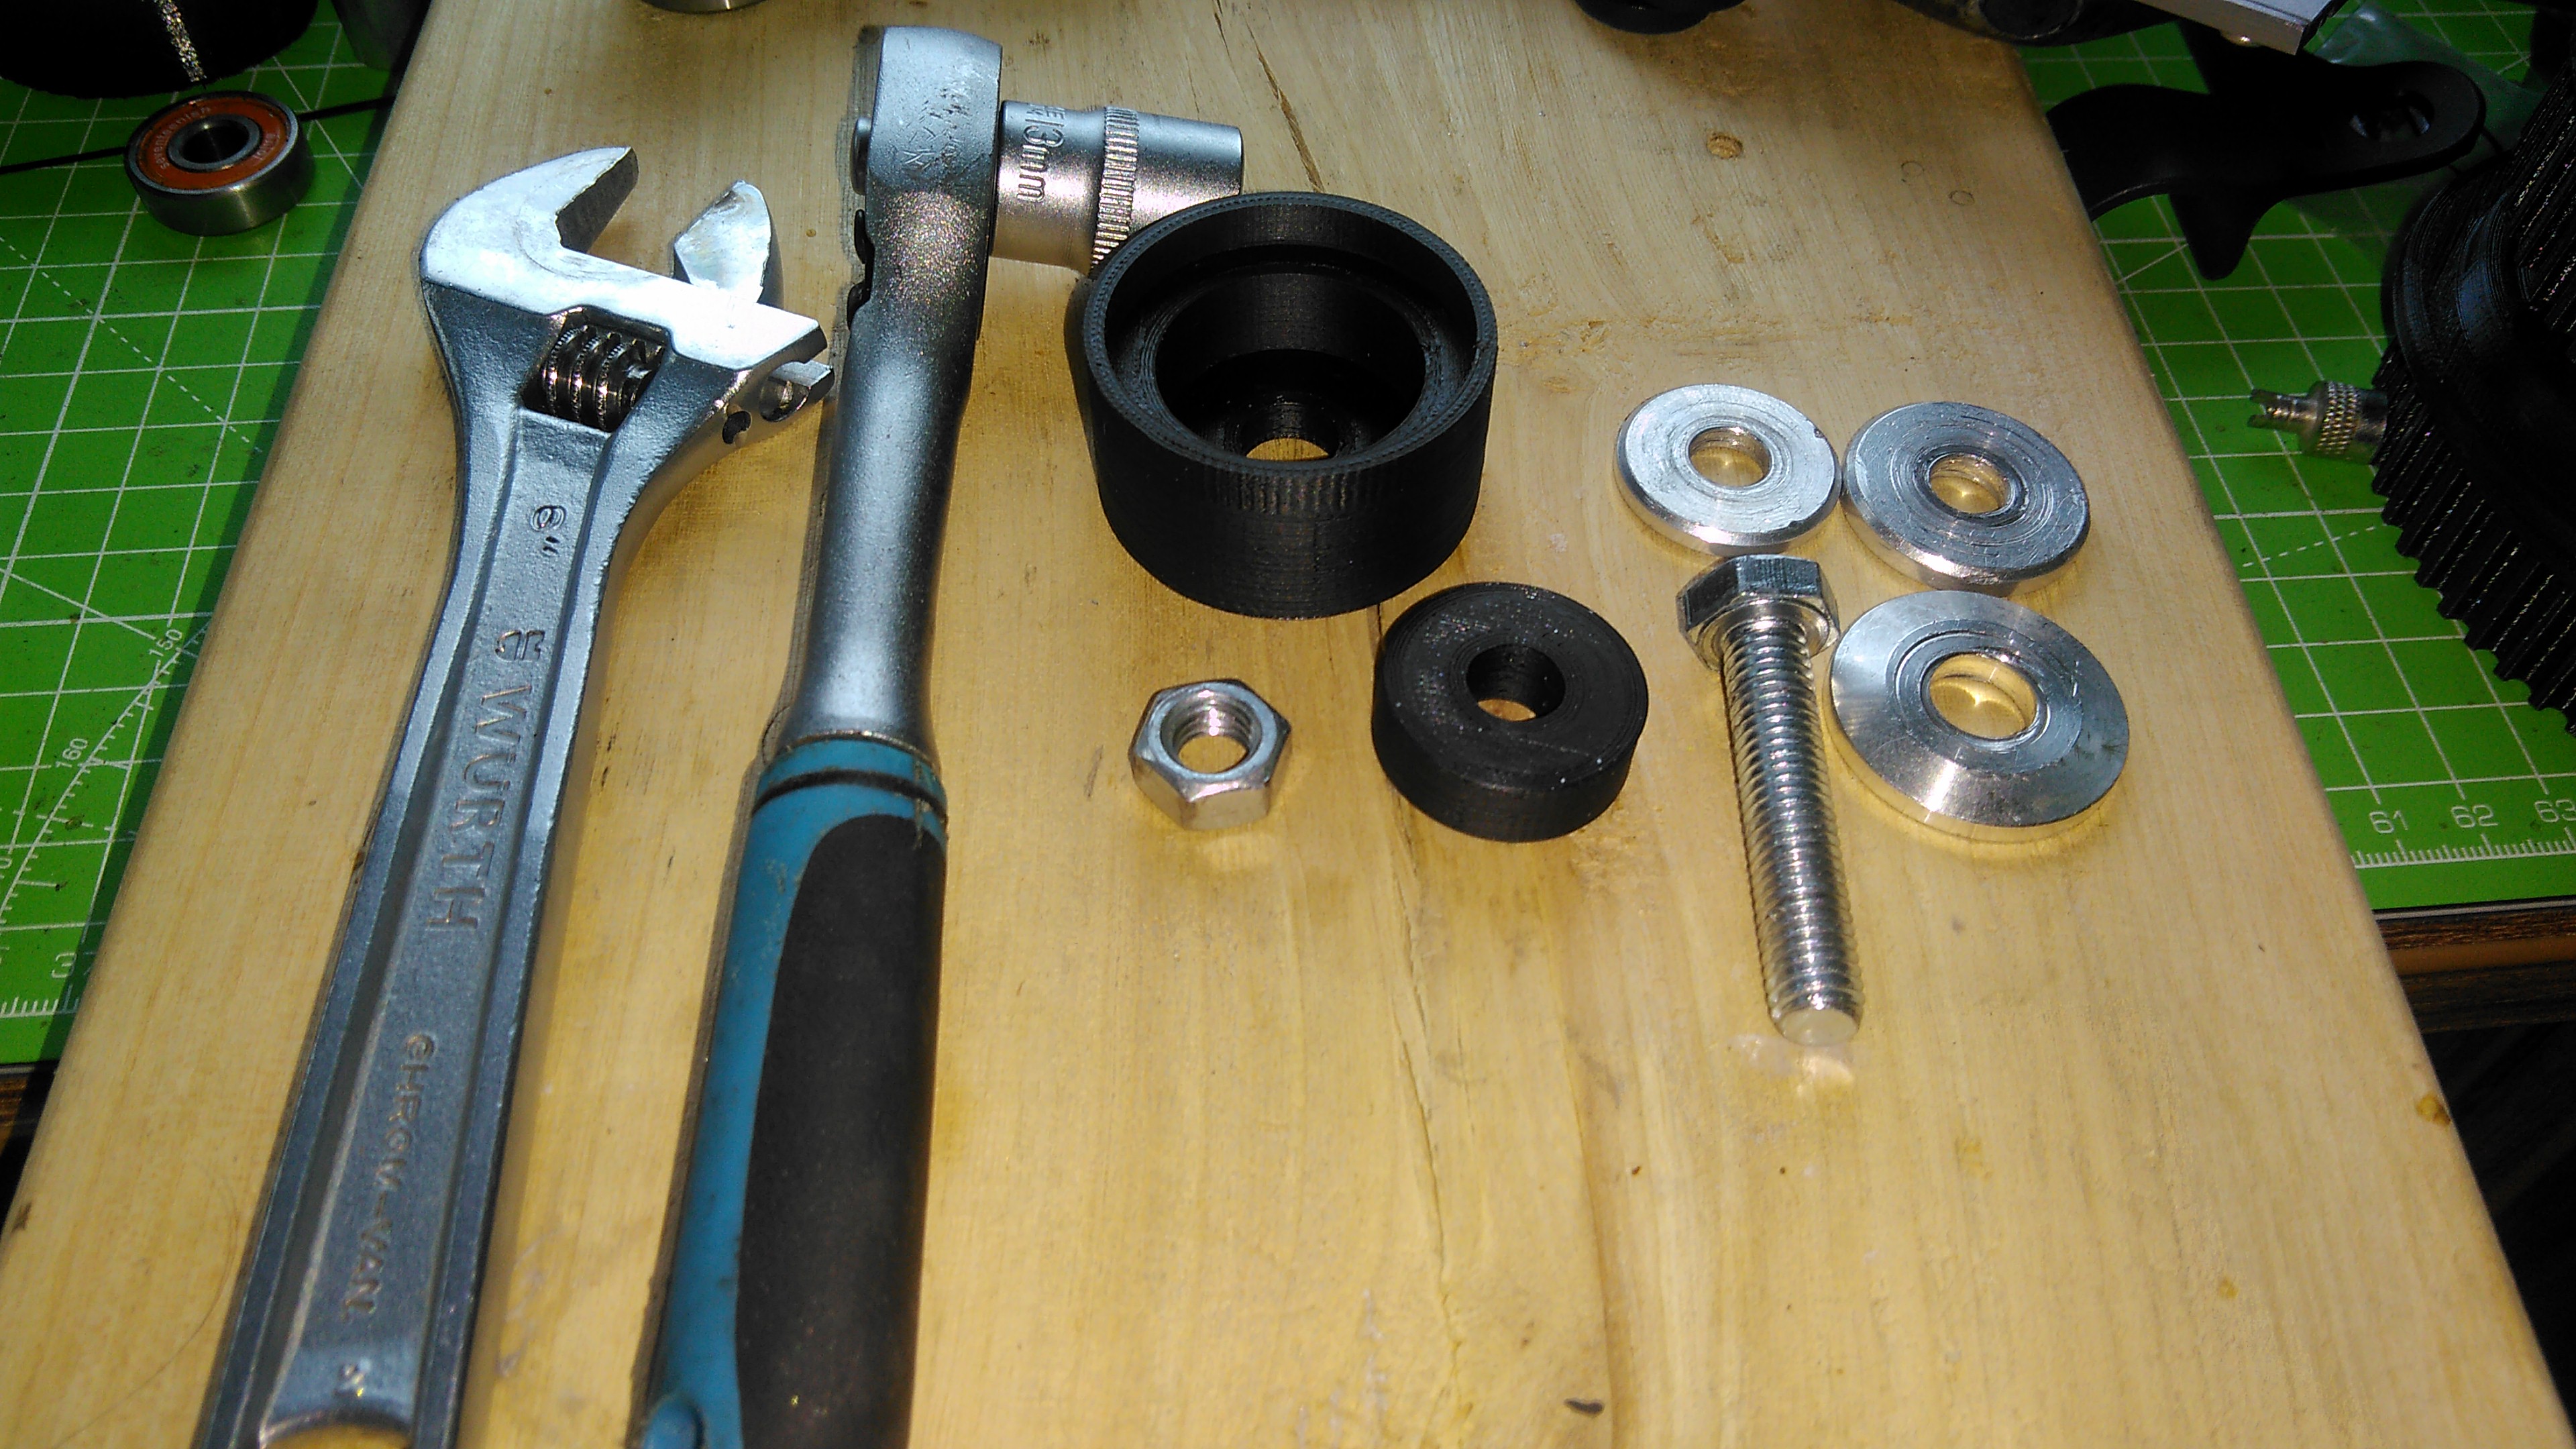
- Ratcheting socket wrench, M8 bolt head size (13mm socket)
- Adjustable wrench or another ratcheting socket or even a simple wrench for holding the other side (M8/13mm)
- M8 x 40mm++ bolt, 8.8 strength is enough
- M8 Nut, 8.8 strength is enough
- 23mm M8 washer (Got this from SK3 accessories) - This one is used for pressing the bearing back in.
- 25mm M8 washer (Got this from SK3 accessories) - This one is used for pressing the bearing back in, centering and support
- 28mm M8 washer (Got this from SK3 accessories) - This one is used for pulling, you can use any other of the two mentioned above, as this is unconfirmed necessary
- 3D printed puller (the big cylinder jig)
- 3D printed press (25mm “bearing”)
The 3D prints are mandatory to be printed out of PLA!!! PLA has the biggest strength for these kind of loads.
Settings(reference):
First layer: 70’C bed, 215’C hotend 2nd layer and above: 65’C bed, 210’C hotend Cooling fan: 50% with auto cooling if supported Perimeters: 4 Infill: 100% rectilinear, don’t skimp, compression forces when pulling are no joke
Files: https://drive.google.com/drive/folders/1IuC-yWQQ25BUsvyrB41DOl68Rjvh4lne?usp=sharing (Small washer model is thicker.)
The pulling:
- Put the tool above the bearing
- Push the bolt through from the bottom of the bearing

- Place a washer corresponding to the model you downloaded
- Put the nut on

- Hold the bolt from the top and start ratcheting from below
- You might hear a loud pop when doing it, it’s not the plastic, I was spooked too, it’s the bearing unseizing(steel inside aluminum)
- Unscrew when done and go back to step one

The pressing:
- Put 23mm washer on the bolt
- Put the bearing on the bolt

- Put the assembly at the bearing seat, make sure to pre-center it a little, but 23mm washer should take care of it while tightening
- Put the pressing printed part on the bolt, fit it inside the slot

- Put 25mm washer on the pressing printed part
- Put on the nut and tighten the same way like with pulling

- Once you cannot really tighten anymore (don’t over do it, you will see the bearing seated anyways), loosen the bolt and go back to step 1

The tool also “compacts” itself quite nicely and can be kept in your pocket if you so desire:


Hopefully this helps somebody. 
Fun extra: Pull and push bearings several times so that the seat becomes a little bit “acquainted” with the bearing. Makes further maintenance a breeze with pretty much no force(still impossible to push in by hand, but much easier on the torque needed). Make sure to clean the seat after every pressing/pulling to get rid off the small shavings of aluminum.
14 Likes
Also make sure you sand/grind/file the spacers.
Original ones are 18.11mm and this makes rim sides float above each other, so tightening pushes the bearing centers out, tightening to the axles will make the situation even worse.
This is how it is before taking a bit off:


The gap is what makes improperly installed spacer lock the bearings A LOT. Especially with load the bearings already get from the pressing into the seat.
You want to reduce the length to ~17.90mm. This will make sure the spacer still contacts the bearings, yet it doesn’t apply too much load when the rim is assembled and axle is tightened.


No more gap and the bearings spin after assembly. Spacer works and you can spin one bearing to make other spin.
EDIT: this is individual to each person. If you try to push the bearings completely to the seat, then the spacers will become 17mm even. Make sure you check your situation and take off some aluminum gradually.
2 Likes
To finish off “Murlocs Mod” list:
Quick removal of the tyre, only works with 3D printed pulley for now.

Get 3 M6x50mm screws and 3 M6 NyLock nuts.
Screw the pulley with spacer in the wheel side with the threads. Hand tighten(approx 15Nm) them so they sit flush.

Put on the other side of the rim after the tire, put on the nuts, tighten them with a 10mm socket wrench to be flush.
That’s all! In a case of a flat, you will only need to unscrew the bolt that holds the wheel in place, those 3 nuts and off goes the tyre! No need to remove the belt/pulley.

That’s all from me. Have fun with the wheels!
6 Likes
very nice. first i will do after the holidays. Btw what are the exact measurements of the bearings used here?
628RS. 8mm inner, 24mm outer, 8mm thickness.
1 Like
That shop is my general source.
Nice! The easy removal option is sweet. I am going to do it after the first tire change. It can easily be done for the versa pulley users too. Just have to follow the same principle.
The replacement bearings are pretty cheap too. $8 for 10qty XiKe 10 Pack 628-2RS Bearings 8x24x8mm, Stable Performance and Cost-Effective, Double Seal and Pre-Lubricated, Deep Groove Ball Bearings. https://www.amazon.com/dp/B0725FBS4S/ref=cm_sw_r_cp_apa_i_7R-jCbE2M2A3F
1 Like
I wouldn’t trust cheap bearings to do the job. That’s the reason the wheels cost is so low. Good bearings cost. A lot. ![]()
I really doubt it as the Versa pulley has hex slots in it…
Well trusting is a different issue from getting a part rated for the job from a reputed manufacturer.
The original pulleys that have been bad might could have been from a water damaged stock, who knows.
There is no point in paying 5 times more for a sense of security. I just saw @mmaner post link to a set of 10 bearings that costs $9 .
It’s not really the point of security. Bearings have different loads and tolerances. Not saying I won’t try to get bearings on the cheaper side, but I think seating into aluminum will require bearings which have better load bearing and tolerances.
Even normal PU wheel bearings differ a lot. I had simple 608 bearings (8€ for 8) that gave up on me kind of fast, they started wobbling and locking up. Then I got 608 Zealous bearings (20€ for 8) with integrated spacers and never saw any more issues. ![]()
I have industrial bearings with ceramic balls and i have never serviced them in 1 year, i use grease not oil. I don’t believe all the hype about these expensive bearings.
1 Like
Well I am not talking about super expensive bearings. I am just saying that I felt night and day difference with bearings that cost 1€ vs ones that cost 2.50€ per unit.
finally back after being on the road the last couple weeks… went out for a ride and it says i did 8mi… kinda windy so I assume some resistance there… but went from 99% to 20% riding medium hard on a 12s4p 30Q… top speed of 32 supposedly…
so not bad… i get about 15mi riding hard on my superflys…so not to bad so far… front wheel(s) has a slight in balance at higher speed… not sure what to do about it yet… new board being built very soon =)
2 Likes
What kind of motor set up are you using? I’m currently building a 10s 5p pack with a single motor and the 6x2 wheels and would like to know an estimate on the range I could get.