Budget Boosted Board | 10S3P HG2 | FOCBOX | 6355 Single Drive | Boosted Boards Vanguard Deck | CUSTOM 2 part enclosure

Hey everyone, I figured I would start a build thread since I finally got everything I need! I am very excited about this, I’ve been planning everything for over a year and it is finally coming together. Like many other people, I love the clean look of Boosted Boards but can’t afford the price. I also love to build and design my own stuff, so I began researching how to build my own electric longboard. This isn’t quite my first project, I helped a friend build a board last year. We both learned a lot, mostly that buying quality parts the first time is the way to go (my friend bought everything on his board at least twice). Anyways, I have been piecing everything together and hope to get it all done before school starts for me in September.

Here’s my full spreadsheet of everything I have purchased if you want to take a look as well:

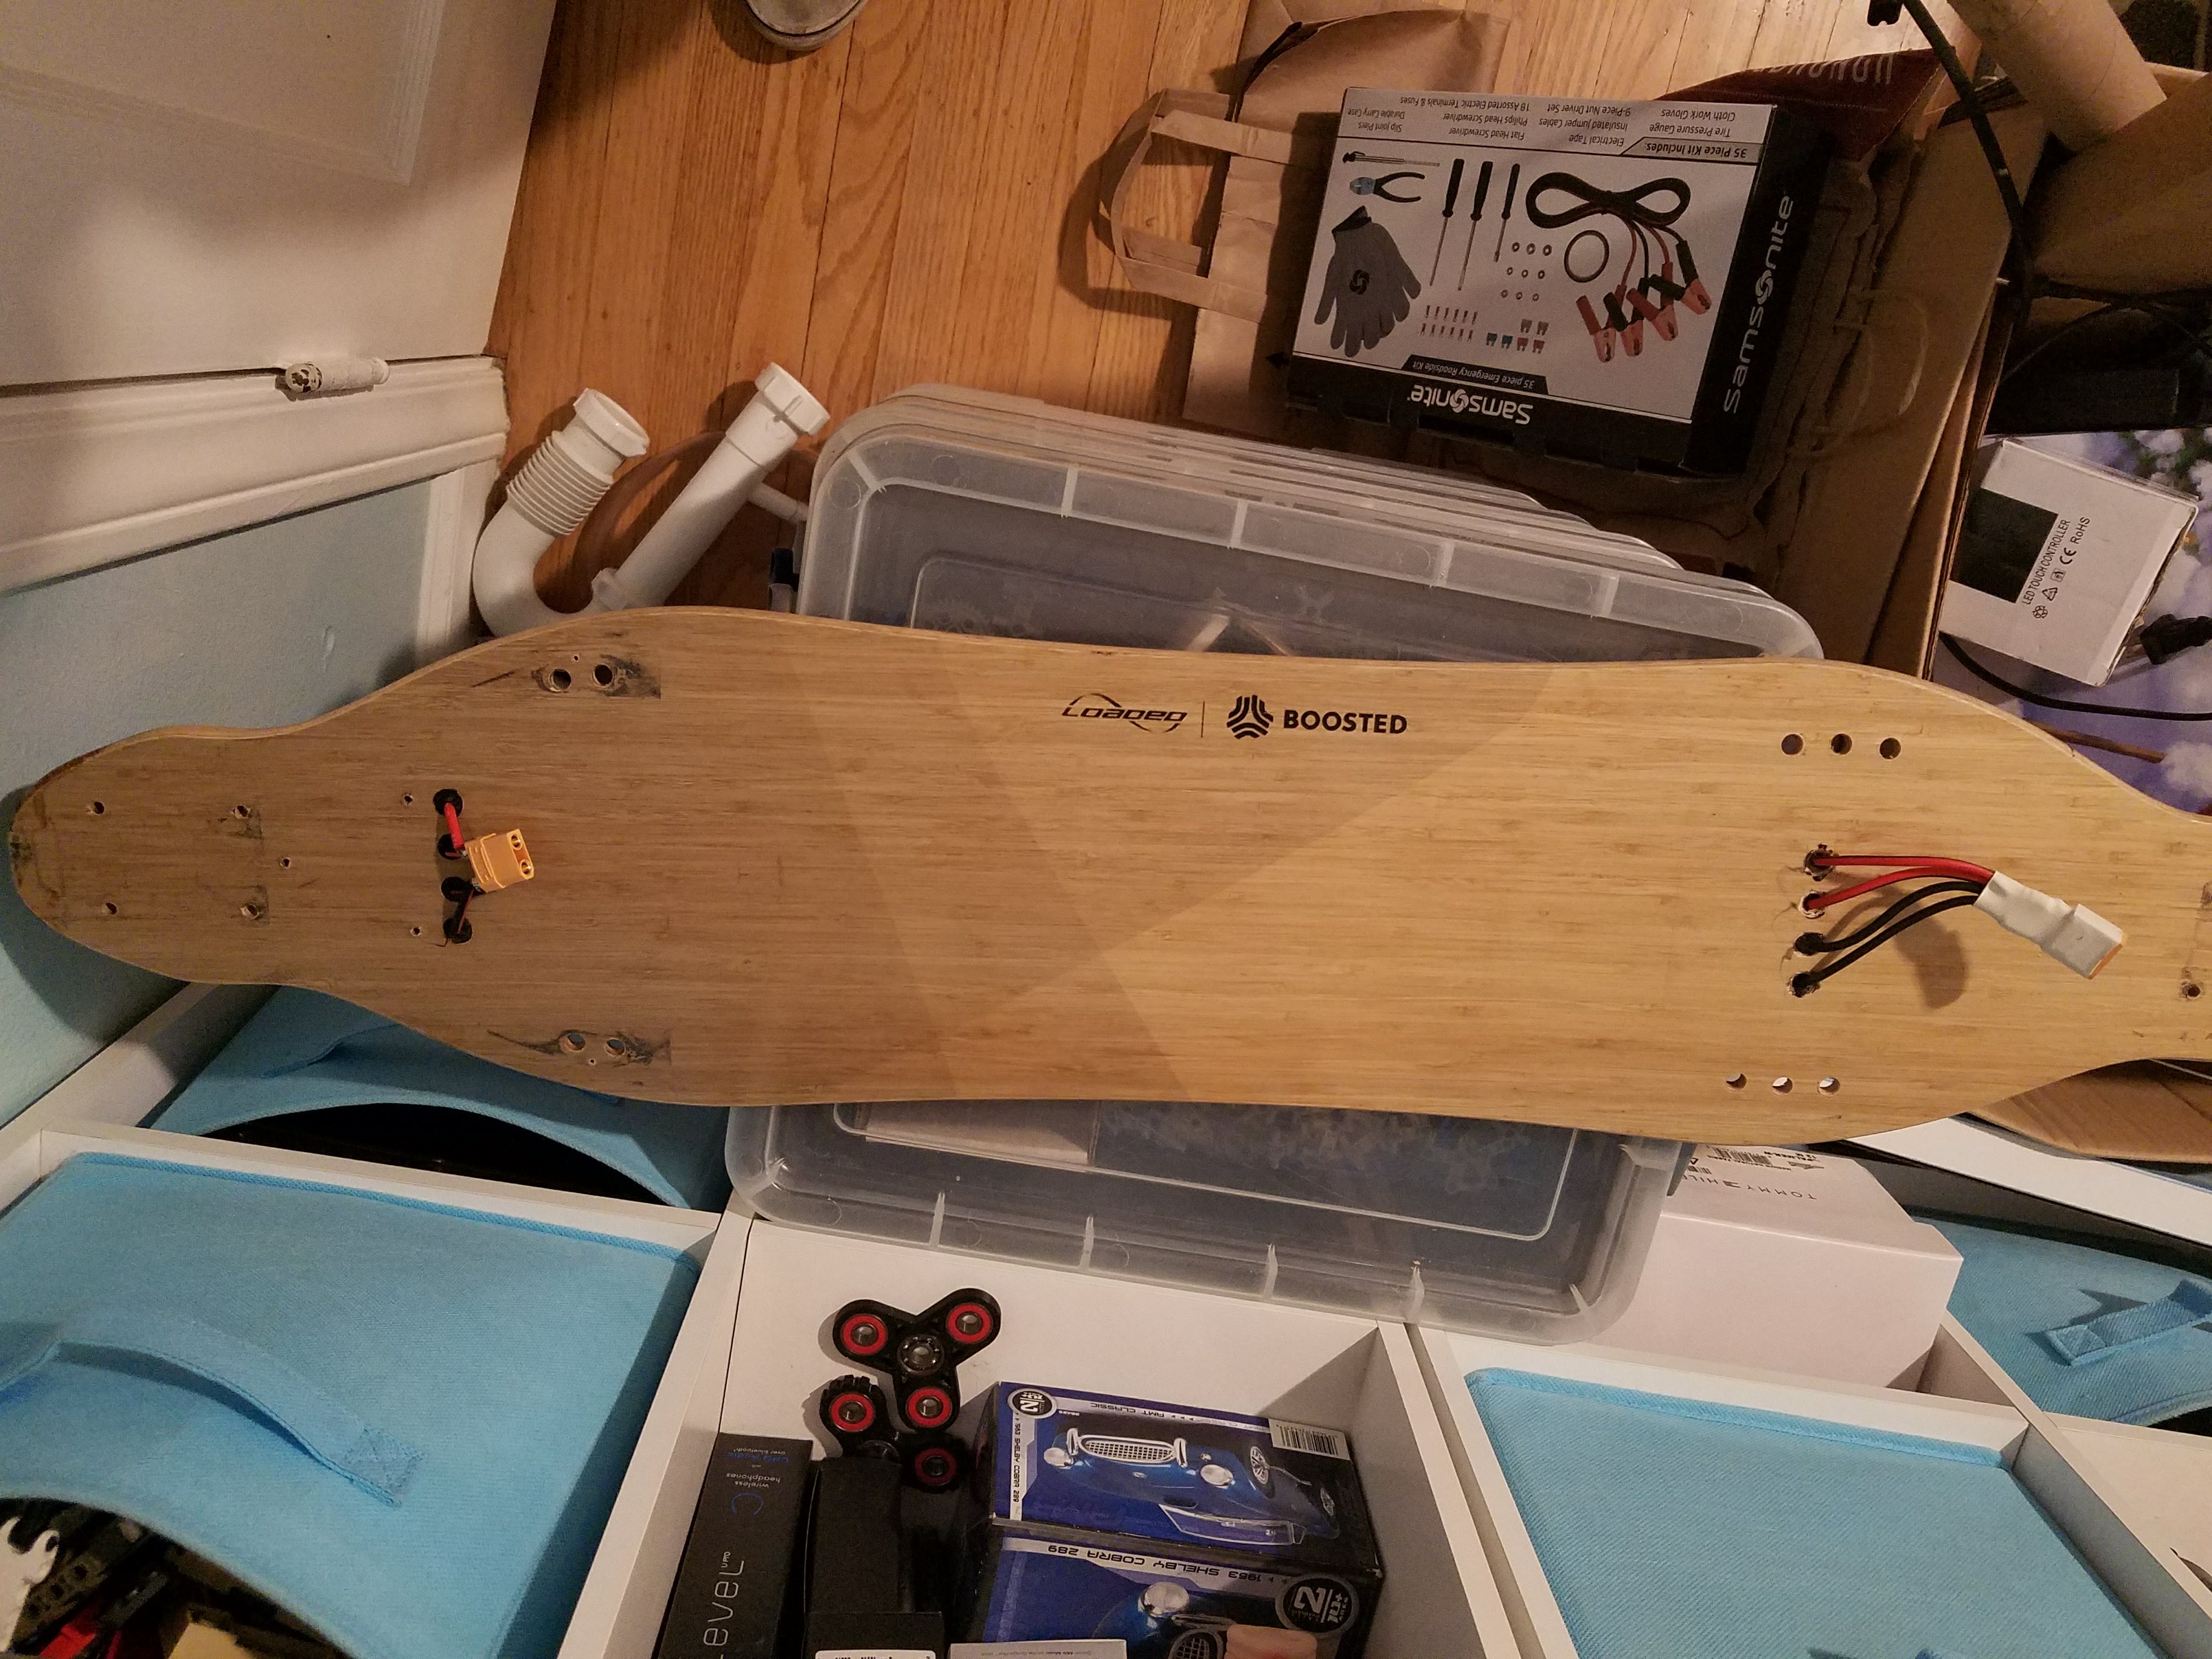
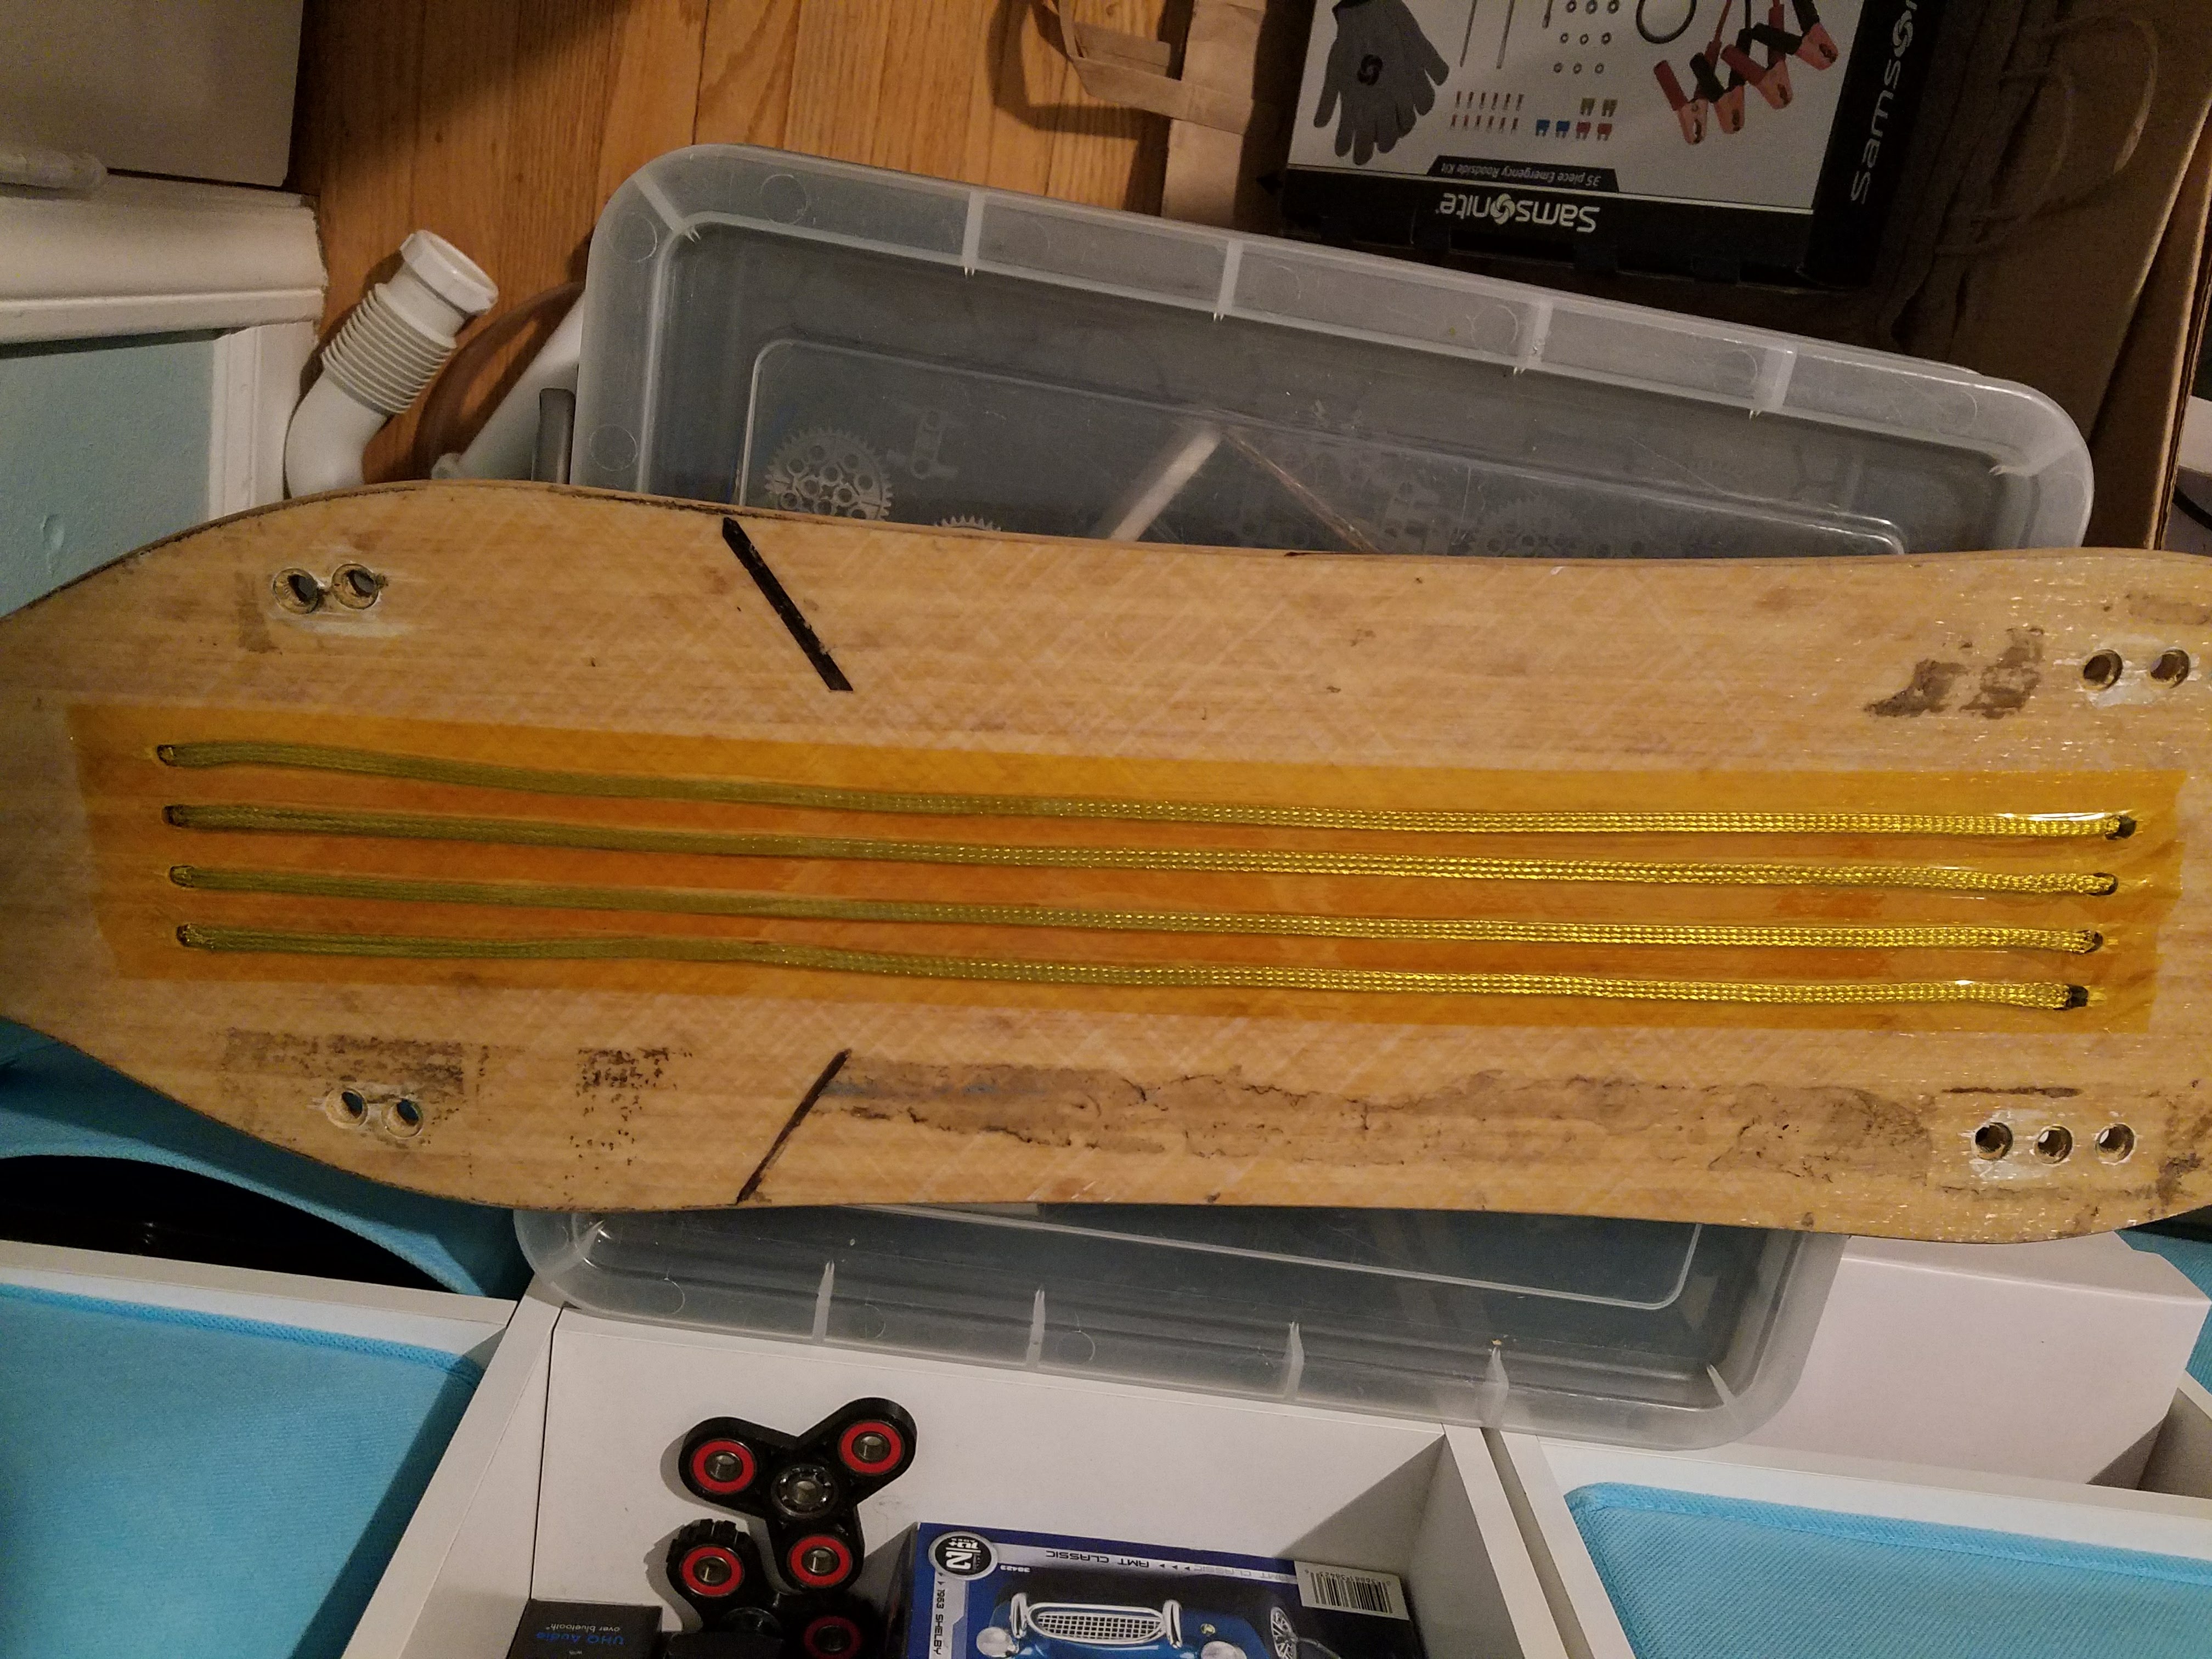
Mechanical Deck: Loaded Vanguard Flex 3 from a Boosted Board (scored on craigslist) Trucks: Caliber II 50 degree 9" Wheels: Blue 83mm Flywheels Motor Mount/Pulleys/Belt:

Electronics Motor: DIYES 6355 190kV ESC: FOCBOX Batteries: LG HG2 in 10S3P BMS: 10S 60A BMS - will most likely get traded out for a 10S BMS w/ e-switch from Bestech Remote: DIYES Nano Remote Charger: 42V 2a laptop style charger Charging Port: Magsafe 2 jack Power switch: XT90-S loop key - Won’t be necessary if I get the Bestech BMS

Miscellaneous Flat Braided 1/4" wire for power wire (will go under the grip tape like Boosted) Battery Voltage Monitor Custom VESC housing Custom Battery housing Headlights: Mini Modpods x2 from theretrofitsource.com Headlight Power: LM2596HVS Buck Converter (5x) Flat Braided Wire 1/4" wide, 15 feet

So I have everything except the Magsafe power jack and still need to 3d print the enclosures, but otherwise I am ready to go! I will start soldering the battery pack together soon when I have some free time. I decided to go for soldering because it is easier and I don’t have the money to put towards a spot welder for one battery. I will be taking precaution to not transfer lots of heat to the batteries, don’t want them heating up too much. I will be posting updates as they come, besides soldering the battery pack I also will be painting the motor and motor mount because they are used from my friend and a little beat up. I will also probably be switching out the blue wheels, I am not a big fan of them with the theme I’m trying to go with. I will go with either orange or black wheels, or maybe red lol, we will see.

2 Likes

Nice! But I though the magsafe wasnt rated for 42V att 2amps?

Before you start soldering your pack you should search this forum for a qoute om how much it would cost for someone to weld it for you!

Might be cheaper than you think :blush: also, eboosted sells some quality enclosures if you’d like to outsource that as well!

Make a spot welder for less than 30 bucks

3 Likes

It isn’t, but it’s rated for 18 volts and 4 amps, or 85W. I will be charging at 42V and 2A, which is 84W. There is more info here by @Maxid, who has used this method with no issues. I have access to a 3d printer myself so that’s not an issue as well. I might look at building my own spot welder from a car battery, that would probably be easy.

1 Like

Yeah I had done some researching about that, I just forgot about it! I should be able to make one of those really easily. What kind of solenoid did you use? Just an automotive start switch?

Yep, exactly that. I’m actually using a solenoid from my old 50cc scooter! Lol

1 Like

Perfect haha, I need to order some nickel strips if I’m going to do some spot welding, and I’ll pick up a solenoid from Amazon or something. Any suggestions on where to get good quality nickel strips?

See my parts thread…

Just got the supplies to make my own spot welder! I got a battery, starter solenoid, and some nickel strips. Unfortunately I probably won’t be able to make any major progress on the build in the next week or so, I’ve been very busy. However, here’s some pictures because who doesn’t like pictures!

4 Likes

Hi @DrM0nsta i’m About to do a similar build, really looking for boosted board style, manly because vanguard deck is awesome. The only part I didn’t find yet to order is enclosure. What do you gonna use for it?

I’m using a custom case I designed myself. Both the battery and VESC case will be 3d printed. Then I am going to vinyl wrap them so they look nice.

That’s a good option but i don’t have 3d printer, was looking online for 3d print services but they gave me crazy quotes to print boosted style enclosure, like $200!!!

Oh wow, that’s really expensive. My university only charges for filament cost, so the cost for both enclosures is like $20

Awesome, which I had that deal!!!

Would you mind showing the 3d printed enclosures you are going to use? Would be interested to have a look :slight_smile:

1 Like

Of course! Here’s both of them, the battery enclosure has been worked over with bondo to get it smooth, I’ll be wrapping it soon. The VESC case needs to get body filled still and then wrapped as well. As you can see I had to print the cases in multiple pieces and then used regular super glue to attach them, its a very strong bond.

2 Likes

Hey everyone, just a quick update. I have been making slow progress on the board, I just keep hitting small roadblocks all the time that are really demoralizing and add time. I hope to be done soon with the board, it is very close to coming together. I have the wires ran on the top of the board, and both enclosures finalized. The biggest thing now is finishing the battery, I have a XT-90S that I can’t seem to solder properly. The anti-spark version doesn’t have as deep of a pocket for the wire to go into, so the bond just isn’t good enough and keeps breaking (like 10x). I am going to get a more powerful soldering iron to try to solder it on more thoroughly, hopefully that will fix it. I was able to fire up the VESC and get the motor and controller which was awesome! However, the motor caught on something and broke the battery connection, which I have yet to redo :frowning:
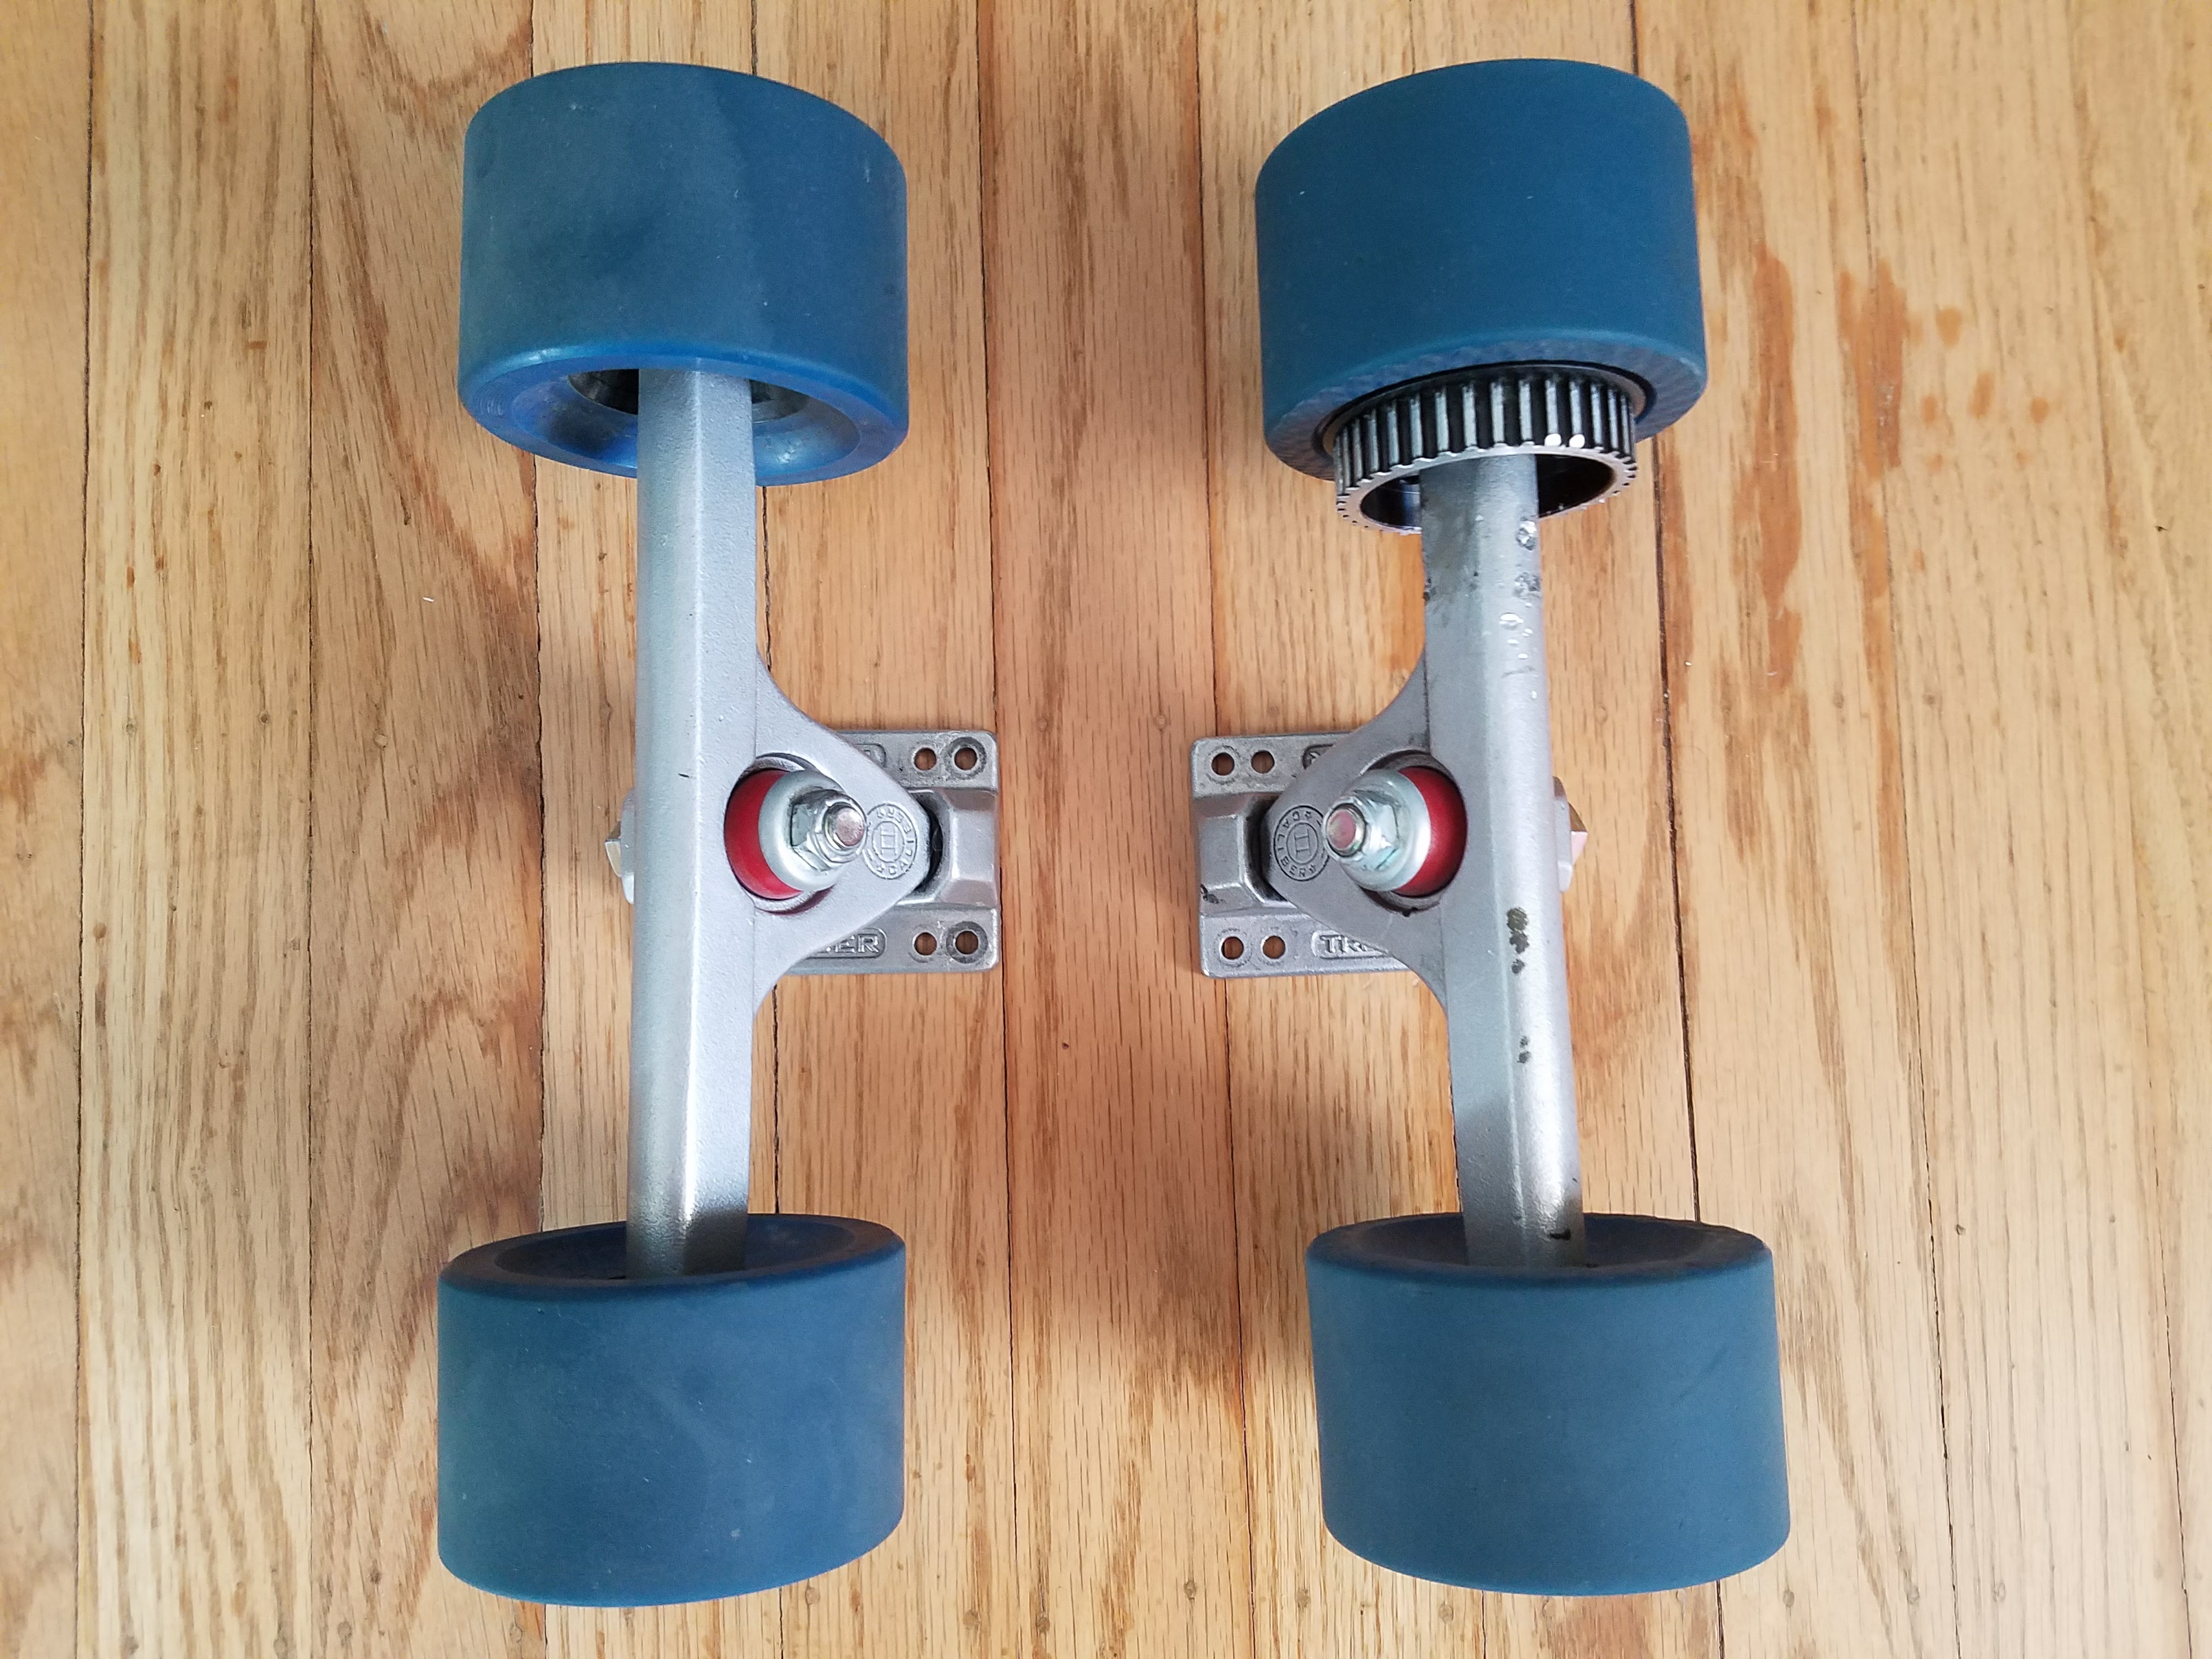
. The end is in sight though! Here’s some pics of the progress:

2 Likes

did it work?