Bluevosity ] Trampa complete Holypro, ultimate trucks, Trampa 136kv motors and mounts ] Kaly built 12s4p Samsung battery pack and case ] Vesc-X

Undertaking my first “build” of an eboard. Went in for the Trampa Holypro. I’ll be using this to commute and also using the rail system, so wanted to try to keep it as light as possible for a big eboard. Gotta be able to carry it up and down stairs!

I’m pretty early in the process, and as any newbie I’ve had a lot of questions, hope to get some of the answers I’ve found down here and hit other questions as well.

5 Likes

Step one for me was making sure to solder the BMS sensor wires in the correct places on the battery… Confirmed with @kaly that this was the correct ordering in correspondence to the labeling on the circuit board

After that I picked up a Hakko soldering iron from a local electronics shop. (love it!) and used it to solder extra length onto the sensor wires. Then double checked to make sure corresponding wires would reach their solder points. (there are plenty of soldering “how to videos” already… somebody have a favorite to insert here?)

3 Likes

Next was to get going on some alterations to the deck and battery case… Got the case squared up to the deck and laid out where the threaded inserts would be located. Put masking tape down on the edge of both the deck and the case for easy marking, making it much quick to relocate the case after drilling.

Made marks for realignment and drilling… sorry no photos of drilling, but first I drilled the wholes through the battery case, then I realigned it and clamped it back down to the deck, used a drill bit back into the holes to start/mark the hole in the deck… switched to a larger bit and drilled the holes in the deck.

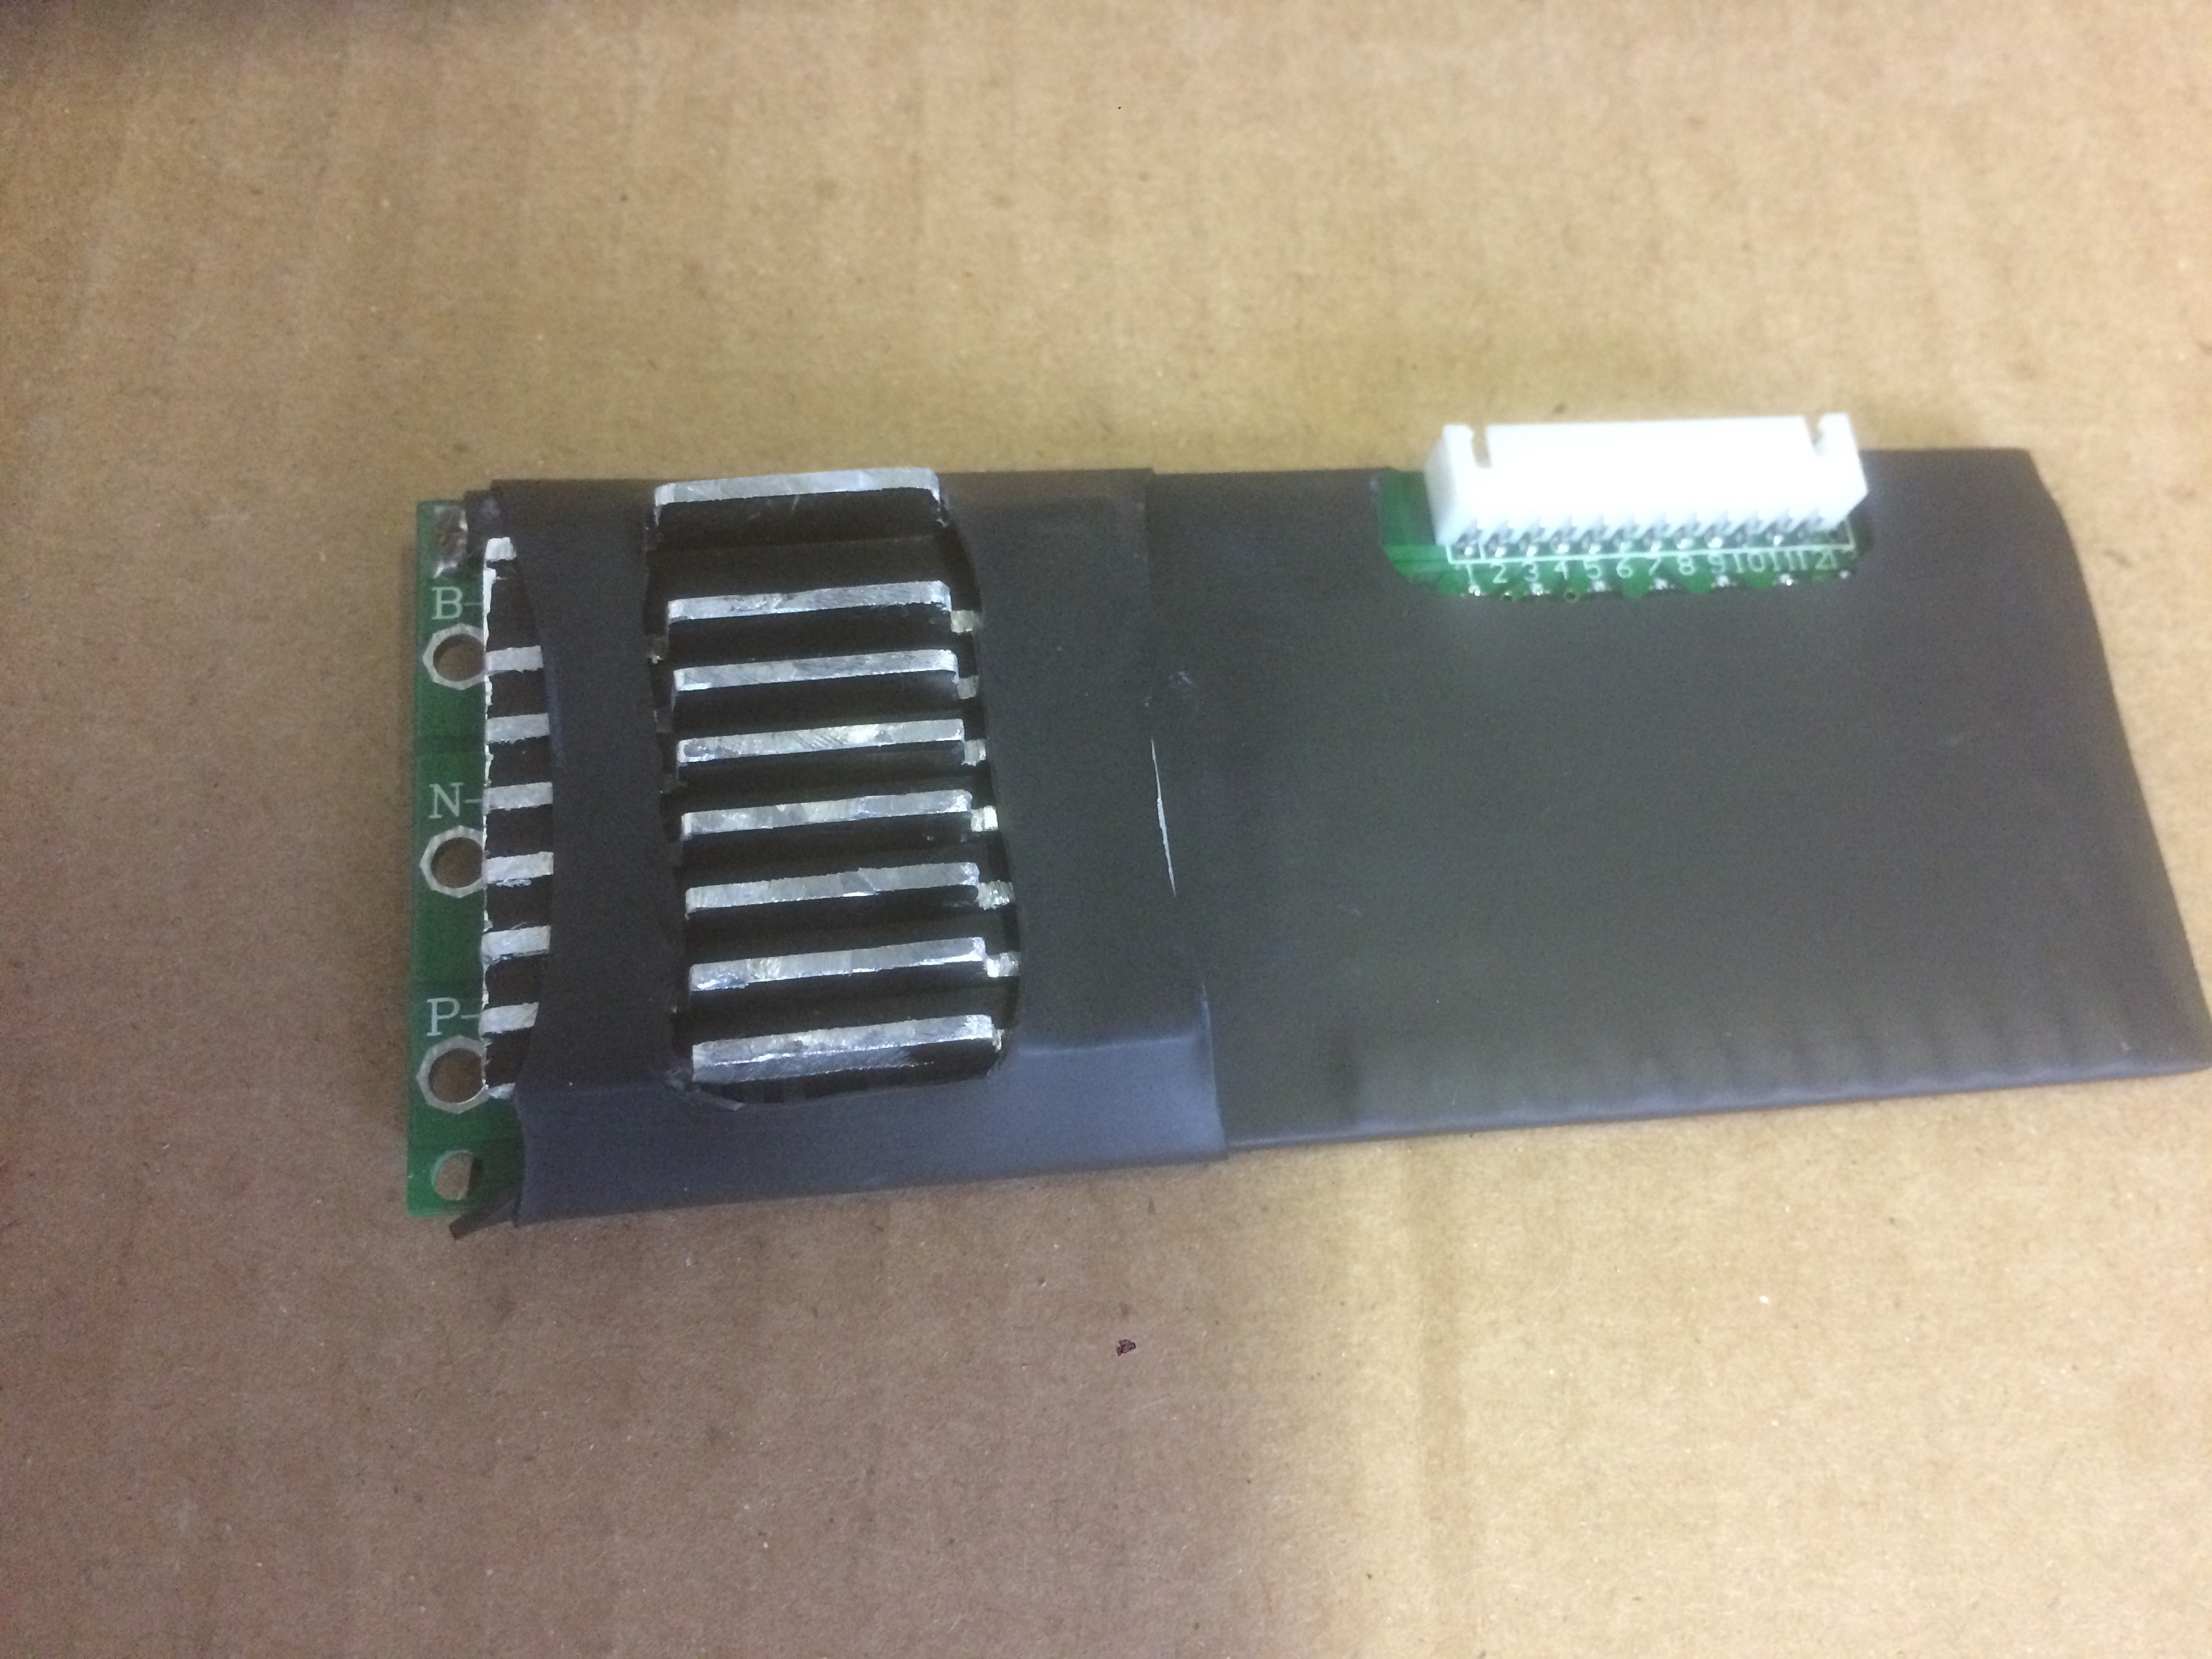
So the holes are great for reducing some weight, but I’m doing a bottom mounted battery, so can’t have it exposed to the elements. started by masking over the holes at the top of the deck and then masking at the bottom… only cutting the tape at the bottom.

Then I filled in the holes with expandable foam… I had some from smooth-on, so just used it, but if you go this route I’d simply use insulation foam from Home depot… This will fill the void while staying nice and light…

easily cut the excess foam off with a scalpel.

Then dug out about an 1/8 of an inch (currently working from the bottom of the deck) I want to make sure that this is completely water tight, so multiple layers of material will be used. Also, created a bit deeper trench around the edge, as this is the most crucial space to ensure adhesion with the next layer. Filled in my trench and coated the top with PC-7 Not photographed is after the first cure I spoted some little holes, so I ended up doing an additional skim coat… all sealed up now. and this is basically where I’m at…

The PC-7 is all cured I had also drilled the deck and implanted the threaded inserts… I also used PC-7 to insure they remain secure for a very long time. With that done and waiting for the wires to arrive for the next steps I decided to put the wheels on and push it around a bit… makes me even more excited to get this thing some power…

One thing coming up that makes me a bit uncomfortable is extending the motor sensor wire so it’s long enough to reach the VESC-x. The connector on it is already the right size, so my plan is to snip the wire and solder each wire back together long enough to reach and then heat shrink that back together… this seams to be the cleanest approach, but is a bit more surgical than I’ve experience prior to this. How does this sound @trampa? I think I’ve read somebody doing it this way but it was awhile ago, anybody actually done it like his?

6 Likes

Sounds good! Nice board, you will love it.

Frank

Yesterday afternoon my heat sinks arrived. I had a flat piece of Aluminum from @Kaly, but

  1. I’m about 187lbs
  2. there are some sizable hills on my commute, and
  3. I live in HOTlanta GA… I want to get as much heat out of the box as possible while maintaining a water tight enclosure.

So this morning was altering the box to fit the VESC’s and the heat sinks:

First was to make sure it would all fit and where the holes needed to be drilled etc… Then mark out where the heat shrink would protrude and cut the inner box out. Then cut one line for the last fin of the heat sink and used the spaces on the sides to hold the heatsink in place. Then I know for sure it won’t be going anywhere. I could have been a bit more precise with my cuts, but I’ve got black Sugru coming soon that will fill in the void really well, make it water tight, and is heat resistant so it shouldn’t disconnect when the sink heats up. That’s all I’ve got time for today.

1 Like

Some progress was made over the weekend. Most of my orders arrived, but still waiting on a couple small things.

There’s a lot of double/triple checking that things fit… After planning on placing the charging port, switch, and usb extension on the same side, I had a change of mind. Instead of crowding that side, I decided to reduce the size of the heat sink on the BMS to make room for the switch on the opposite side of the enclosure. Got that cut and ground down so cords could run over the top and an xt60 connector could fit in the space to the side. (also not shown is that I filed and sanded all the edges smooth so they wouldn’t cut into any cord over time) used some thermal paste between the sink and BMS and then heat shrink to secure it. After that, cut out the fins to enable better heat dispersion.

The motor sensor wires weren’t long enough to reach the VESC-X controlers with the @kaly under deck case. I spliced the cord (nerve wracking) and soldered all ends to a longer length of wire.

I know that brown heat shrink isn’t pretty, but it all ends up in another casing eventually so I’m not too worried about it… all extension solder points done and secured in heat shrink. now it reaches no problem… (not seen is temporarly taped the VESCs in place and mounted the battery enclosure… connected the sensor wire to the VESCs and had the motors in place… stepped on the deck and push to simulate the tightest possible turn… measured how long the cord could be pulled and gave it another .5 cm to be sure… and that’s where it was cut.)

My black Sugru showed up so I got the heat sinks permanently attached. as well as the battery indicator

Also made the rest of the modifications to the enclosure The only other thing permanently installed is the USB extension… the charger and switch can still be removed, for now. The holes at the top still had foam exposed as I only used PC-7 at the bottom… With the arrival of the black Sugru, I used that to seal off the top… Black on black… :slight_smile: With the motors off I also removed the belt and took it outside for a roll around. Wanted to feel the carving and test turning radius… I had ordered Dampas but decided to take them out, ended up setting it up with inner spring position on the front and outer spring on the back. No Dampas… We’ll see how that feels once this thing has power, but seems like the right feel as of now. Triple checking on this, but the positive is the top one and the negative is the lower one, right? This is the D/C charging port (back).

4 Likes

I’m soooooo close to having this thing working! Super excited. I’ve just done my first test ride! I’m running into a problem that you might be able to help me with… My sensor wires were too short to get from the motor to the FOCBOX so I spliced them and soldered in these wires: https://www.amazon.com/gp/product/B073QJZ3PD/ref=oh_aui_detailpage_o02_s00?ie=UTF8&psc=1

They were 26 awg. it was the closest I could find that came in a set like this.

So when I plug the ESC into the computer and go to set it up it detects the Hall, but when I set it as either FOC and then do the Hall detection and click “Apply” then write configuration the motors get really jittery Then I tried BLDC and used sensored mode and they chop all over… Finally I got it running using sensorless in FOC. I think I could also use BLDC and sensorless…

Now I’ve just done a test ride and as I put load on the board it stats to get a little choppy at higher speeds… maybe I’ll switch to BLDC but FOC is supposed to be smoother?

@Jinra you mentioned the sticker was wrong, but the cable from the motor is set to fit into the FOCBOX sensor port… So the sticker being wrong isn’t like the wiring is actually incorrect causing this sort of problem, right?

Current settings

The motors are @trampa 136 KV motors

1 Like

If you follow what the sticker says you’re sensors wont work since one of them wires is plugged into the temperature pin. You have follow the PCB, but the correct order is…

GND, HALL3, HALL2, HALL1, TEMP, 5V

and that’s the order the wires come in on the motor at the start? I spliced and lengthened each sensor wire, I haven’t changed the plug at all. Is the color coding for this order standard?

I think the jitters that are happening right now might be the battery dying. I’m charging it now and will see how that goes. The meter was reading full but everything just been wired and I didn’t try it after use.

I’m not sure, different motors come with different orders depending on the mfg.

Your settings don’t match the detected settings… make sure you hit apply to all the fields and write

ok… thanks I’ll check with @trampa it’s late in the U.K.

The new problem is my meter is reading full when it’s obviously not full. Not sure what’s wrong there.

Hi Blasto, Ya sorry that’s confusing. I did that when I tired the sensored mode, but when I switched to sensorless the Hall sensor table reverted back to 255.

I’m also looking at your R and L settings, they also son’t match

Sorry for the shitty paint job, on my mobile

1 Like

Ha… No problem… I’ll hook it back up tomorrow and try again. Thanks!

I’m having another problem with my voltometer… doesn’t seem to be reading correctly: First I tried wiring + on meter to + after the loop key and - meter to - after the BMS (basically did both on the xt60 just before the ESC)

That option showed full battery even when the battery wasn’t full. Until it was all empty then it showed empty.

Then I tried + on meter to directly into the battery + and - on the meter to the + just before the ESC (As diagramed in the attached file)

That just gives me nothing…

I’m trying it when the loop key is in.

1 Like

That voltage display you are using is 12V, you need to connect it to the last 3 cells of you pack (via the balance leads)

The good news is that that display is pretty robust, i jammed 50V in it while testing it (thinking it was 12S). Realized after it was 12V, during this build http://www.electric-skateboard.builders/t/arch-s-build-log-kaly-nyc-build-dual-6374-focbox-12s4p/25995?u=blasto

Still worked

The balance leads are all bridged over but connected to the negative of each section. Where would the + go?

Ha… that is good news, and makes sense that the lights flair up like it’s Christmas!

You negative to the batt -, positive to neg 4 cell (positive 3)

You’re awesome, thanks! Just to double check as that wiring diagram is borrowed… I’m on a 12s4P set up will I still use Positive #3?

Great thanks!