Hi all
Long time lurker here, 40+ yr old ex skateboarder, DIY everything and rooted knees led me to Esk8!
I’m a complete novice so I have written this for people just starting out that will come across these things like I did, building from OZ with little or no experience. I have actually built this already and tested it over the last few months. What a blast the thing is to ride! First ever ESk8 and build for me. Was challenging getting parts together from Oz and will talk about that later. This is my version of the Skatemetric Foosted Copy you can find here. Its a good starting point. Skatemetrics Tutorial is awesome but a little hard to follow if your like me and learn visually.
Went to my local skateshop here in Melb (In Richmond) called TwelveBoardstore https://twelveboardstore.com.au/. They are actually the Australian Rep for Boosted Boards (funnily enough) and do lots of downhill stuff as well. Great shop. Boards and gear here in Oz are eye wateringly expensive$$$$$.
I originally wanted a deck with a tail as a have a skateboarding background 
That quickly went out the door when I walked in the shop and saw this gleaming Powell Kevin Reimer Downhill Deck and instantly fell in love. Got some funny looks from the Boosted Rep when I explained that I was building a better esk8 than the Boosted with it😂. Walked out with Abec 11’s in 83mm and Caliber two trucks and bearings about 600 bucks poorer.


 Now after much research I began ordering parts for my build from Torqueboards (Diyelectricskateboards), MBoards and Flipsky.
Torqueboards 2 x 4.12 VESC’s 2 x Abec Pulley Kits (not kegel like skatemetics copy) 2 x 6355 190kv motors 1 x Nano Remote 1 x 2.4ghz receiver Canbus cable Servo wires (didn’t need these) XT90 parallel connectors.
Mboards ESC Enclosure (absolutely useless and thrown in bin) Battery enclosure 10s5p Battery (this is huge!) Premium Clamp Mounts (good but an effort to keep tight) 36 tooth Pulley Kit (never arrived and ended up ordering second set from TB)
Flipsky Anti Spark Switch 280amp Pro Bullet connectors
So after many weeks of waiting I finally got some parts to place on the board and mock up something resembling an ESk8.
For those Aussies reading this, be VERY careful who you order from and read these forums closely for other users experience.
Flipsky is actually the fastest postage wise to Oz (Singapore I believe)
DIYelectric skateboards (Torqueboards) was 3-4 weeks to my door. I like how you can see if they have stock on the site and I recommend using the chat to ask if they have stock before ordering, very helpful.
MBoards I won’t talk about too much, except to say the postage and communication I received was horrendous. I actually gave up on the pulley kit and ordered from Torque Boards which still arrived BEFORE Mboards. Long discussions about MBoards here https://www.electric-skateboard.builders/t/is-mboards-legit/47112/71
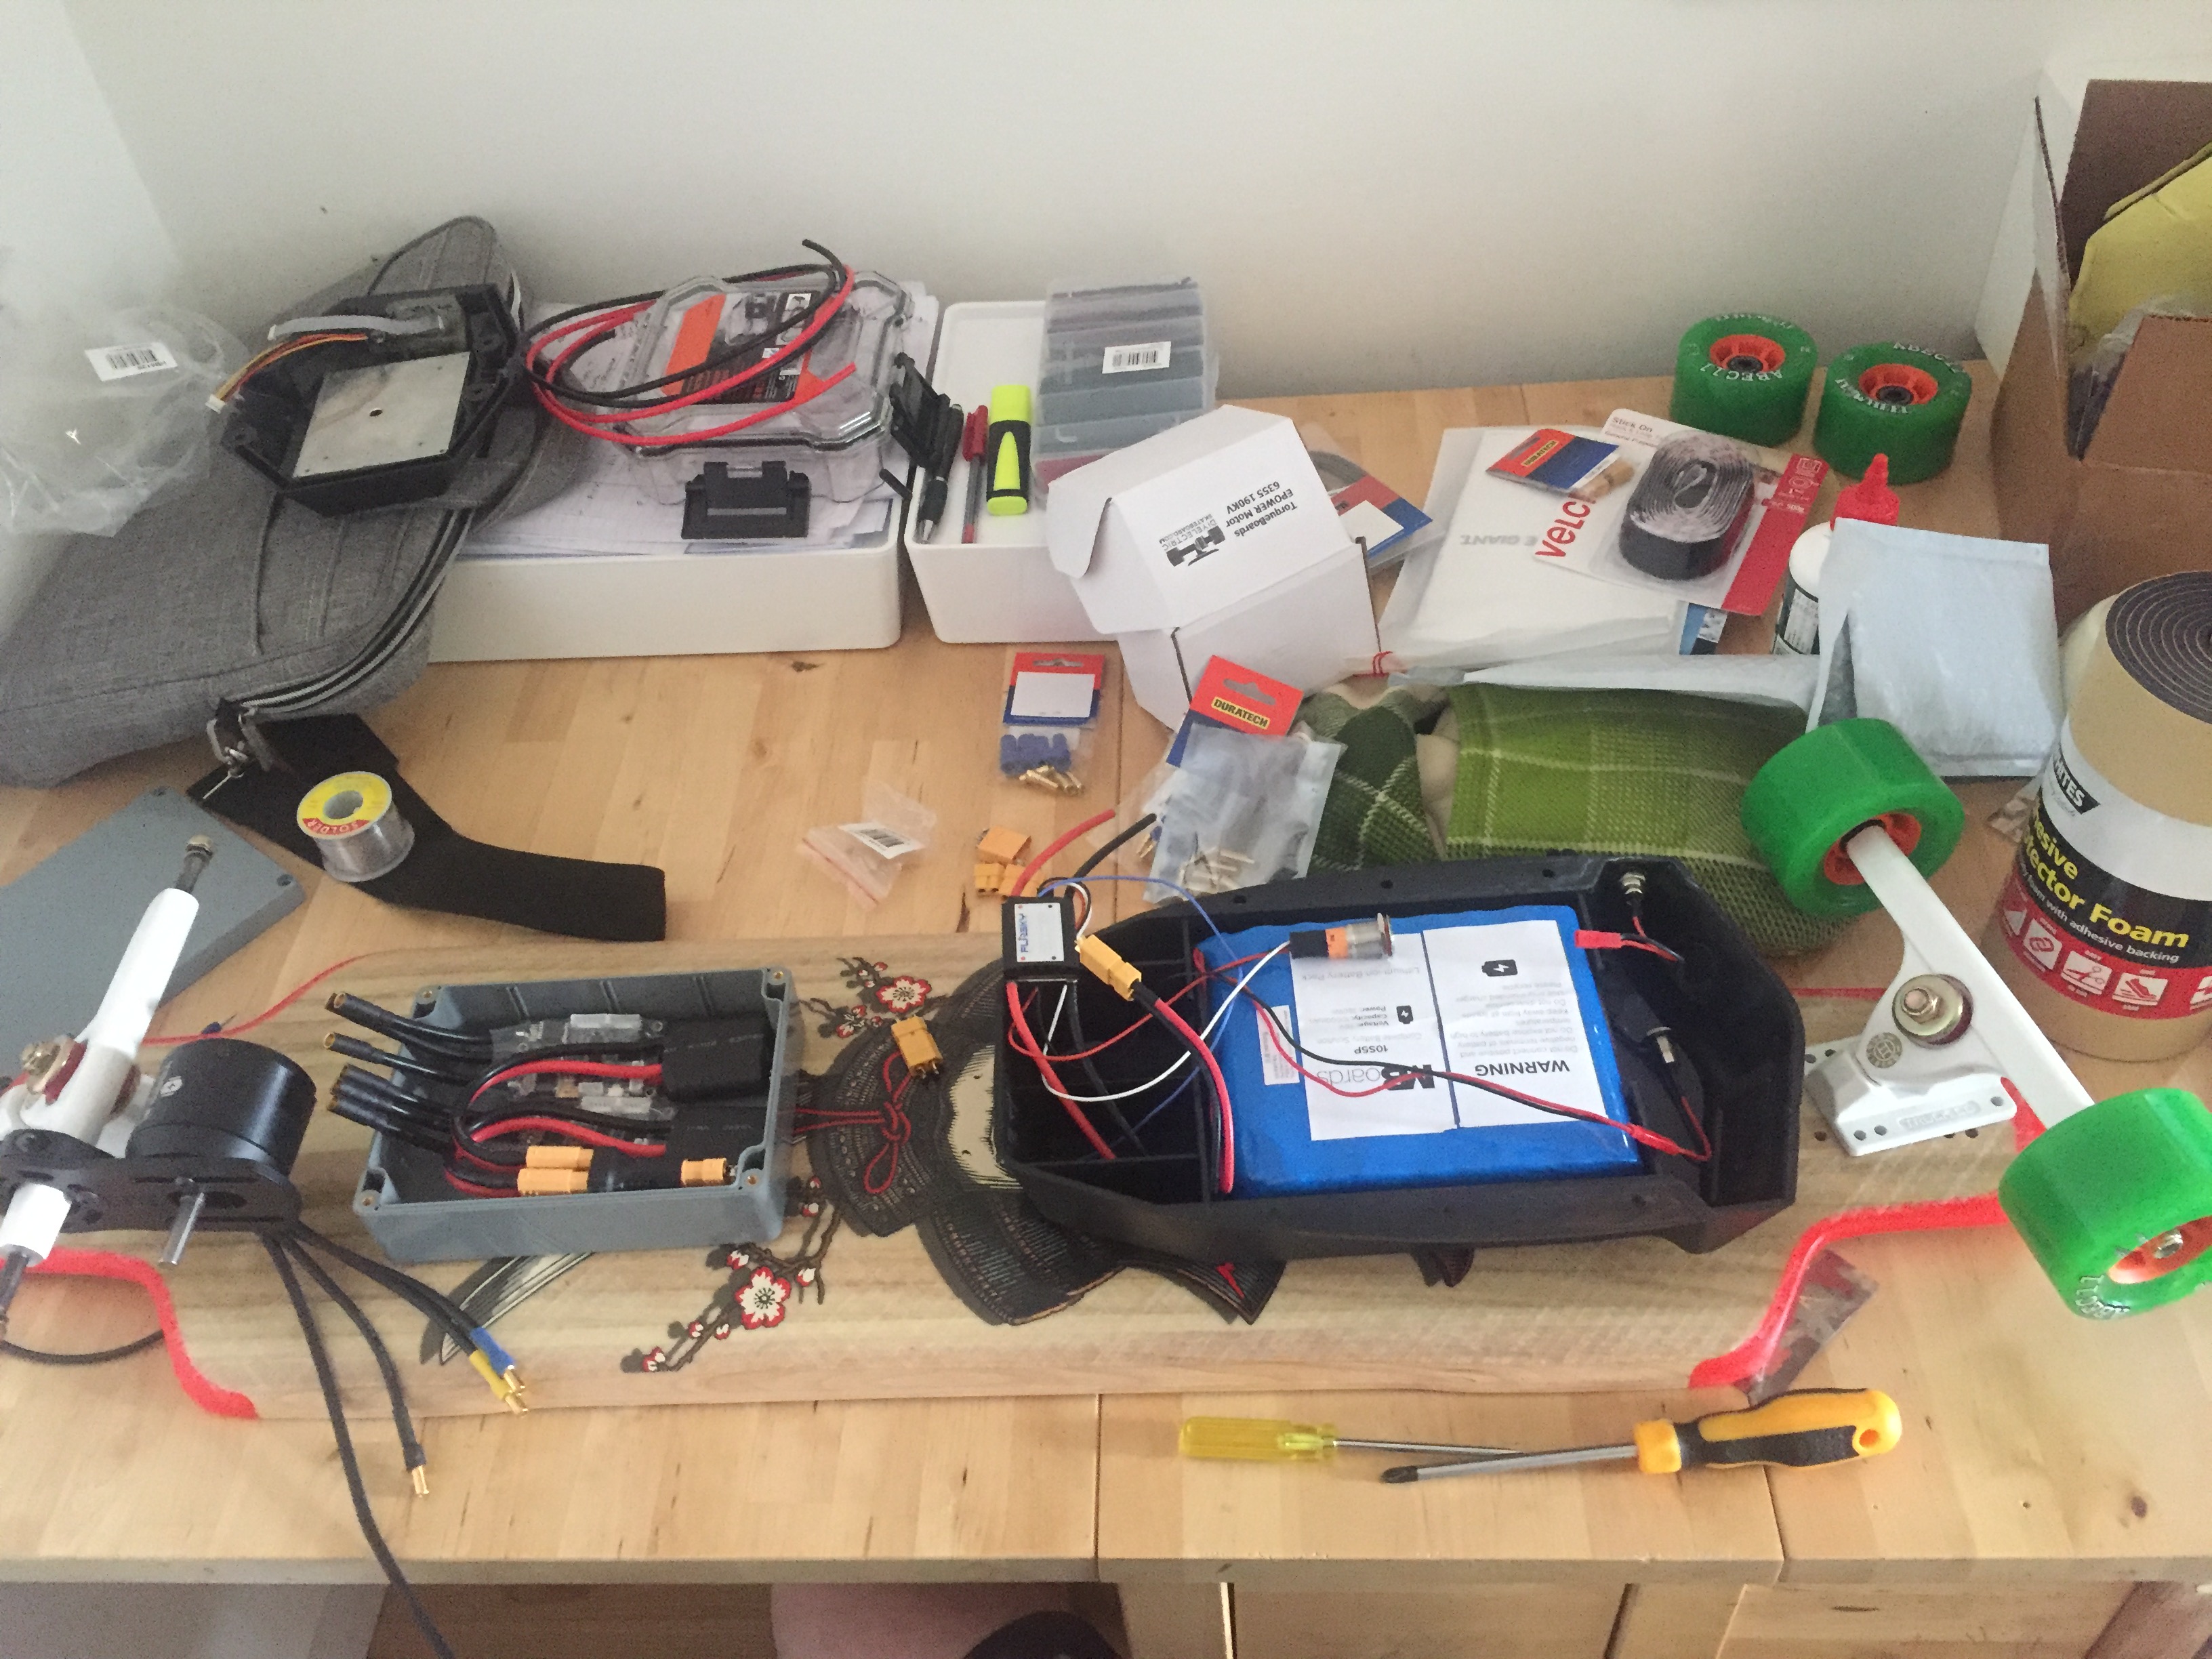
Bad photo but you get the general idea. For people just starting out with a DIY project here are the things I quickly learnt the hard way
enclosures Measure carefully your Esc and preferred enclosure before buying. The MBoards one I got was useless and would hardly fit one esc. I went to my local JAYCAR store and found these circuit boxes that come in a million sizes ( yes that ugly grey thing in the photo) $20 and so far bullet proof.

Wiring Note that everything you buy from the states is measured using their backwards AWG (American Wire Gauge). Everything here is in KV or mm. I just got some 0.6KV stuff in a similar size and seems to be holding up just fine. Get extra wire from the states when you order your gear if you want to keep everything the same.
Connectors Order more than you need, you will wreck some especially if you haven’t soldered before. Get double.
Soldering Learn to do it, but buy a decent iron, my first one melted before my eyes! You will be definitely shortening wires and soldering connectors. YouTube is full of good videos👍 I had to shorten all my VESC outgoing wires to my motors considerably. Plug and play is BS. i actually melted down some connectors and reused them a number of times.
AntiSpark Switches The one I got from Flipsky which has a sensor wire that you have to solder into one of the phases on your VESC. This is so you can turn the system on without the button by just spinning the wheels a bit. Thought this was a massive wank to start with but now I realise just placing the board down and taking one push is so much easier. The blue wire is the one you need to solder into the system.
I threw away the switch that came built into the MBoards enclosure and installed the Flipsky button into the same spot. Sexy. For some reason they have a switch on everything they send you, useless.
Supplies locally Don’t get Velcro, adhesive foam etc from overseas if your in Oz go to Bunnings they have a plentiful supply of this stuff. JAYCAR has limited supplies of bullet connectors and BEWARE they are in Millimetres and won’t fit the ones you bought overseas. I got extra wire from there and heatshrink kits. Good and cheap.
Thread Locker I clearly did not understand the vibration that goes through these things. I used locktight Blue threadlocker on everything. First ride around the block one motor dragged on the ground! When you think you have it tight enough, tighten some more. The bolts for motor mounts and truck mounts are hardened, and you will bend the Allen key before you bend the bolt. After three or four 12km + rides I almost have it right. Expect everything to come loose the first few rides. You need to make sure you tighten the main bolt on the truck, THEN the for Allen Screws holding the motor in place in that order. I think this gives the one bolt secondary support.

This is how’s my wiring ended up. It looks terrible in real life, but phase two should clean it up a little. I need to add in easier ways to dismantle, and attach the battery to the board with velcro instead of to the enclosure. Fitting in XT90 parallel connectors is an absolute head f$ck. Mine is ugly but works. I used XT60 connectors at the battery and antispark end.

I got a battery capacity gauge from EBay which seems to be working just dandy. Make sure you wire into correct side of your switch or it will be on permanently. I hot glued mine into the side of my MBoards enclosure.

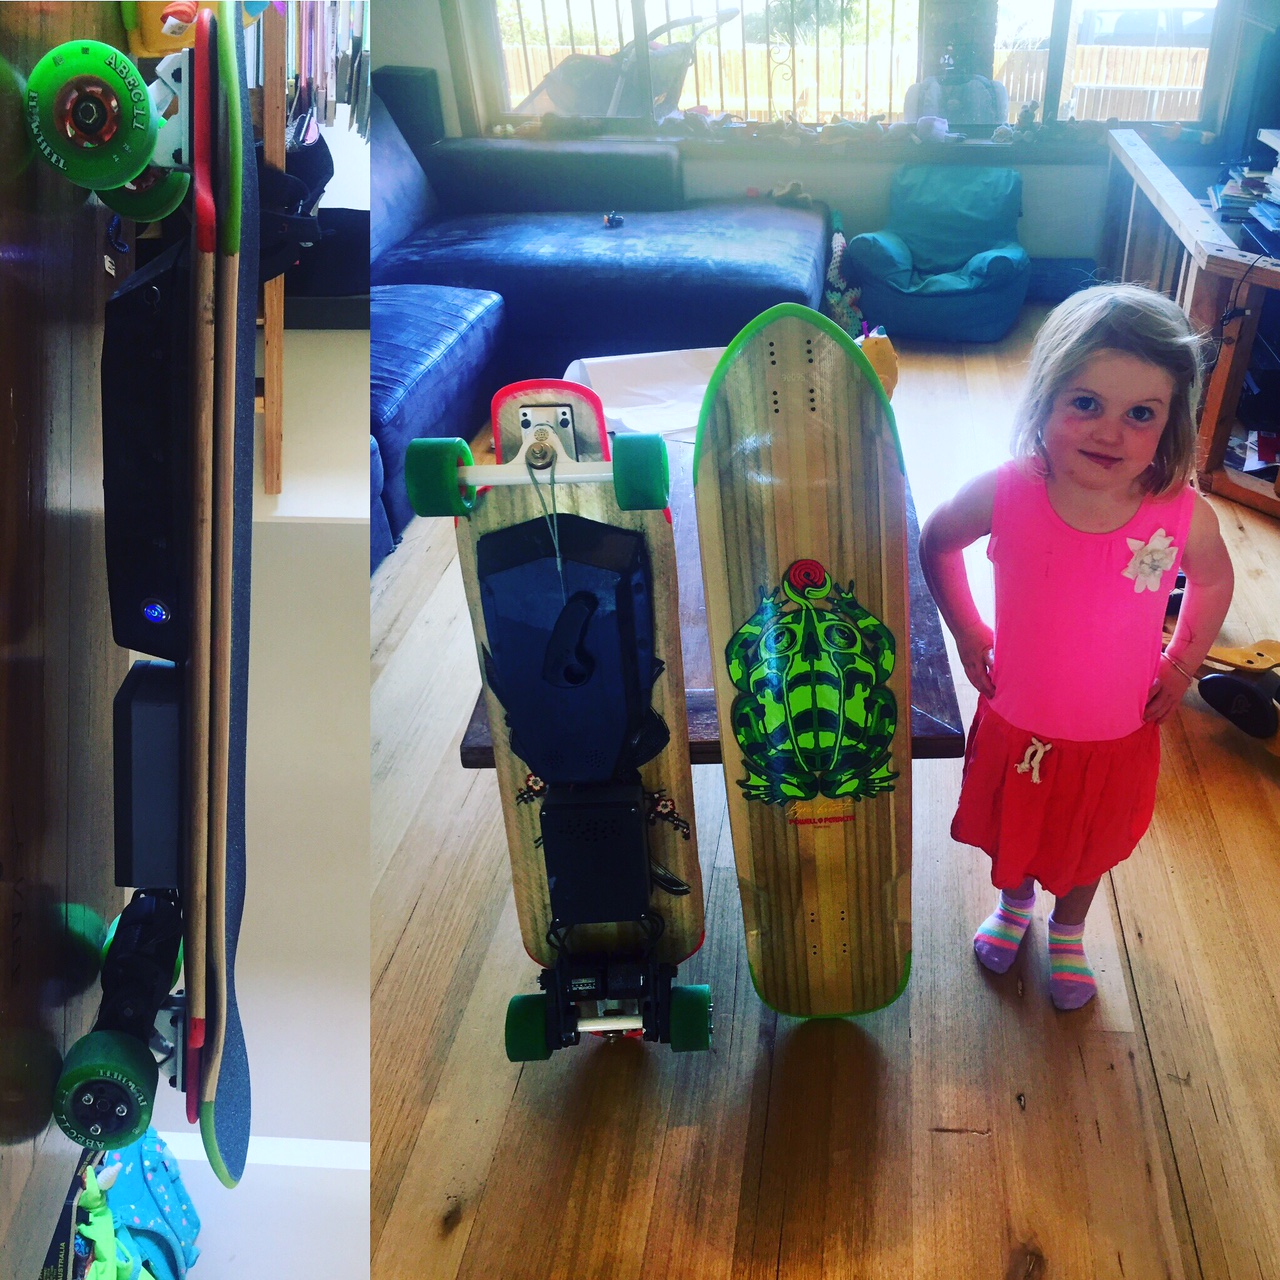
this is how the board looks now, note my motor with a little less paint than it began with 

I have done a few decent rides to work (32mins each way) along rough footpaths, roads and bike path.This was along Maribynong river from Brunswick to Port Melb. I haven’t yet even come close to flattening the battery. I went 45km per hr down the hill behind the Zoo in Parkville and it was soooooooo stable at speed with this stiff board. It turns beautifully. I can carve easily on wide flat roads at full speed. I found I do still feel it after a while through my feet, especially raised concrete kickers in footpaths.

One thing I learnt is I could do with some more ground clearance from the motor mounts to the ground. It catches big rocks and debris. One mount has taken a massive hit, didn’t even feel it. I actually have a small piece of metal missing from the corresponding pulley that embedded itself in the belt. You can kind of see it in the photo. I am hoping an extra 14mm of wheel will help with this.

PHASE 2.1 BEGINS 
So this is where I am today, I have purchased a new Byron Essert Downhill board from Powell Peralta (with a tail). Yes it was expensive, but being a skateboarder, I hate the feeling of not being able to lift the front wheels to get around things. I want to be able to move the board with my foot instead of having to pick it up if I find a turn that is too narrow.
This board is DROOOL WORTHY, its a thing of beauty.
So I need to clean up this mess of wiring, still undecided but might make my own ESC enclosure to replace the Jaycar box. I hate the direction of the incoming phase wires where they go into the VESC’s. I am too scared to cut them and solder them the correct direction towards the battery so I have tried making some 2 into 1 connectors out of 5mm bullets. Not sure if I will go down that path. You can see how much room is taken up by that horrible XT90 parallel connector

Also have gone up to Abec 11, 97mm wheels and adding half inch risers for more clearance. They arent in this pic but you get the idea. Drilling into this board to mount everything is going to be hard to deal with…its soooooo nice.

Also need to fix up the way the battery enclosure seals to the deck surface, need to find some thicker adhesive mounting that i can trim to shape.
i think I might make some sort of handle to carry the thing around with.
give me a yell if you have any questions, or if I have misquoted something!
Stay tuned
GUZ
 I’m in the process of waiting/ ordering parts.
 jaycars around the corner its amazing
 ![IMG_8454|666x500]
Ended up with a mix of Vac and pump
![IMG_8454|666x500]
Ended up with a mix of Vac and pump 


