Hey guys, just wanted to show you my first build here. I’ve been doing lots of research/buying/machining over the last few months, and the build is almost complete. I decided to try make things where I could (I’m an engineer and I’m fortunate enough to have access to some great tools and machines), and as a result the whole thing has taken a very long time… but I’m pretty happy with it so far, learned some new techniques and had good fun along the way!
The detailed specs are:
Board: Loaded Tesseract (used, bought off a local for cheap) Trucks: Paris V2 180mm in silver Wheels: 83mm Flywheel Clones Battery: Torqueboards 12S3P 30Q @torqueboards ESC: Torqueboards VESC Motor: Build Kit Boards 6374 190kv @JLabs Remote: Mini Remote & Receiver from eBay Motor Mount: Custom CNC Milled Hub + Motor Mounting Plate + Belt Cover Enclosure: Custom Carbon Fibre Enclosure (with inspiration from @MasterCho)
This is the CAD for the drive system. I got the files for the Paris trucks off a very helpful Grabcad member (https://grabcad.com/david.doluca-1)!

Turning the trucks in a lathe

Trucks with nice flat surfaces to weld the motor mounting hub onto, with other bits and bobs that came in through the mail

CNC milling the wheel pulley

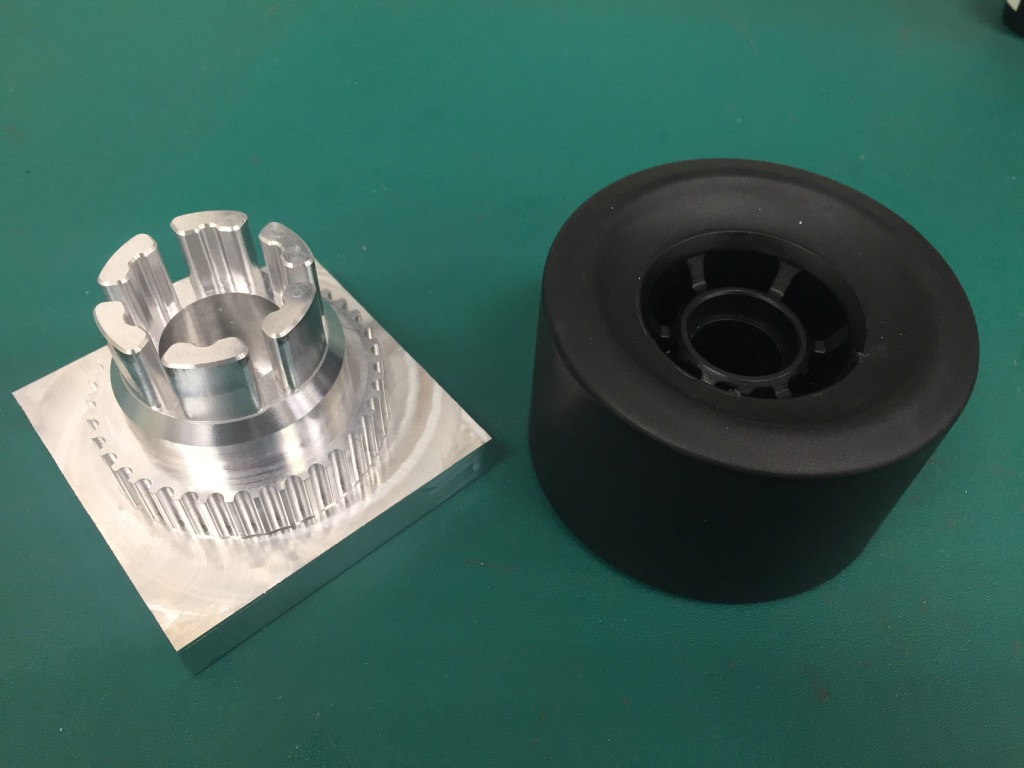
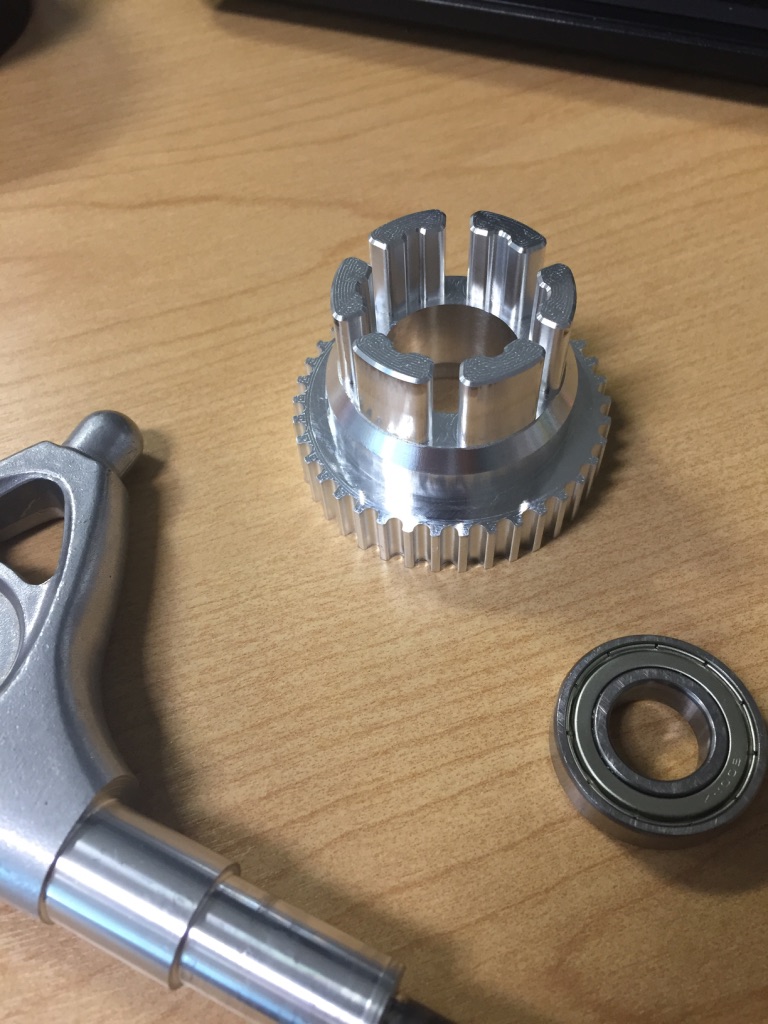
Machined and welded the motor mounting hub!


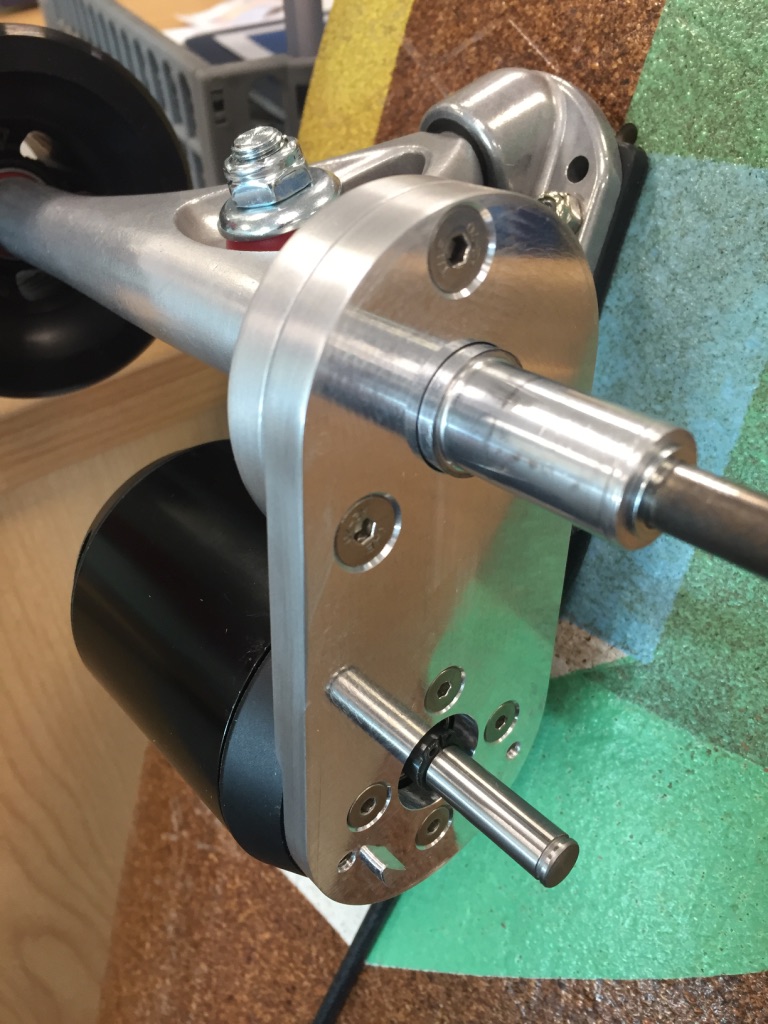
Machining the belt cover + motor mounting plate


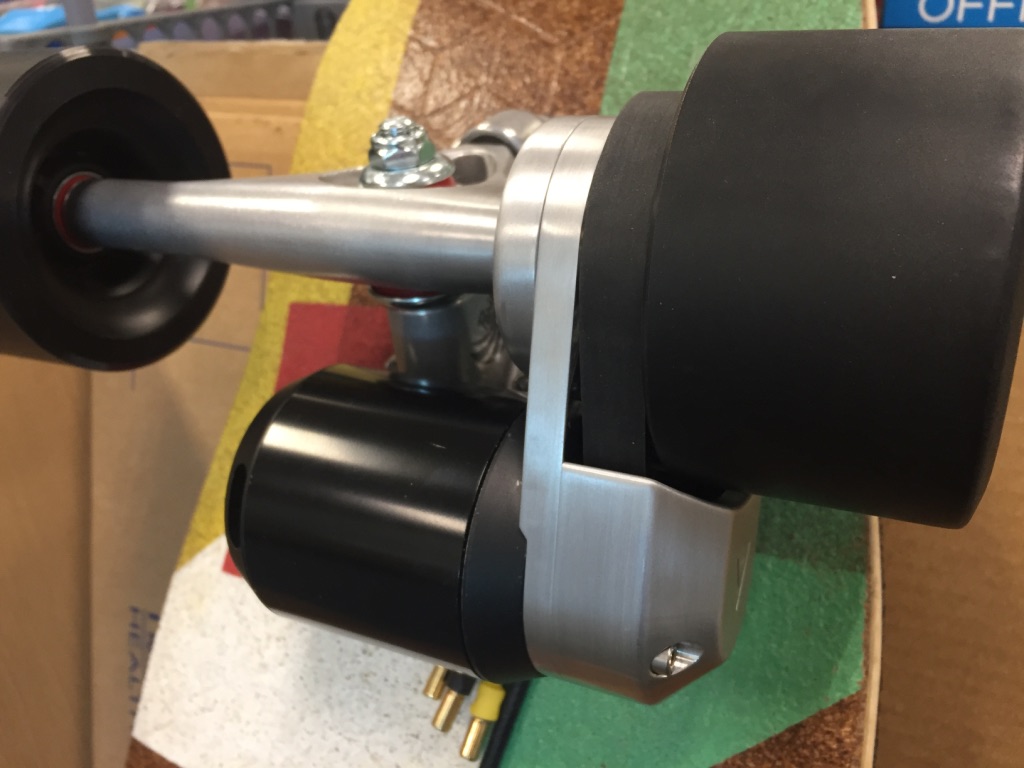
I gave the external surfaces a brushed look by using a polishing wheel

Assembling the drive


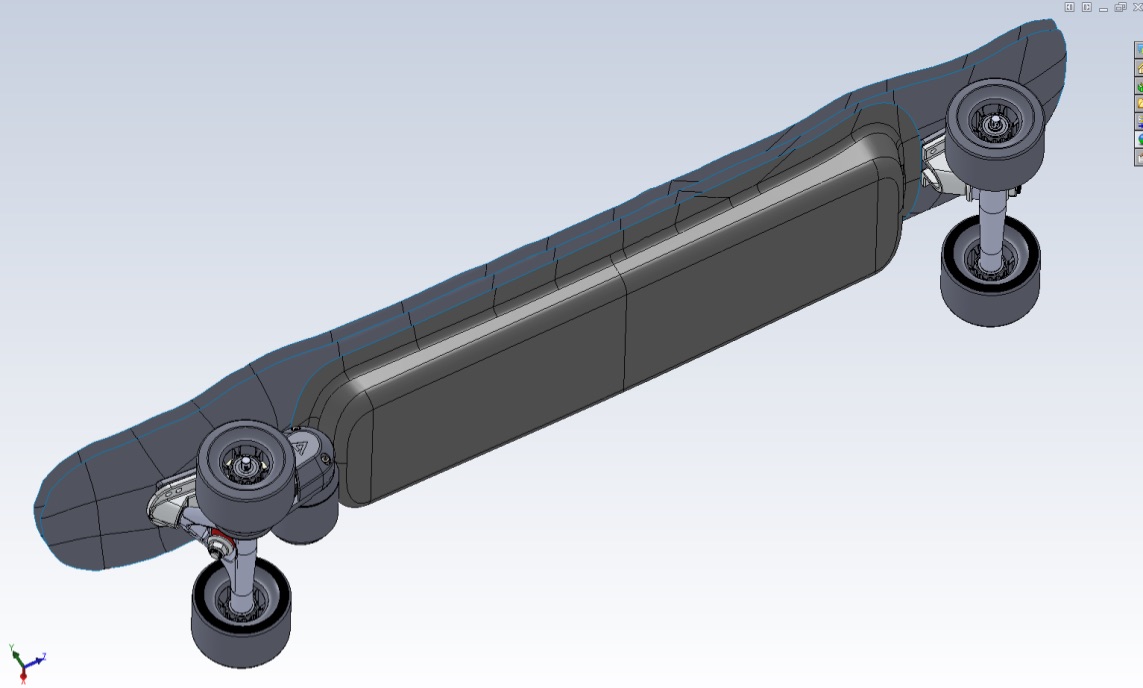
I then thought it’d be a good idea to make a carbon fibre enclosure from scratch. Ended up taking forever, working on it bit by bit after work. I used a 3D scanner to scan the bottom surface of the board, to get the enclosure to follow the contour of the board. Ended up with the full CAD of the board:
Then I got some 9mm MDF, laser cut into the layers that would form the mould. Laser cutting the sheets beforehand meant that I wouldn’t have to rough out as much wood, for a quicker CNC job.


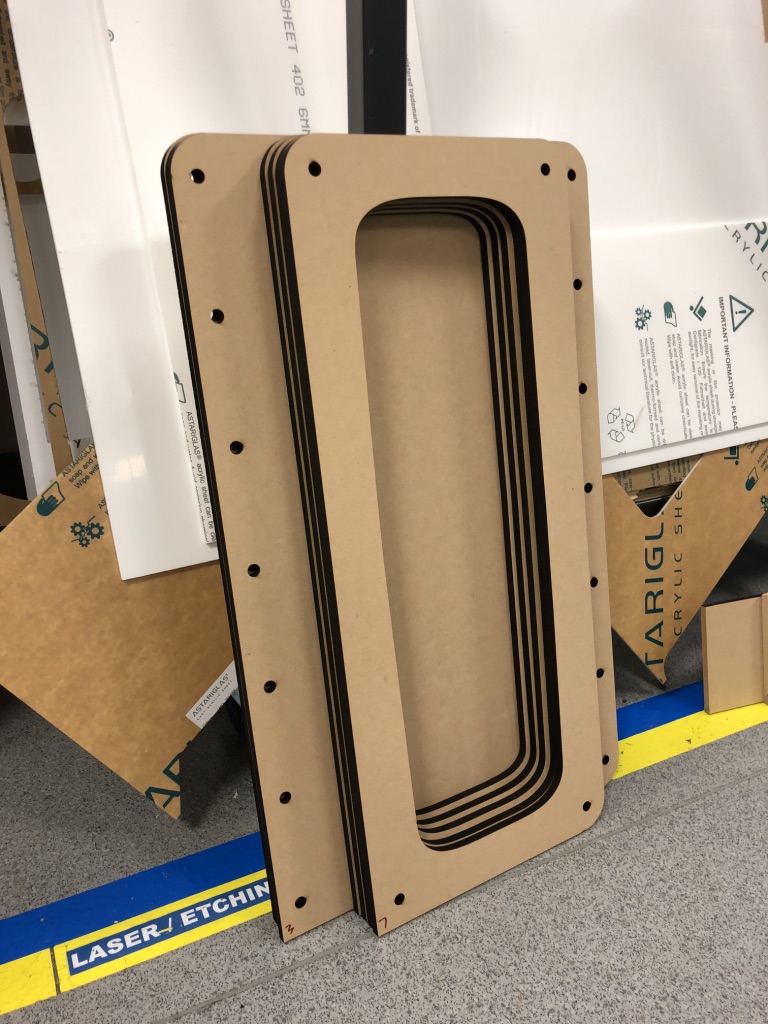
I then glued all the sheets together, and machined the mould on my buddy’s CNC router (some of his cool stuff can be seen here: https://jeremyyoungdesign.com/)


Quite happy with the results! We didn’t do too fine stepovers because we didn’t have too much time, and I was going to have to sand the crap out of it anyway:

After much sanding, I used some polyester resin to seal the MDF mould… and sanded it some more after that. Some black spray paint was used to help identify the low spots, I think this is called a guide coat?

At this point I was seriously questioning the effort gone into making a mould for a one off part. Oh well. I used some of this stuff to wax the mould to help release the part:


And finally the mould was ready! I got some sheets of 200 gsm twill carbon fibre and 200 gsm plain weave fibreglass. The idea was to do 2 layers of carbon, followed by 4 layers of fibreglass. My buddy Max (check out some of his awesome work here: www.maxbetteridgedesign.com - amongst many things he has built a very unique electric longboard, and an absolutely jawdroppingly slick Ducati Monster Cafe Racer) showed me some parts he had made with a similar layup and we decided it was going to have the right thickness and strength.
Laying down the fibreglass, cutting out gussets to help reduce wrinkles:

I took a timelapse video of the layup for Instagram. Here’s a gif of it: https://gfycat.com/HeavenlyJaggedBoaconstrictor
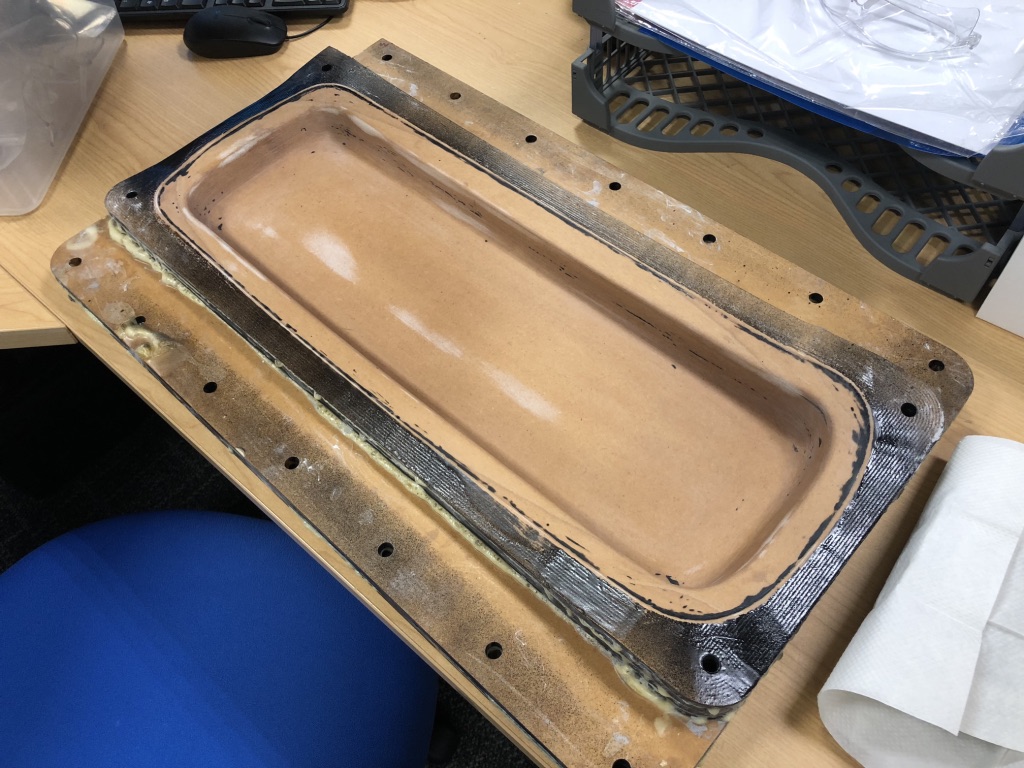
And this was the part fresh from the tool - some of the mould came off with the part! Woops. Nothing that can’t be scraped off though:


After scraping off the excess MDF and trimming the part with a Dremel, here is the enclosure laid up against the board.
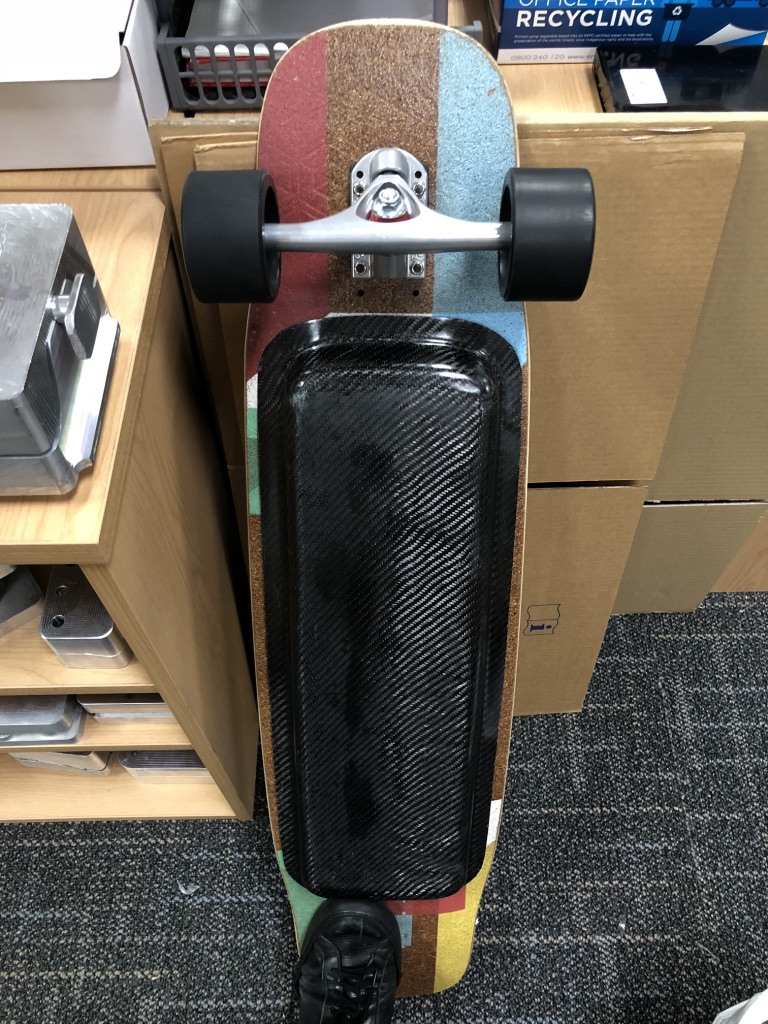
I didn’t want to polish bare carbon, so I gave the surface a coat of epoxy resin:

And that’s about where it is right now. There’s still some bubbles and stuff on the surface of the enclosure, I might try sand and polish that if I get the time, but I’m not sure if I can be bothered because it’s going to get scratched up eventually anyway. Next up is drilling the board and wiring it up, can’t wait to actually take this out for a spin!
Cheers to @onloop for this great platform where we can discuss and share builds. I think 99% of my research regarding building an electric skateboard came from this site, it’s been a huge help!
Feel free to ask questions and give some feedback!
 Some really good DIY here!
 I can’t believe what you did, this is so freaking great!
Wow
I can’t believe what you did, this is so freaking great!
Wow 