With it I was able to resurrect the motor pulley that was banged on too hard. I had somehow with pure clairvoyance bought 3 pulleys. That one with the diagonal hole is no good but I still have two not totally destroyed pulleys left for my dual motor plan. With the straight drilled pulley and the belt tensioned properly, things were looking pretty good, but I wasn’t happy with the softness of the plywood mount. If I yanked on it, the plywood compressed and everything got loose.
So the new drill was put to work on an aluminium based motor mount. I drilled a bunch of holes in some of that 2 inch by 1/4 inch aluminium bar to try to once again make a hole the size of the MBS Matrix ii Pro truck.
It’s actually not a bad fit, just a little wobble. But I’ll need to figure out how to secure that properly to the truck. I’m thinking a simple right angle bracket will do the trick, so the next step is probably to find/create one.
I also ordered some new aluminium motor pulleys. Much the same as the plastic ones, but should help if things don’t go well, or I destroy a motor pulley again : http://www.bbman.com/catalog/product/16XL037-6FA4
The RC controller I ordered right at the beginning of all of this is due to finally show up next week, so I’m hoping I can sort out all the issues, and this will all be ready to go by then…
I bought a couple of little zinc brackets to attach the mount to the truck. They might not be strong enough, there is a fair bit of flexibility in it all still. With a bit of force I can bend and twist to adjust where the belt sits. That’s kind of good right now, but might not be so good when I’m riding. But the nuts and bolts are all a bit loose. It will help when I tighten and loctite everything.
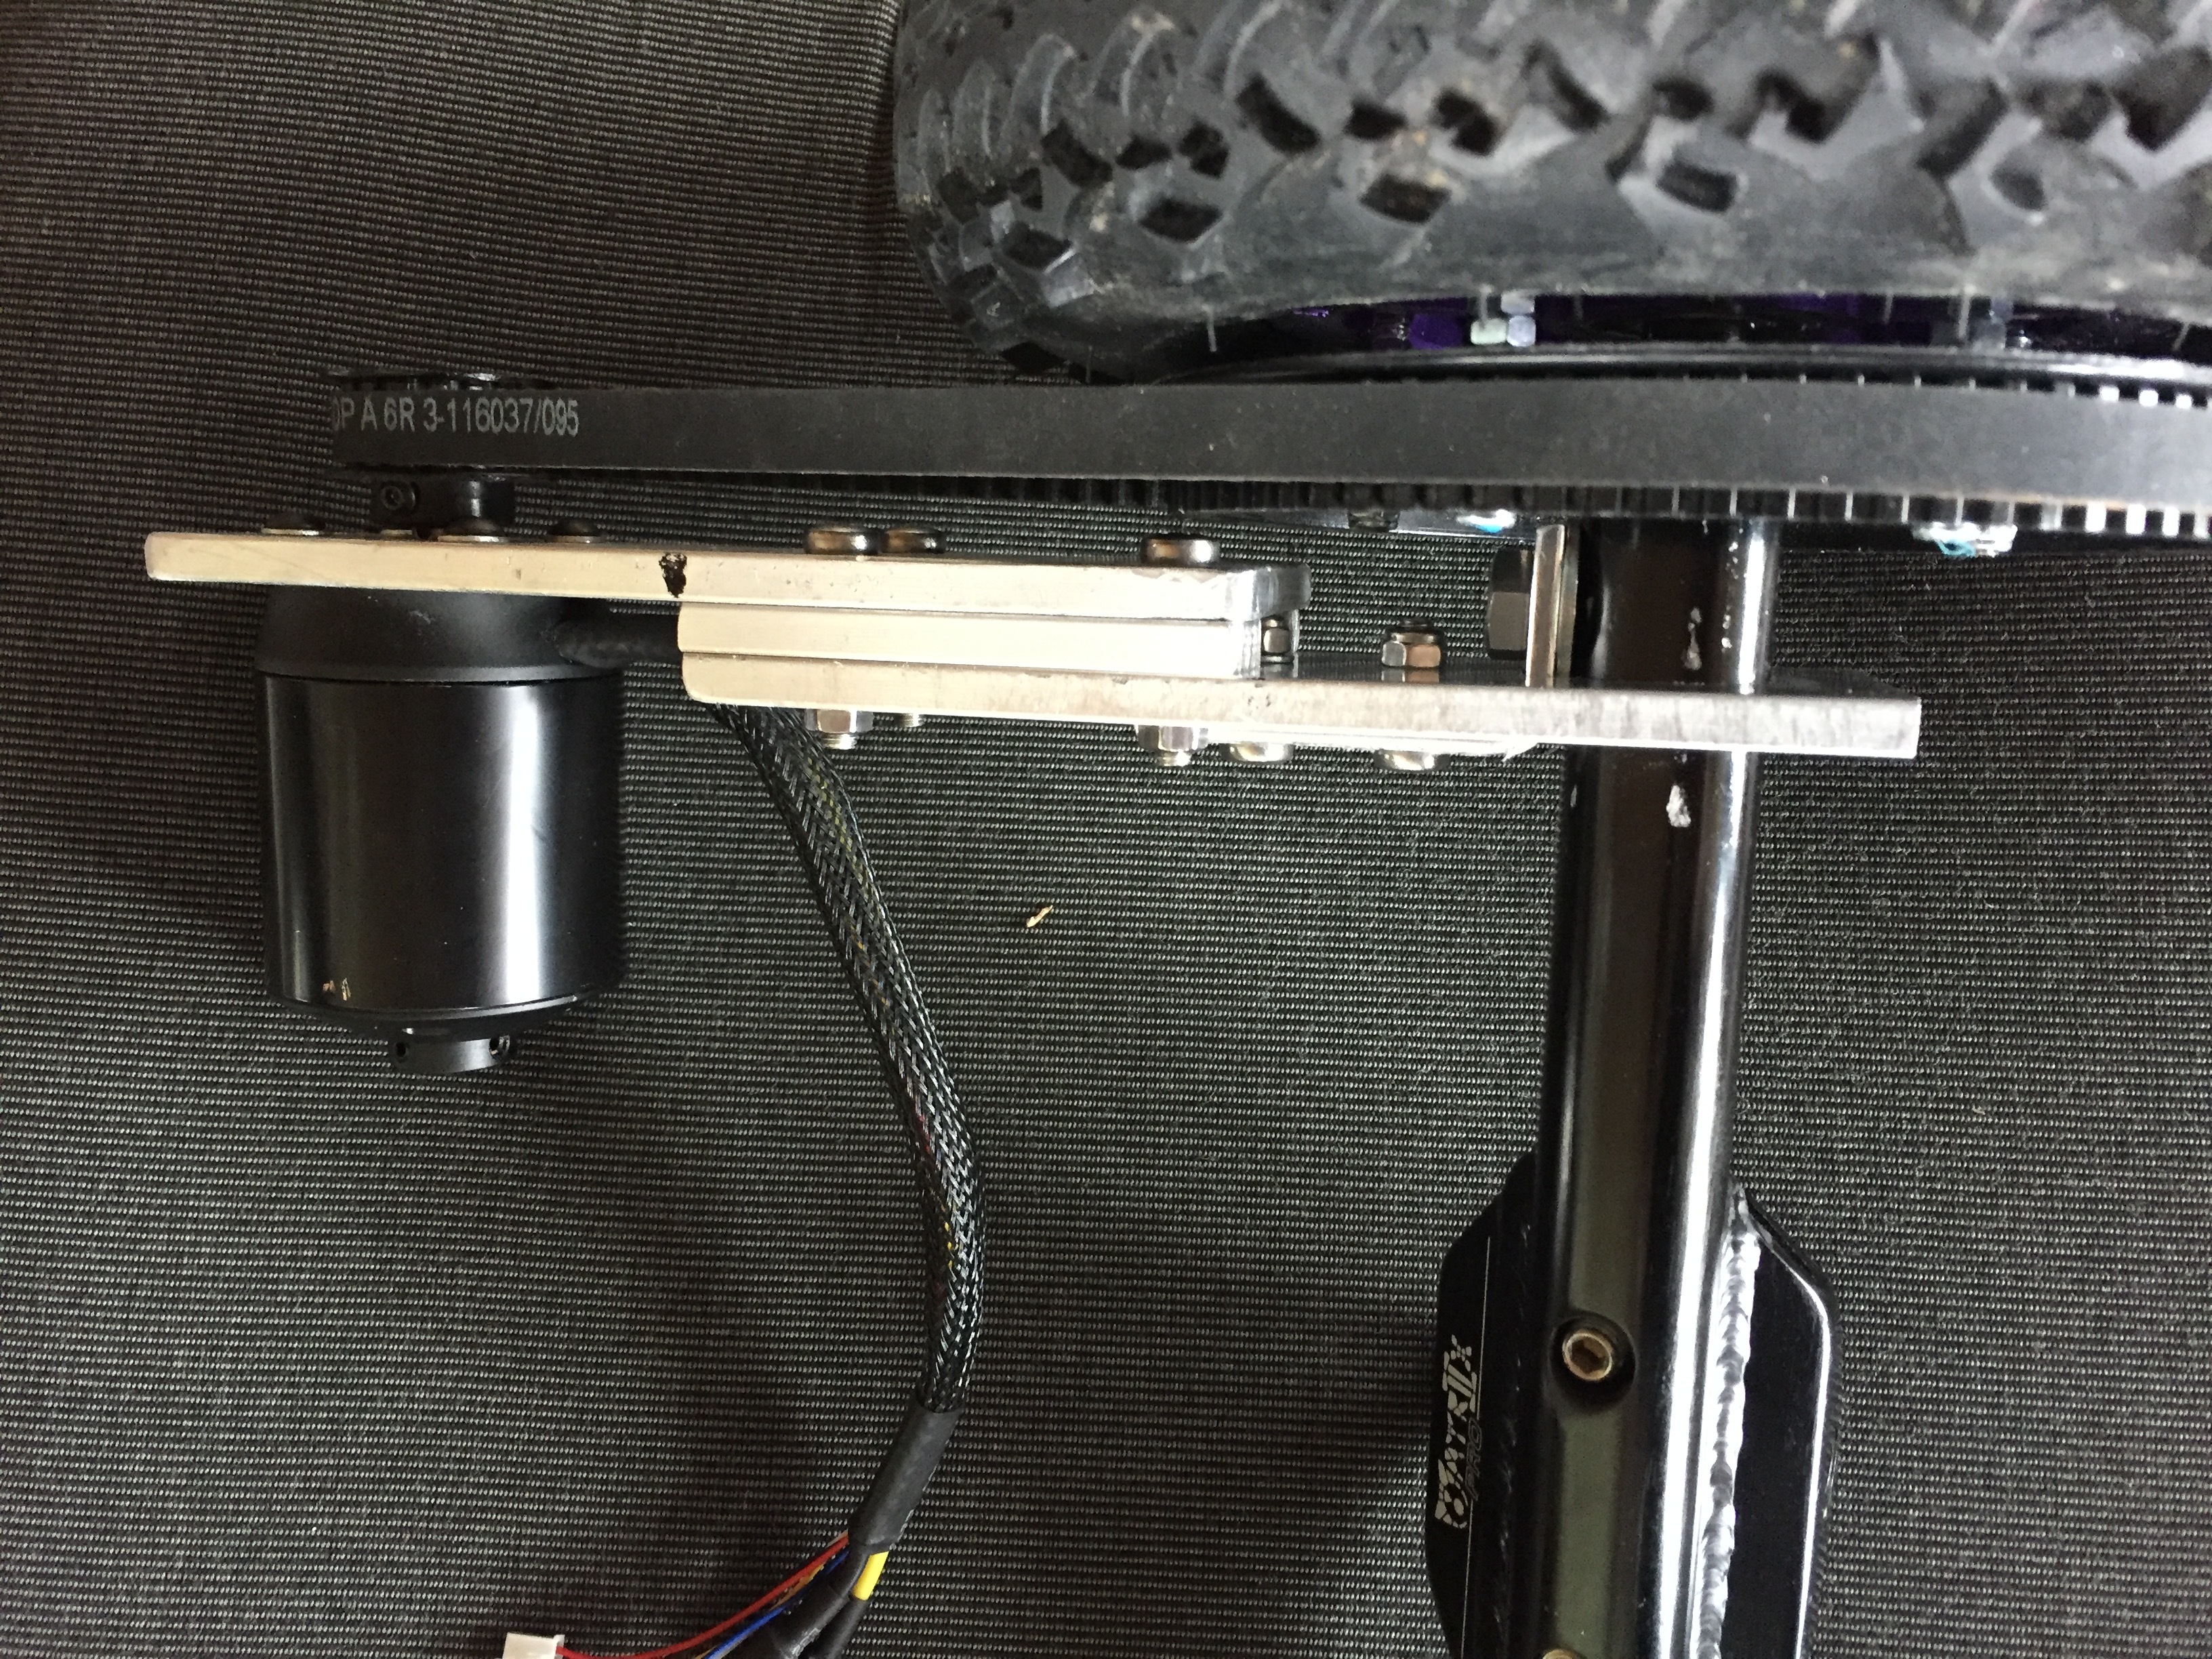
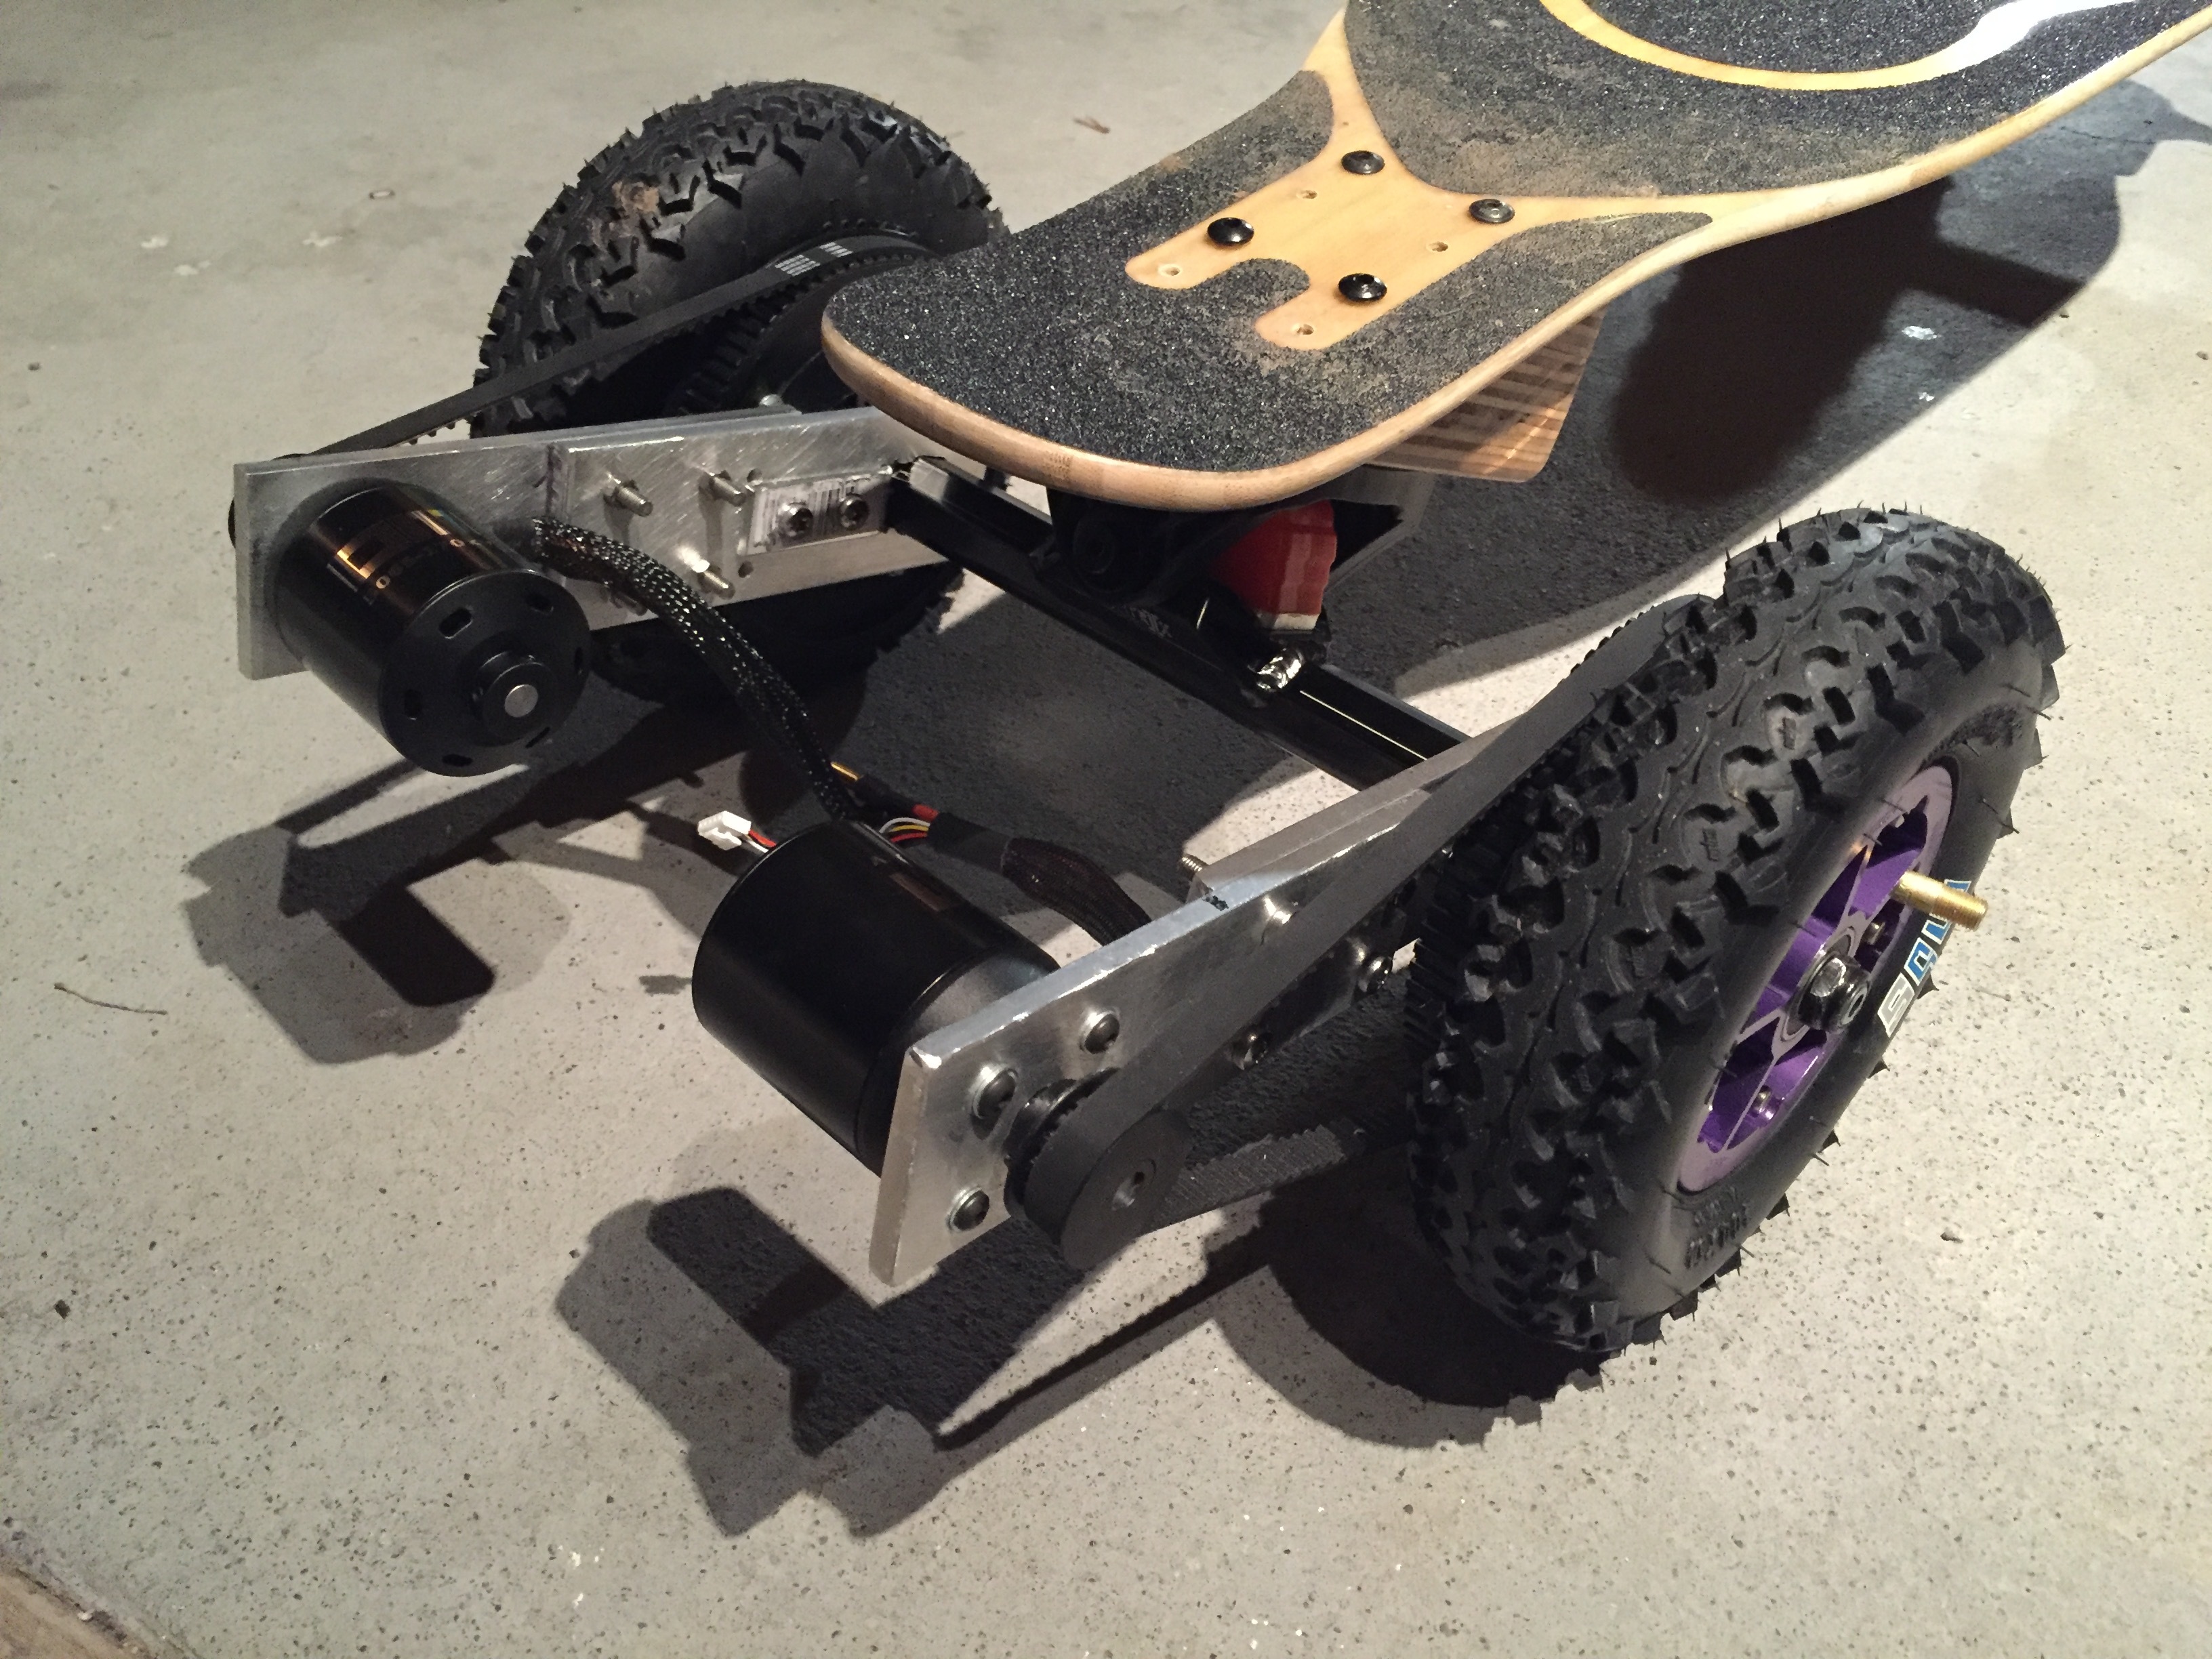
It’s feeling pretty smooth when I spin the wheel or motor. The belt is sitting a little off the wheel pulley, but there are a few things I could do to fix that if it continues to be a problem. The middle of the 3 aluminium plates is basically acting as a spacer to get the motor closer to the wheel, I could add another. Alternatively I could put the truck mount plate on the other side of the bracket, but there’s a bunch of finicky filing involved in that. Or I could just add a bit more space between the wheel and the wheel pulley.
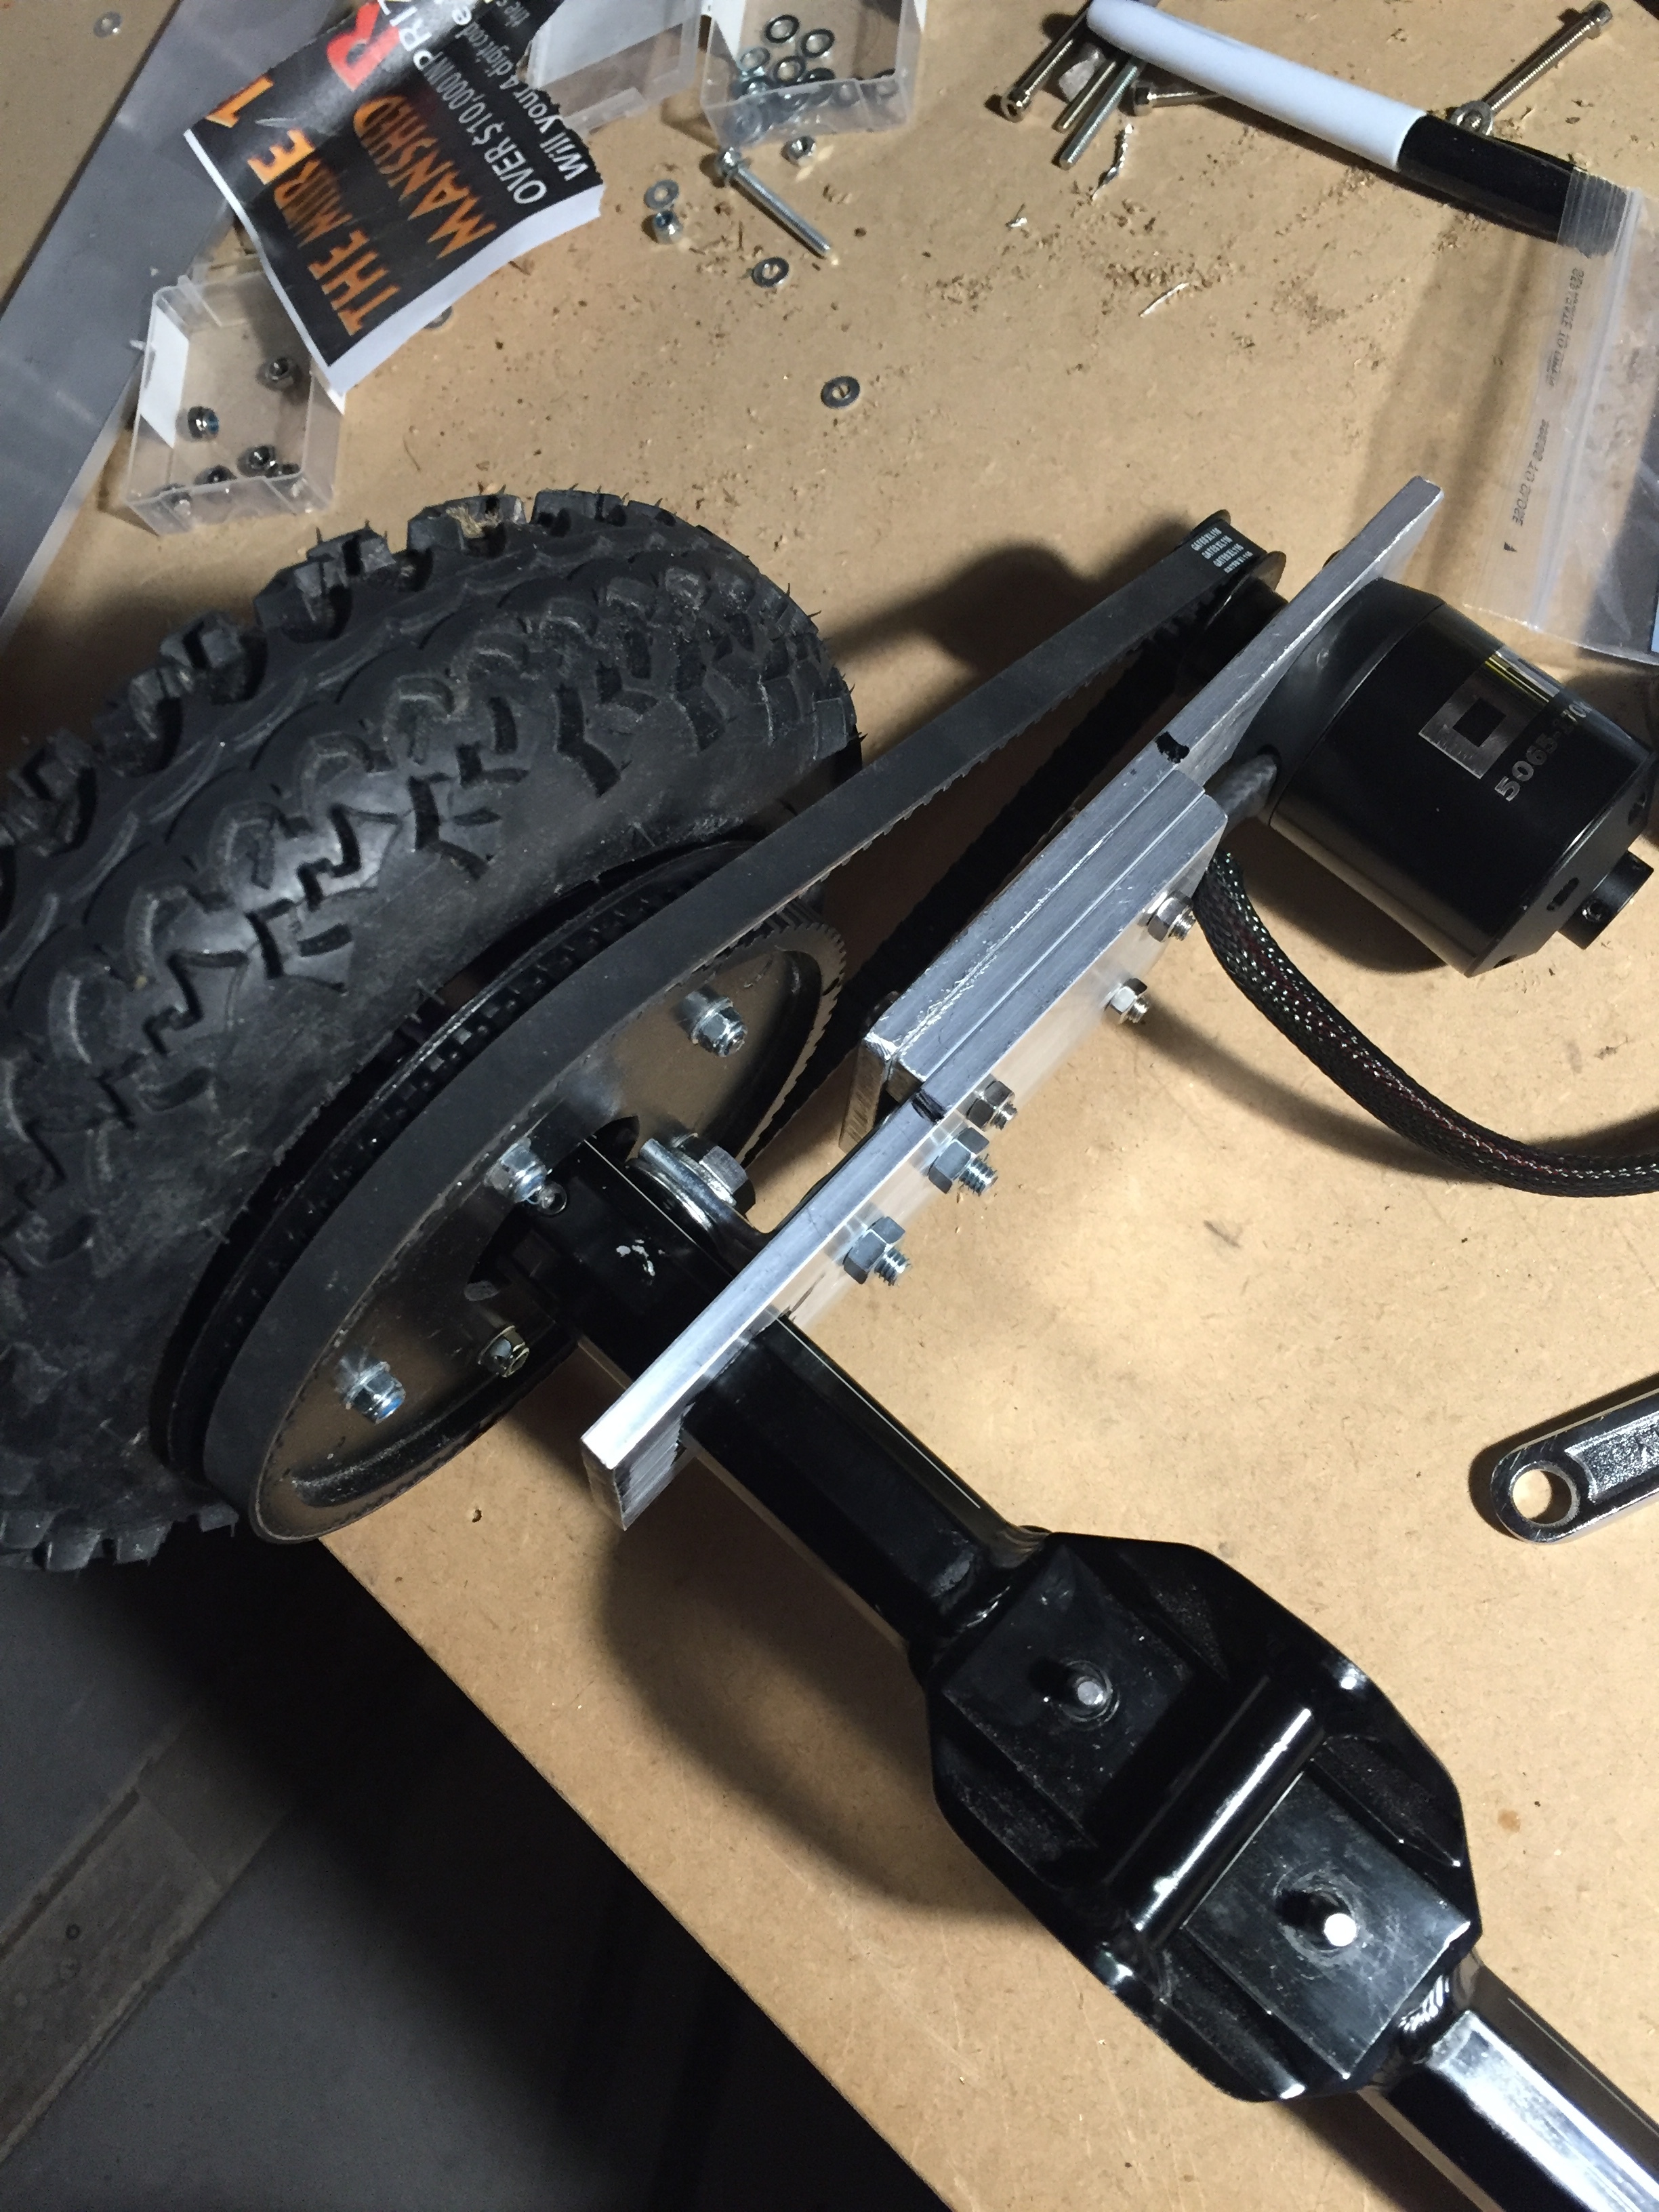
This is a sort of exploded view of the mount. I had to cut out a space for the truck bracket, decided that was a better option than losing the second bracket screw. Unfortunately it meant the bottom hole has no top edge, but that’s OK, that plate isn’t really structural.
This is all much harder than it should be, mostly because I chose to use 8 inch all-terrain wheels, and the trucks that were designed for them. The MBS trucks are oddly shaped and no one makes/sells motor mounts for them. The bracket is unusually long because the belt is unusually long because the wheel pulley is unusually large, and that’s all to create enough torque with these 8 inch wheels.
Loving the process though, this is the first time I’ve worked with aluminium in this way, I’ve only ever worked with wood and metal like this in a pretty limited way 20 years ago at school, so this is a sweet learning experience.
I shifted the mount to the other side of the bracket, and now it’s lining up perfectly. I had to file out a slot for the bracket, but all up it was a pretty simple fix.
Both mounts are functional now, looking pretty good. I think I can remove that spacer plate, the motors have now ended up a little too close to the wheels.
It’s all feeling a bit rickety and loose to be honest. I think my choice of MBS trucks was a bad one, given the difficult profile of the trucks. However there are still plenty more things I could do to tighten everything up. For now though I’m done with all this drive train stuff. I’m going to do one last disassemble, liberally apply blue loctite, put it back together and get to work on the electronics.
At this point I also kind of wish I’d gone single motor for my first build. Doubling everything up when this is really just a prototype wasn’t the best idea.
First step into the electronics has revealed that I need some thicker silicone wire. Mini-quadcopters are comparatively low on the amps, so I’m mostly using 16-20AWG there, and that’s all I have on hand. My batteries will provide 240A if you believe the C rating, so it all comes down to the VESCs which should handle 50A-240A and the motors I’m not so sure on. http://www.ollinboardcompany.com/product/om5065-170kv says 2200 watts… that’s roughly 85A at 8S x 2 = 170A max.
Anyway, that means I should have 8 AWG from the battery to be super safe, and in fact the 4S 8000mah batteries ship with that, but from what I’ve seen/read/experienced I’m going for 12AWG from the battery to the ESCs and 16 beyond there. I doubt I can find 12AWG silicone wire within a 4 hour drive, so am now stuck waiting for delivery.
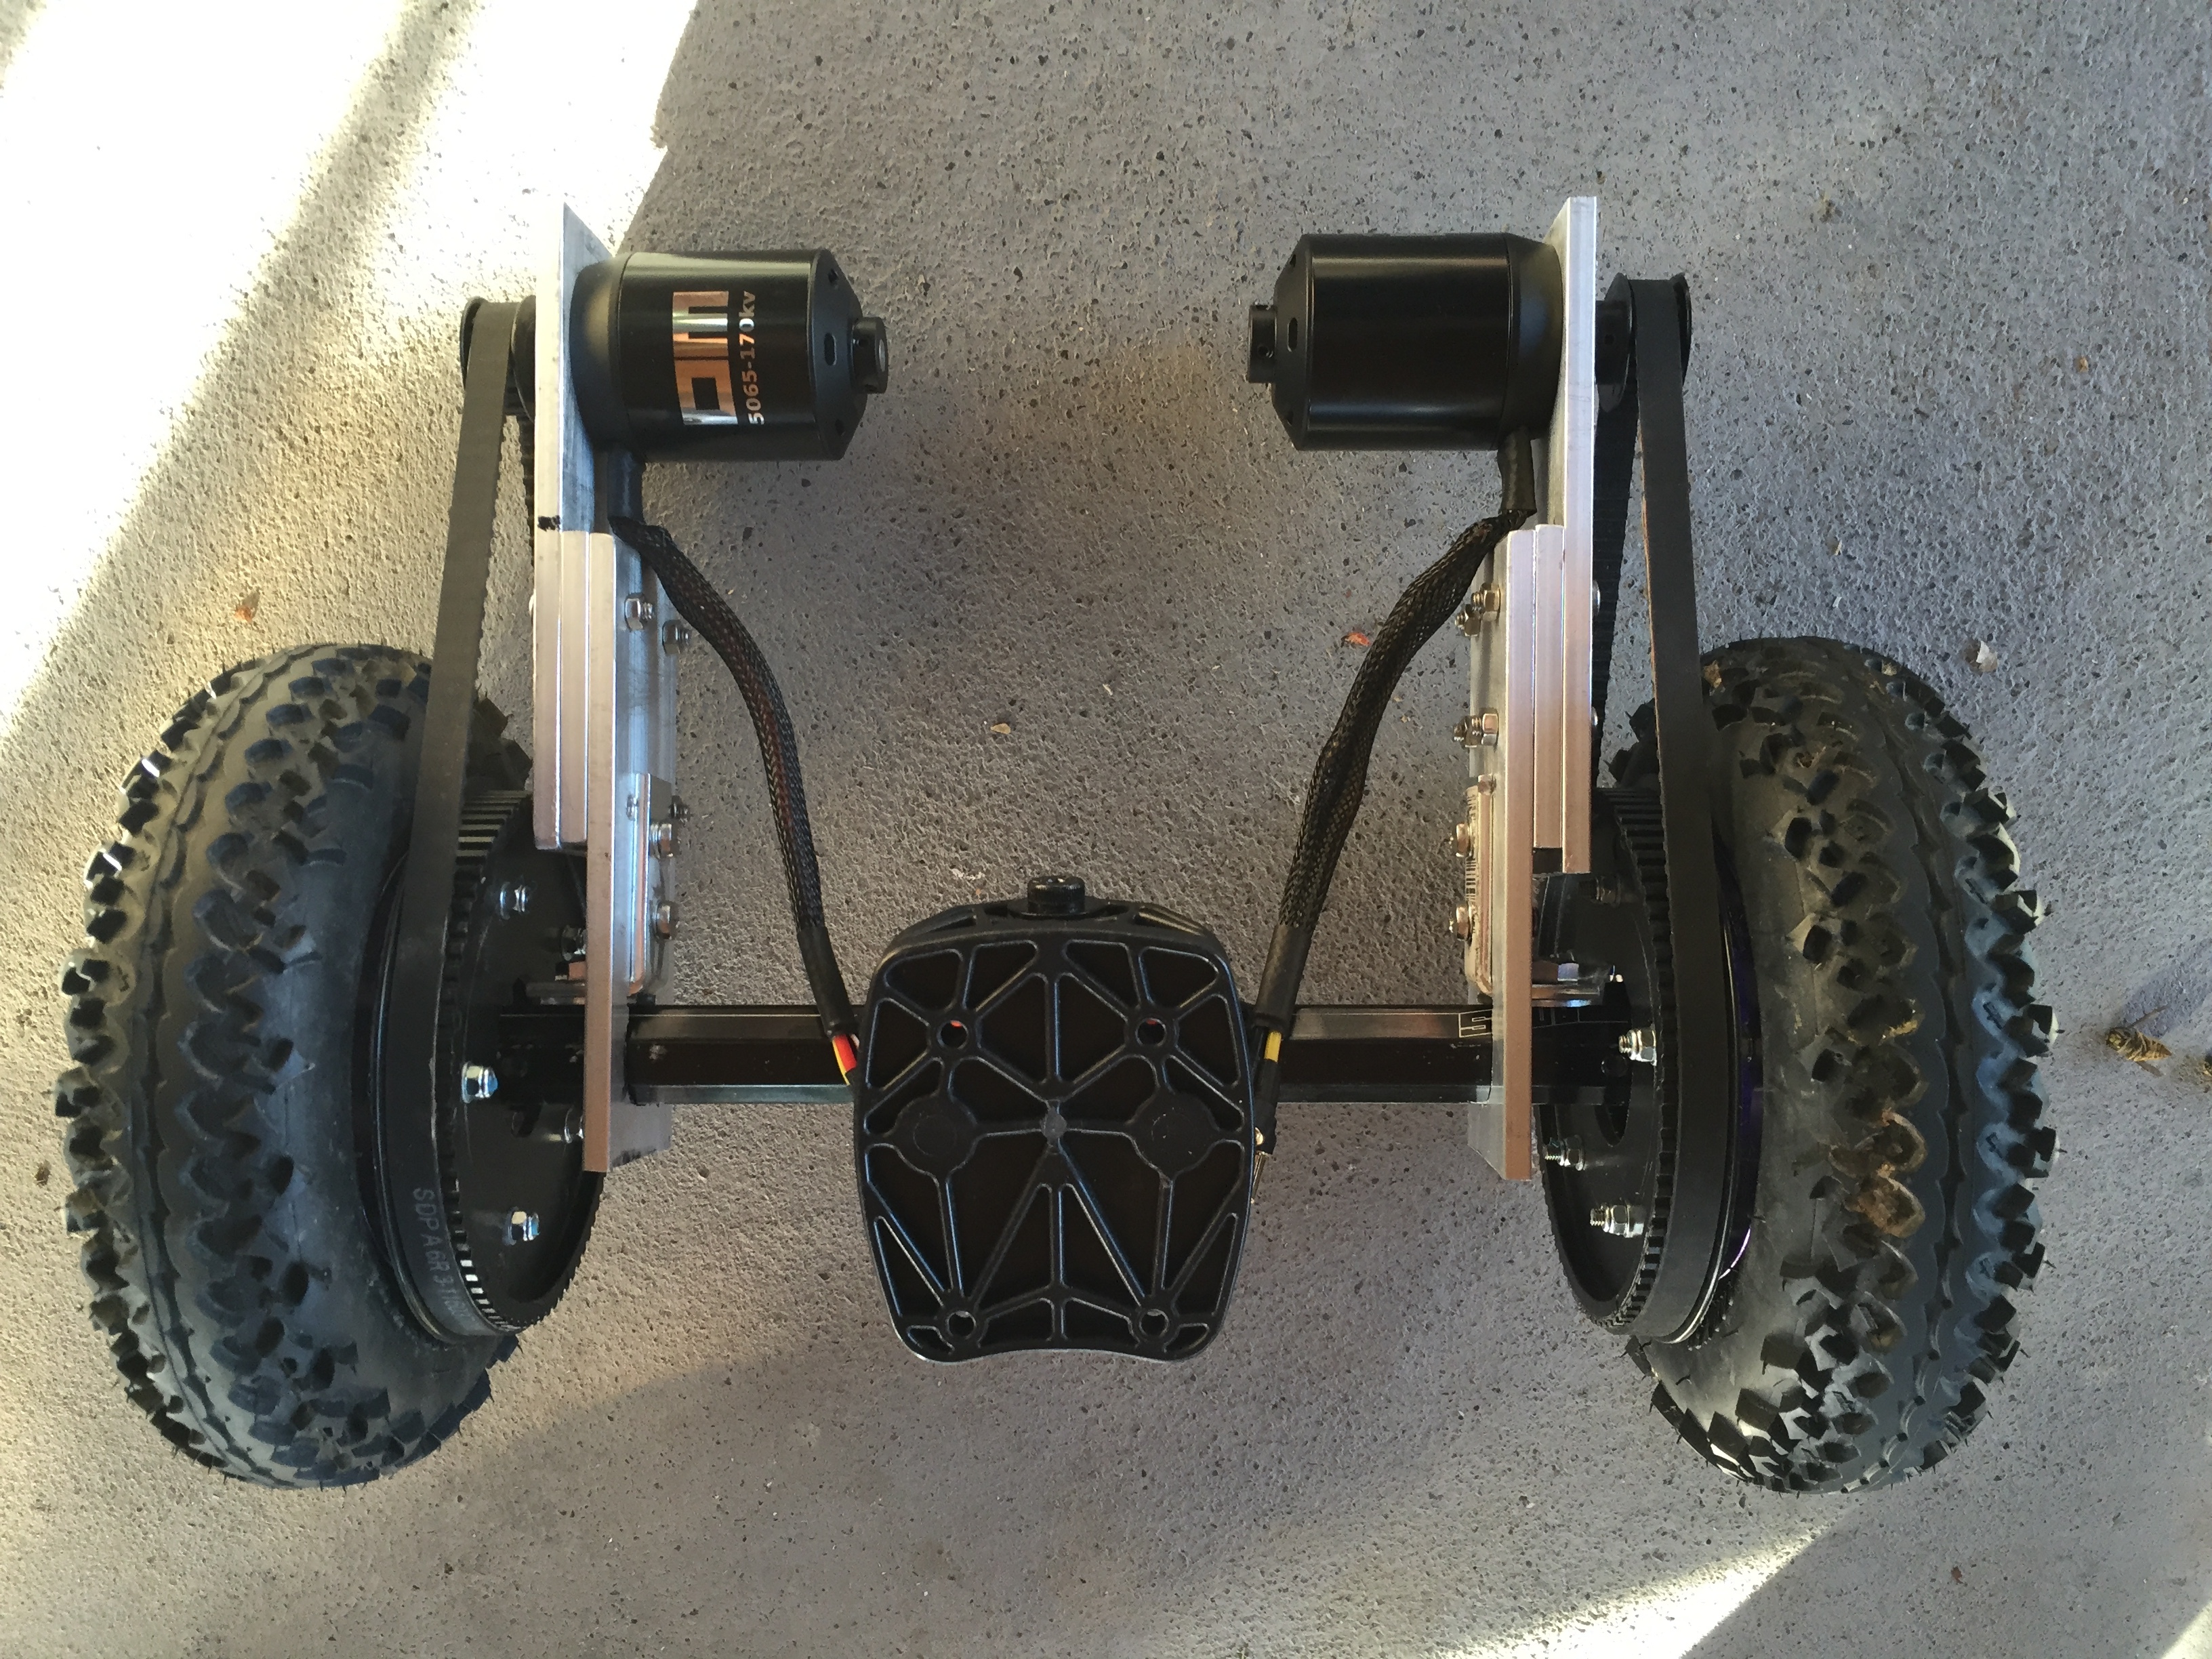
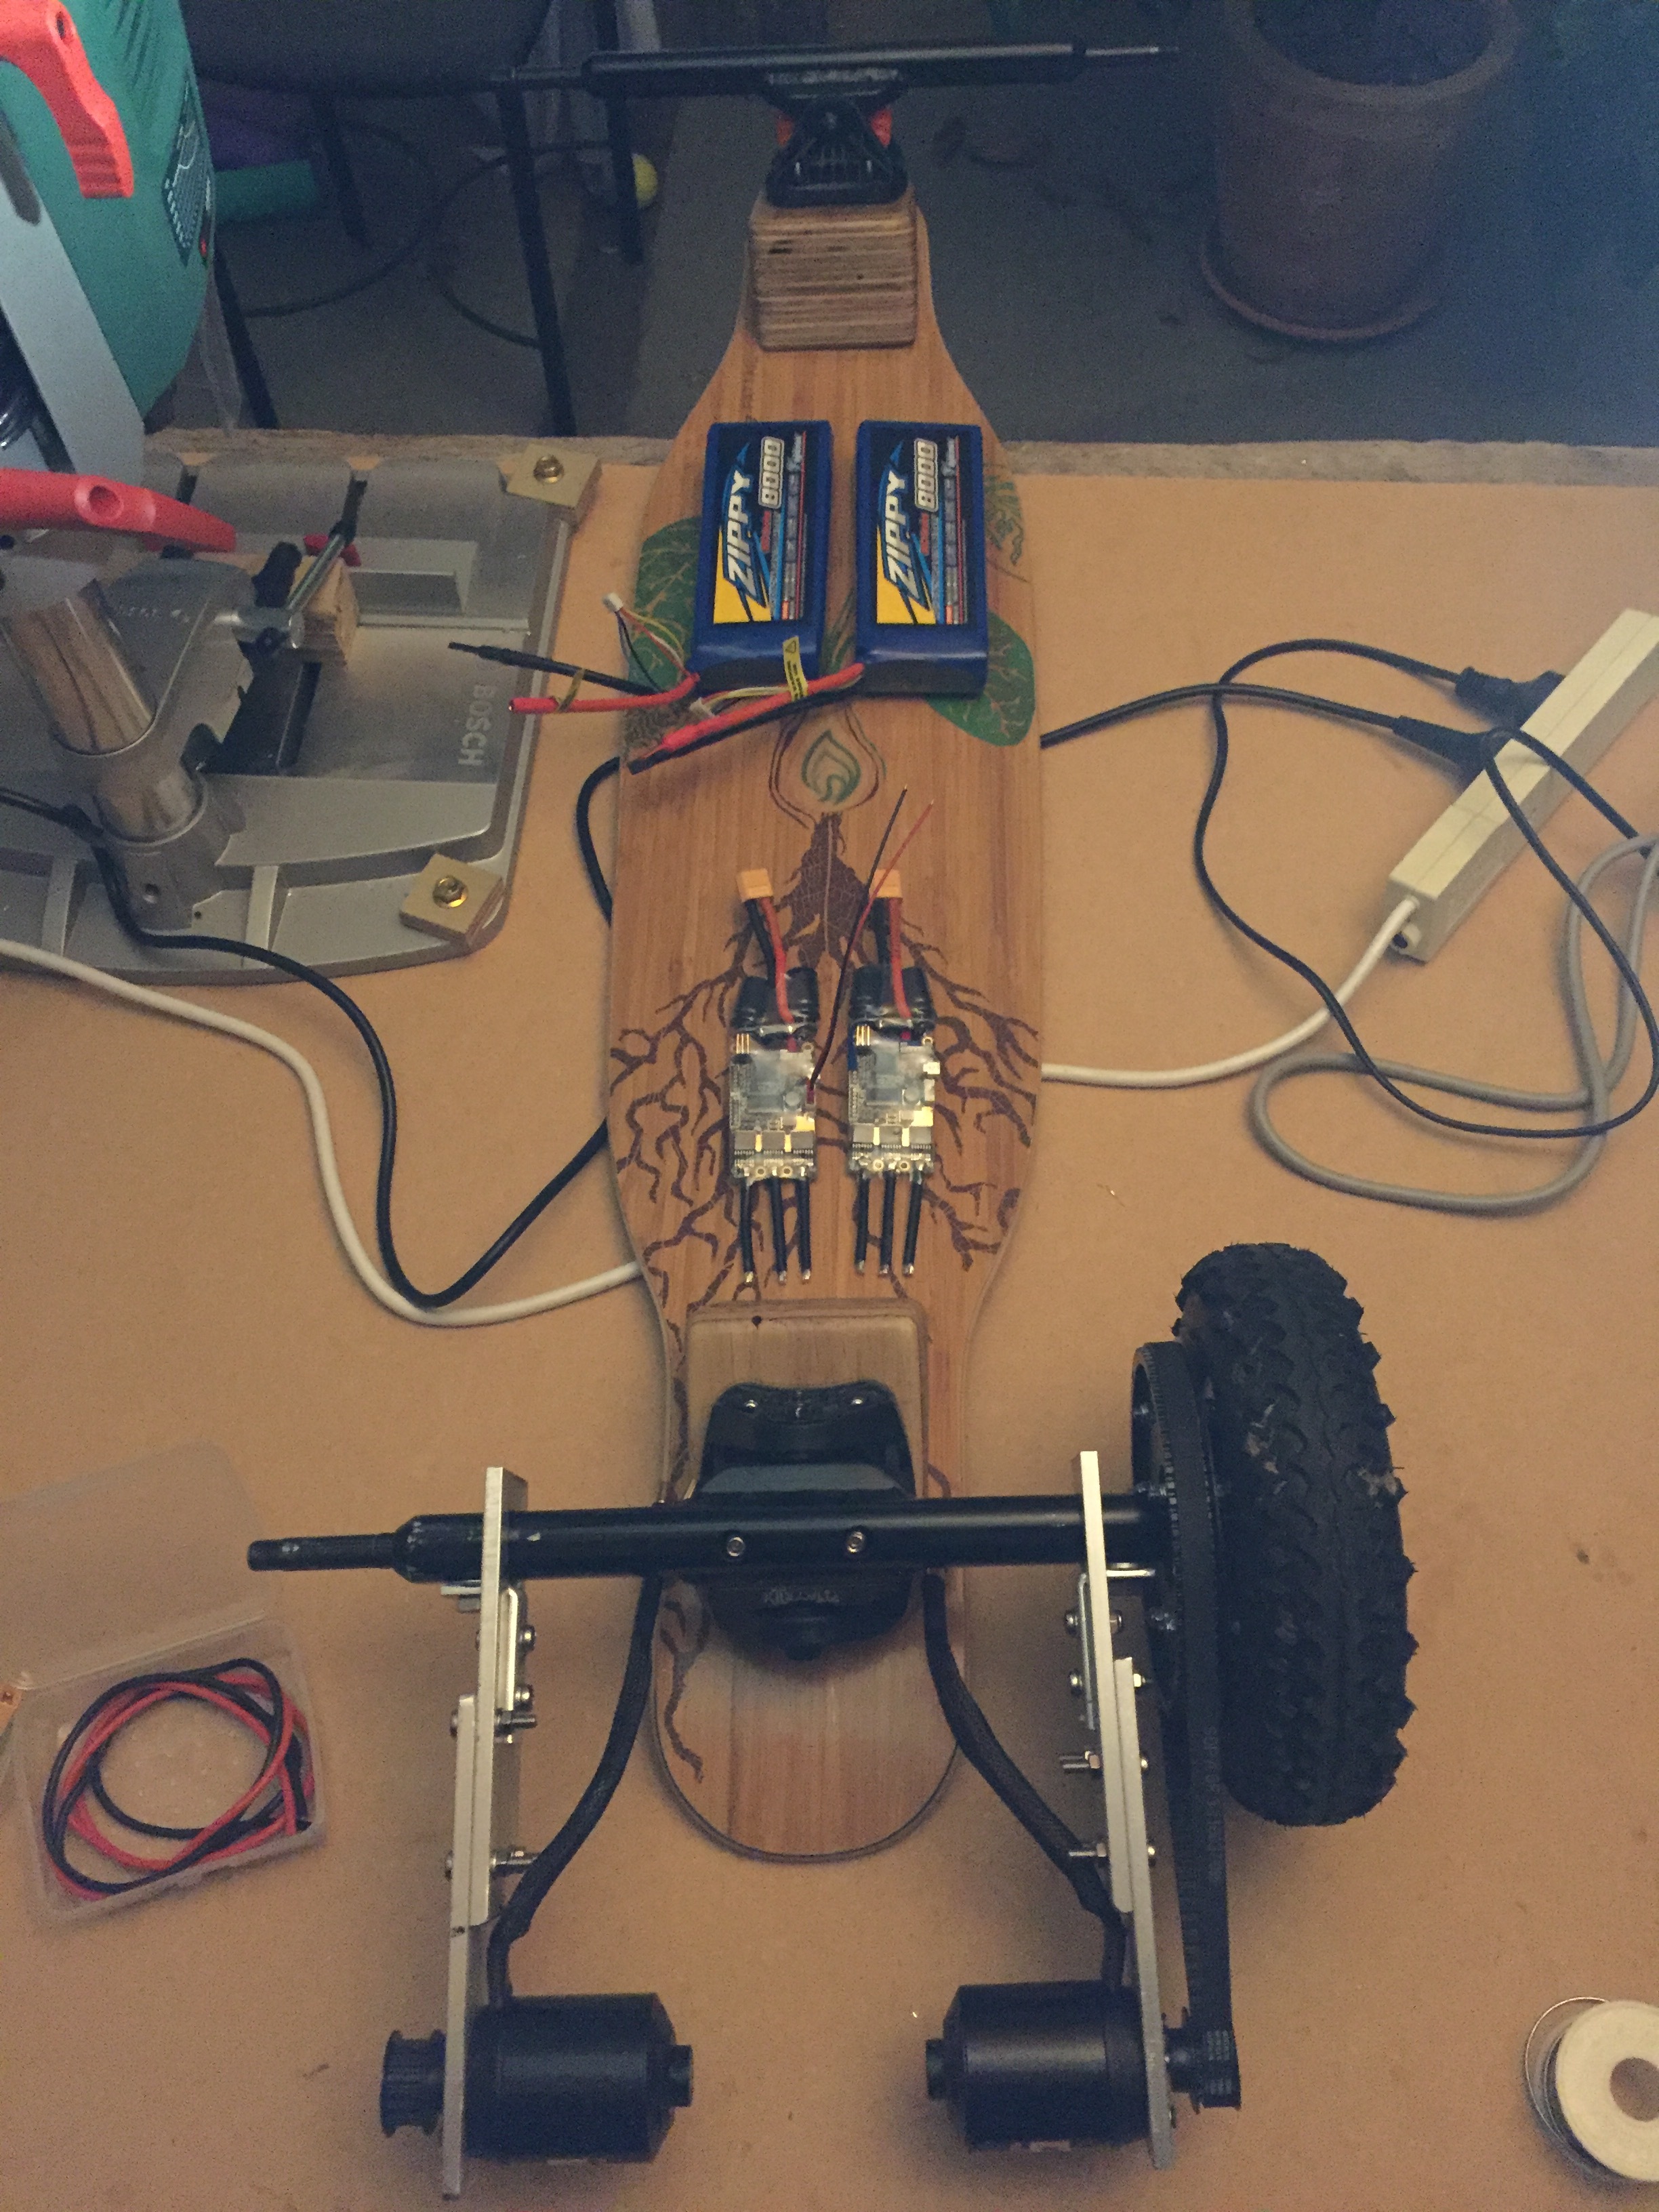
In the mean time I cleaned up my bench, and get to lay everything out and plan ahead. It’'l look something like this, but with lots of bright blue ugly velcro and a tangle of wires:
Battery connections for serial to parallel are done, VESCs powered up and configured for master/slave mode over CANBUS, motors with sensors are connected, detected and setup, and Winning controller is working, and spinning the motors nicely!
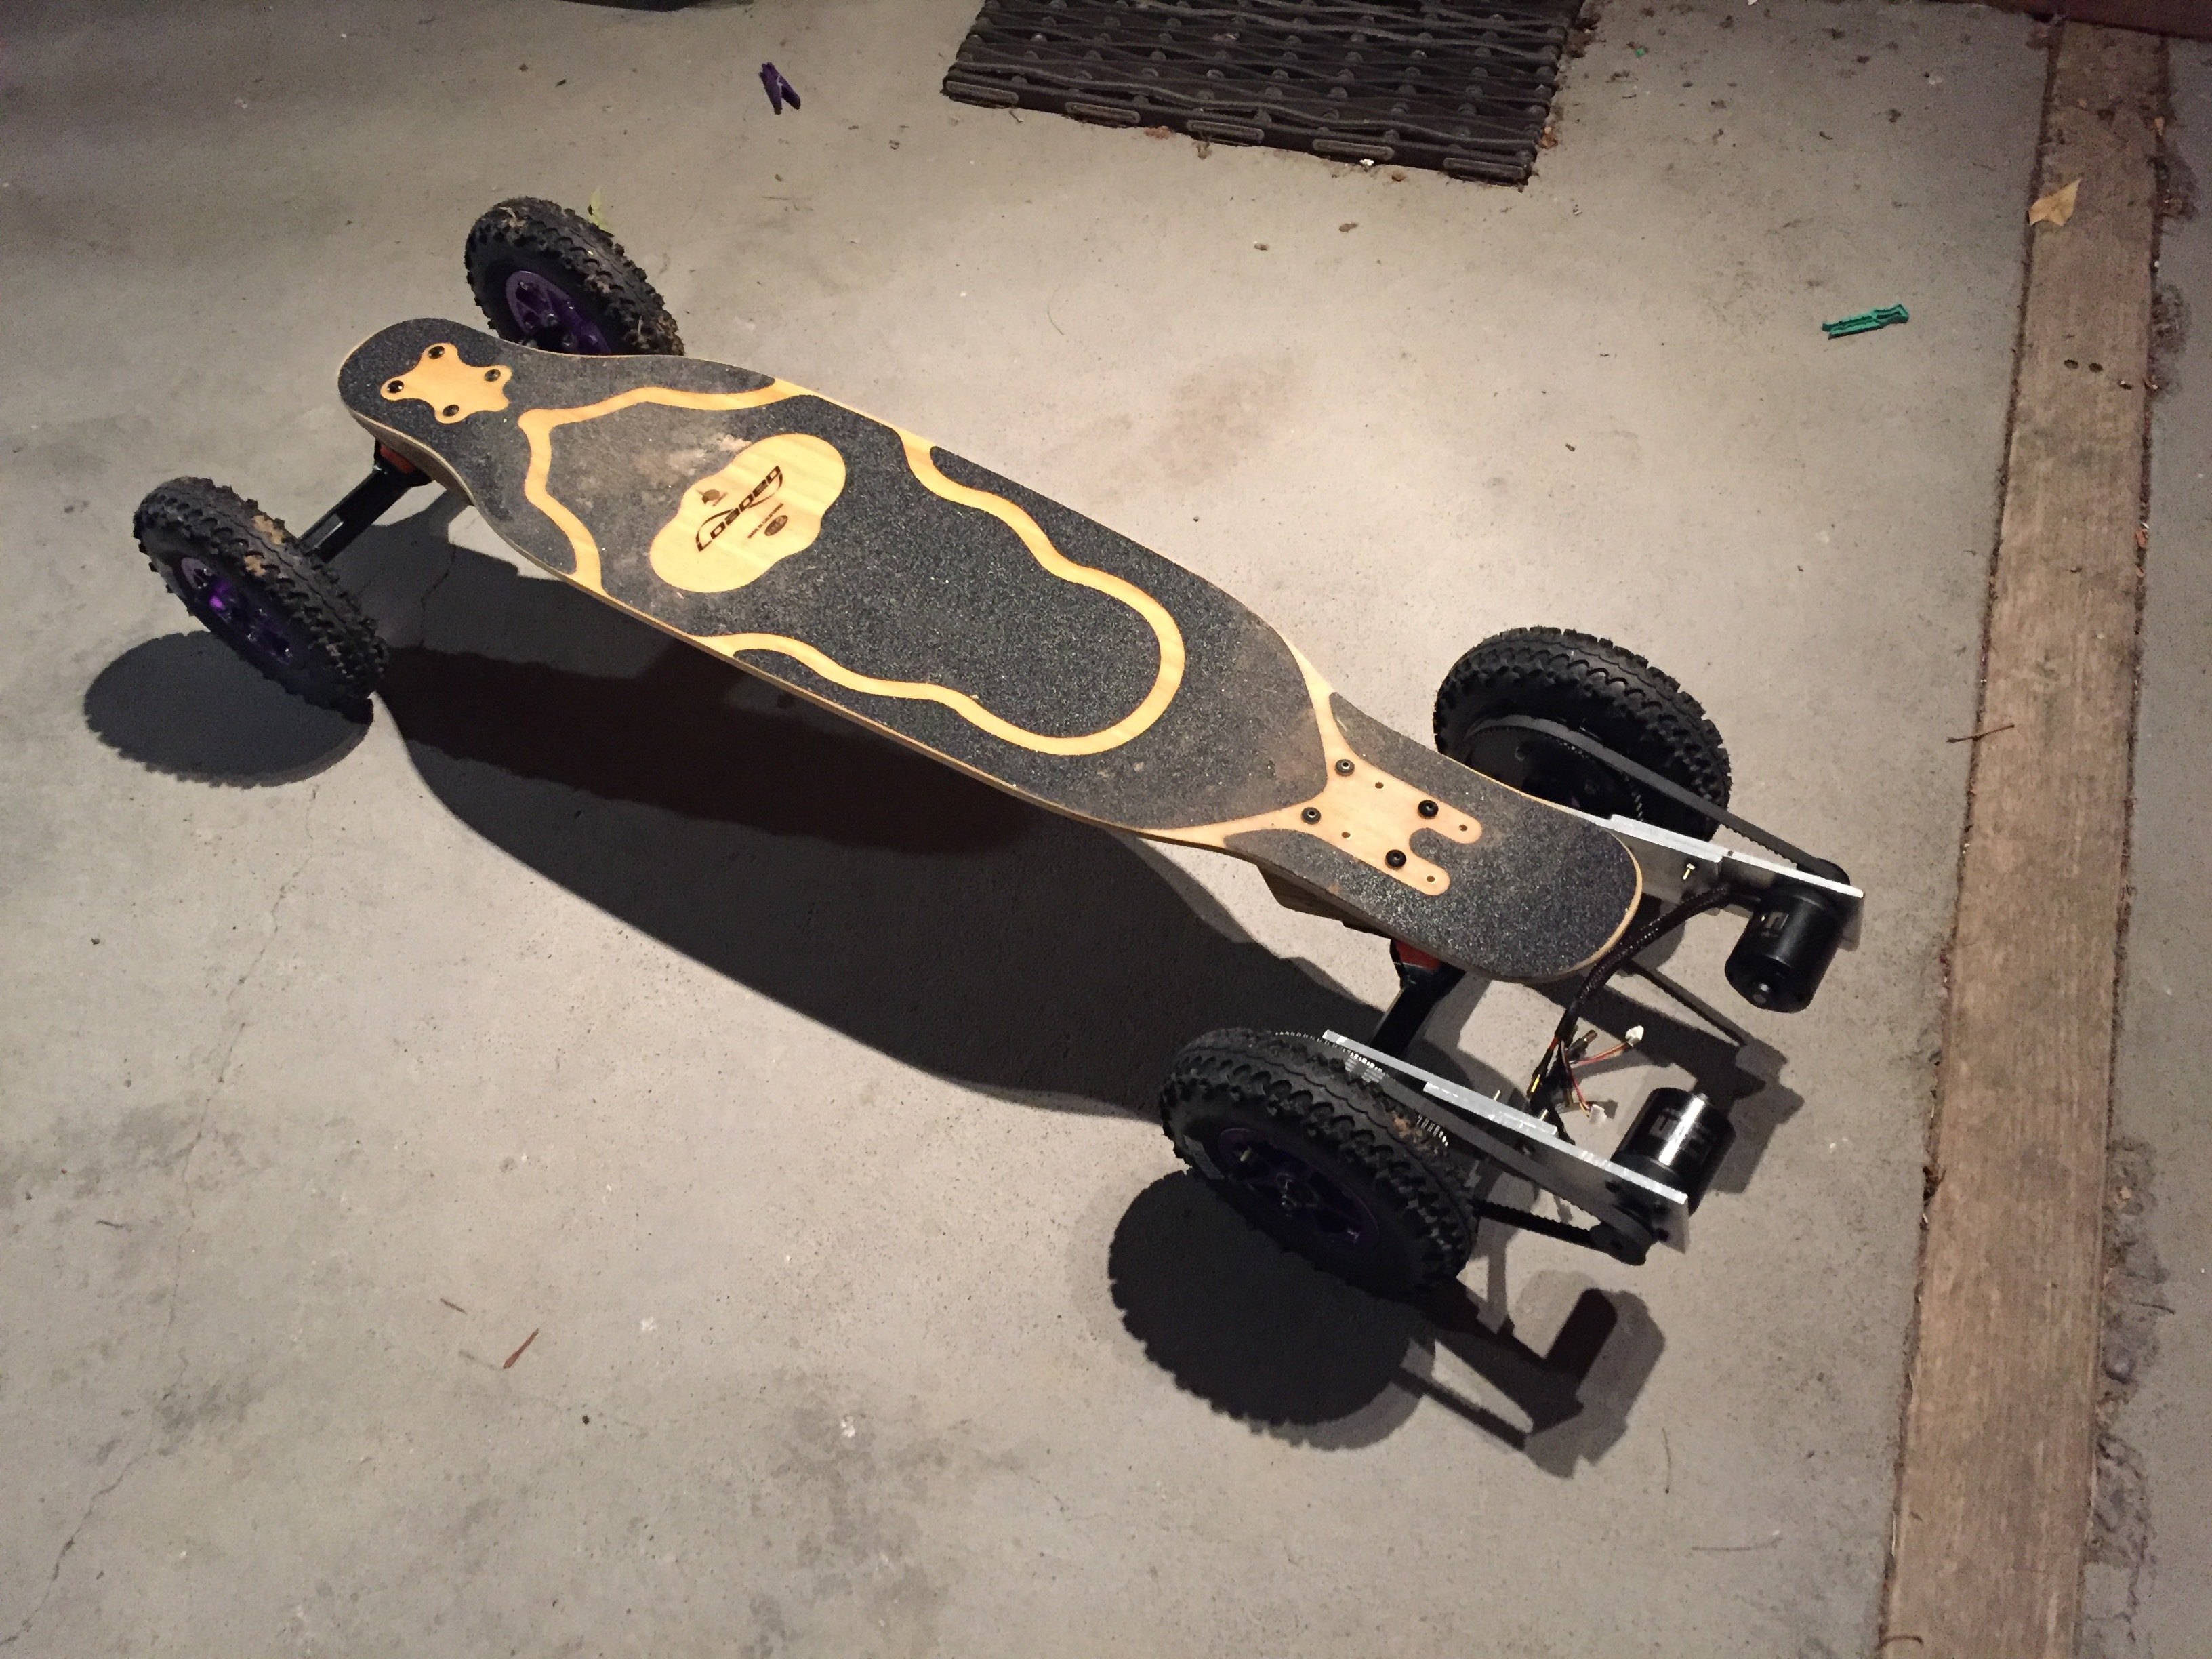
All that is left is to stick everything to the board somehow. I’m so eager to get going that it’ll be all velcro and duct tape to start with. I’m so super excited, even just getting the motors spinning finally was an awesome moment.
I do have one concern - your motor mounts. Considering they are so long, are you going to put some sort of bracing between them so they don’t flex?
To fix this, I reckon you could get away with a length of all thread bolt between the middle of your mounts to keep them 90 degrees to the rear axle, secured with nuts like shown in the diagram below. Will probably need to locktite the nuts.
I agree with @baxter. Add a long bolt or grid style plate will to hold either side parrellel and also give extra support. Other than that I think your setup is pretty rad!
Thanks, I was concerned about the flex, and was thinking about using some brackets and a plate to connect the two, but a threaded rod is a much better idea. I’ll definitely give that a try!
First ride was a huge success! Was super impressed with how it handles gravel, both up and down fairly steep gradients.
I just had a couple of failures. I had hot glued the canbus connectors in place, but one of them was glued in place disconnected already! So that was a quick fix. Then at the end one of my batteries fell off, so I can say that Velcro alone is not enough to hold your batteries! Will strap em in for next time.
So, really good fun, still lots to learn and tweaks to make, but I’m super stoked.
Definitely on gravel, without the connector initially it was effectively a single motor setup, and one wheel just span in the gravel even with no load.
I went dual for extra torque as well as traction, and it feels like the right choice. We have a steep gravel drive I want to be able to ride up and down.
No belt skipping, though everything was pretty low speed. I didn’t see any issues at all really, but yeah, need to head out and find some more space to push the acceleration/braking a bit more. It was able to accelerate me up a fairly steep hill from near stand still though, so that’s not bad!
These trucks feel super firm, making it hard to turn. Not sure if that’s just me expecting to be able to carve it up like a surf board or perhaps something particular to mountainboard trucks. I’ve ordered some of the softer yellow shock blocks to mellow them out a bit, hopefully that helps loosen up the turns.
I guess it’s also possible I need to mount the trucks to the board at more of an angle.
Thanks man! Yeah, hoping that this will be of some help for some people, there haven’t been all that many non-mountainboard builds aiming for AT, so it seems worth sharing.
I just remembered that the Matrix trucks have adjustment screws, so gave them a twist to reduce the stiffness a bunch, sweet! Looking forward to giving that a go tomorrow.
A couple more pics, I’ve added a strap for the batteries, took the buckle off a quadcopter battery velcro strap, and secured it and the other side with some bits of bracket I got at the hardware store and bent into shape:
And finally a tiny little 3 second clip of my first ride looking all uncoordinated and slow. The kids love it, and I feel confident enough that it won’t fire off at them, but I think it will be quite a while before I trust it enough for them to try riding.