6374-192KV - 10S2P - First ESK8 log

After I started building more than a year ago I learned quite a lot. And dit quite a few changes.

Is first spend quite some time planning everything out, reading and searching what was the best setup for my goal. In this process I already learned a lot. I have a technical education so I have quite a lot experience with soldering, wiring and electrical components. But e few in portend terms where new for me.

Because I wanted to plan things ahead and I like to make CAD drawings I first made the board like is wanted in SolidWorks. This enabled me to try some different battery configurations and it looks assume.

asometric
buttom

Of course I wanted to make my board zo cheaply as possible. I also investigated the possibility to build a dual motor board and read a lot about hub motors. After a lot of reading I decided I wanted a:

  • Single motor build
  • 10S2P Lipo battery
  • 83mm wheels
  • Cheap longboard from the local “ebay”
  • Turnigy Aerodrive sk3 – 6374-192KV motor
  • 1/3 pully
  • 15mm beld
  • “cheap” VESC
  • 3D printed battery and controller case
  • Universal motor mount
  • Chargeable by a power brick
  • 2 BMS of for 10S
  • Battery percentage meter

I made a excel document for myself with all the part could use and would need to make my board.

xlsx%20-%20Excel

1 Like

Cool looks like it will work but none of your choice links are working. Also not sure on the lipo choices. Are they options? If so try to get the links up so we can help. Got the basics though.

Because I wanted to print my cases I took a lot of care in designing the cases in my model. I had to make and print a few prototype before everything fitted.

vlcsnap-2018-10-30-02h02m57s325

When I received al the parts I needed I went on building my board. I discovered on the way that is needed to change a lot. Bud I will tell more on the way of the story.

First of all u discovered that the ring of the motor mount didn’t fit on my trucks. So I had to file these down. I did this by putting my truck in the drill, turning it around and holding the file against it. So I had my own little lathe.

mp4%20-%20VLC%20Media%20Player

I went on mounting everything.

As soon as I was done with the mechanics I started with the electronics by shortening the cables of my battery’s. or else they wouldn’t fit in the case.

After a few evenings I was as far done that I could make a test ride.

1 Like

Thank you for you’re interest.

I will fix the excel links in the further for other people who maybe want to use a few things I use.

I’m sorry I wasn’t relay clear about this. I have made a lot of mistakes and learned a lot. I already build my board and wreck it. And repeated again a view times.

My intent was to tell my story. Because else it would be a giant post I put it in separate post.

Well then sir you need a reprimand because we love the pics. The trials and tribulations of the build process the finished article all that lovely stuff. Shame on you :smiley:

1 Like

You totally right and I’m very sorry. But I always plant to make a video about it. A have hours of video bud not the time anymore to edit it. But if I did a update topic here I would have made a lot of pictures a lot better.

1 Like

After I made my first test ride I discovered that my belt wasn’t tight enough.

So I tried to tighten my belt by moving my motor backwards. But after I tighten my motor again I wreck my thread of my motor. So is had to tap new thread. Whel, I am a idiot as didn’t operate the vacuum cleaner well enough I got metal grit in my motor. And we all now that this grit sticks on the magnets. So don’t do that…

I managed to get the metal out of the motor so I could resume my work.

One big problem was that my motor mount slips over my trucks. You could put it on his place with 3 set screws. Bud no matter how hard I tightened these. It kept slipping.

So I drilled 3 holes in my trucks where the crews would slot in to prevent it from turning.

So my board looks something like this: (sorry for the dirt)

IMG_20171222_234833%20(1) ! IMG_20171222_235020 IMG_20171222_235014 !

This worked for a while. But I made a mistake where my motor could hit the board and the trucks when I made a turn. So pieces of the bell of my motor got scraped away.

IMG_20181030_024133

So I had to change this angle of my mount. Only problem, this meant that I had to re drill the set holes just a few milometers. whel… I tried but it kept slipping on the axle. Every time returning to the destructive angle.

A other problem what I had is that I couldn’t tighten 2 set screws anymore because the screw head was flat. So I ordered a new one so I could start over. But after I, again, ripped out the thread of one of my motor mounting points I threw this motor mount out and started thinking about a other option.

I also had problems with my cases. I used ABS for these cases because that’s what I have laying around and it can manage some heat. From the VESC ore the sun on a hot day. But I think I didn’t setup my printer correctly because the mutual layers of the print started to separate. Especially when I stood on the board it got a lot of tension on these layers. And after a while the mounting holes gave in and my cases where laying on the ground.

I paged this up with duck tape and glue. But that’s not wat I wanted with my board. Also, this was not very waterproof. And this is a pretty important thing when you live in the Netherlands.

In the same time I have problems with my VESC as you can read in this post.

So, next on my to do list : make a new motor mount and battery case.

After i had this plan I started reading about a lot of possibilities. But by the arriving holidays and a moving to a new house my board ended on a shelf.

(I am going to sleep now, I wil finish my post tomorrow)

did you mount your stuff (battery and vesc etc) to the board or it´s laying on the enclosure. in case your things laying in the enclosure, maybe try to velcron everything to the deck and just use the enclosure for covering the electrics.

I also have seen your phase wires are making a loop before they going into the enclosure. That´s a possible place that things get stuck and damage the wires. If you can better try to put them more deep inside of your enclosure.

Nice log so far! Keep on reporting :wink:

With the 3d printed cases the battery’s just slide in and are sitting very snuck. I then screw a lit on. With my VESC and receiver I just t-rep’t it and screw on the lit.

batterij%20case%20withoud%20lid batterij%20case esc%20case

1 Like

My new case.

After half a year I was settled in our new place so I decided to go feather with my board.

For a case I plant to use polyester a make my own sturdy case with it. So I went on and ordered 1 liter of polyester resin and a glass mat for a total of €21,38 included shipping.

I used my old 3D printed cases as a mould. I tried to fix all of the holes and gapes in the old case and covered the whole mould with packing tape so that it would be possible to remove the mould after curing.

Because I wanted the cases to have the same shape as my board I also taped my board.

With the help of a few scissors I already cut my fiberglass mat in shape. I wanted to make a 3 layer case of both cases so I had to cut 3 X 2 = 6 pieces of fiberglass.

Now I finish the preparations I could go on and mix the risen and roll on the first layer. Starting with the front battery case. Soling al the corners and folding the fiberglass like I plant to in the process. I did this 3 times and started with the second vesc + battery case.

After I did al the layers I tried to perfect some edges and curves. I also used all of my mixed resin to try and make the cases so thick as possible and don’t waste any.

IMG_20180529_213932

Only thing left to do was wait until the resin cured and hardened.

After I came bag from school a day later it was cured and hard.

IMG_20180530_171042 IMG_20180530_171050

Now I could start pulling and prying of the tape from my board, taking the new made case with it. With the help of a screw driver and some controlled force I managed to separate the tape form my mould:

IMG_20180531_173633 IMG_20180531_173847 IMG_20180531_173907

Like you can see the lit of my mould came lose, not really a problem. Couse now I could remove the tape from the inside of the case:

IMG_20180531_173953

Now I have 2 custom size cases.

IMG_20180531_175515

Now I have to trim the rough edges to my liking. I did this by first laying the cases on my board an marking the overhanging edges and trimming it down with my Dremel. I then drawn a few lines and trimming it down accordingly to make it symmetrical as I could get it.

IMG_20180601_212523

The final resold looks something like this: IMG_20180601_221320

Now I had to drill al the necessary holes for cabling and for the screws to mound it to my board. And last but not least I got myself a spray can to spray-paint everything black.

2 Likes

The motor mound.

My other problem with my setup was my motor mound. It kept rotating on my axel and I couldn’t tighten my belt properly. So I decided to make my own mount. I googled a lot about different motor mount approaches. I wanted a mound where my motor was mounted on a plate that I could slide to tighten my belt. So I could mount my motor ones and I would not have to be scared that I ripped out my tread again.

I also needed a way to change the angle of my motor relative to my axel.

As last I wanted that there was no way possible that my mount could rotate on my excel.

So I sat down and started drawing. Starting with a big ring whit a specially shaped hole in the middle. This hole was the shape of my trucks. If I made it like this It would be impossible to rotate on the axel.

SLDPRT%20_%5D

I was lucky that the company I did my internship at that moment had a CNC controlled plasma cutter. So I could machine about every strange shape I could think of on that machine out of steel from 1,5 until more than 100mm. so I had what playroom there.

I uses 10mm for the ring.

It didn’t fit properly the first time. So instead of file it down I changed my design a little bit and cut it again. Because… why not right?

video of plasma cutter:

It fitted quite nicely now, so I was happy about that

IMG_20180522_163257

As you can see on the picture above there is a bold on the top of the ring. This is to get all of the wiggle room out I had left in the ring. It also makes shore the ring can’t just slide of. To make sure that the ring staid on his place I drilled, with the column drill, 2 more holes apart from each other and threaded the holes. Now I could tighten the ring on his place from 3 different angles.

The next part was the part that mounted to the ring. This would get round slots and straight slots to make it possible to change the angle of the motor and to tighten the belt.

I cut this with a bit thinner steal of 4mm. A bit thinner than the ring but more than strong enough to not bend under stress.

SLDPRT%20_%5D SLDPRT%20_%5D

The last part would be the part where the motor mounds on. This would be a very simple part with just the mounting holes of the my motor as stated in the data sheet and check by measuring, a hole for the axel and 2 holes for the bolts that go into the slots on the other plate.

SLDPRT

I had to make a few different design changes. But after all, this approach worked quite well.

The design as I made it in SolidWorks

motor%20mount

And in real live:

IMG_20181030_1417

Wiring the BMS.

One of the requirements I had was the possibility to charge my board with a “normal” wall adapter. In the beginning I charges my battery separately with my hobby lipo charger. But this is inconvenient cause I needed to open up my case and disconnect al the wires of the battery’s. This cost a lot of time and it already cost me one of my battery’s where one of the balance cables came lose while charging. So I had to order a new battery pack for that one.

So I bought 2 battery management system’s (BMS) circuit boards specially make for 10s battery packs. These will not only balance my battery’s while charging and prevent overcharging. They are always connected so they will balance the battery’s while I riding it. In combination with a 42v charger.

These BMS also has a undercharge function where it will cut the power when it gets to low. Bud I won’t use that because it has not a big enough power rating as my VESC can draw. Also, the VESC has this build in so it isn’t rely necessary.

IMG_20171025_131327

I 3d printed a tray for the BMS so I could stack these 2 BMSen on top of each order.

SLDPRT

After a lot of soldering and checking with my multimeter I managed to get this part working and now I’m capable of charging my board very easy with the charge port

IMG_20181030_141712

(I will make a simple schematic in the near further)

Lighting and battery capacity indicator.

I wanted a screen on my board so I could see how match power I have left in my battery’s. so I ordered a special display wat would indicate my battery capacity. This display support up to 48v (10S) and you can set it with a switch between led battery’s, LiPo and lifePo4 battery curves. So this screen is perfect for wat I wanted. It also look pretty good for my taste.

2018-10-31%2001_10_05-12-V-24-V-36-V-48-V-Groen-LY6W-Loodaccu-Capaciteit-Indicator-LCD-Digitale-Displa

I wanted to mound this display on the front of my board above the trucks. My board is originally a board with trucks what go true the board. But to make a little more clearance I moved the trucks under the board. So now I have a pretty big hole there. I think that this is a perfect place for a battery indicator and a few buttons.

SLDPRT

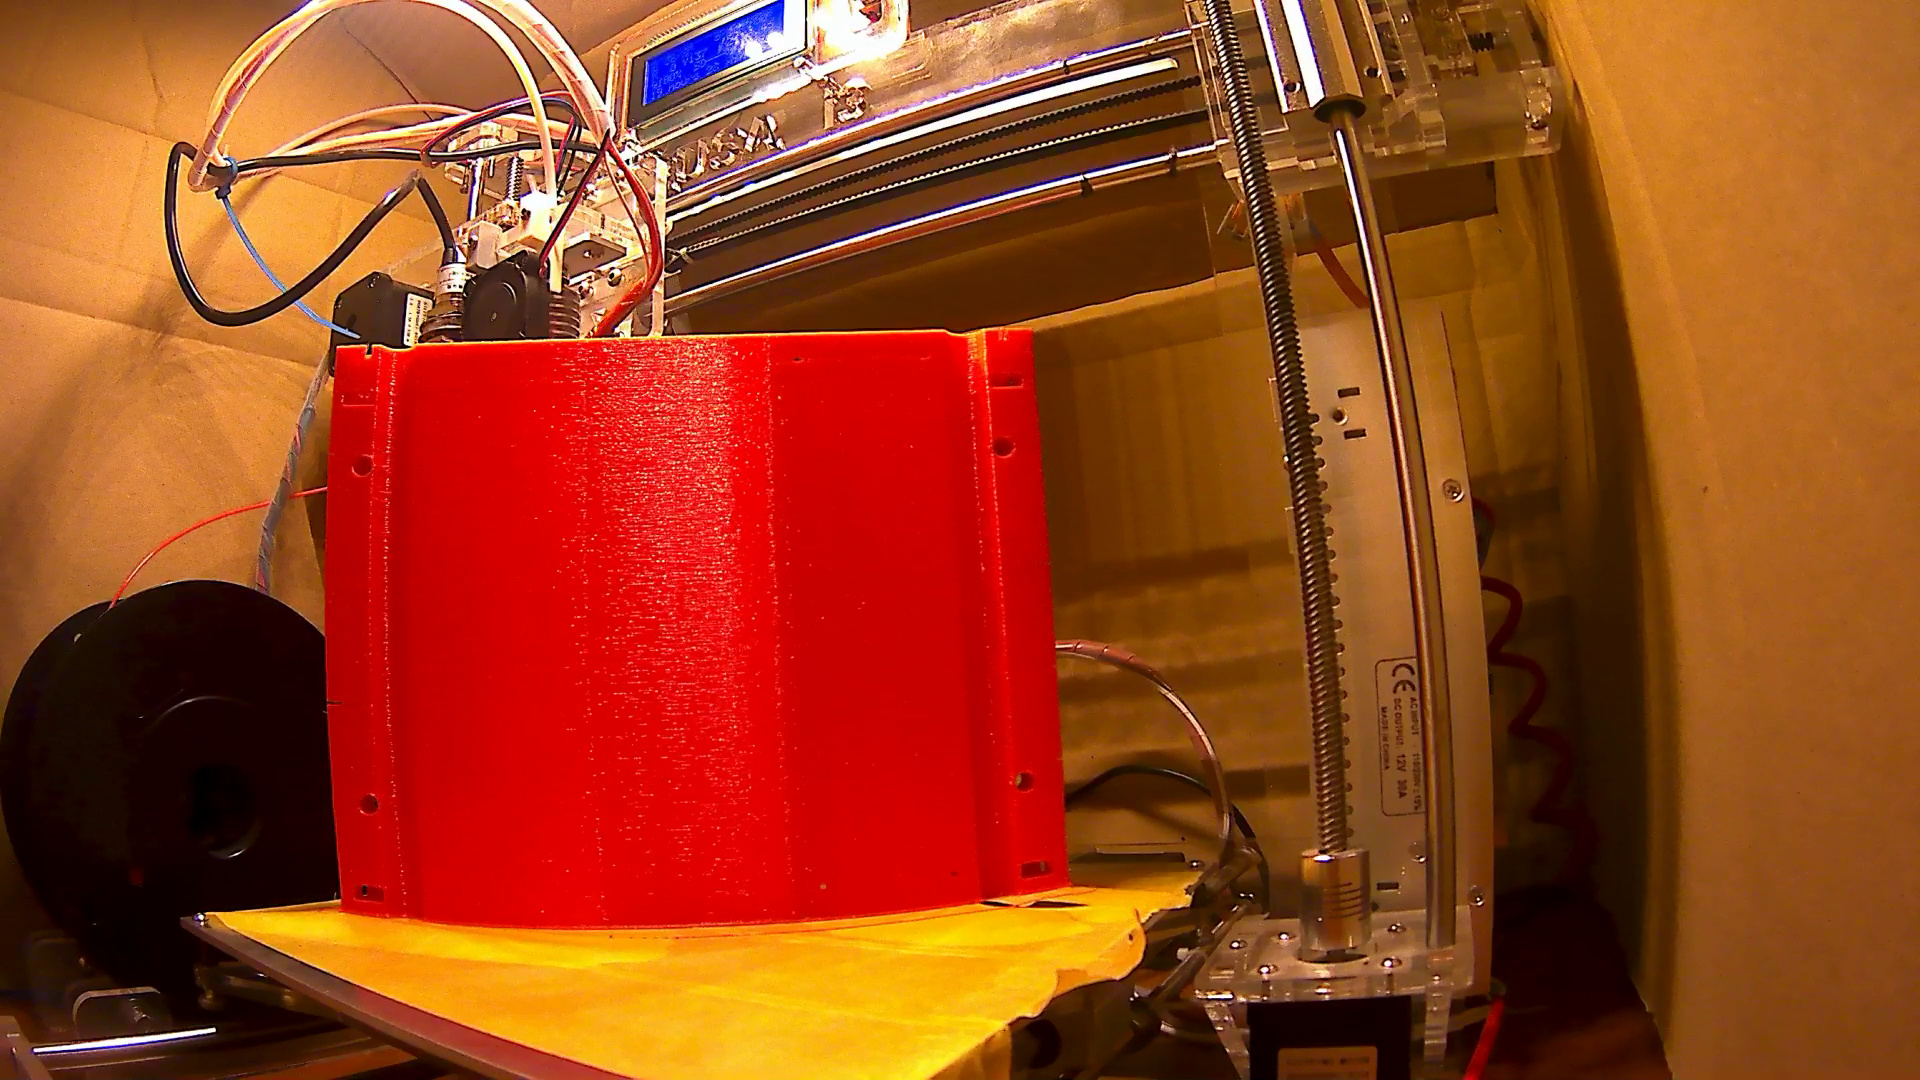
I printed it, sanded it a little bit and then painted the print.

IMG_20181030_141912

I only have to make a few holes for a screw so the screen stays on its place without the duck-tape…

wiring of the screen is pretty easy. Just 2 thin wires of a UTP cable Is enough to measure the battery’s capacity.

Because you don’t want to hit a hole in the road when you riding with 38KM/h in the dark, and also because it would be assume, I wanted to fit a head and tail light on my board. So I ordered a few super bright white and red led’s.

2018-10-31%2001_24_55-12%20V%2010%20W%205730%20LED%20Eagle%20Eye%20Reverse%20Lamp%20Motorfiets%20Auto%20interieur%20Deur%20Decorat

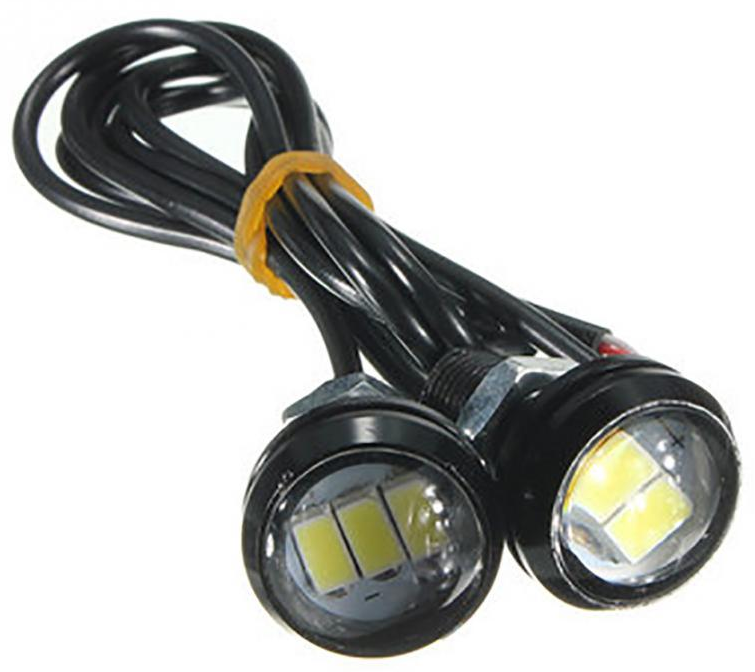
To mount 2 of each led on my board I designed and printed a light holder:

SLDPRT

And also painted it black.

I could just simple put the led’s trough the hole and tighten the knot on the body of the led.

IMG_20181030_142044

Now I needed a way to power the led’s and turn them on and off. The led works on 12v. so I needed a way to step down the 36V that I get out of my battery. So I used a simple stepdown converter and set it on the needed 12volts. I didn’t now if this converter would manages these voltages because it’s actually rated on 36v but we all know that a fully charged lipo is about 42 volts. But is is holding until now so that’s nice.

Like you can see in the image with the battery indicator there is a button next to it. This is a little momentary switch what gifs a signal to a Arduino. This Arduino also gets power of the 12 volt’s of the converter and switch with the help of 2 mosfet’s the front and back lights.

IMG_20180705_152204

Why did I use a overkill microcontroller ? because I’m planning to add a bit of RGB strips on the underside of my board. That’s why I have a hole for a second button next to the lights on button. Next to that I want to put in a Bluetooth module and connect these with the Arduino. With the help of a little app I can control the RGB and brightness of my front and tail light. And maybe I can even find a way to interface with the Arduino and the VESC. Bud that’s for far far later.

But for now, I think the lighting looks assume. IMG_20181030_141920 IMG_20181030_141934 IMG_20181030_141957 !

In the dark it look even better… (pictures coming)

A little side note: Is also made a 3d print for my anti-spark “key”: image IMG_20181030_141759

1 Like

A other side note:

By using my new motor mount I changed the location from the motor the right to the left. This was a pretty comfort improvement. Because the motor first sits on the right site it pulls constantly to the left. The way I’m standing on my board I had to compensate this by pushing with my toes. This get exhausting after a while. So changing this to the left resulted that I had to correct this with my heels and this is a lot less exhausting.

Last but not leased: a few pictures of my build, taken yesterday. IMG_20181030_141705 IMG_20181030_141718 IMG_20181030_141722 IMG_20181030_141810 IMG_20181030_141818 IMG_20181030_142021 IMG_20181030_141901

1 Like