Congrats on the amazing build, You are seriously a fucking legend brother! this is an amazing build! Made my day 
3 Likes
Thank you! But this was only the beginning. I have made a lot more optimizations which I will share as soon as I find the time…
2 Likes
its amazing what those little ntm 5060 prop drives can do
Yes, the power output of 4 NTM5060 was already impressive, but if you were drawing high power for a longer time, like riding in snow or loose sand, they got veeery hot.
Later I switched to c6364 motors and beefed up my VESCs. This almost doubled the power output…
4 Likes
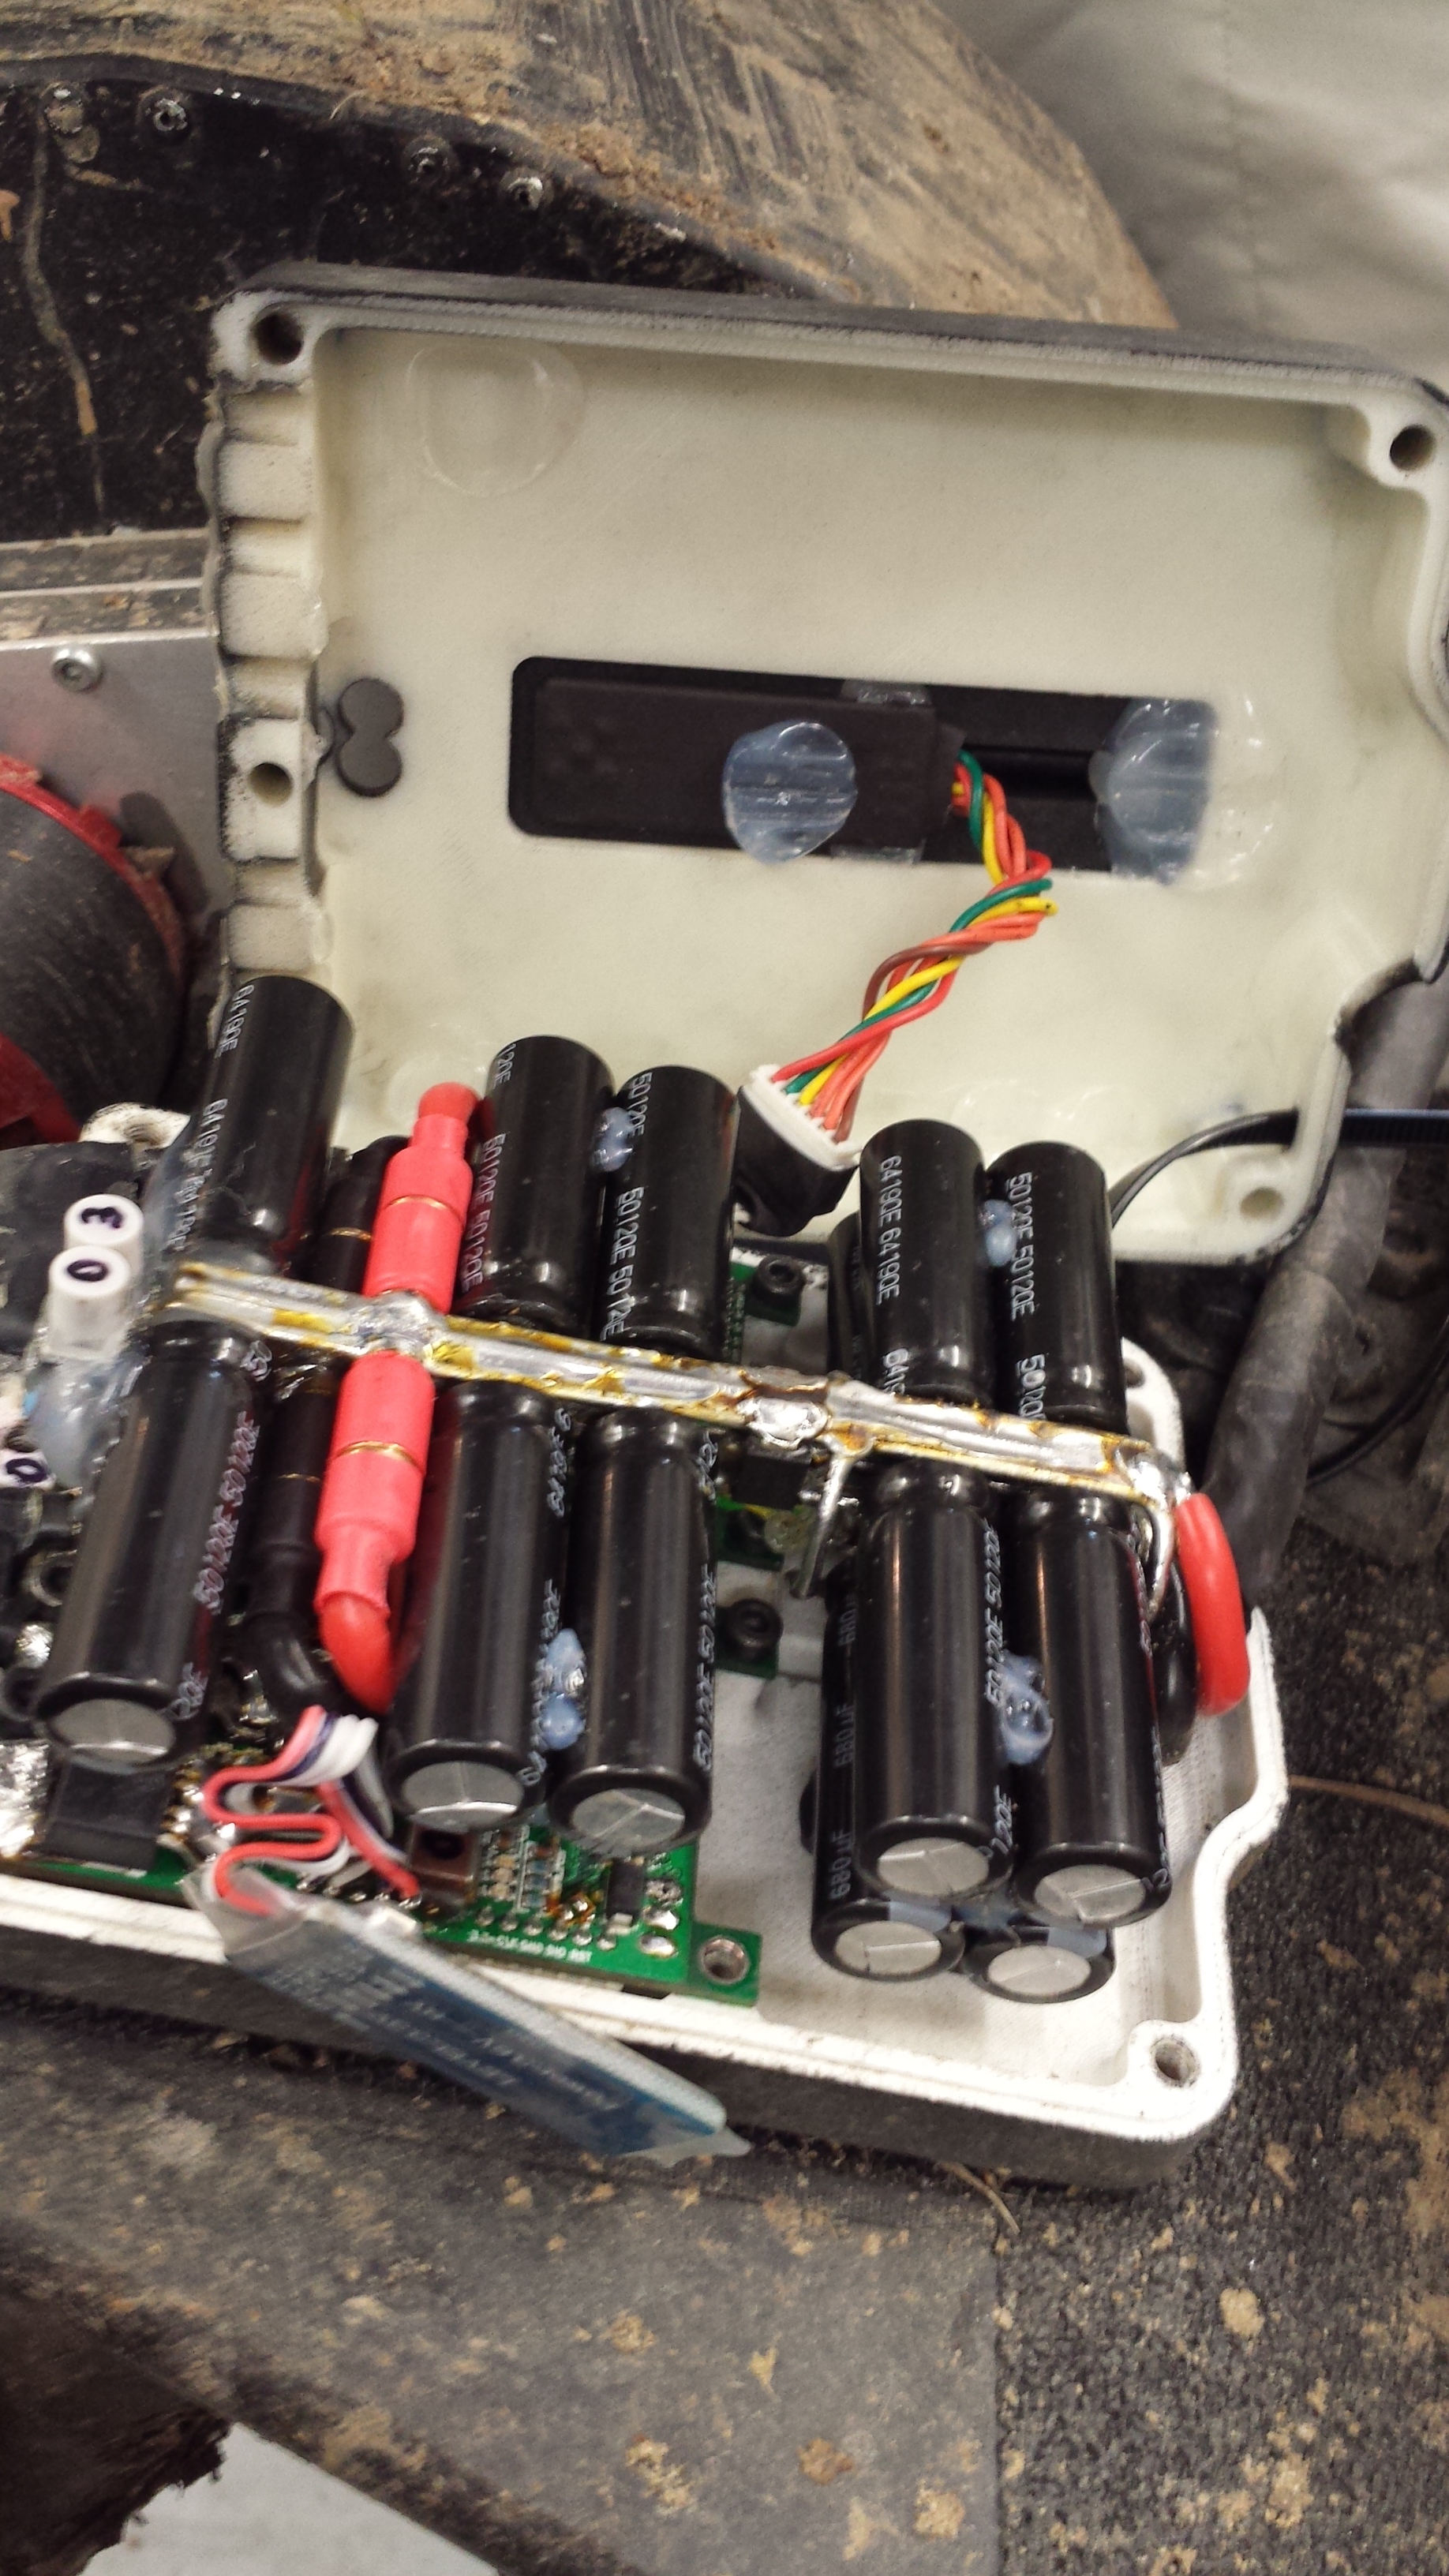
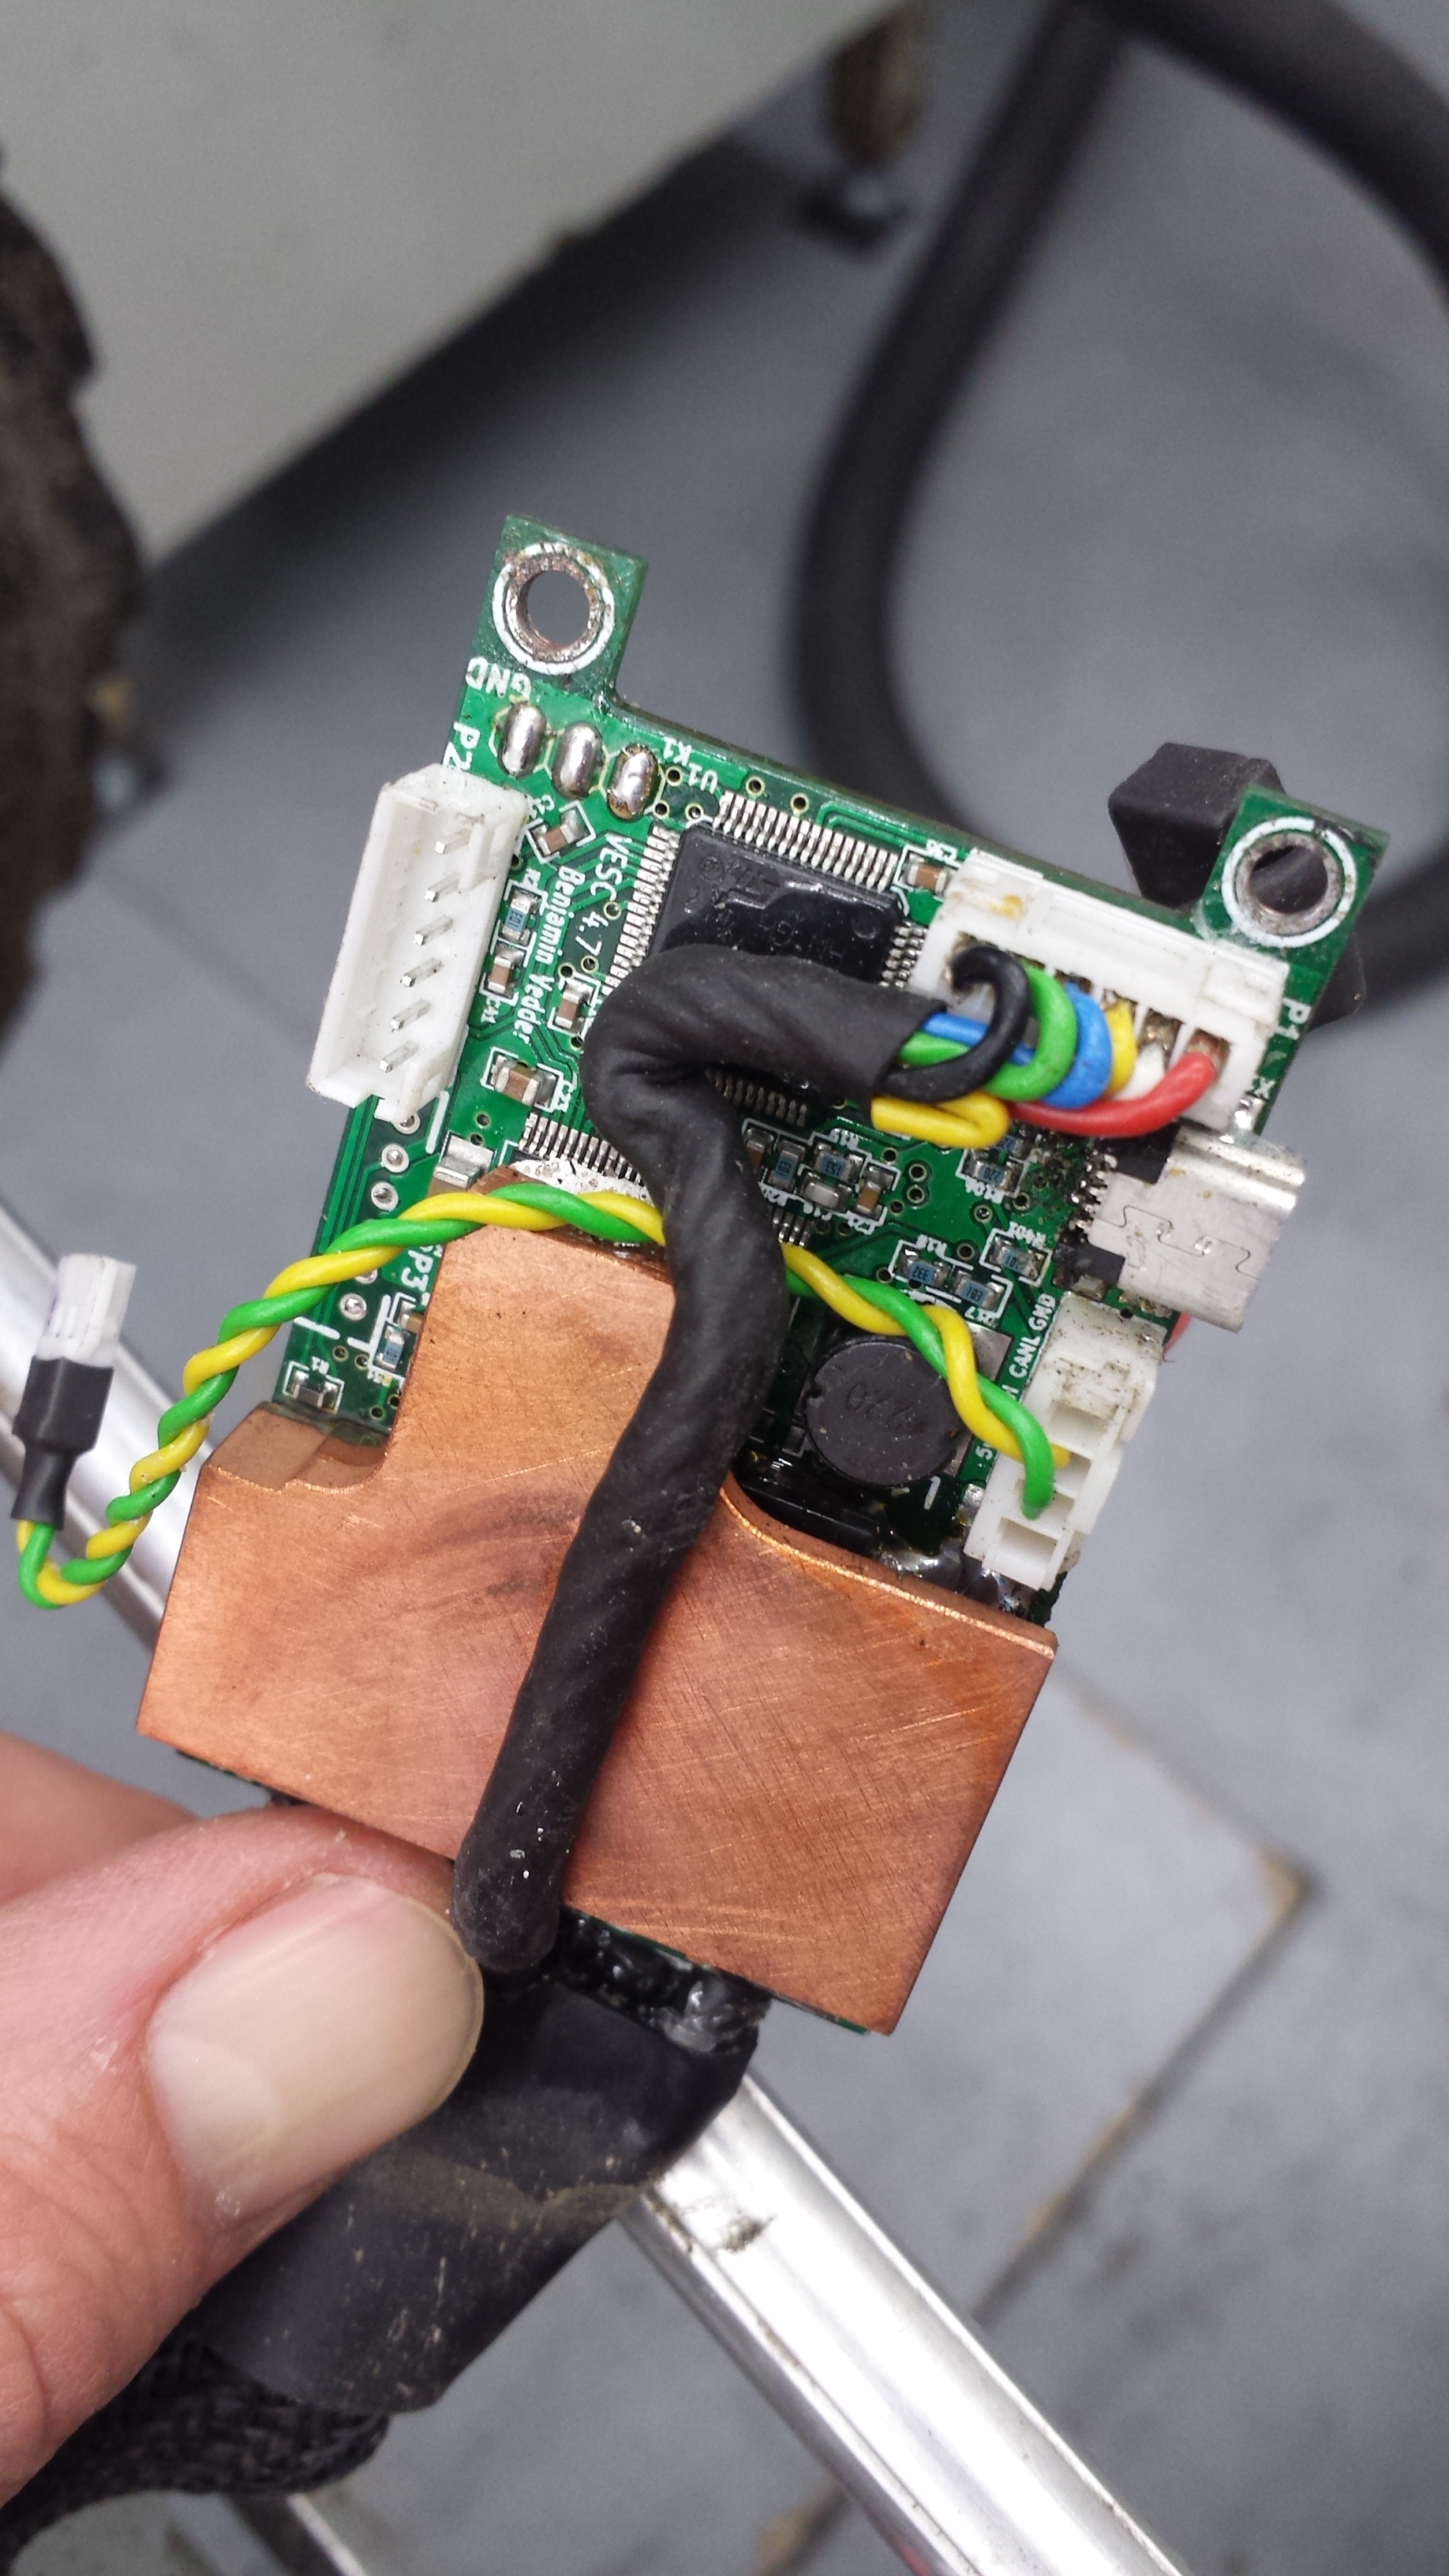
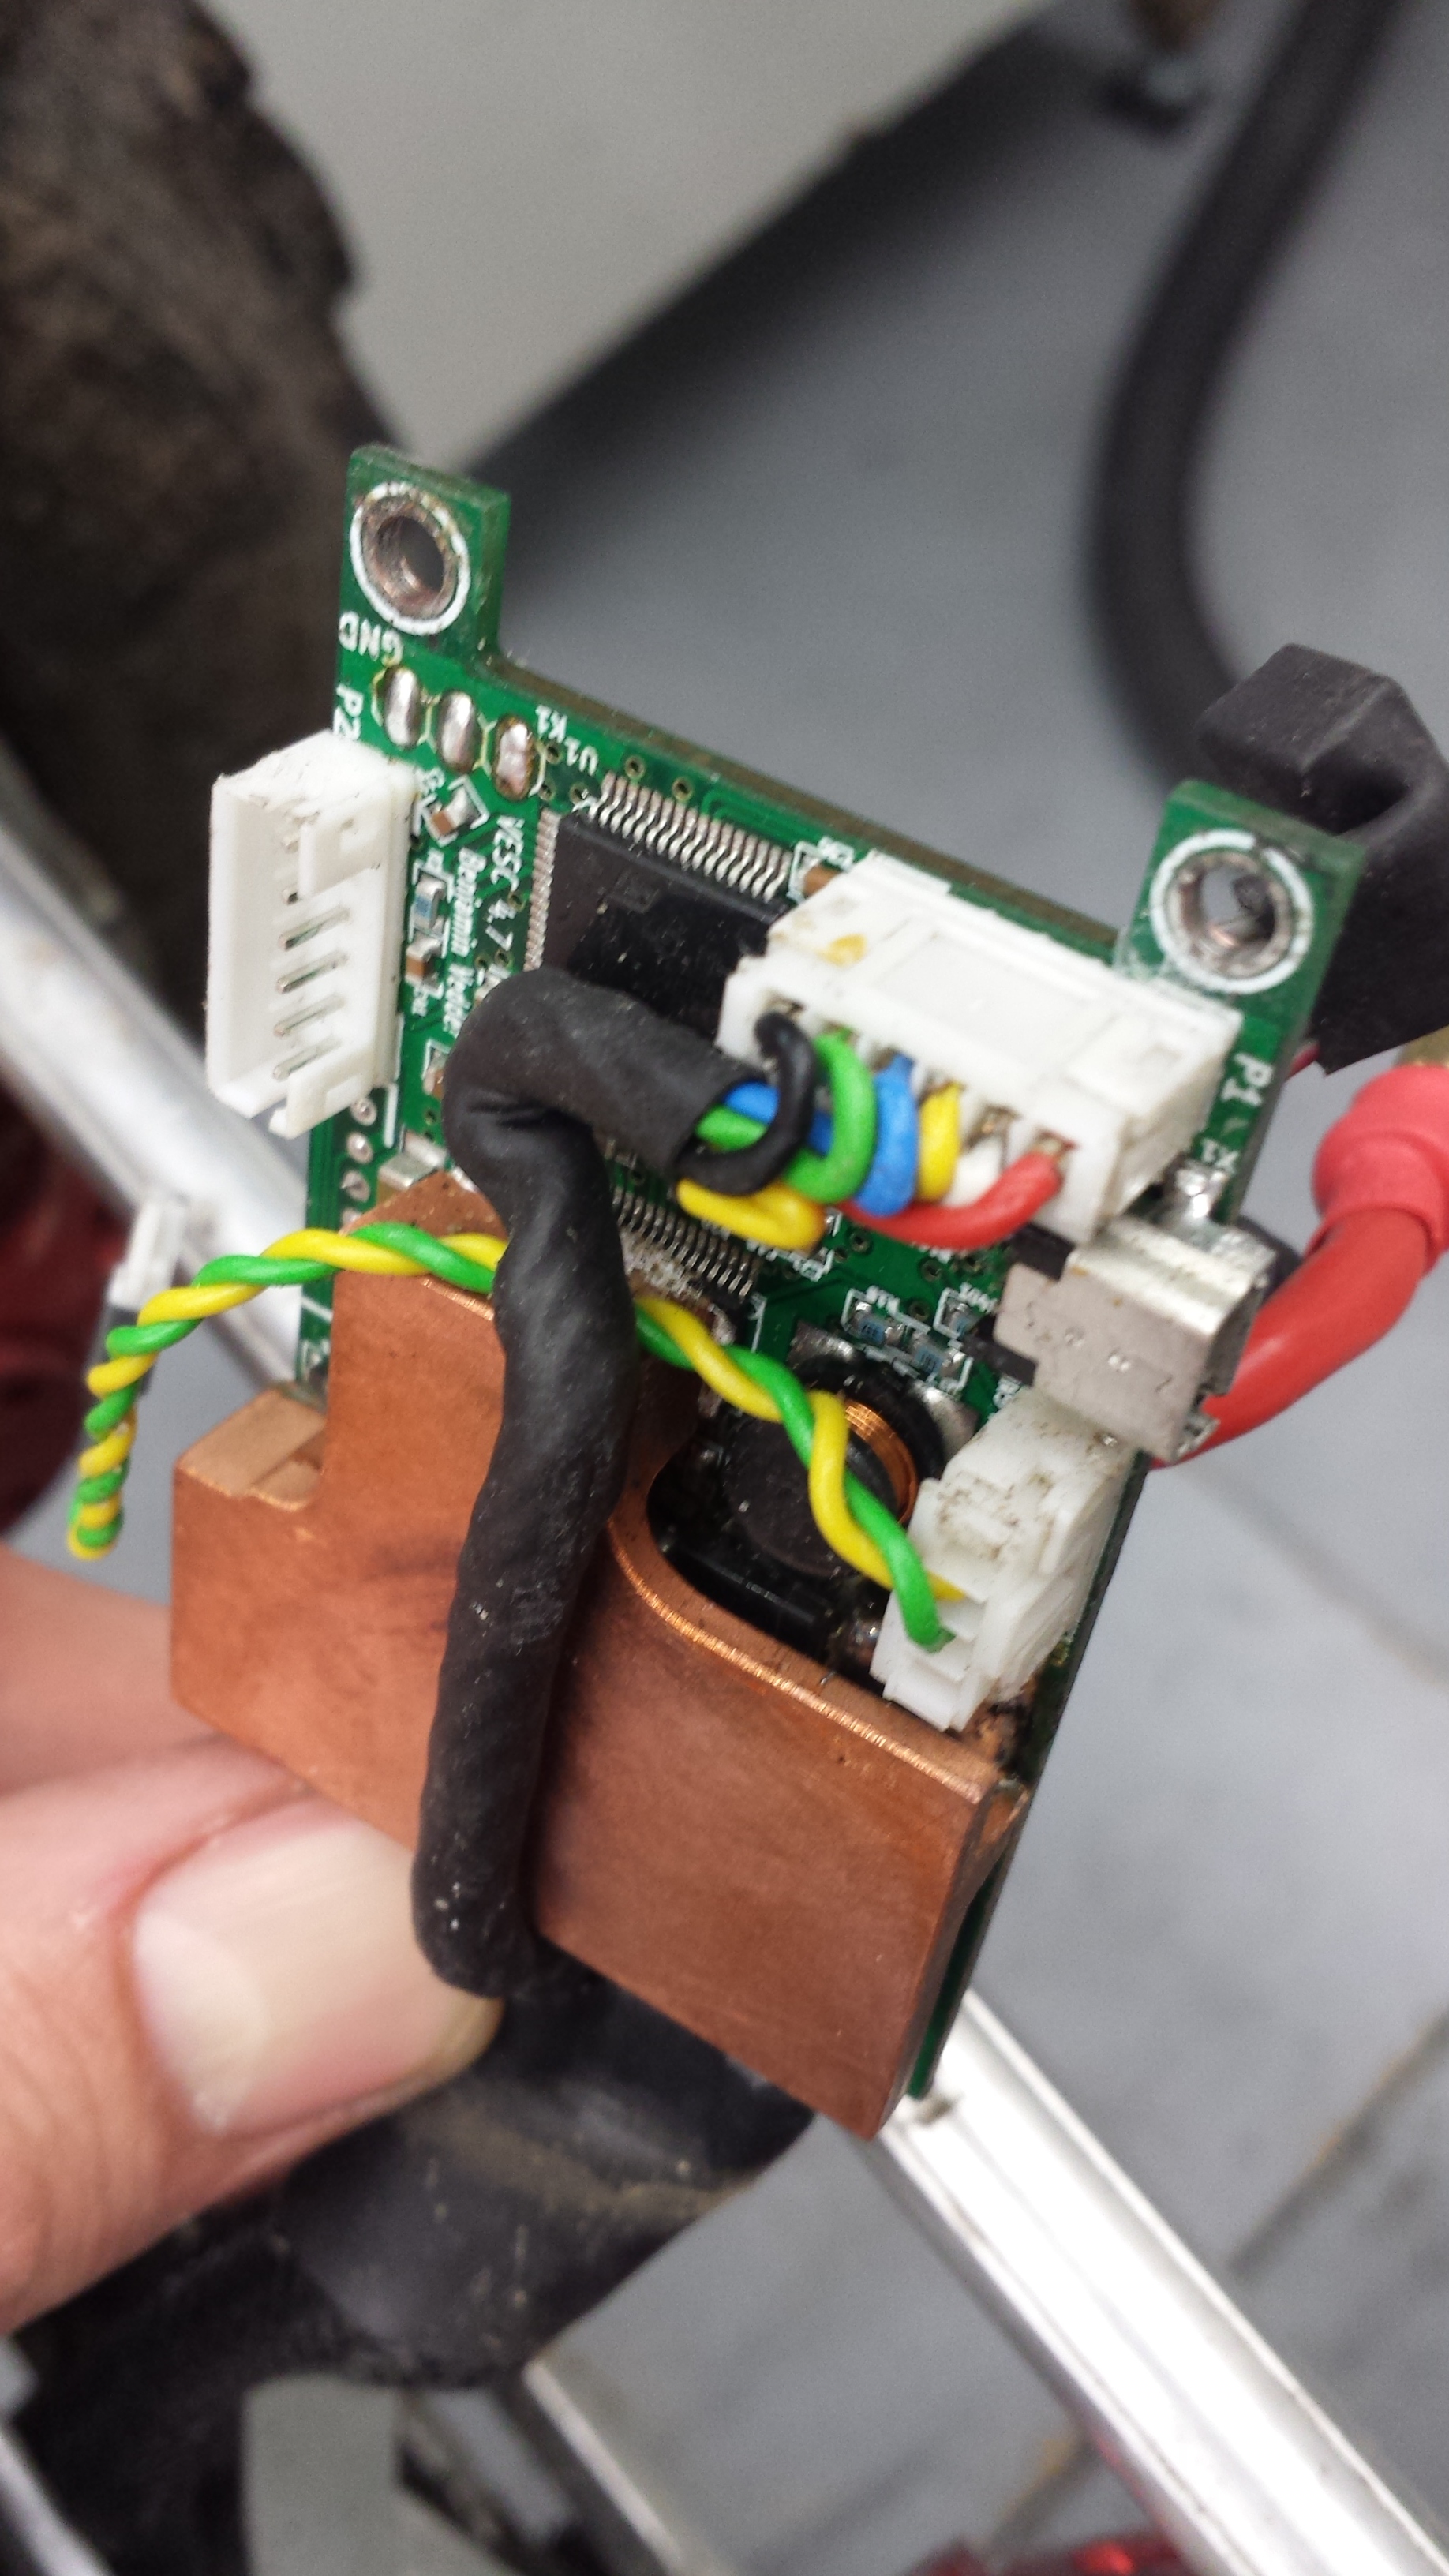
Luckily (for you) I had to open my VESC enclosure yesterday, because I had some connection issues with one of my hall sensor plugs.
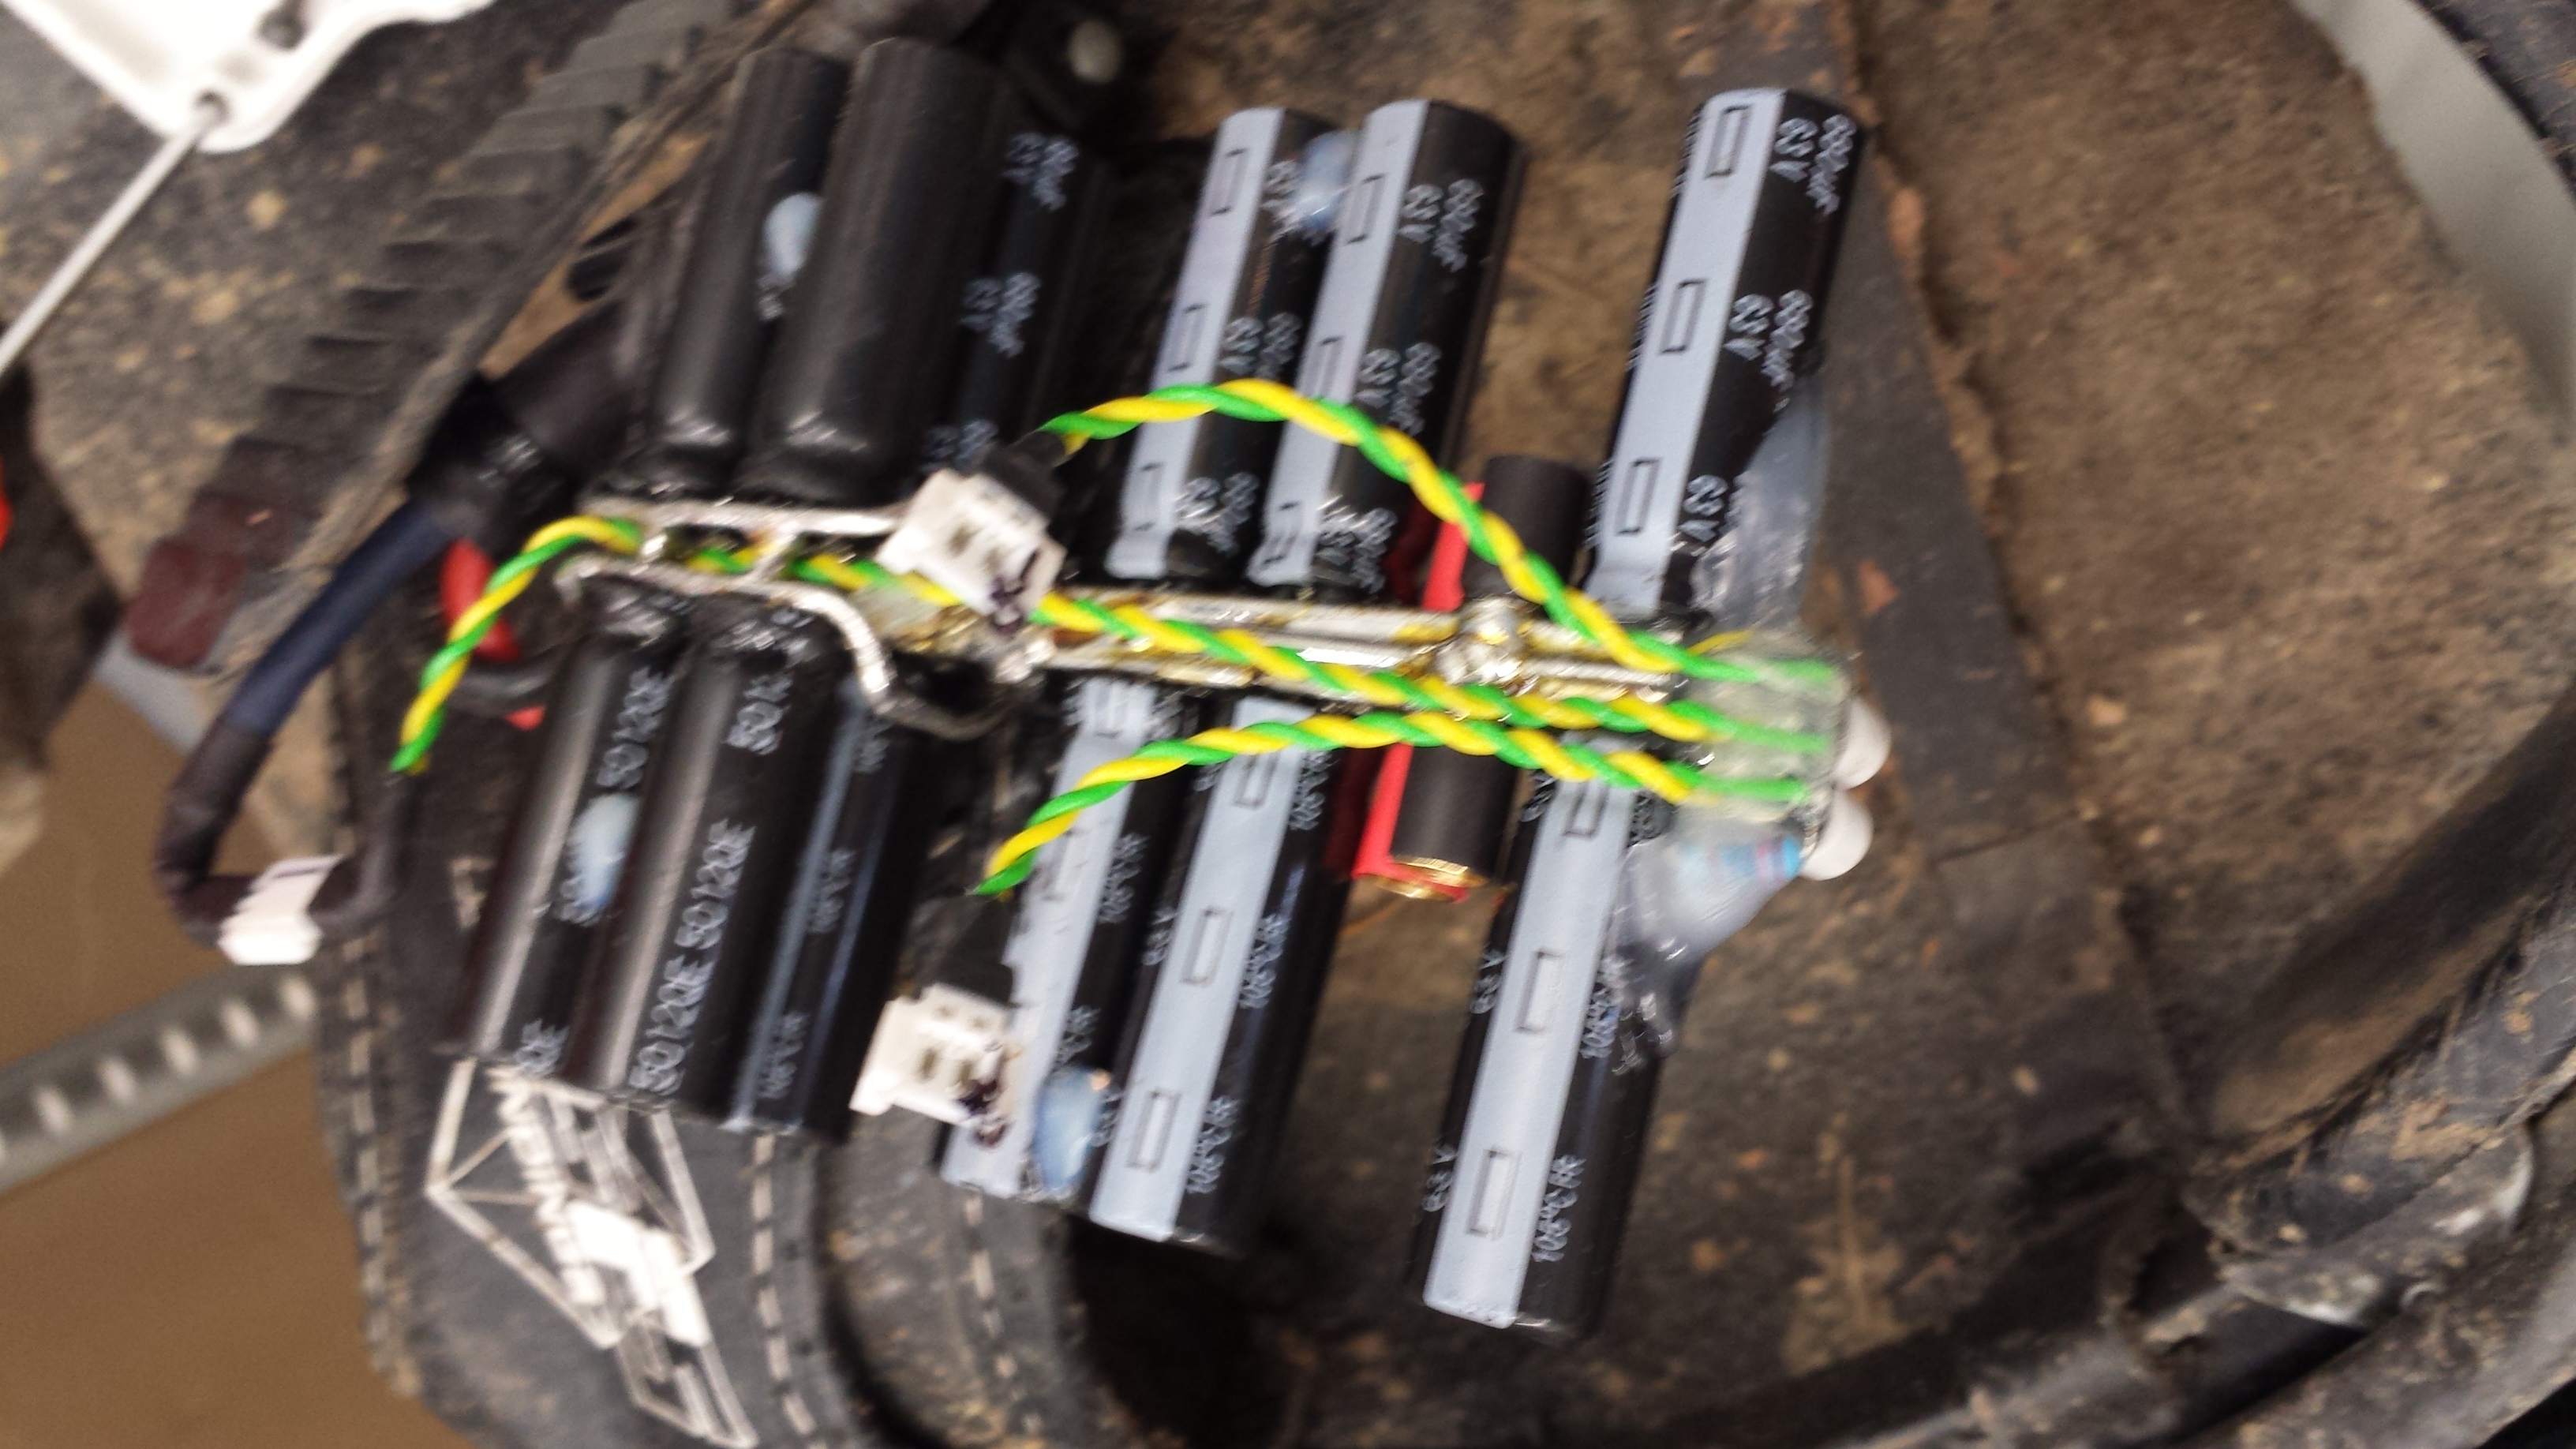
Cable tension relive:


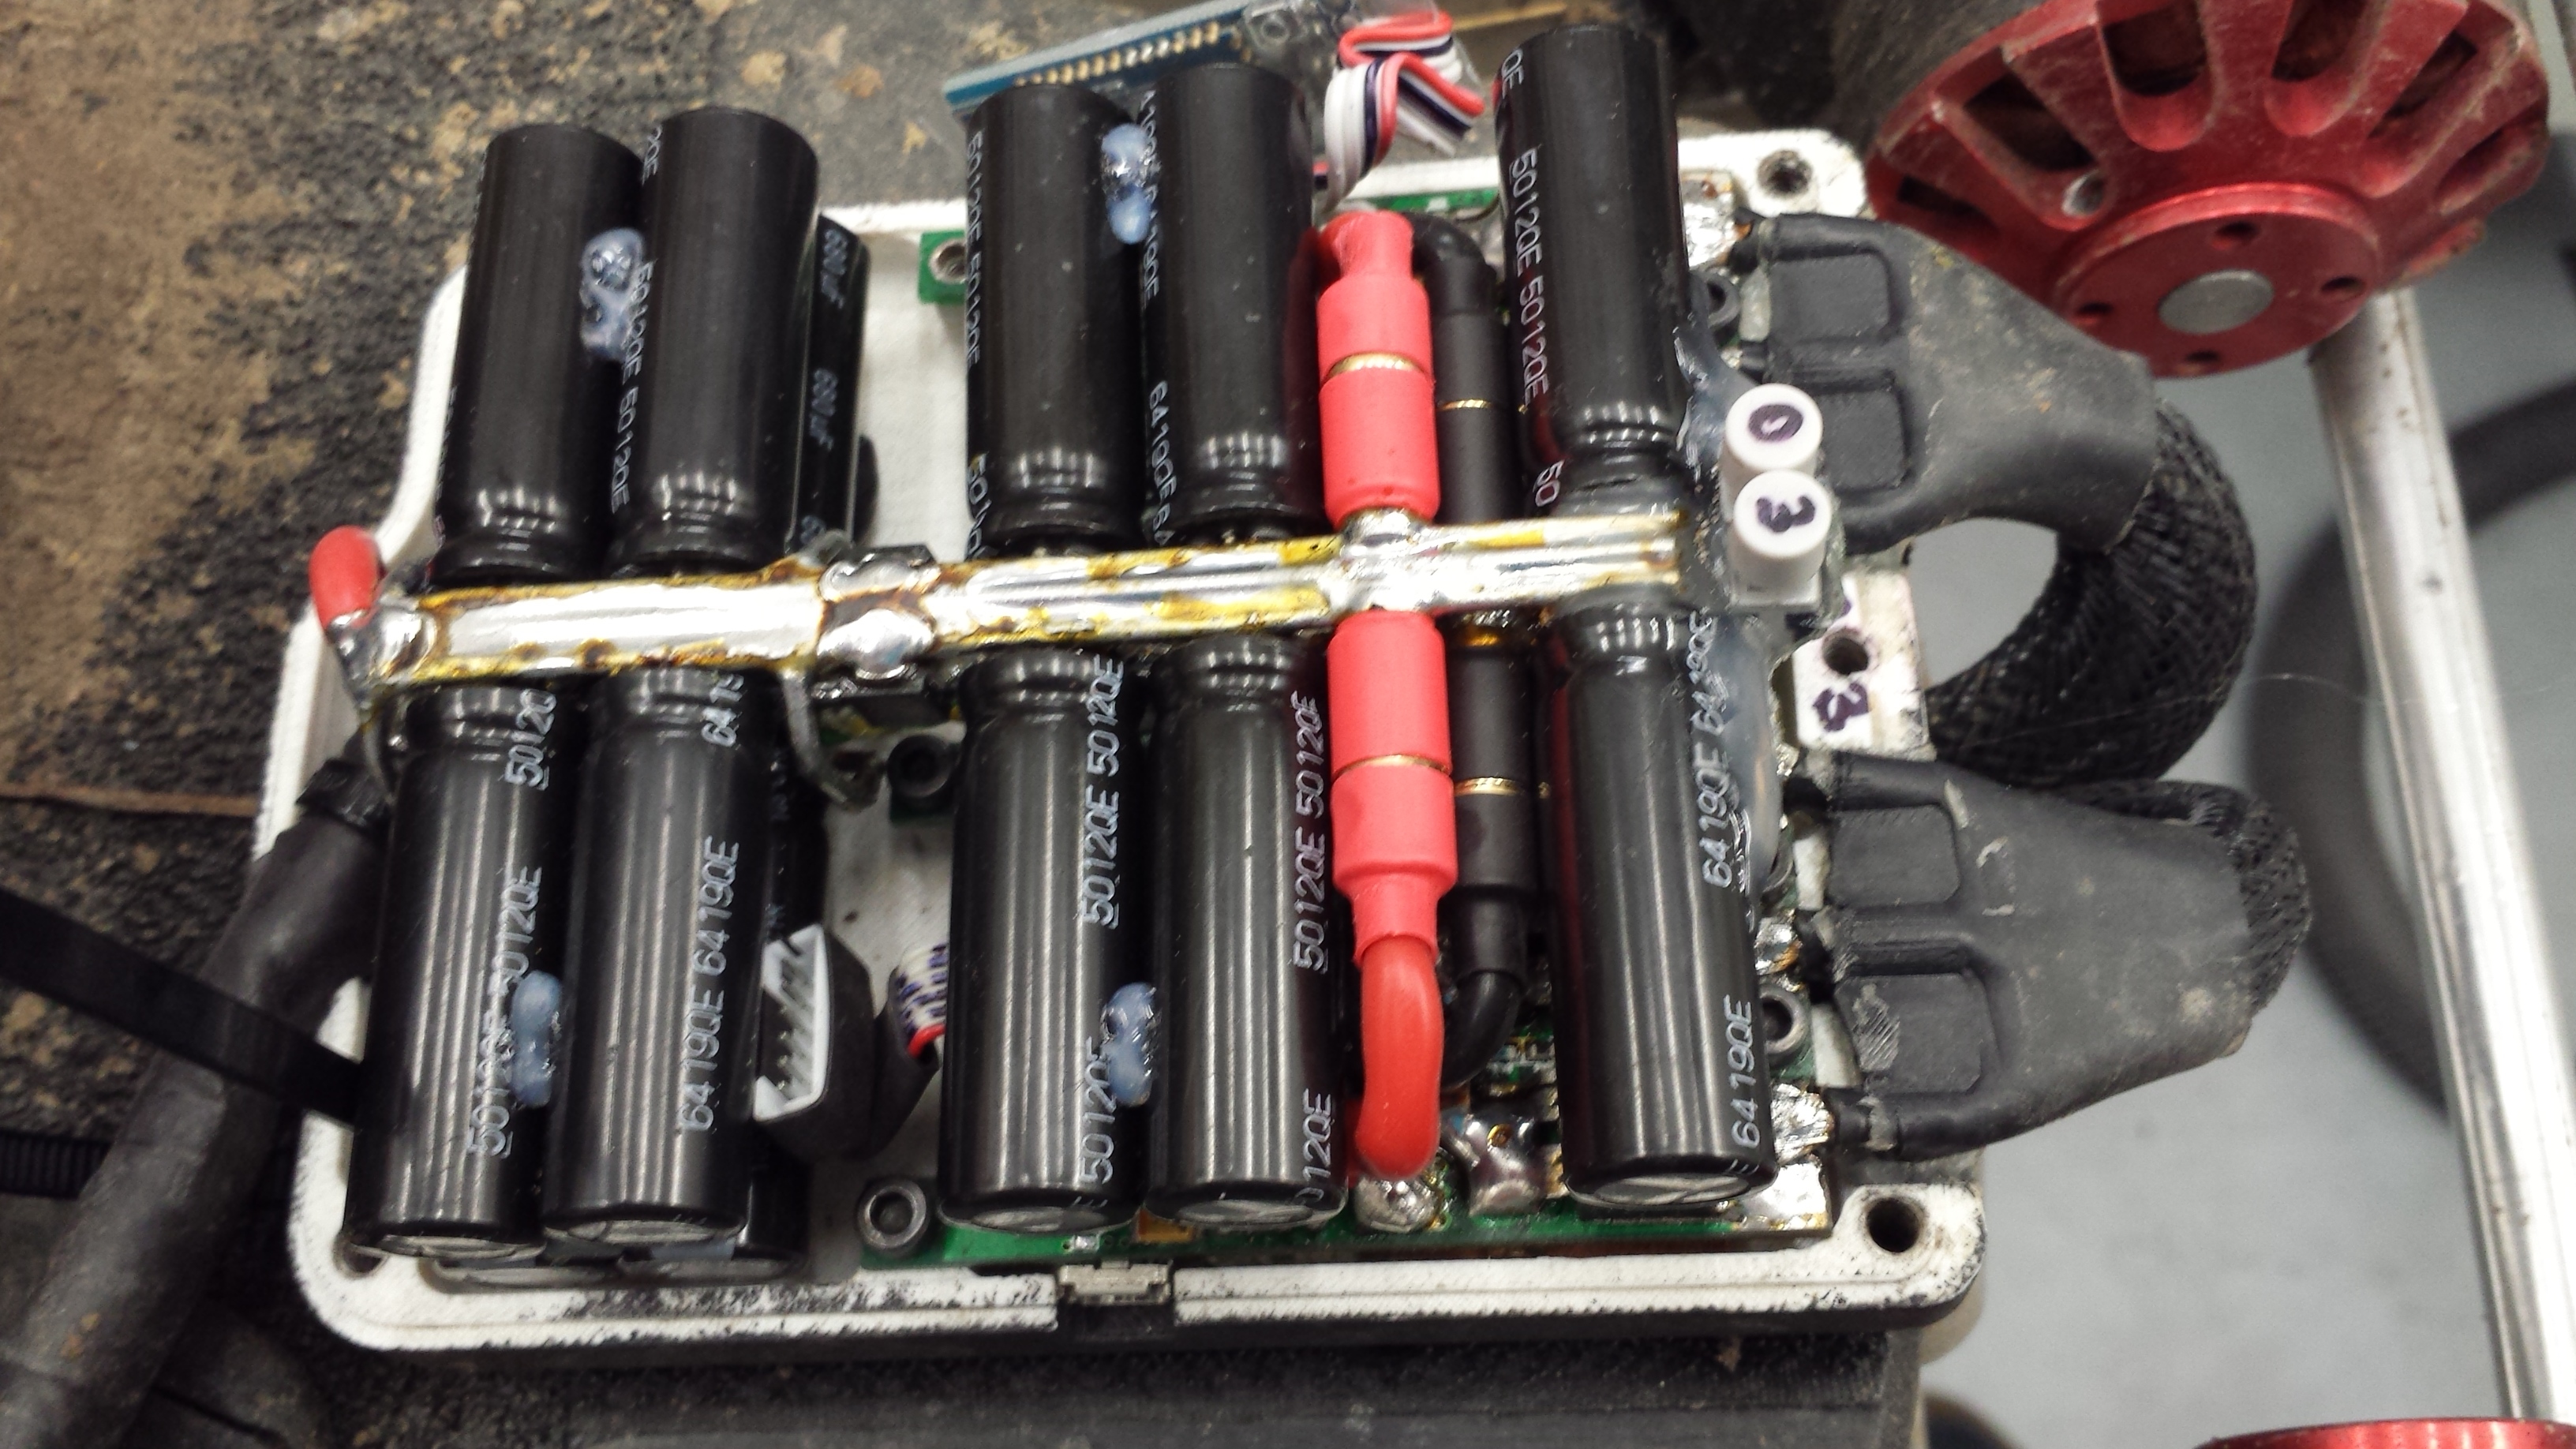
NRF Transceiver & BT Module and 14 ultra low ESR caps:

6mm bullet connectors for the VESCs:
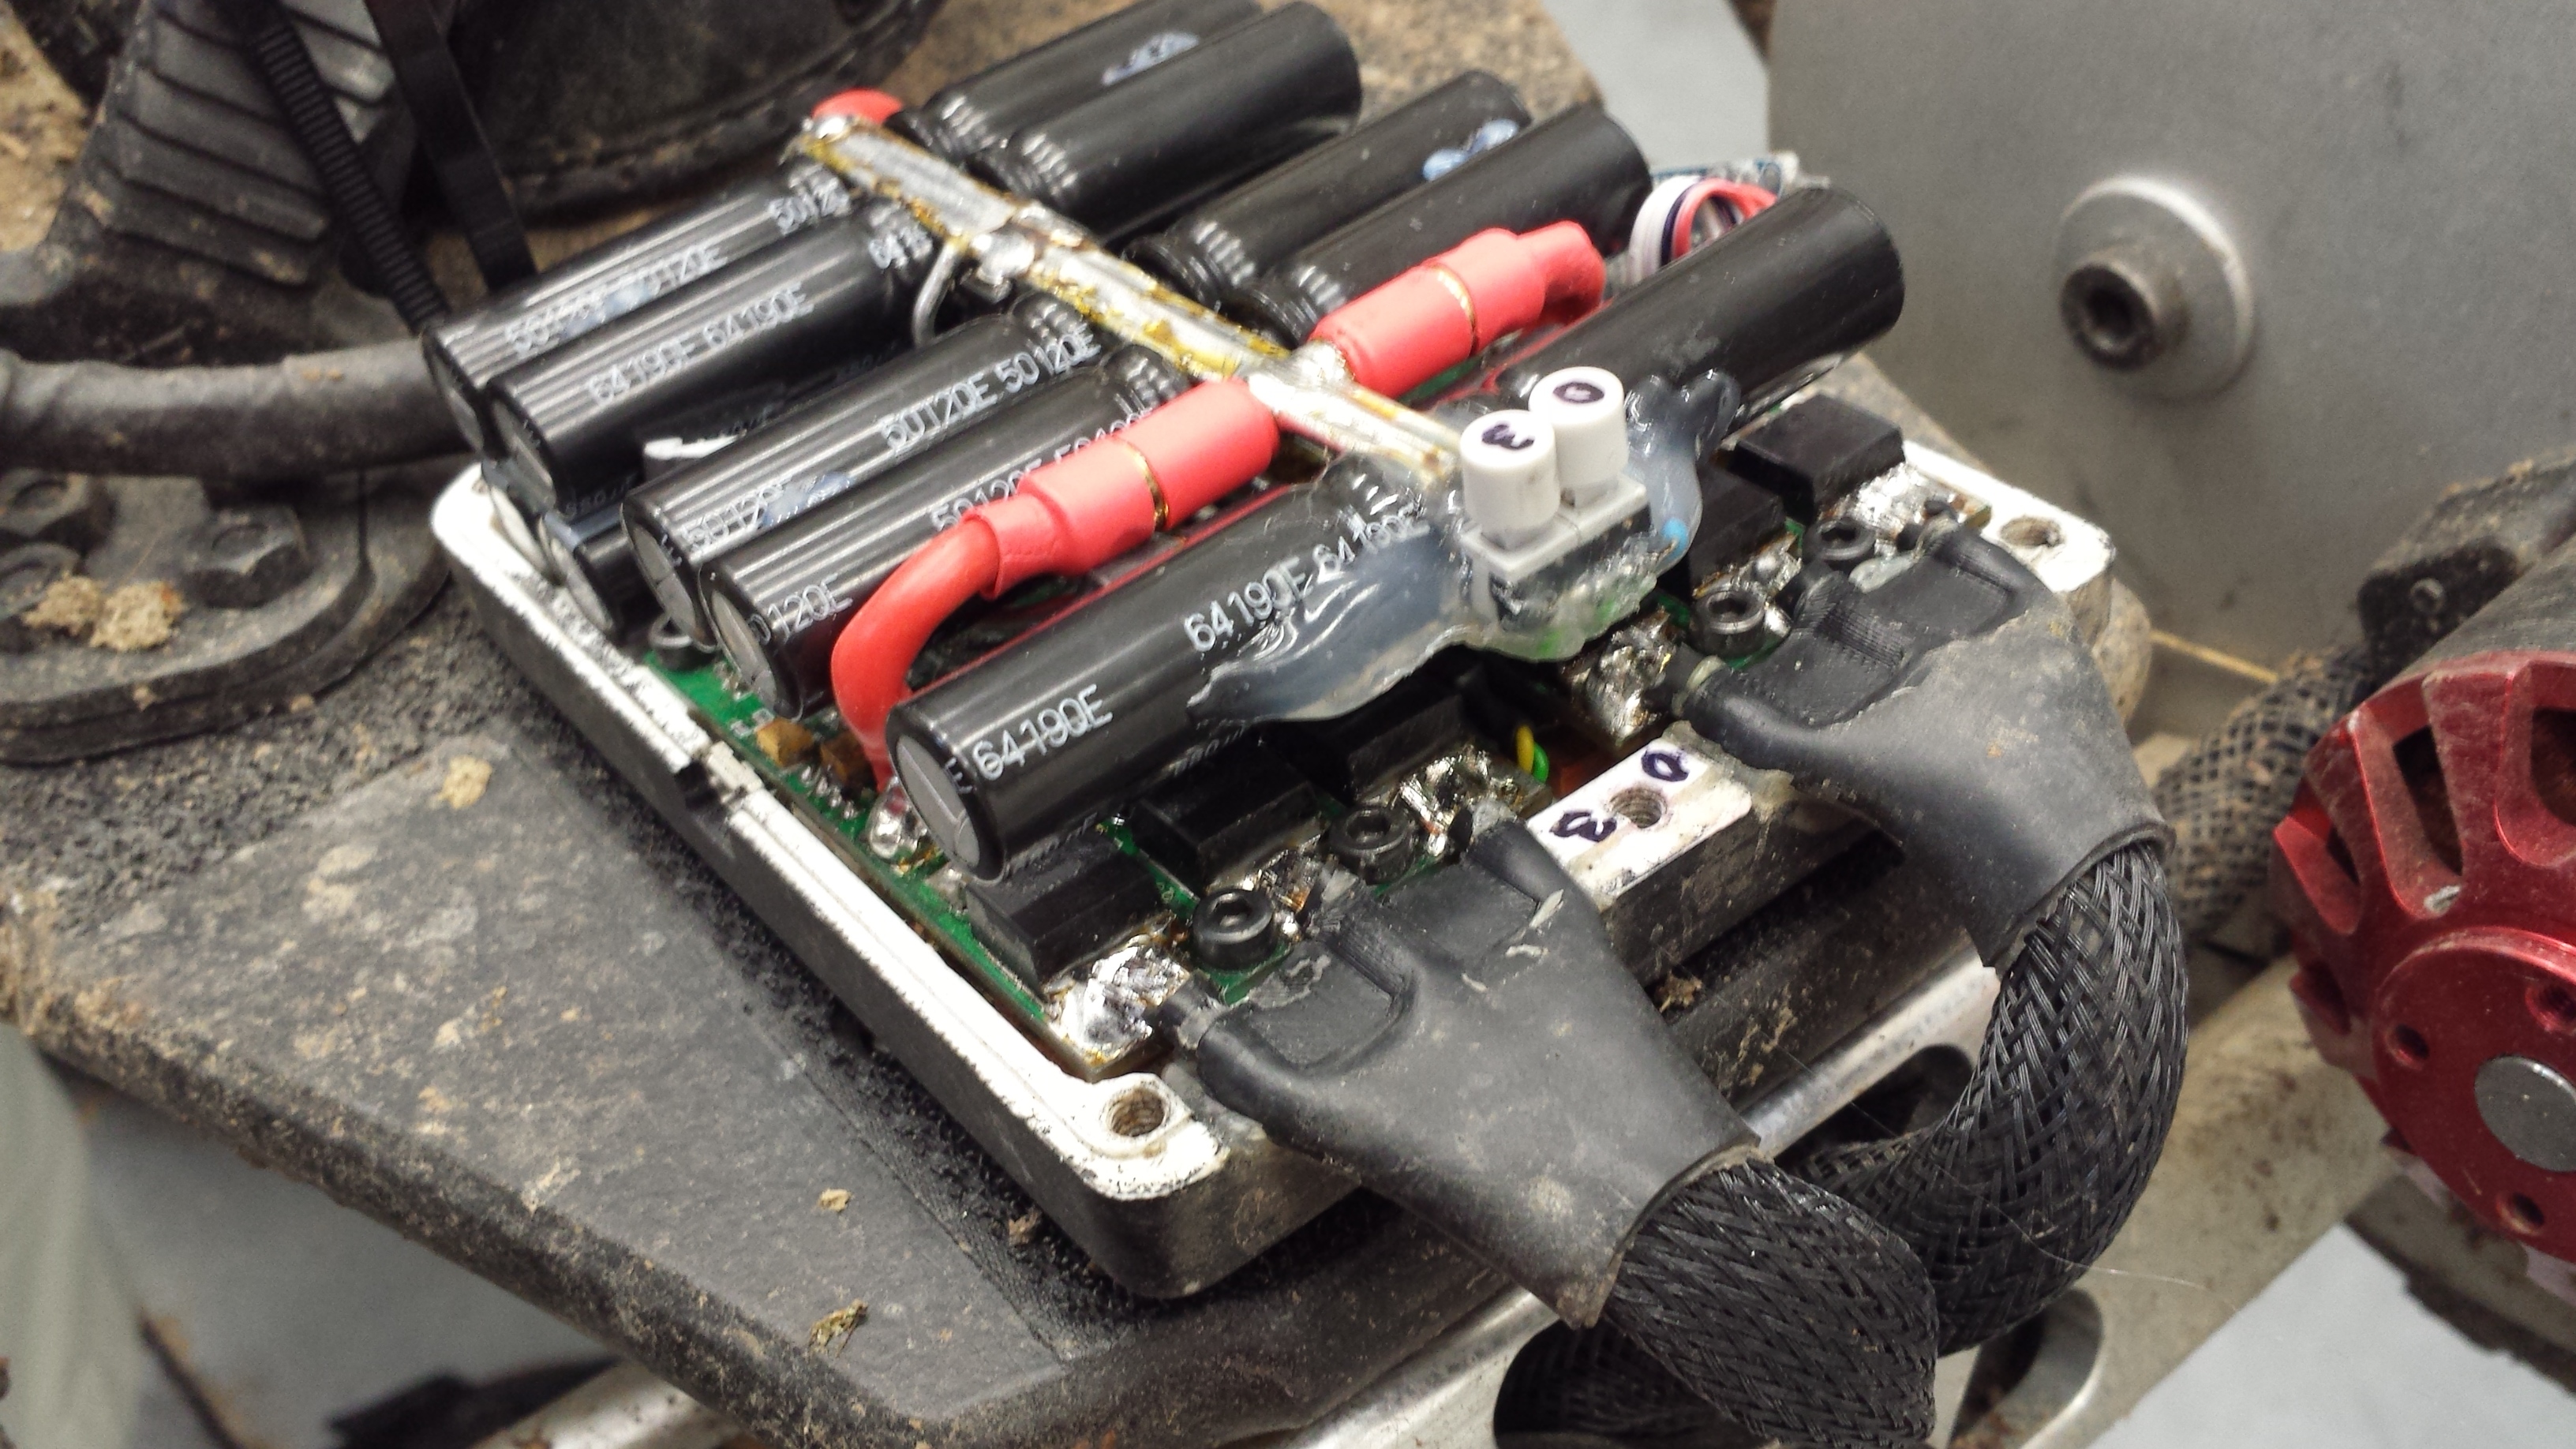
Microswitches to add the possibility to disconnect every single VESC in case of a fault from the CAN bus:
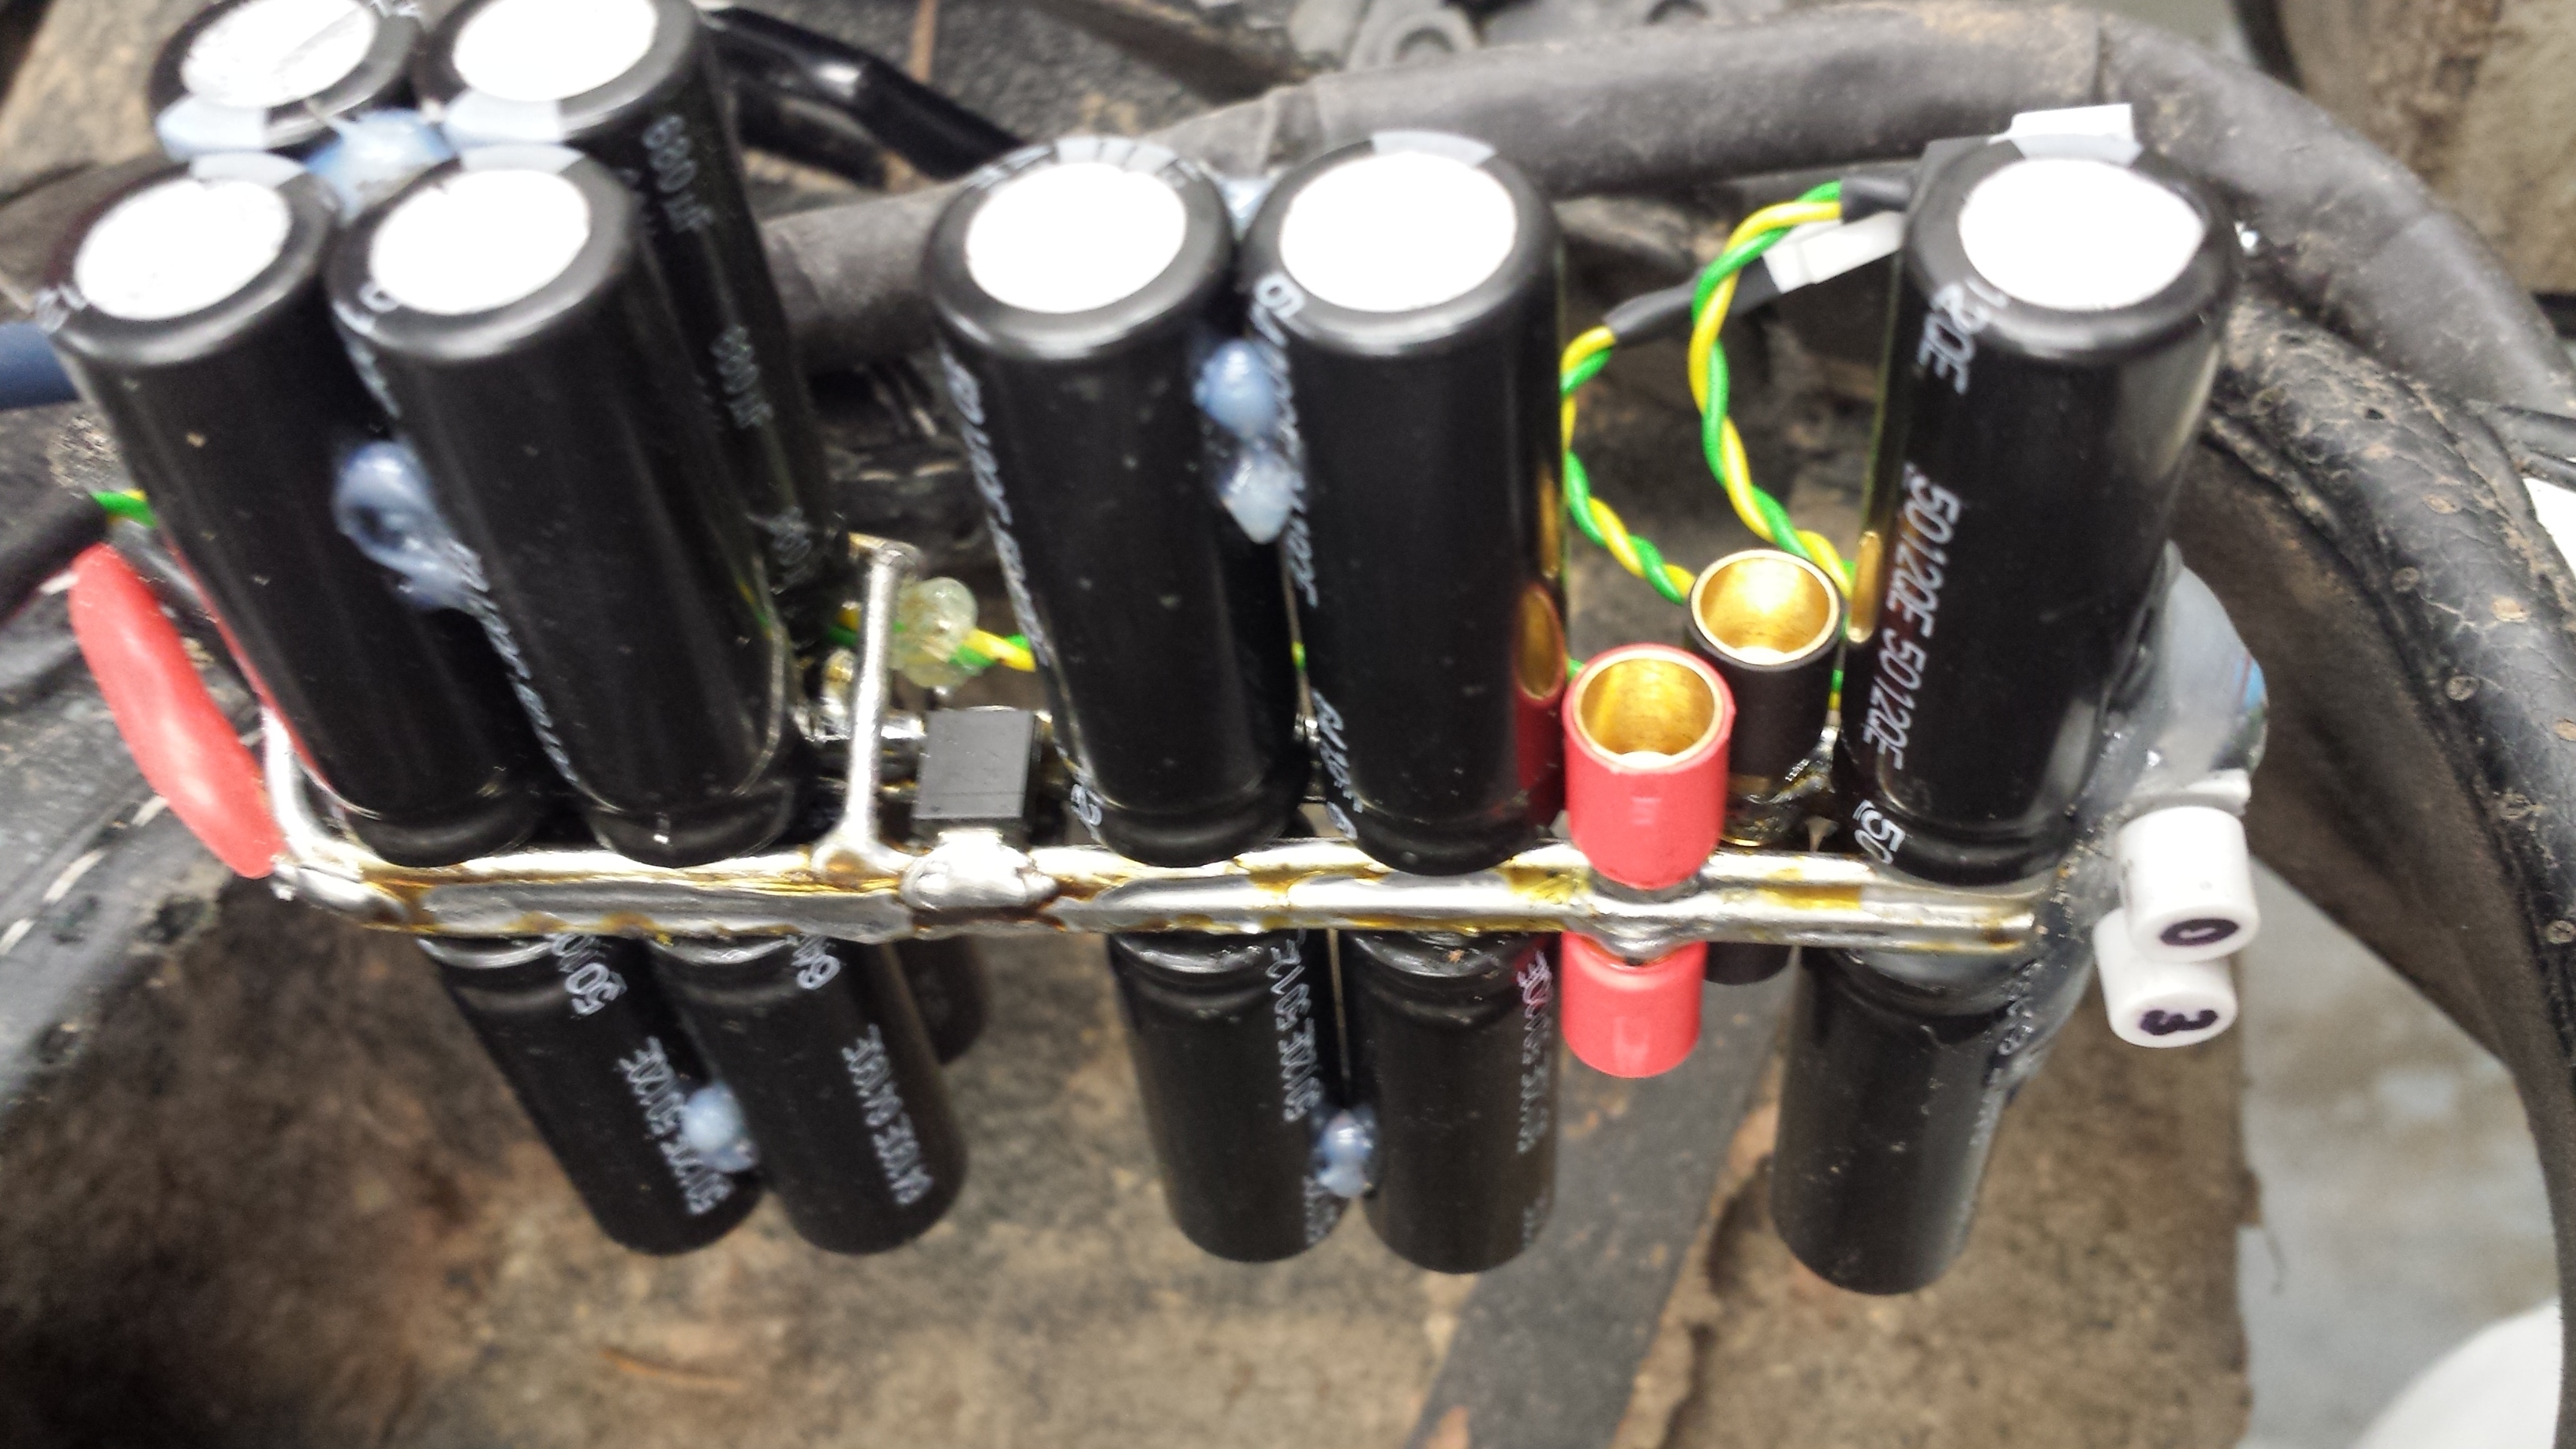
20µF on GVDD, 0,0005 Ohm shunts for up to 240A current measuring ability, NRF extension and BT directly soldered to the PCB:
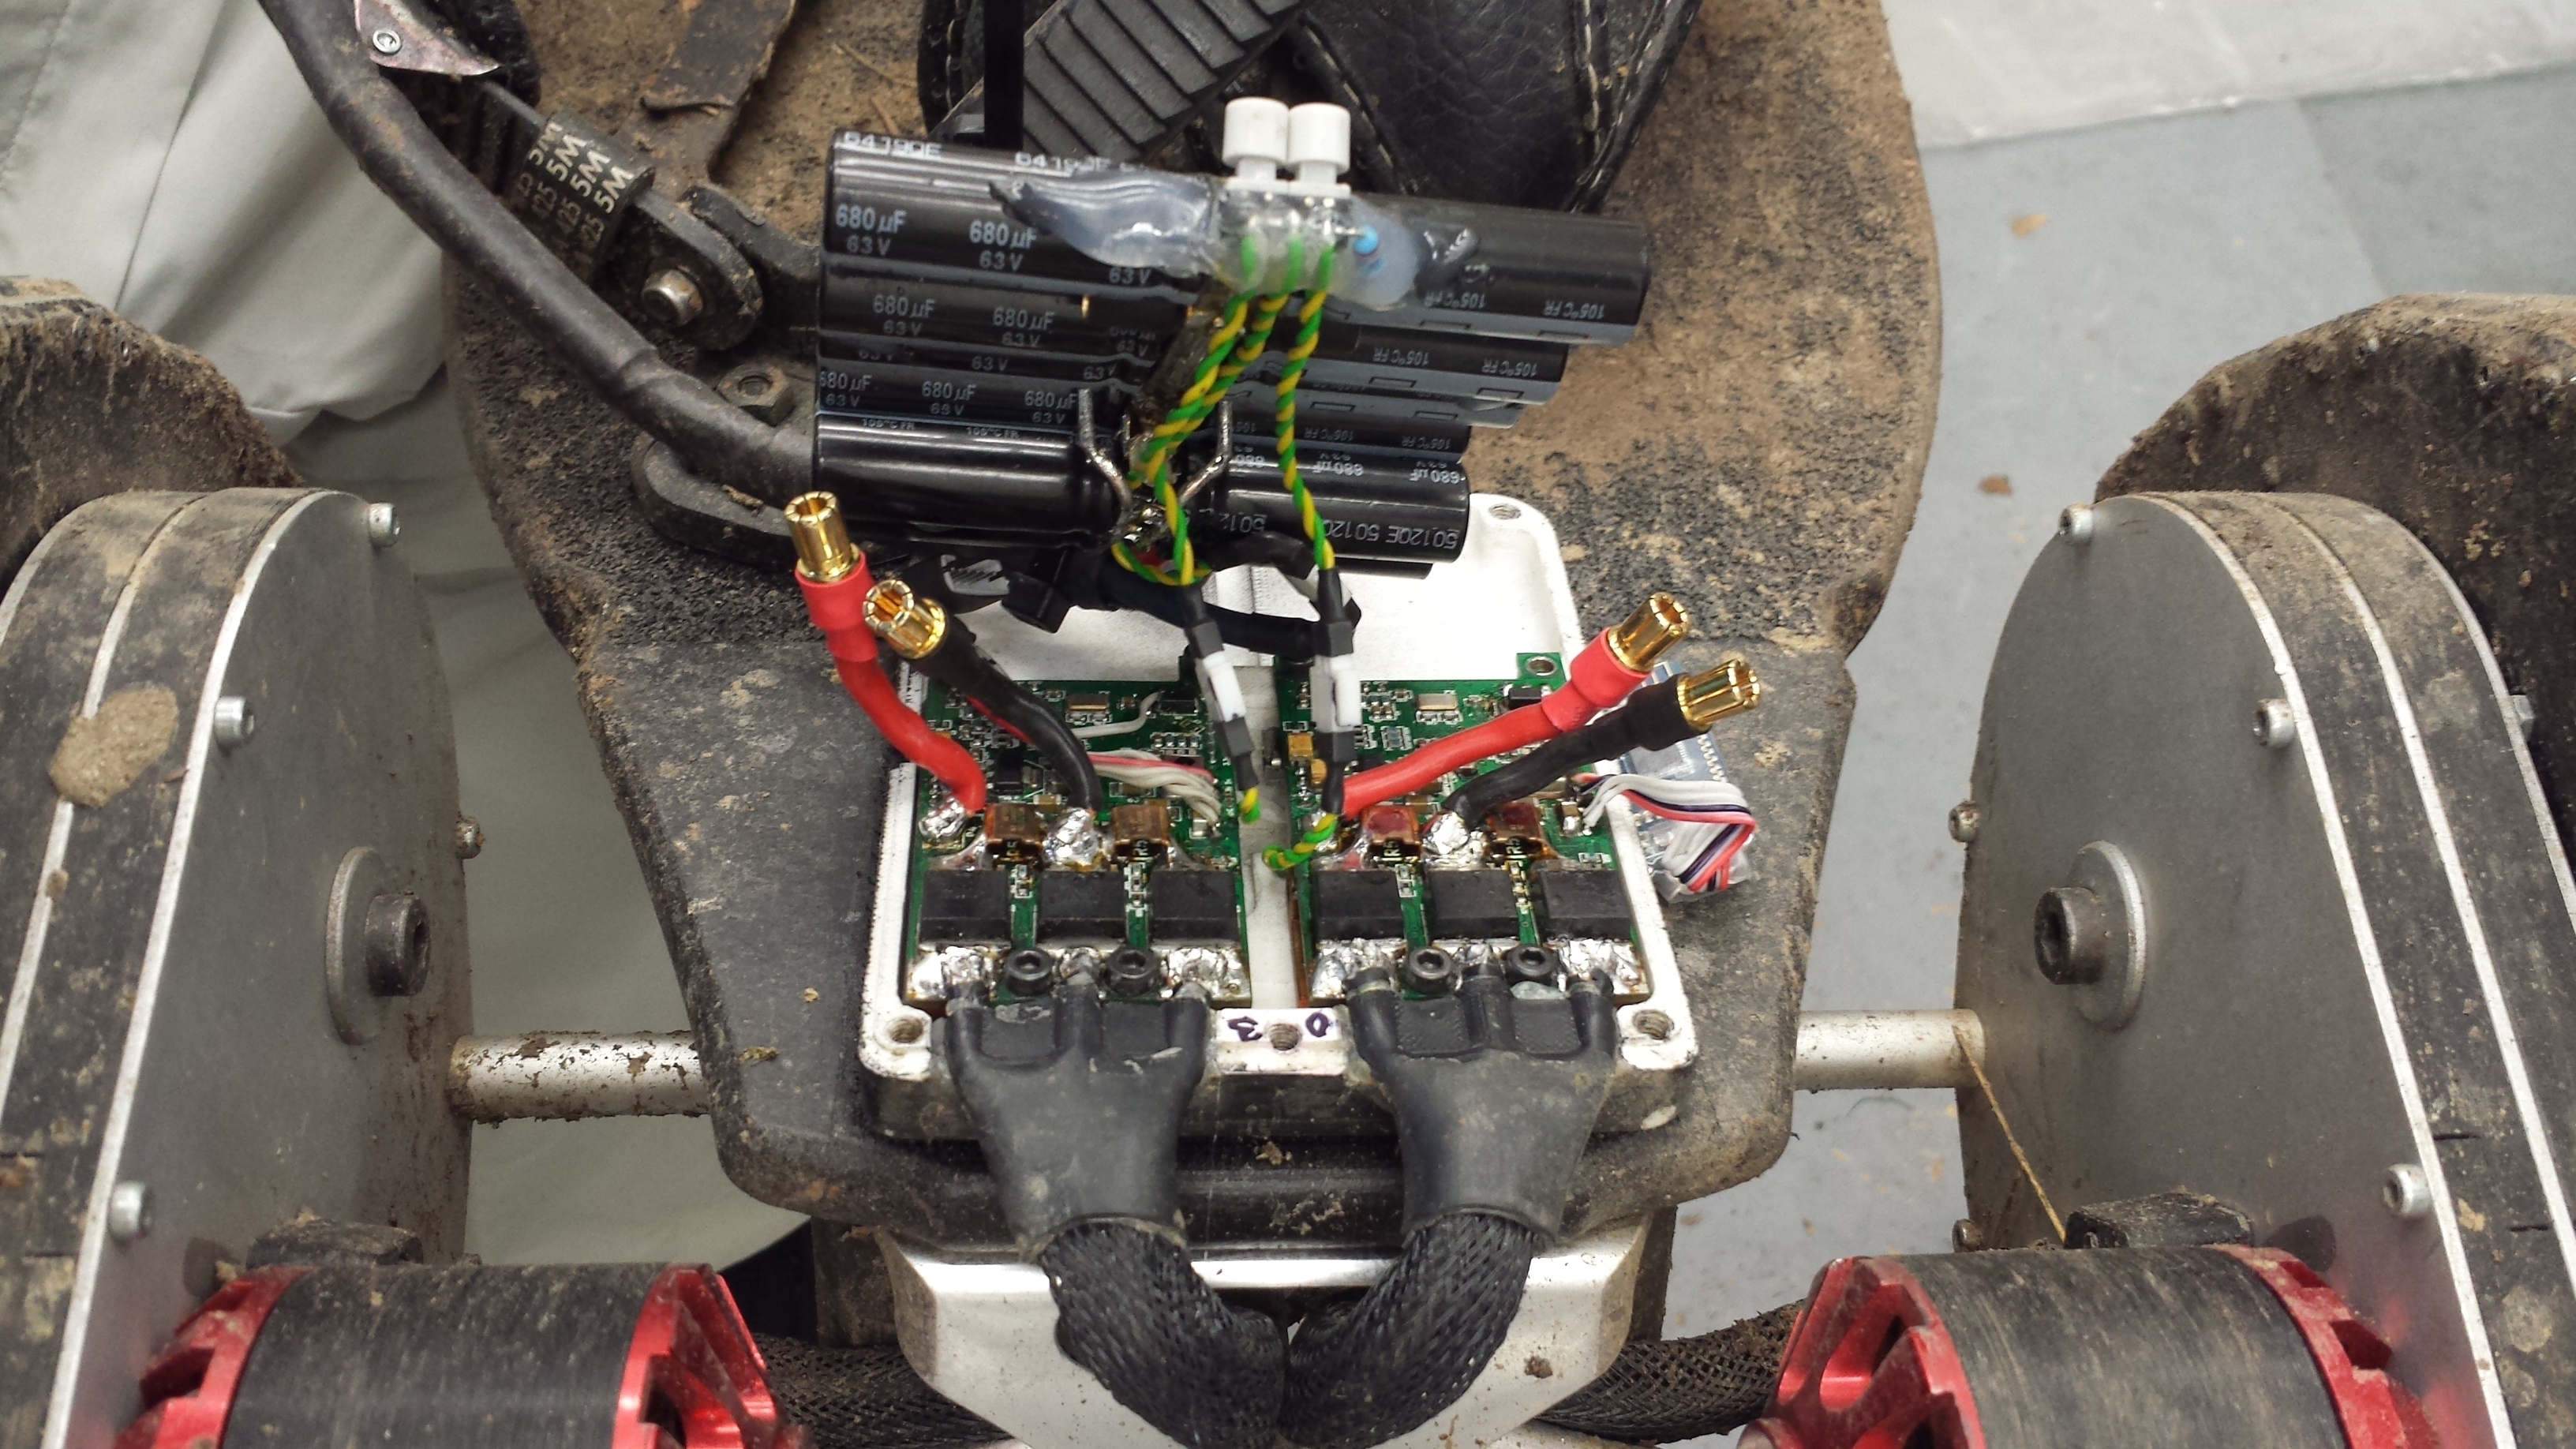
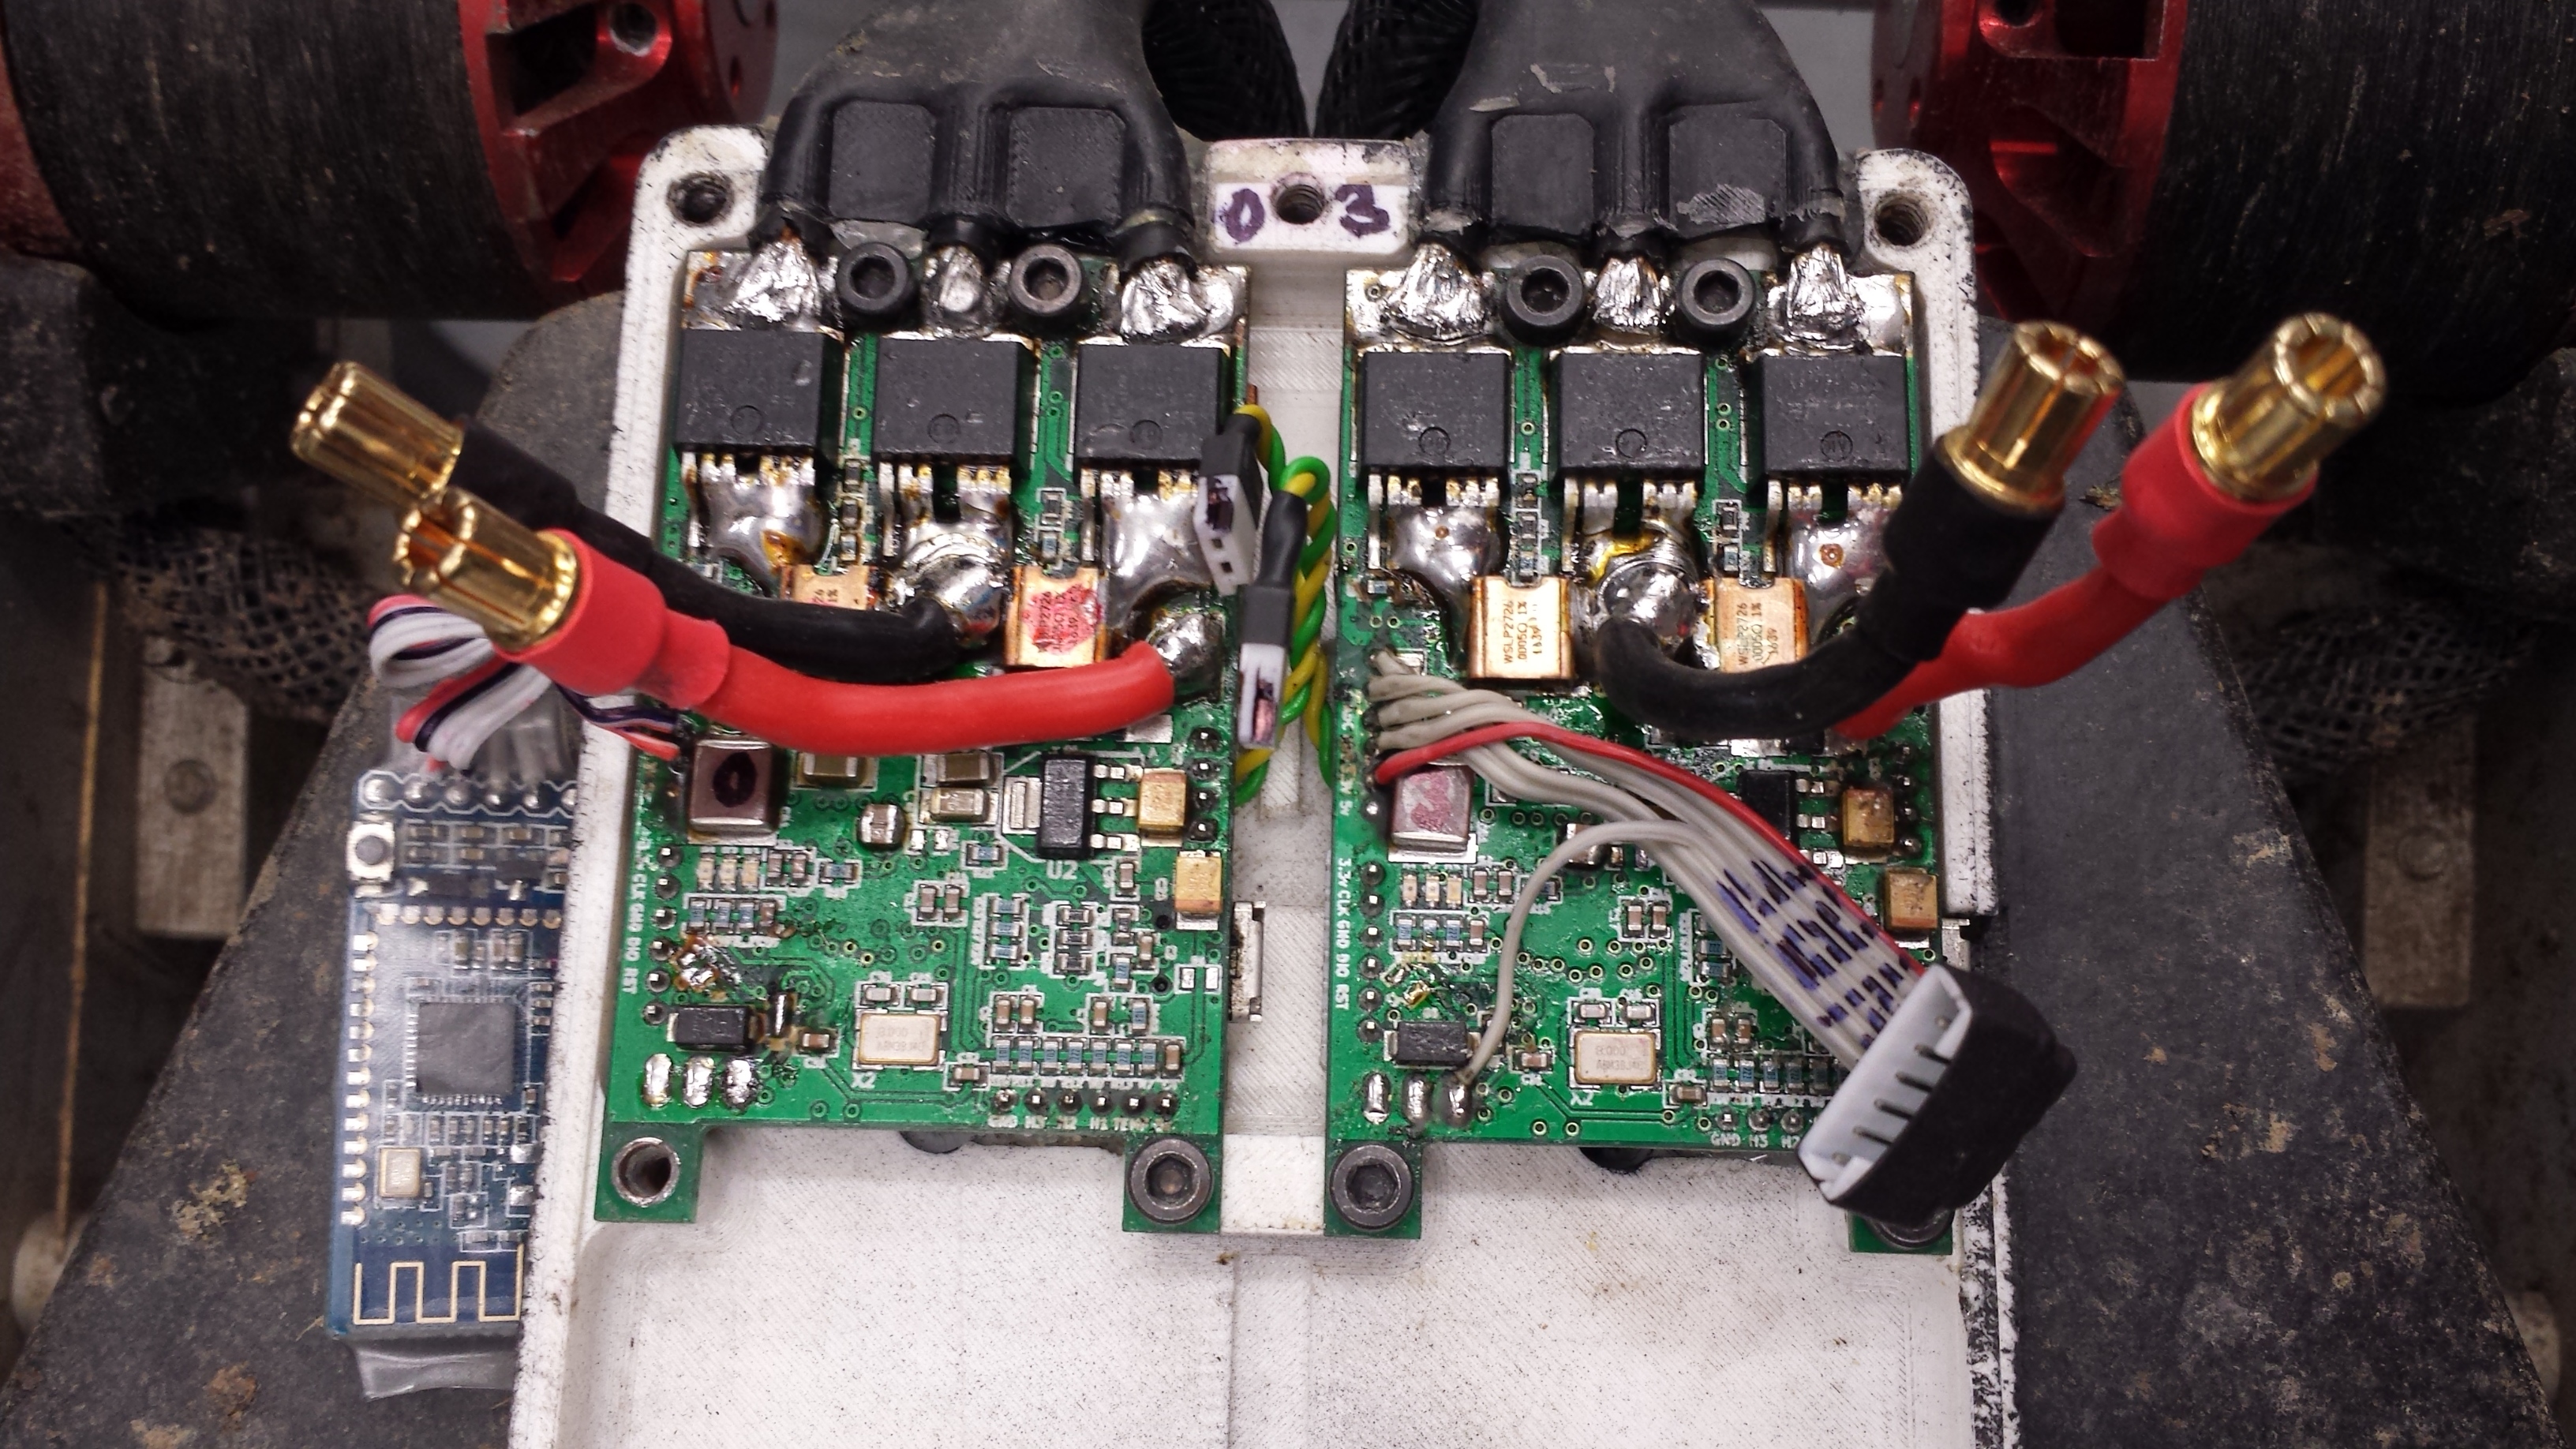
VESC with heatspreader soldered to the common positive FET connections, 54V TVS diode on top of of the big ceramic cap. Hard to see under the heatspreader:
15 Likes

11 Likes

5 Likes
@Duffman You should estimate the value of your build… im sure it would grab the first places and would be the king of emtb’s 


Your capacitor ‘‘booster pack’’ also looks incredible…
So how many micro farads of caps do you have per one vesc?
Jeesus, this beast is the stuff of dreams. I never thought I would want a mountain e-board. After riding one for 5 minutes and seeing your stuff my bank accaunt is going do die (after its alive in the first place )
1 Like
I’d like to officially cast my vote for @duffman for Build Overkill Of The Year (BOOTY award) in 2017, based on posting date, at least. I know this build is actually much older, but who cares? BEEFCAKE!!
6 Likes
@Okami The total cost of this build was somewhere between 4-5k€. Hard to tell with this constant rebuilding and improving, don’t really want to know exactly… 
I have a total of 28x 680µF caps. 7 per VESC, so 4760µF instead of 2040µF. But much more important is that each of them has less then the half esr than the stock caps, in common 5 times better. So hopefully less voltage spikes from switching at high currents.
@Mobutusan BOOTY sounds good
But back to the buildlog, I still have a lot of things to show you in detail:
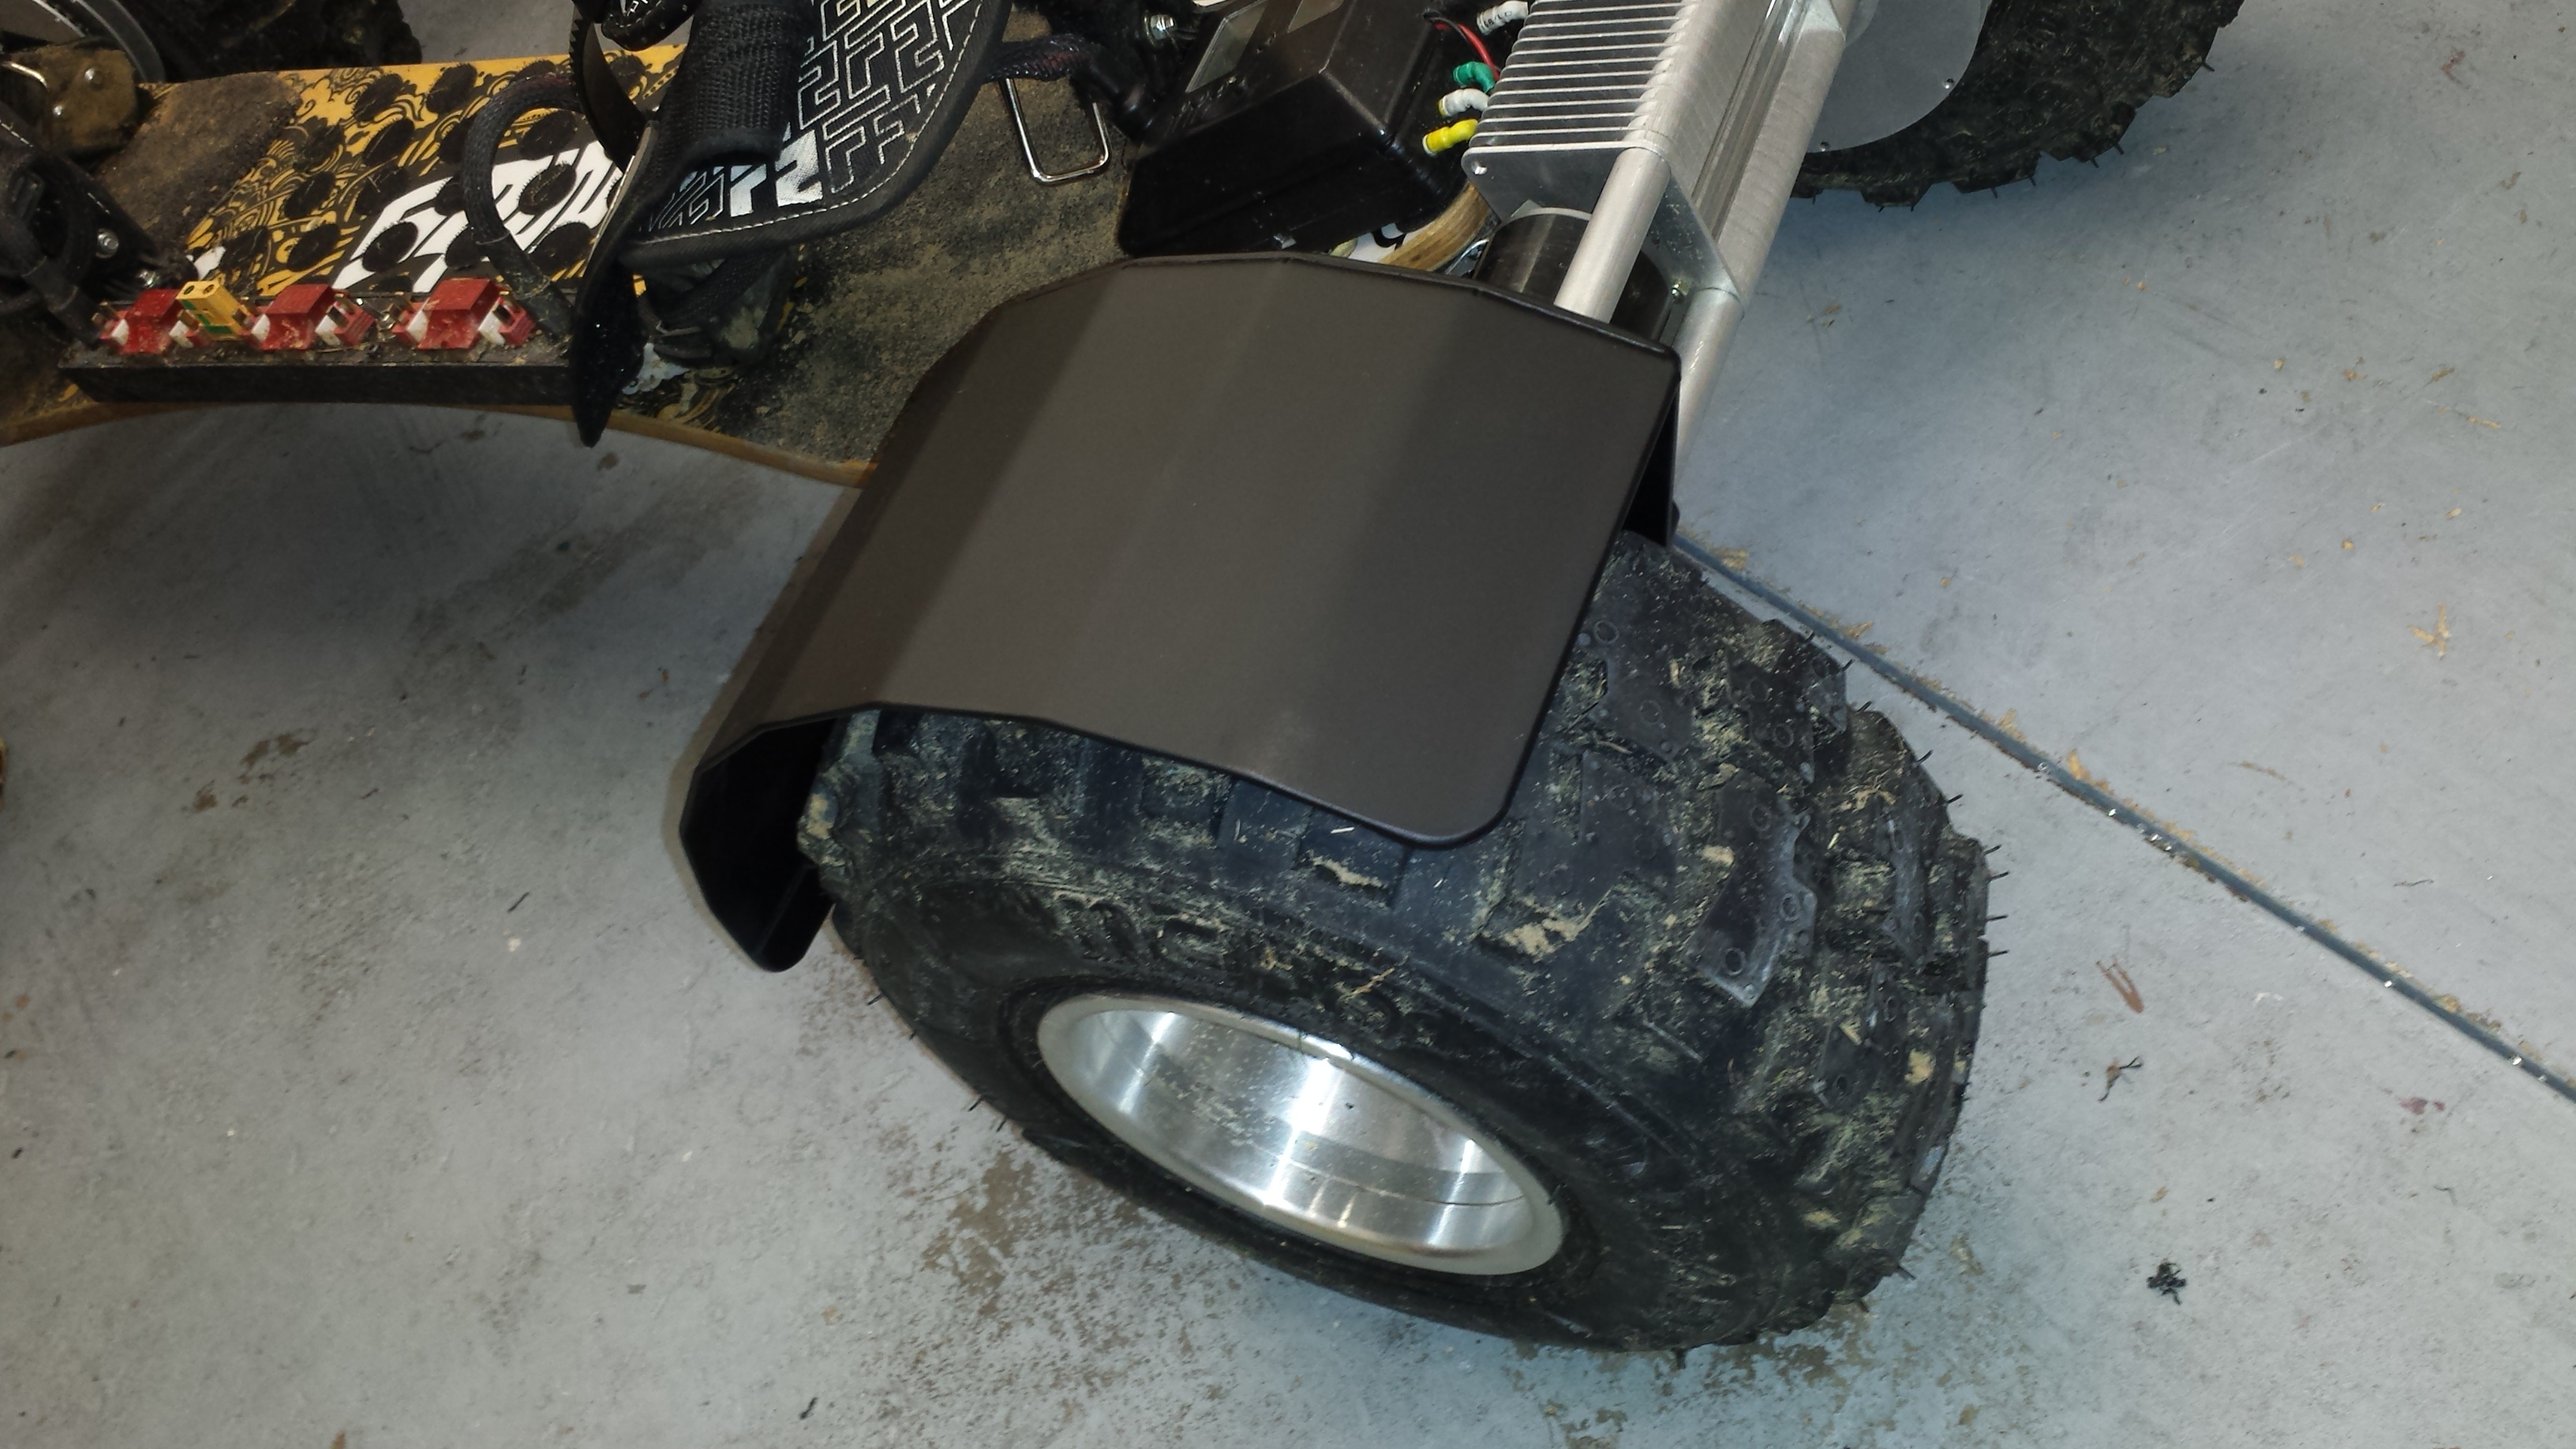
The first testride with the new big tires was a lot of fun, but they were throwing so much dirt at me that I had to build fenders. Therefore I had the mounting plates cut from 4mm Alu and the fenders from 2mm Alu and bent to shape:


The two parts were riveted together and bolted to the gear housing:


Spray painted and mounted:

Additionally I finally printed the cover pieces for the gear housing:

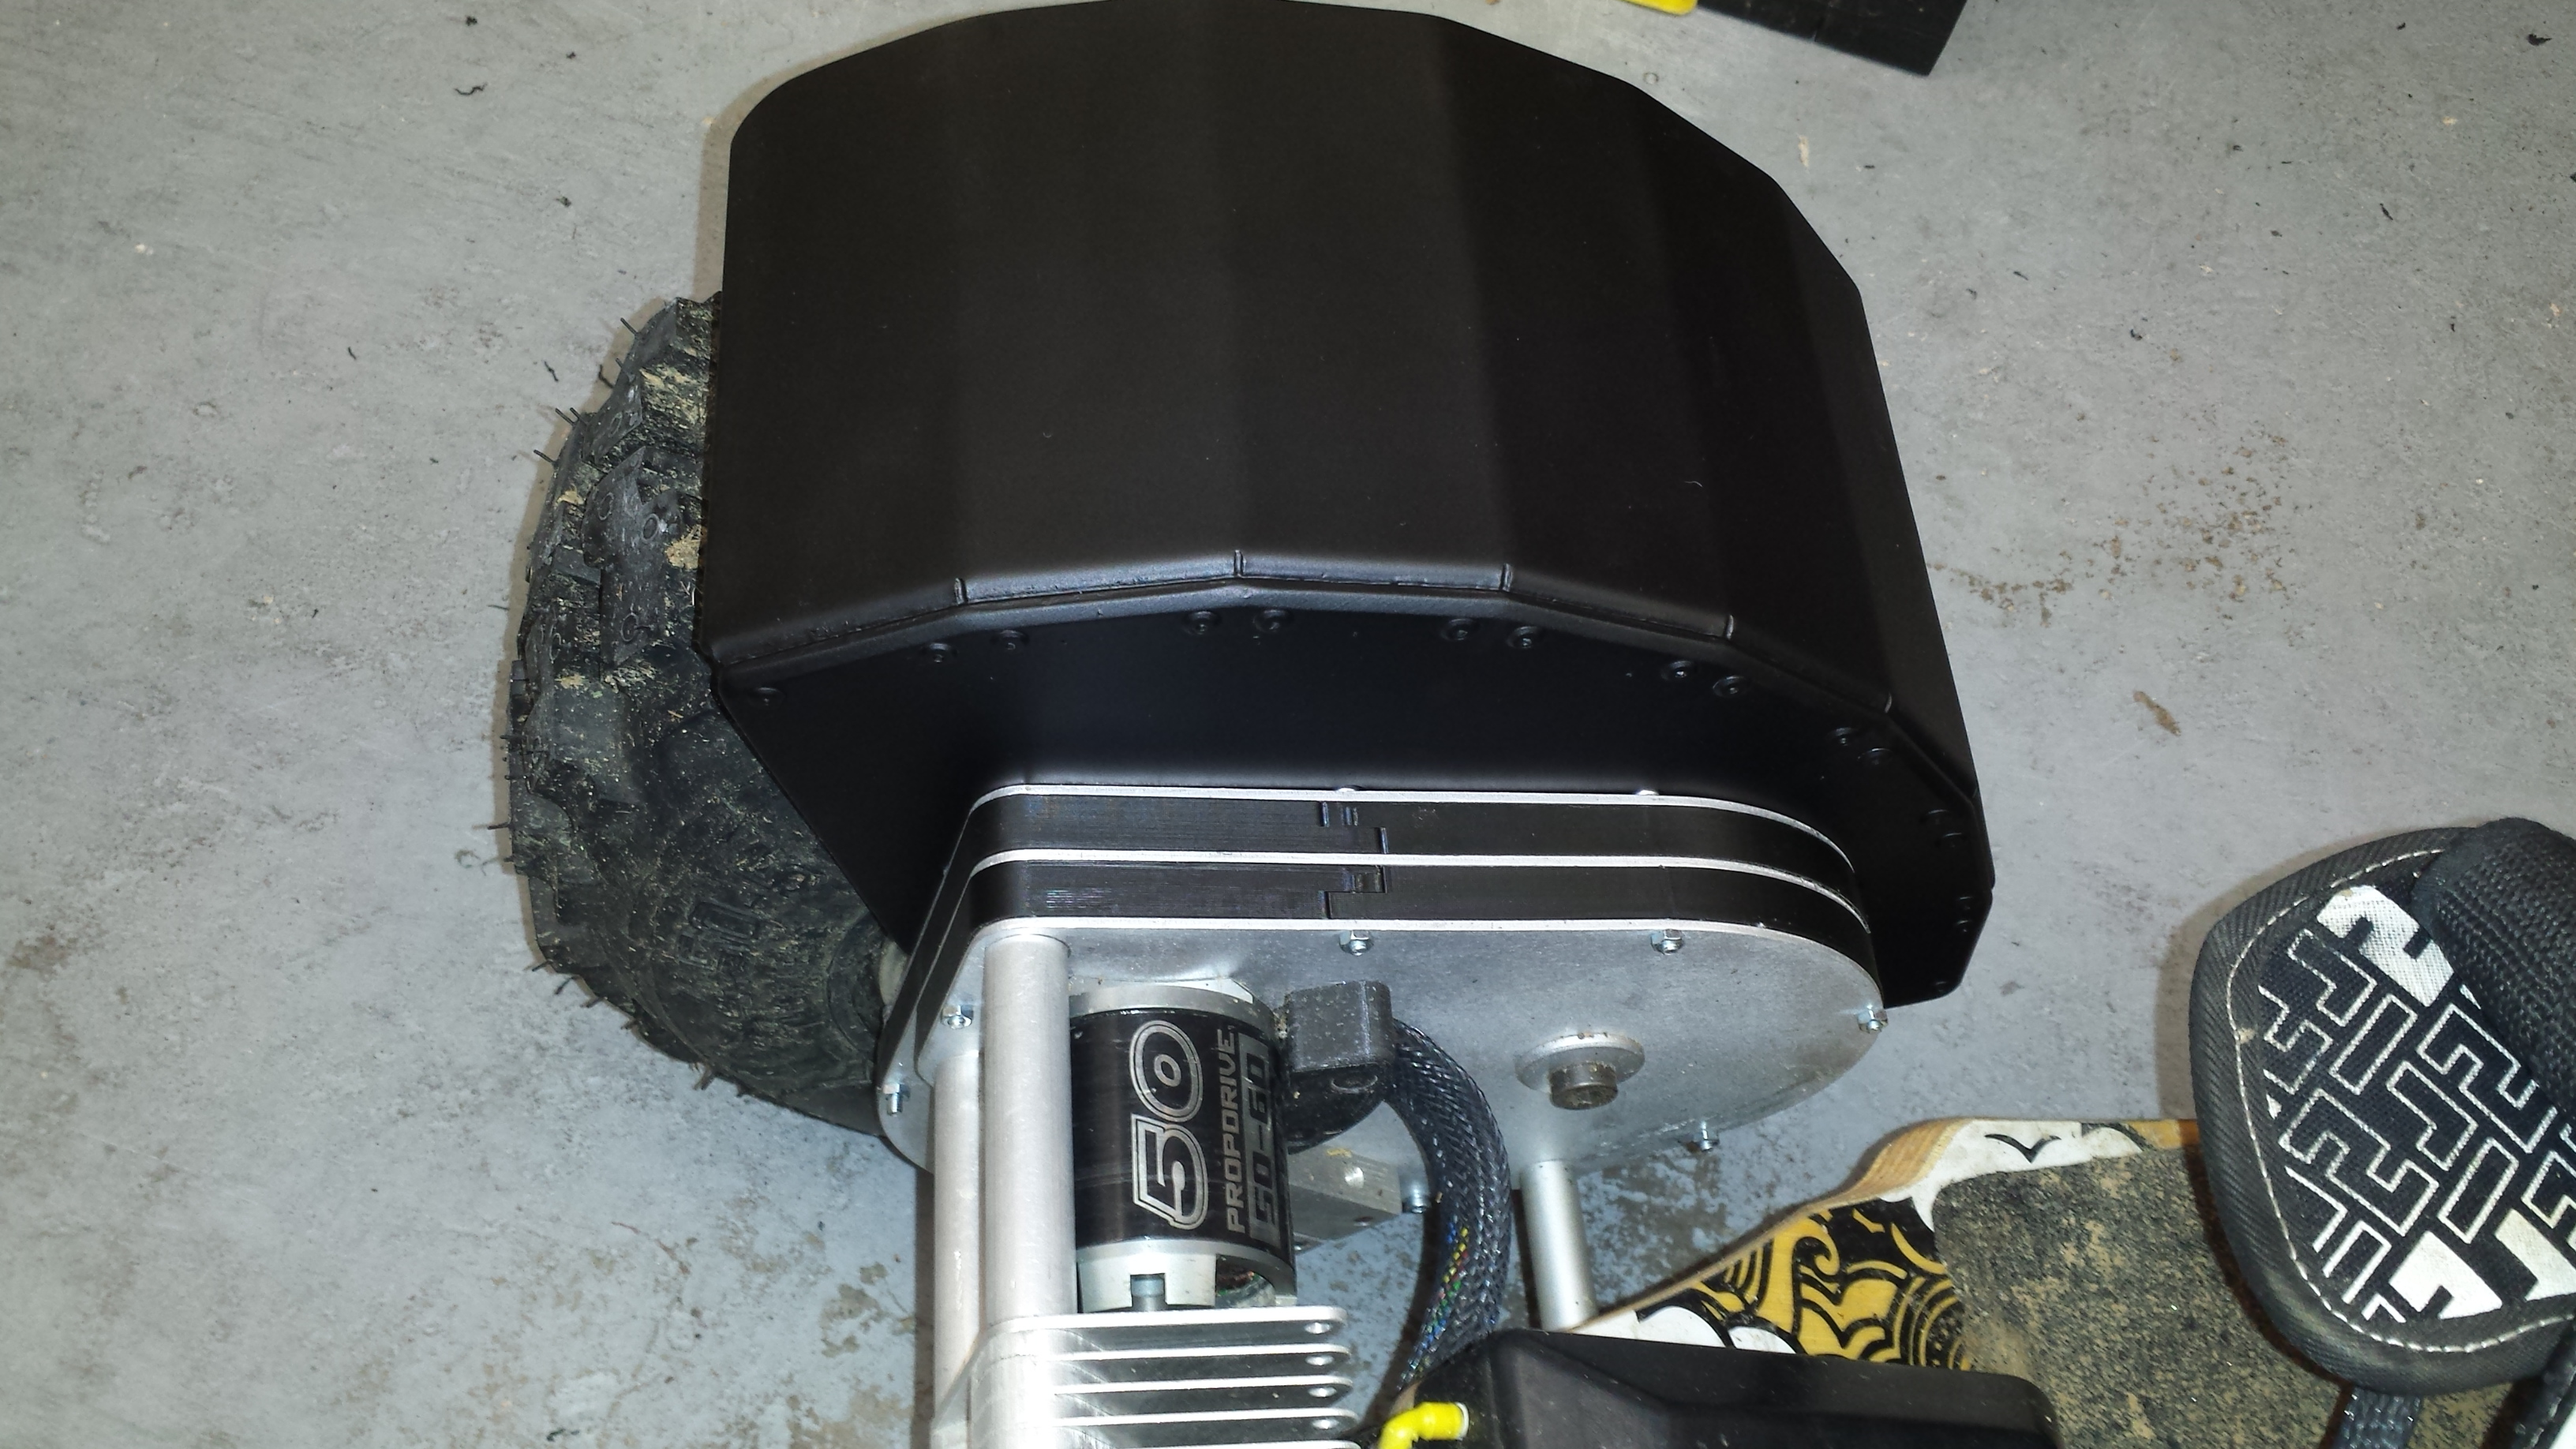
Completed:

13 Likes
I rode around 500km offroad over the summer 2015, when fall came and the days got shorter and darker I had to build a proper headlight. Before I had done some experiments with flashlights but was never satisfied because there was always too much light directly in front of me and always to less light in the far field and in the corners. I found the perfect solution in a 32W (105 lm/W) high power LED strip in combination with a cylindrical lens.
High Power LED Strip: http://www.leds.de/en/LED-strips-modules-oxid-oxid-oxid-oxid-oxid/High-power-LED-strips/SmartArray-L25-150W-25-LEDs-neutral-white.html
Datasheet: http://www.leds.de/out/media/Datenblatt_SmartArray_2014_V11_ENG(3).pdf
LED Strip Optics: http://www.carclo-optics.com/optic-12750-300mm?opticfamily=strip%20optic
This produces a oval shaped spot, wide in horizontal direction and narrow in vertical direction:


The LED strip and the lens are held by a housing stacked out of laser cut aluminium sheets:


The two different parts in 1mm and 3mm thickness are alternating stacked to produce a housing with heatsink fins:


The stack is held together by M4 threaded rods and Locktite:


The LED strip is sitting in a milled slot:


Completed housing with LED, lens and wires:


The spot has some chromatic aberrations but normally you don’t see them, only when pointing on a wall:


The 32W LED puts out a huge amount of light. It is sold to replace a 150W halogen tube:


The LED housing is mounted on the12mm stabilization rods which connect the front motor holding plates:


To power the LED I’m using a Meanwell LDD-1000HW - a current regulated 1000mA 56V step down regulator which is located in my ‘cockpit’ (black brick in the lower left corner of the last pic):


17 Likes
Insane light, man!
@Duffman do you by any chance know how much lumens/watts Cree XM-L leds produce (commonly used now for flashlights)?
Edit:

Ok, so at max it looks like they produce 10W of light, some of which probably gets eaten away by reflector or lens, if one is used… so we would need at least 2-3 such Leds, to attain the same brightness level / power output as you got for your lights
They are now included in a lot of headlight lights but im not 100% sure at what power levels they are driven by the circuitry inside of these lights.
So far one of these lights (with 1x Xm-L cree led chip) have been good enough for me along with ‘‘Zoom’’ lens Im having for my headlight.
But to be honest, now I think 2-3x of these chips at the power level I am getting, would give way better riding for trails/tracks in the dark!
The headlight can take up 2x 18650 but they are connected there in parallel and increases brightness only a little bit when 2x 18650’s are inserted, instead of one.
I’ve also heard there is the XM-L2 led chip out but im not sure which lights offer it and which not.
If someone missed it, then my headlight has 1x XM-L chip, while there are models out there now which offer 2 or even 3x of these chips in one headlight.
For off-road this is somewhat a quick solution as you dont have to install the light directly on the board, has seperate battery box and u get light in which direction you are looking at.
Though, im sure @Duffman has way more light for his big board than one or maybe even two of these XML chips can offer
Also I apologize for sidetracking everything but Im just appreciating how much work @Duffman put into creating a housing/sink for these lights, too!
So yeh for offroad and riding in darkness a good light is a must… unless someone ones to hit a pothole, huge stick or something else while riding!
Amazing work, yet again. This thing is like a 7 layer burrito of DIY goodness. Do you mind if I ask what you do for a living?
1 Like
Im gonna guess he is a professional lottery winner with degrees in physics, mechanical & electrical engineering and a red phone to Thor ![]()
11 Likes
@Okami I edited my post above with the links to the LED and optics.
According to the datasheet the strip produces 3283 Lumen at 32W power and 85°C temperature, which results in 103 lm/W. 3 XM-L @10W each would produce almost the same, but usually they are driven at much lower power levels (3W) to get better efficiency.
@Mobutusan and @mmaner Unfortunately no lottery winner but mechanical engineer, doing CAD modeling of plastic injection moulds for 10 years and expensive hobbys like building drones, building cncs, building 3D printers and of course esk8ting
9 Likes
Take ALL my money !
Back to my 7 layer burrito ;-):
Because the new tires are gocart winter tires and can officially be equipped with spikes I simply had to try it and bought a 1000pcs set of ‘screw in spikes’:


Each tire can take 132 spikes, at 4 tires this means screwing in 528 spikes and takes about 2 hours:


Ready to ride:


After a short testride:


After a real ride:


In 2015 we had 2 weeks of snow (and 2 weeks of fun!!!), afterwards I simply screwed the spikes out and was ready for spring again. Unfortunately we had no snow in winter 2016 so I couldn’t use them again…:


This was (for reference) a testride without spikes:

And this are some rides with spikes:

15 Likes