That looks so dope with 97mm wheels and the deck drop. How much is the drop height?
1 Like
Glad you like it! The drop is ~ 4cm.
1 Like
You said board carves good, didn’t see any video of carving. Can you get some?
2 Likes
@makevoid Nice work! I’ve got almost the same deck with the same red 97mm wheels. It’s definitely still a lowrider with those big wheels though. I had never ridden a drop down deck before, and it’s surprisingly carvy and really maneuverable for being so long. I’m running pretty tall 20/40 gearing on 6s, 245kv, and it gets me moving pretty well. Easily 25mph (41kph)+.
Do you have any clearance issues with the motor mounted inboard like that? It looks really close to the deck. Mines hanging out the back, but I was thinking about mounting it inboard since it looks like it would just barely fit.
1 Like
I use pretty high risers (~1cm), if it was a little bit longer I think that it would be perfect, also I would like to try one that is not double drop but just single drop at some point 
1 Like
Li-ion 8S 5P wip… enertion pro4 enclosure, using the built in spacers to align the cells, worked quite well…
cells in the box from nkon.nl - 40 cells (Samsung INR18650-25R 2500mAh - 20A) + solder tags already spot welded + 2m strips ~ 170 eur - all arrived @ 3.49-3.5V
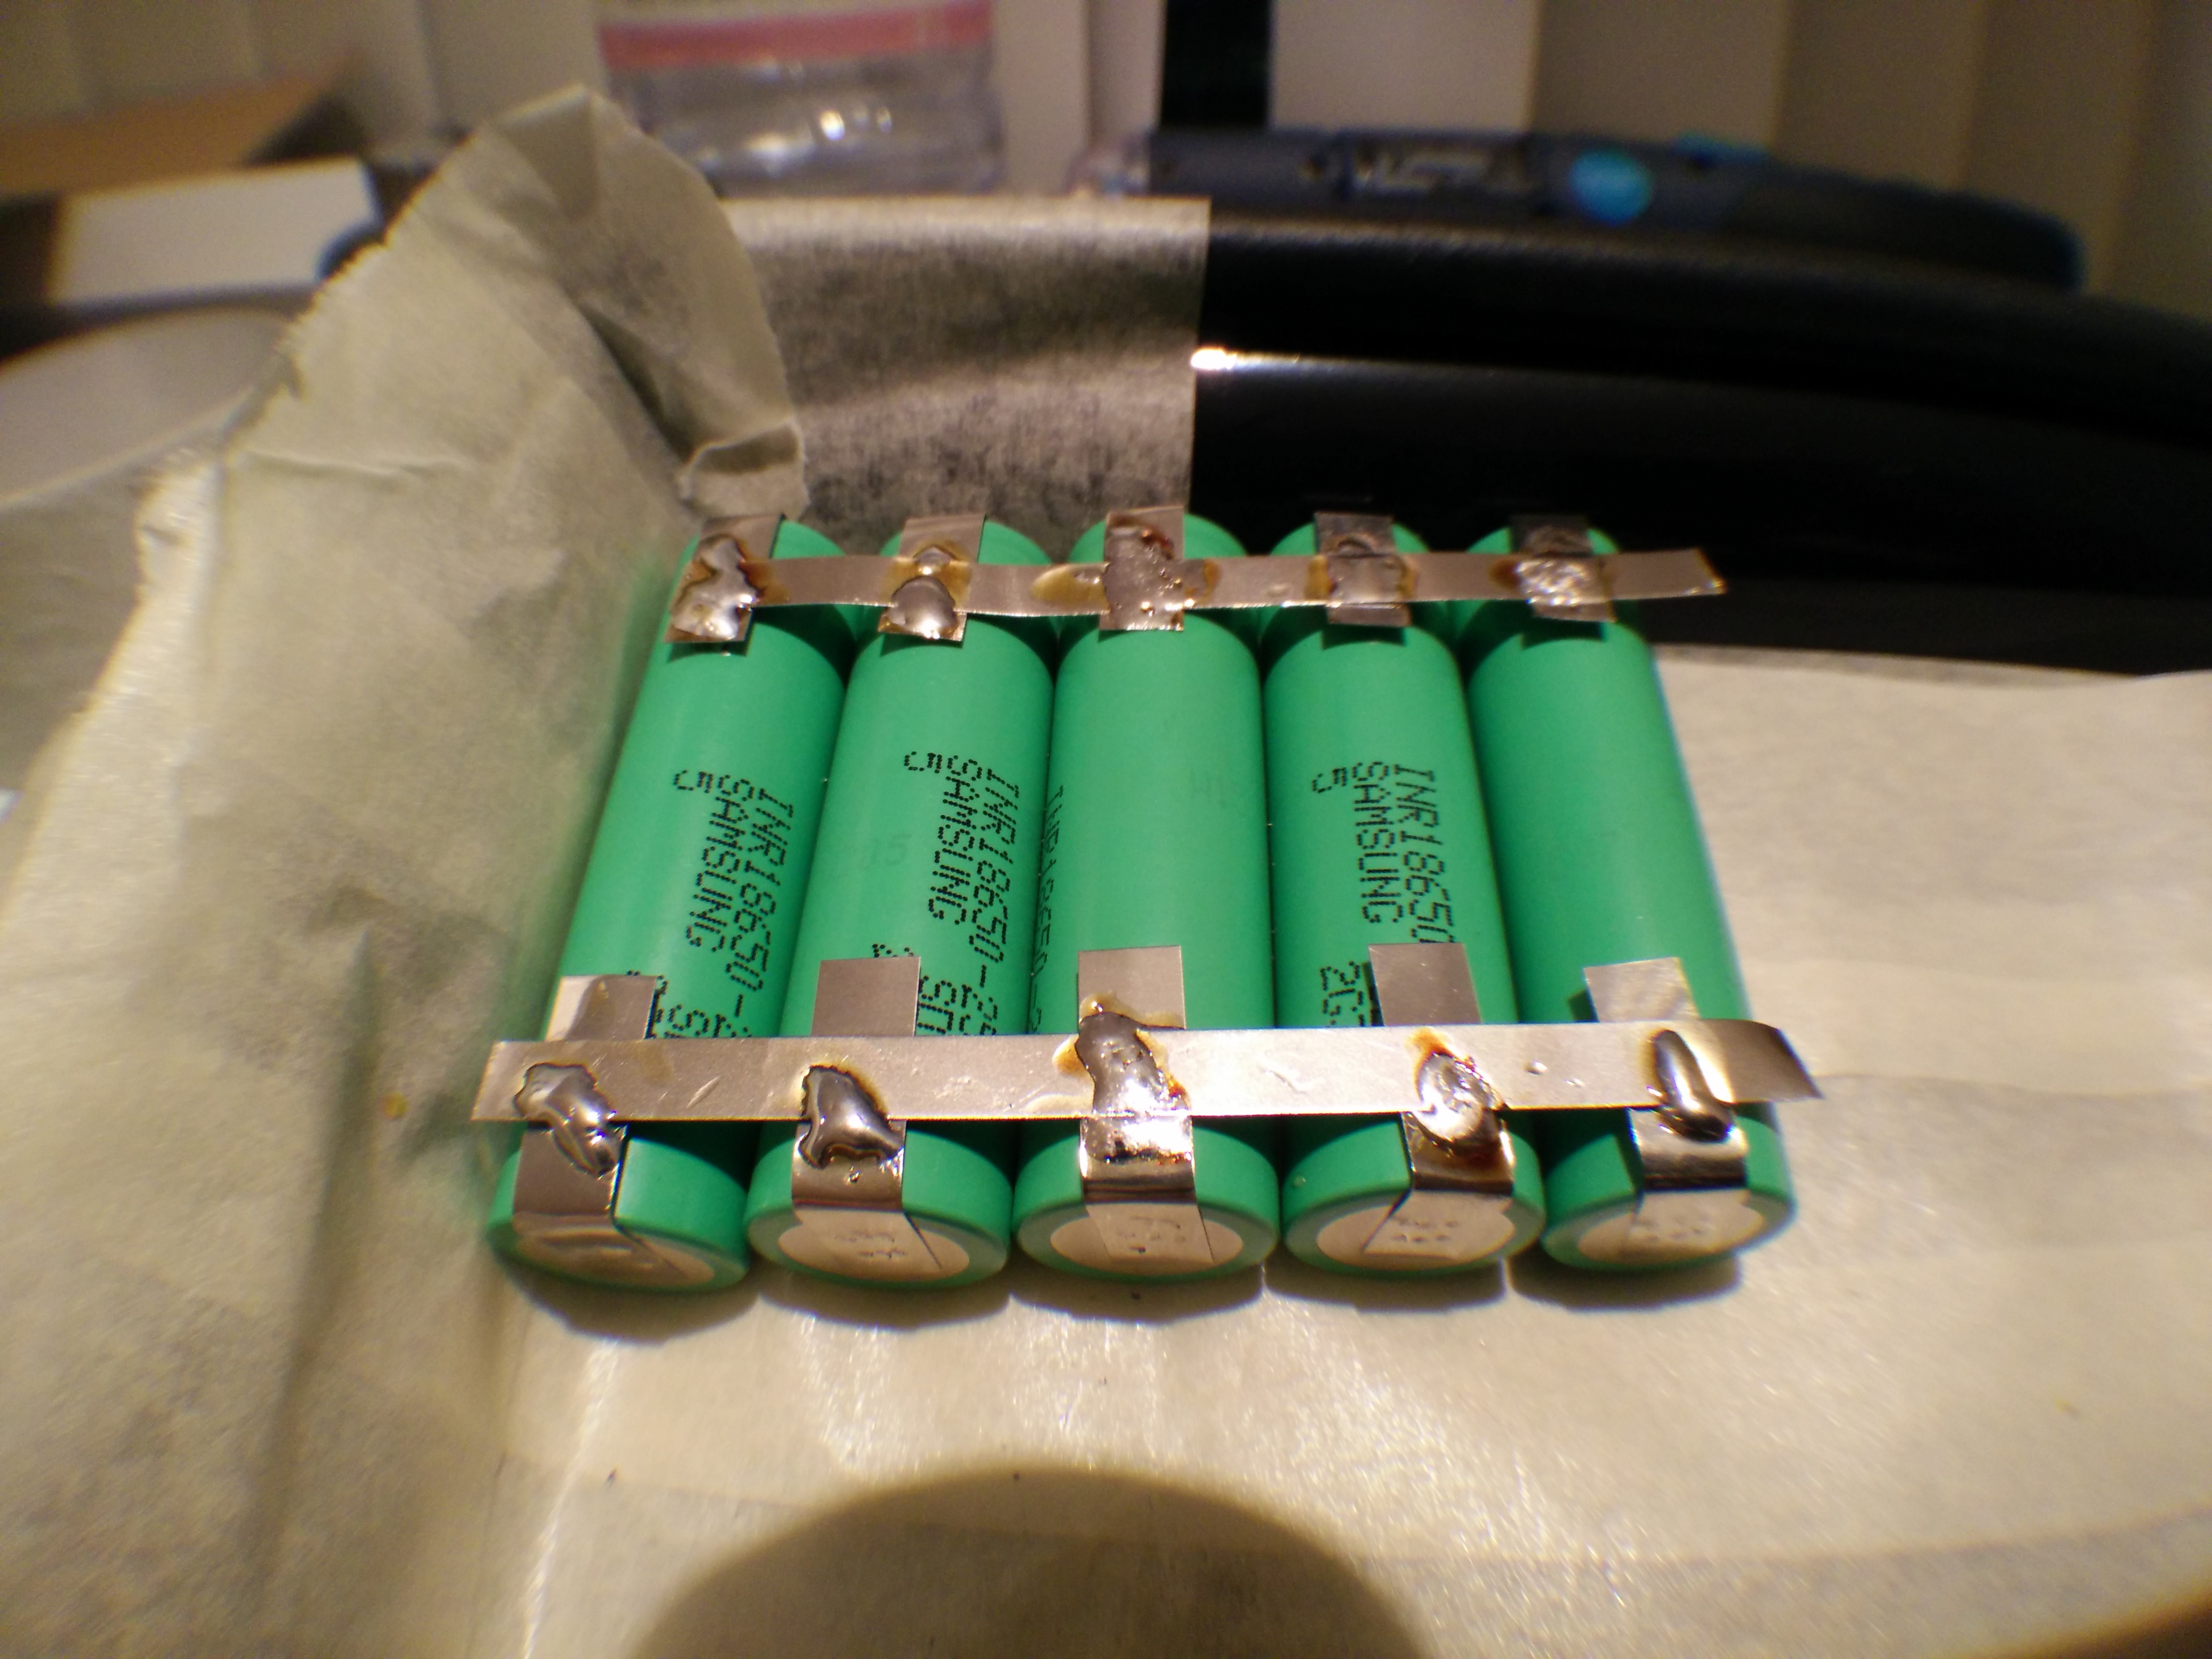
strips/cells “assembly line”


It took me ~3hrs to arrive at this point, very easy to solder the cells without overheating thanks to the solder tabs, I think for 16 eur they’re worth it.
next shrink wrap + series connection + BMS, stay tuned 
4 Likes
with the solder tabs you have only one layer of nickel connecting the batteries - that is not enough for the currents we use in esk8. One nickle strip is usually suitable for ~15A.
look at @whitepony - he even adds braid copper wire on top of the nickel strips to make it safe.
My opinion: This is not safe!
2 Likes
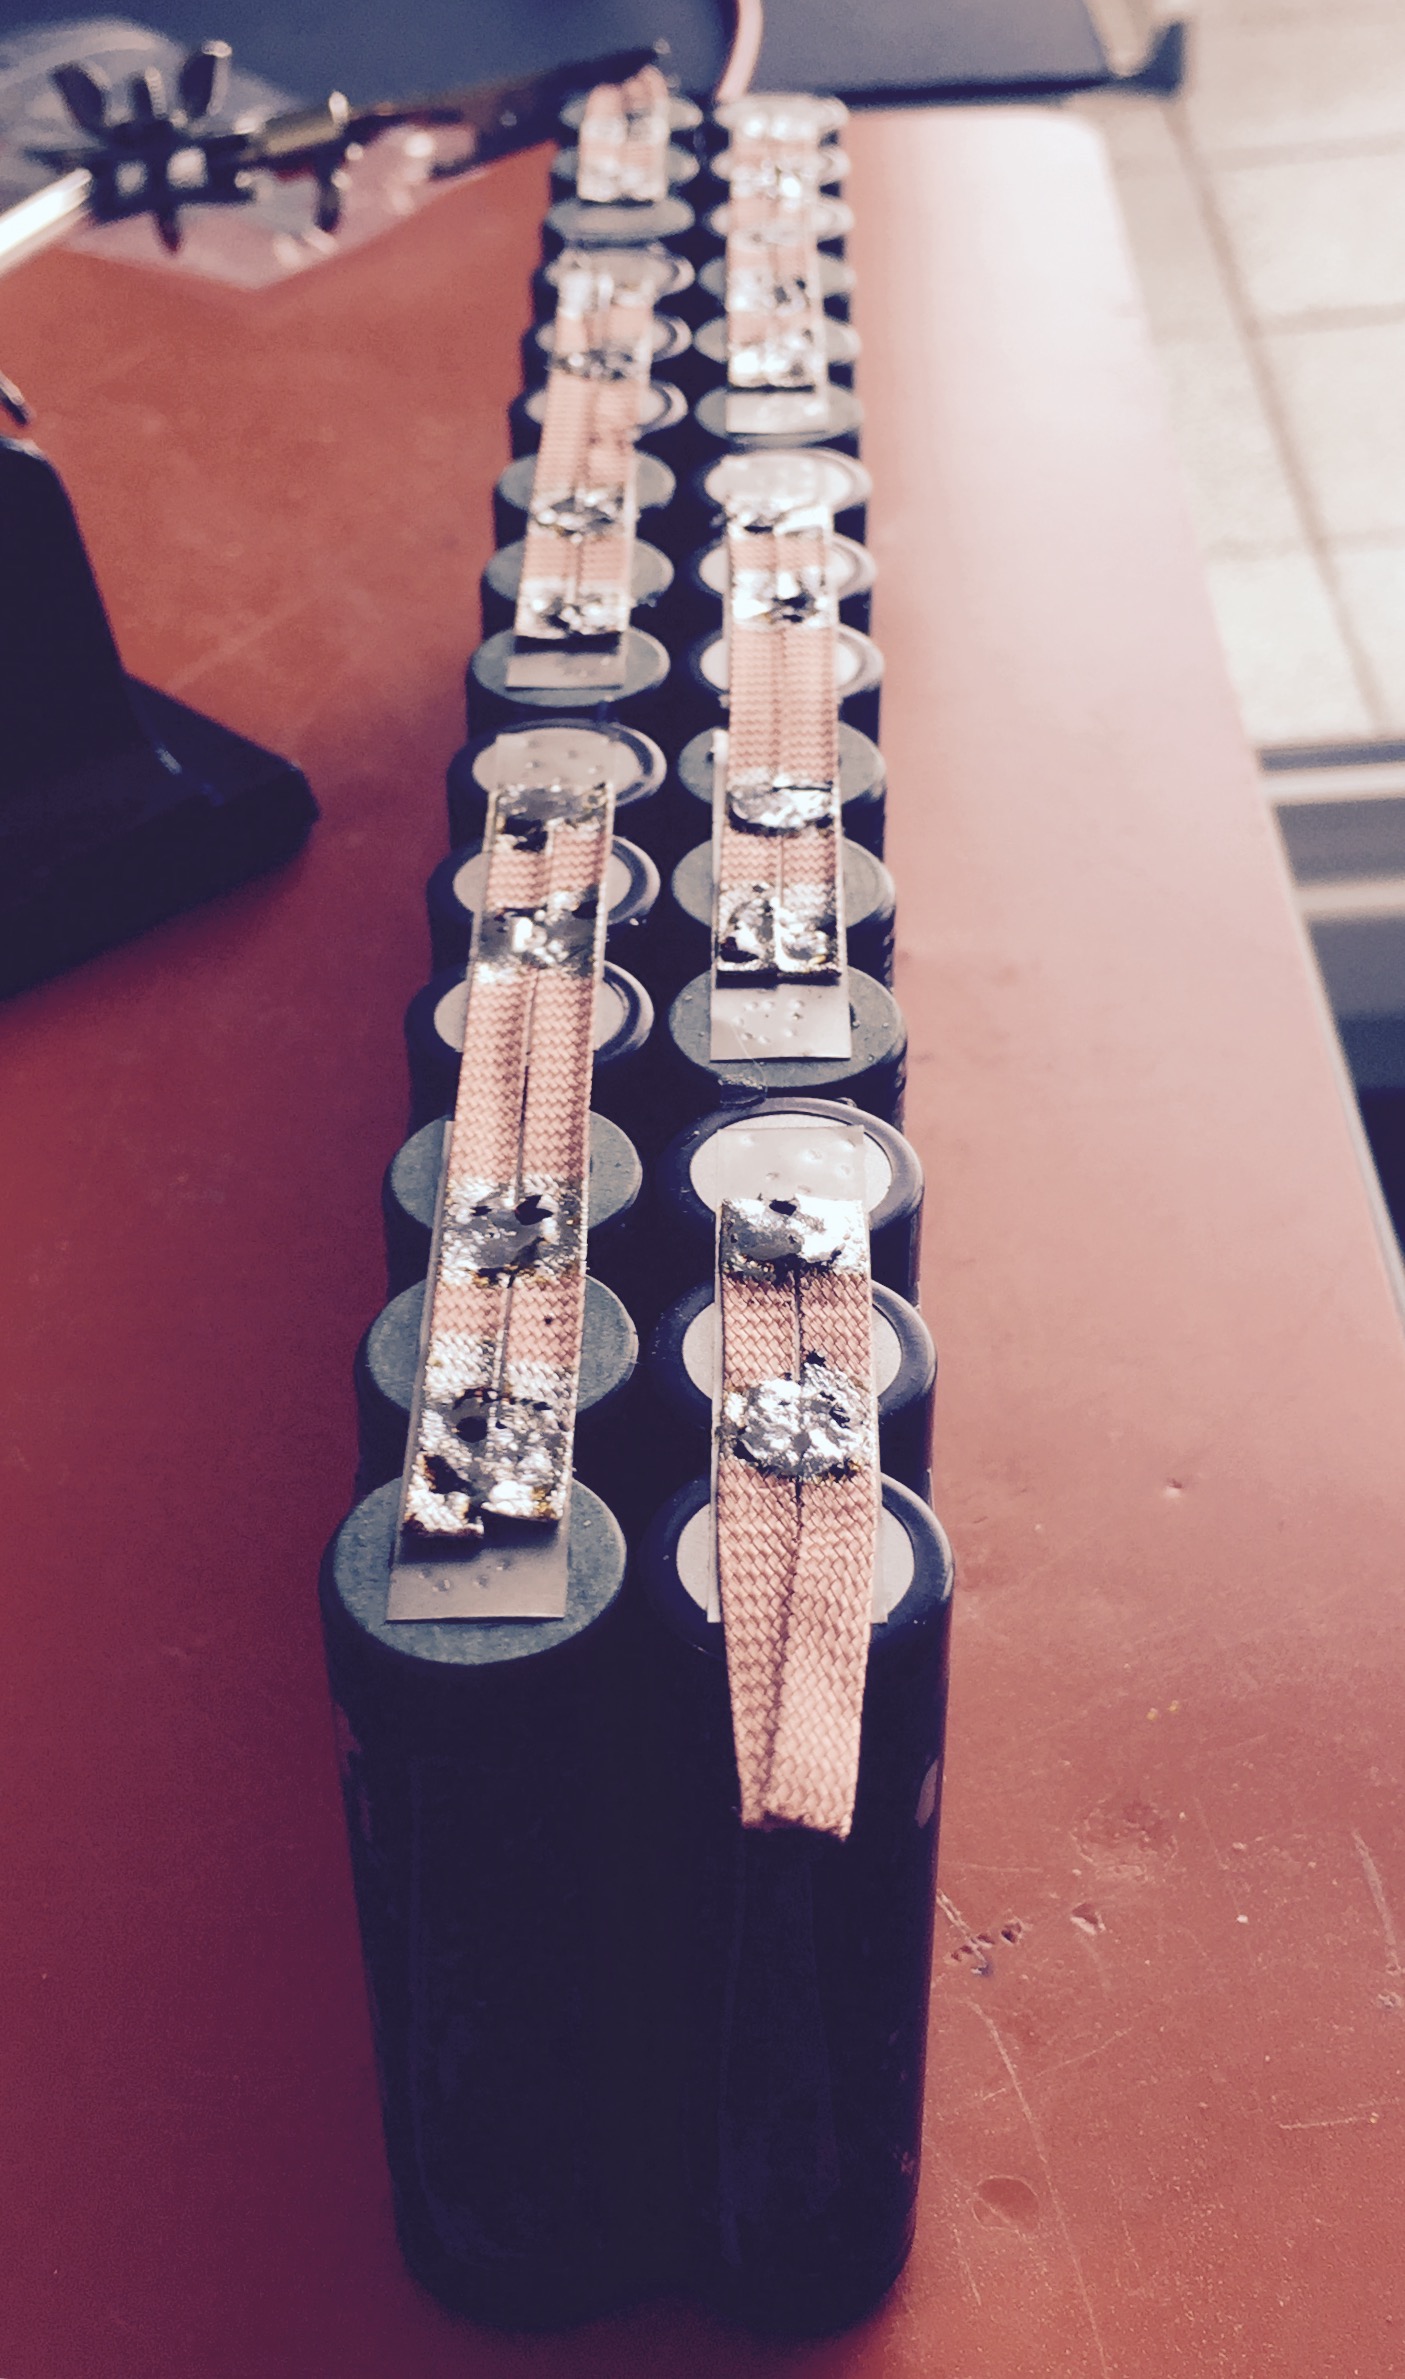
Thanks for the tip, you’re right it will probably overheat and desolder at the tirst ride I will probably put 12awg wire if I don’t find something better at the local hardware shop! At least for now I can test the bms for charging that is one of my main points were I’m unsure if the solution works or not ^^
update on battery, everything seems well, the BMS (from sunpower) even if it is meant originally for a 10S battery seems to work with my 8S as well
before:
forgot to take the pic after I put the 12awg wire (a bit overkill, probably a wire 4 times smaller would have done the job but that was the only one I had at the moment ^^)
after:

still waiting for the proper charger + shrinkwrap, I am currently charging it at a conservative voltage (~30.8V) with a 6S li-ion charger through a cheap DCDC step-up module - I am looking forward to see if at 80% charge I will have the cell balanced or not, then I’ll need to test the discharge as well
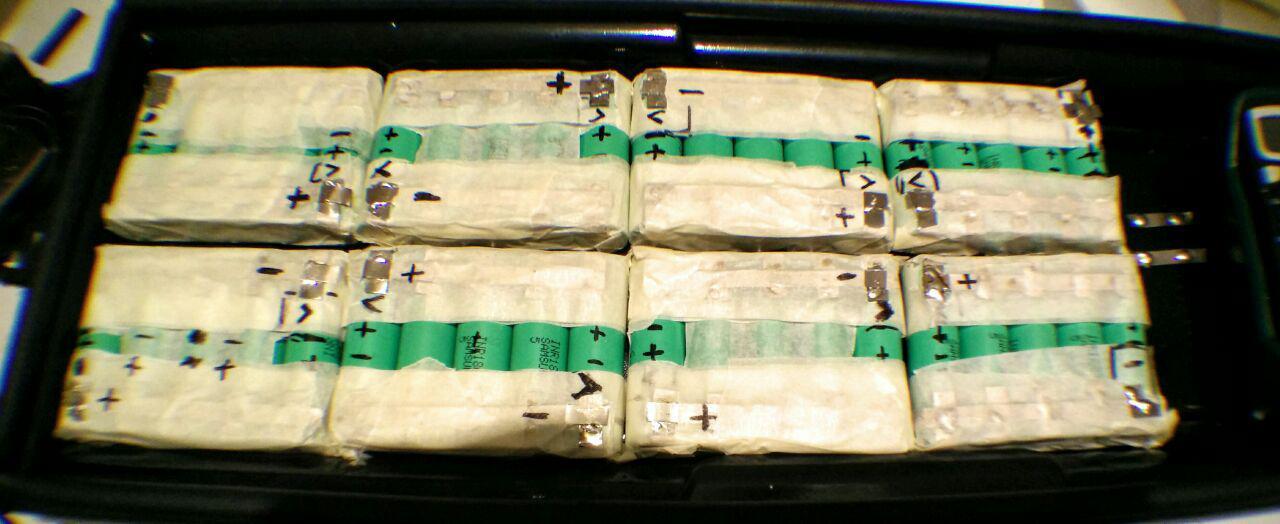
I soldered the batteries placing them into the space cell enclosure and that gave me the right spacing and positioning. Making the packs this way was easy, because of the shape of the enclosure there’s no way they’ll move inside it.
2 Likes
The Li-ion charger arrived, charges with no problem, the 10S BMS works perfectly at 8S, charges and discharges with the correct voltages, I have also a 8S BMS now but I’ll probably keep the 10S as it’s already wired. 8S6P gives me zero headeaches in charging the board, finally no need to open enclosure, remove the series connection, connect the lipos in parallel and charge. Now I can finally charge by plugging in a laptop style charger, the 5A version is a bit bulky and also 1kg, I couldn’t find a 3/4A quick charger that weighs less than a kilo (basically to stop at a starbucks and charge from ~40 to ~80% in ~1h instead of ~2h, cause to charge overnight my current 2A charger is ok, but also a charger that weighs 1.1kg is hard to carry ).
At the end the pack costed me ~170 eur (~190 usd) shipment included and Samsung INR18650-25R 2500mAh - 20A - 18650 - Li-ion - Rechargeable batteries | NKON (I ordered 42 cells to have 2 spares, all the cells arrived at 3.7V± 0.05v) , I ordered also U solder tabs and 2 meter of nickel strip so I was able to solder everything with a standard soldering iron (40w) without overheating the cells too much.
Here’s the new video showing the enclosure at the end:
https://www.youtube.com/watch?v=13eclkHO-W0
(6 miles ride in the video) still plenty of battery left, at 30% → 20% VESC cuts off (voltages cut offs 3.51 → 3.31 per cell)
max range 15 miles (not riding conservatively but also not very aggressively, from 100% to 25% charge)
VESC settings
summary (current limits):
----------------------------------------------------
Motor max                                 : 60
----------------------------------------------------
Motor min (regen)                         : -50
----------------------------------------------------
Batt max                                  : 50
----------------------------------------------------
Batt min (regen)                          : -25
----------------------------------------------------
Battery cutoff start                      : 28.08  (8S li-ion)
----------------------------------------------------
Battery cutoff end                        : 26.48  (8S li-ion)
----------------------------------------------------
basic BLDC parameters:
----------------------------------------------------
Sensorless min RPM: 100
----------------------------------------------------
Integrator limit: 1100
----------------------------------------------------
BEMF coupling: 600
----------------------------------------------------
And some pics:


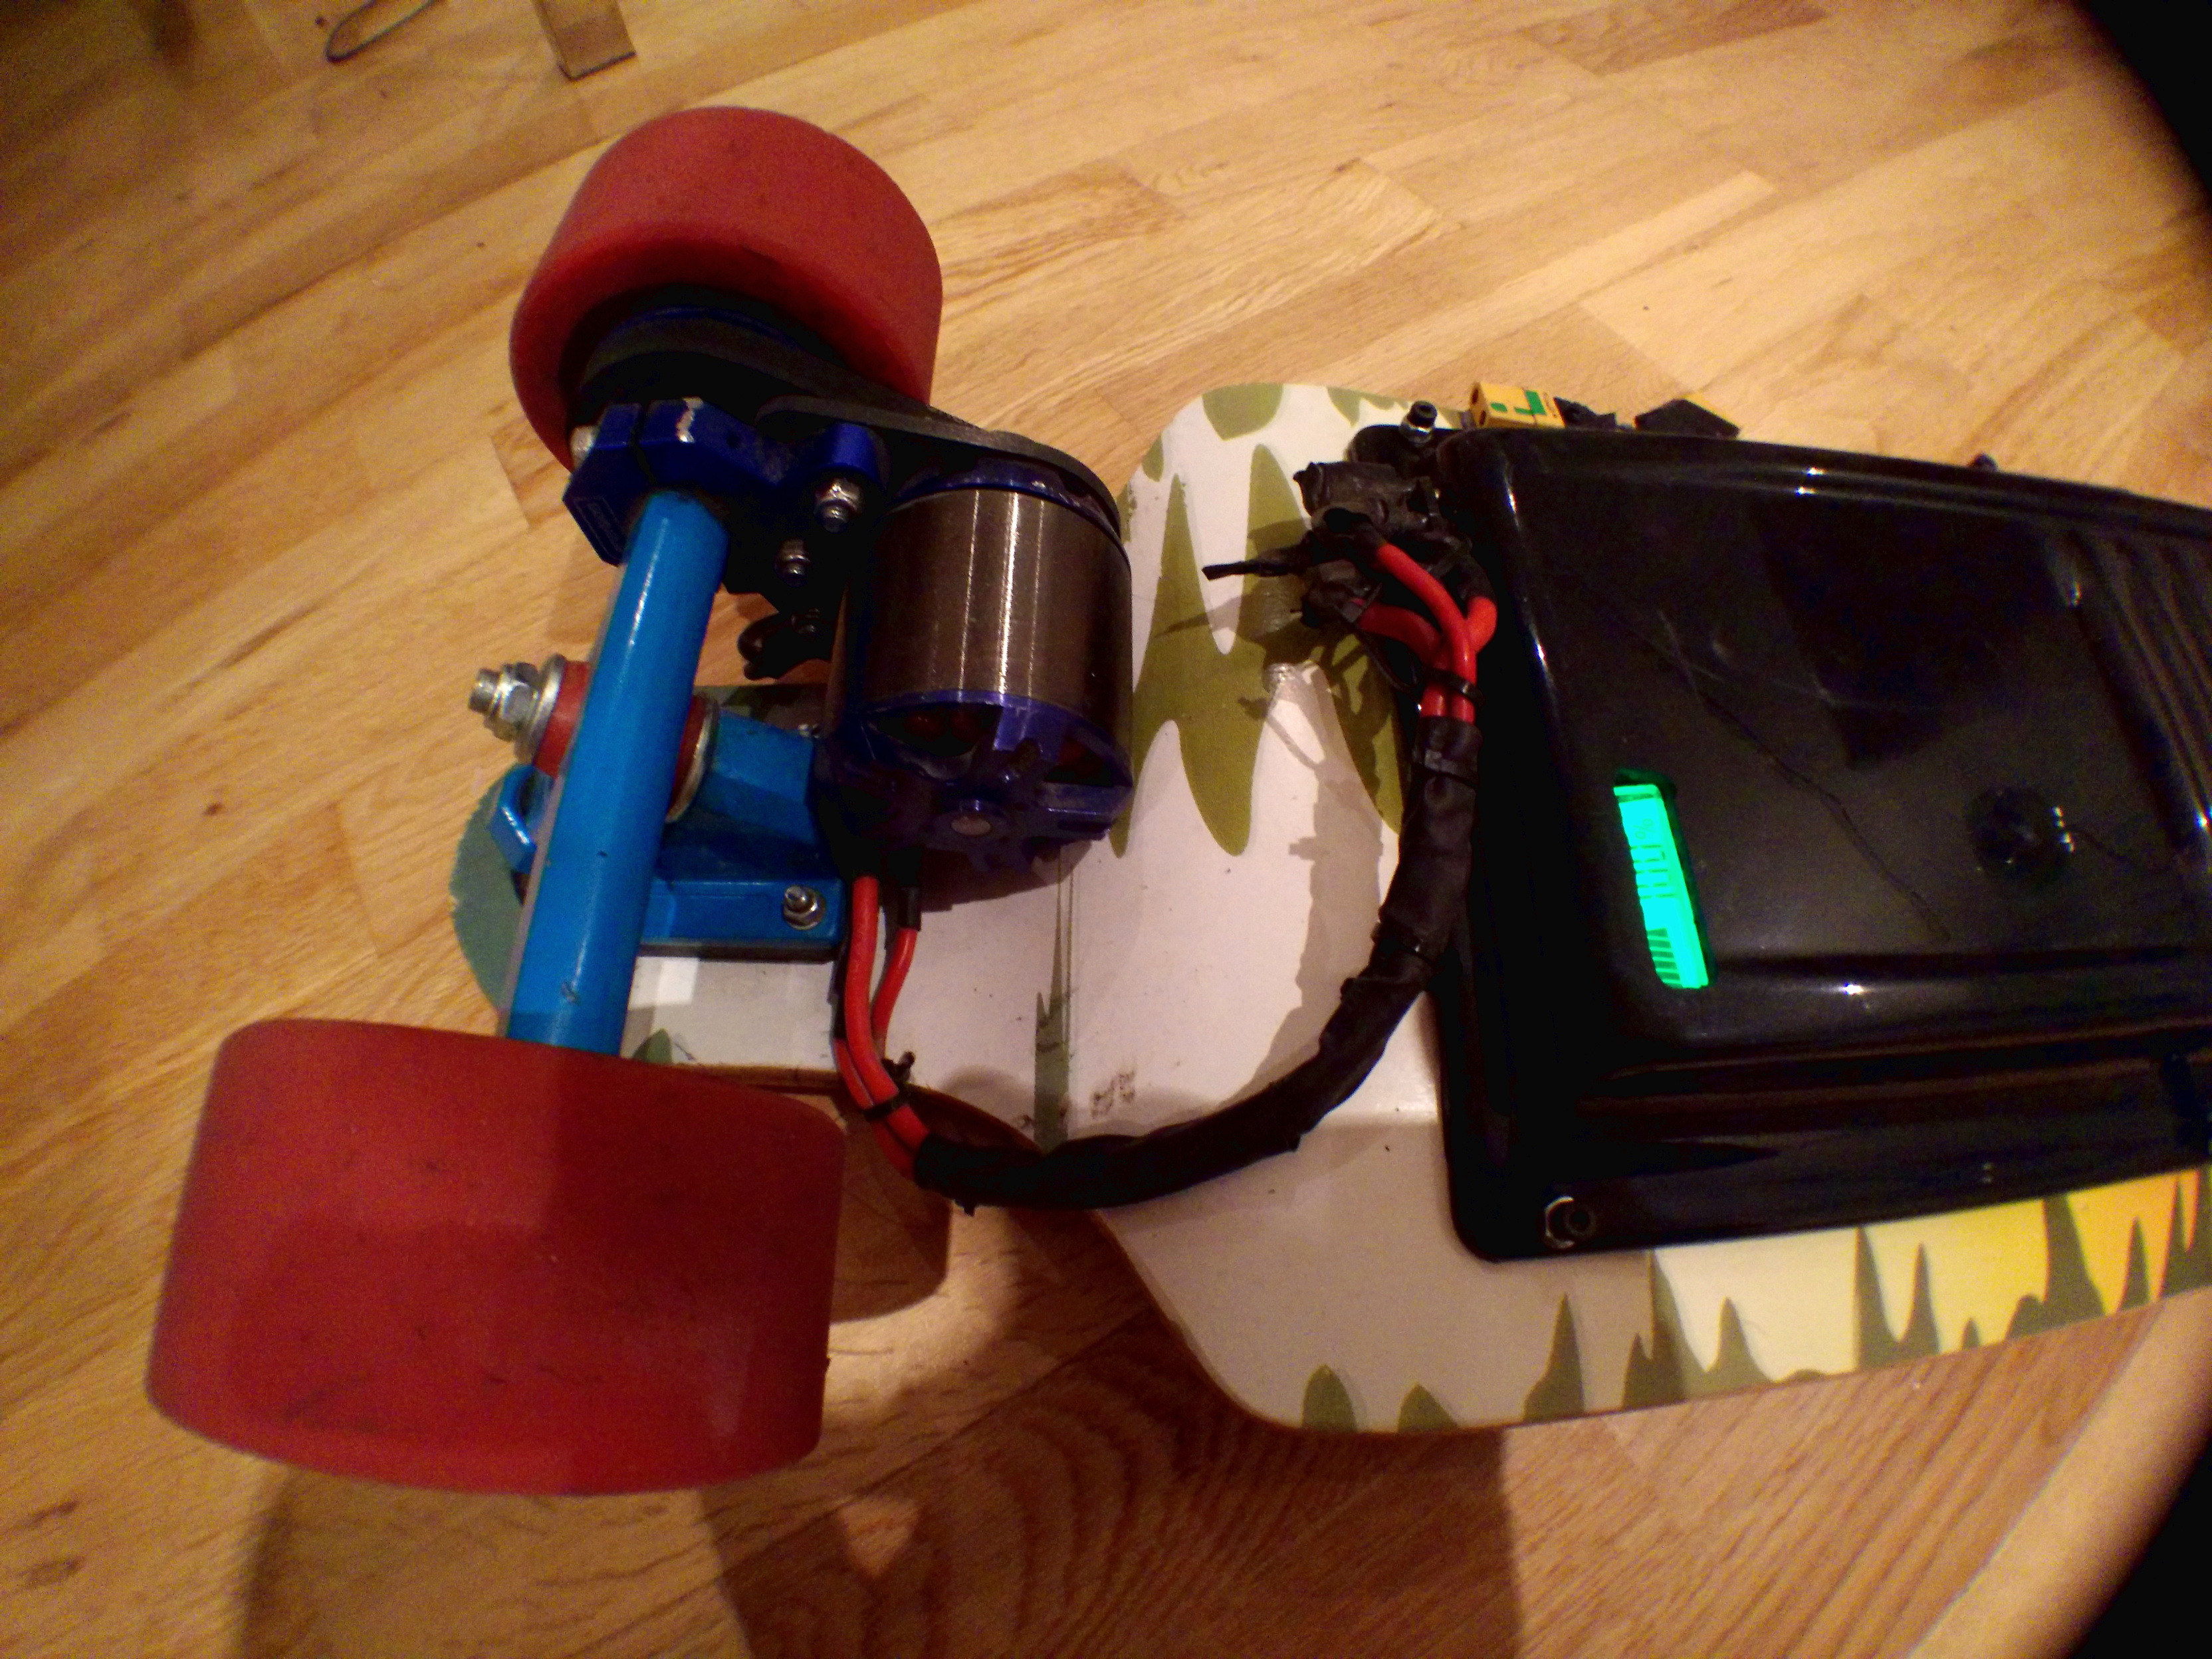
motor cabling is very temporary lol ![]() - also anti spark switch will be installed this week as soon as it arrives
- also anti spark switch will be installed this week as soon as it arrives
5 Likes
If you’re running standard 18650s in 6p, why do you have your battery max at 25? This pack should output 120a continuous, but 80A comfortably.
You are right, there was a bug in the config web app that caused the app not to parse the values correctly (on ff or mobile webkit) and that picked the default value of 25 - well spotted, it should be fixed now 
my battery max is 50A ^^
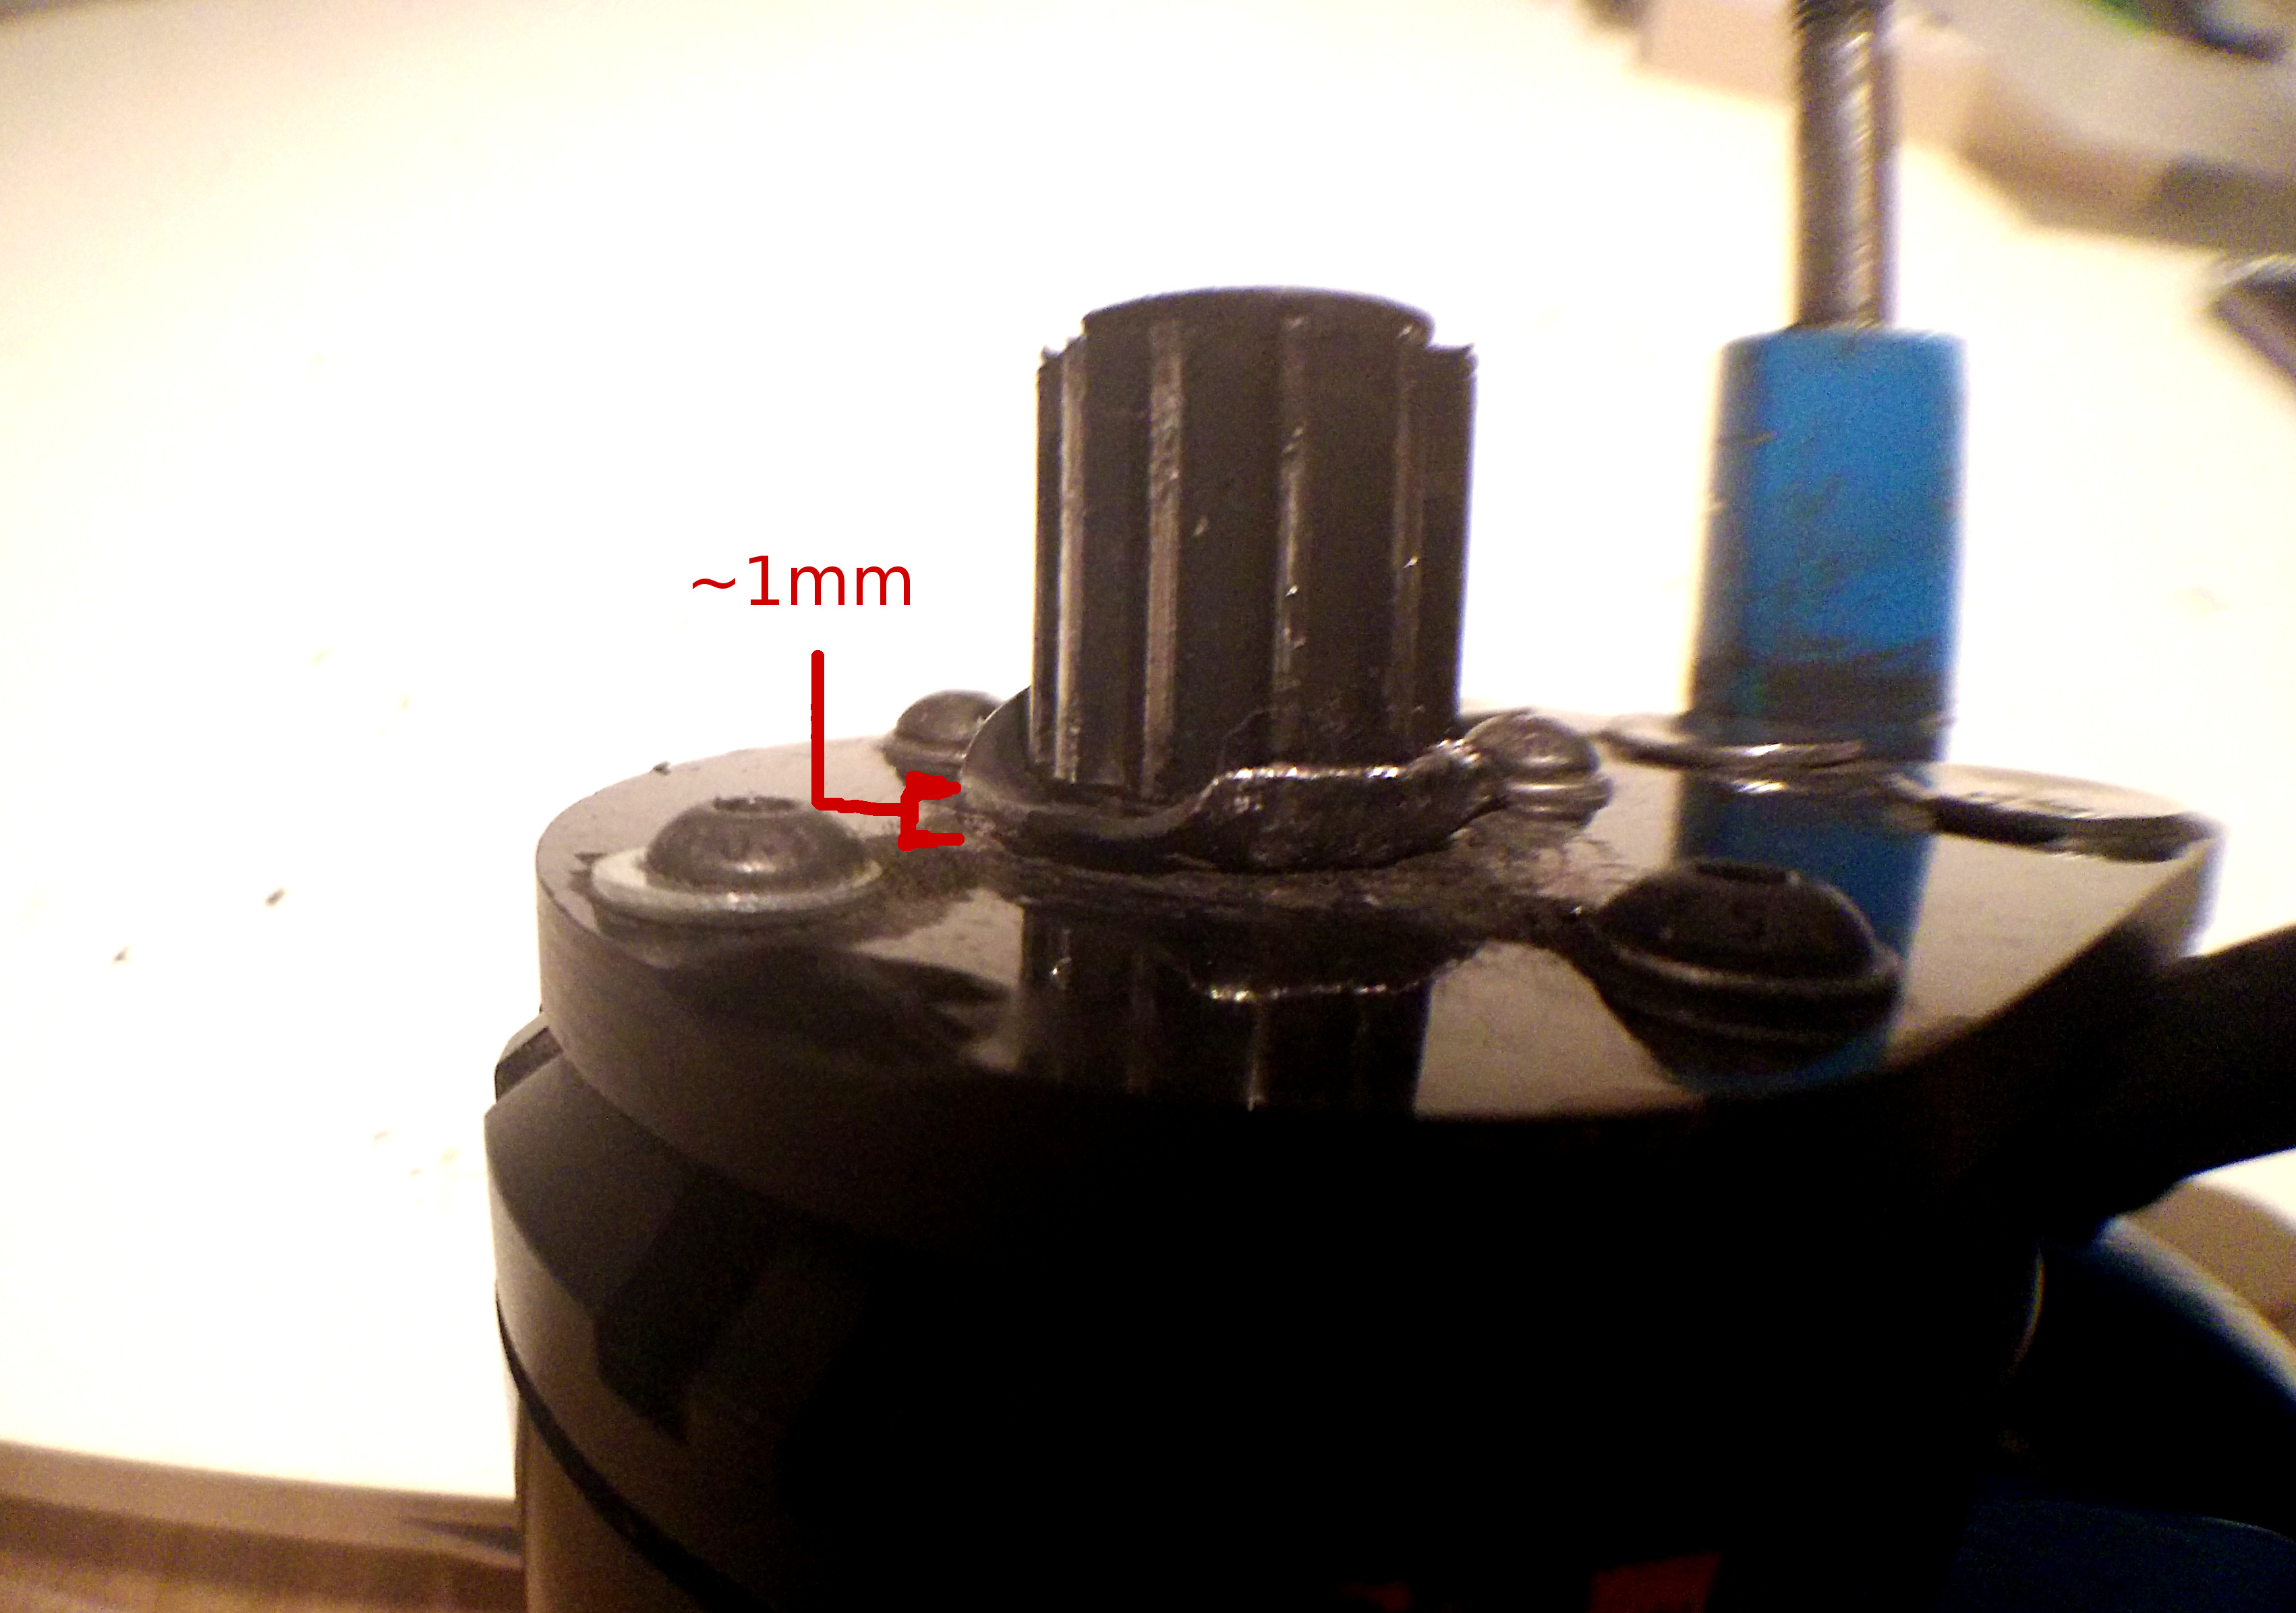
I would like to switch the enertion 6372/6374 motor with the sensored 6374 (esk8.de) but It’s currently stuck (a lot of green threadlock and not enough space to grab the pulley with my current battery terminal puller) on my other enertion mount, I would like to remove the pulley without breaking the carbon fiber piece of the mount but I don’t have a battery terminal / motor pulley remover, can somebody suggest one that is able to grab the pulley in 1-2mm of space or another method I could try to remove it, should I try to grind the pulley with an angle grinder? I tried to heat the pulley up but it’s not coming out. Thanks in advance!
edit: a pic from inside

pretty much everything crammed in a tiny space, added heatsinks on the VESC, they help, probably having an air convection system will definately help too (the simplest is probably an air extractor (small pc fan or a blower fan) into the enclosure near/over the vesc to keep the vesc cool - I think it would help because at 8S (and with me being not conservative on the controller and being ~220lbs) the esc needs to dissipate a lot of heat, if it runs cool you can keep going at a good speed everywhere as long as you have power from your battery - because if the esc overheats it will cut power to prevent that, and you’ll have less acceleration/torque/speed at the end
@makevoid Did you ever get your pulley off? I’ve found success with loosening or removing the grub screw, and then riding until the pulley starts spinning on the shaft, or with the belt drive connected, just grab the motor can and wheel and work it back and forth until the pulley breaks loose.
Thanks for the tip! I think there’s a lot of green threadlocker in there, I put quite a big amount of that because there’s no keyway / grub screw and with few drops it was coming loose… I think I will need to break the cf bit of the mount, use the battery terminal puller to remove the pulley and buy another motor mount from enertion for my other build
Maybe cut the pulley in half with a dremel tool. If it’s steel it will take a lot of work but doable
y i have an angle grinder, it will be trickier but I could attempt it, thanks!
What I’ve done with stubborn pulleys is heating it up a good bit then wedging a flat tip screwdriver in between and prying it off.
1 Like
Thinking of making a board with the same batteries but in 8s5p format, is the range still good on the board (by how many miles has it degraded each year). Also in London, do you advise riding on the road (bus lane) or pavement or cycle lane? Your board looks really good btw.
thanks, I assembled a new battery this year and I’m not using this build so much so I couldn’t see much range “degradation” yet, also I usually never discharge it to < 20%
I expect that when the range will drop ~30% on my main board I will need to change the cells. I think it will happen in 1-2y maybe? I don’t know.
For London I recommend cycle routes and parks, non trafficked roads are good and generally rush hours (~6pm) are bad for both roads and cycle routes - check google maps with biking trails overlay enabled and tfl cycle routes (+ “cycle superhighways”) maps, they’re both helpful
I’m also slowly making a video “series” of possible commutes in the south/east part of london, check my youtube for those
1 Like