maidens ride last week on 83s 76A trampa stickies, now switched to 90mm 76A stickies and made around 50km already. superstoked about the wheels, never had a more silent and smoother ride feeling than with these new 90s! just super comfy, even better than my 90mm 75A abecs which so far set the bar for me!
about motors: on my diy board im running an old 6355 rspec, on my vanguard I ran one of those APS closed 6355 motors. got a direct comparison for the first time, back to back, and I like the rspec a lot better. both motors in foc mode, both on german vescs, uthe rspec is much more silent, especially at max rpm where the closed aps motor was screaming like a little girl. perfectly suits the carving cruise character of the flexy board and the great wheels.
max gps speed: 51kph and absolutely no sign of speed wobbles even though the board is about as flexy as my flex 2 vanguard and all that with a shorter wheelbase! thank you ronins
I know I’ve seen you posting it somewhere but I can’t find it. Would you post the link where you got the screw/wood inserts ? Particularly interested in the one used in the vanguard. Just the length might help
search for “rampa muffe” on ebay, there are plenty types to choose one. Im using M4 8x8mm, choose the length by how you plan to use them. if you drill a hole in your board and stick them through, you can just use 10mm length, if you just drill a partial hole, 8mm length is probably better.
ill take a foto from the outside when im home from business travels.
its a simple male-male 4mm bullet connector loop key and its sparking nicely. i went back to this kind of on/off after I had a melted xt90 and an electronic powerswitch stopped working in on-mode, nearly killing my battery!
I was debating whether or not I should get an anti-spark switch or if I should just go the loop key route. Looks like a switch would be a more elegant solution although more expensive and more prone to failure as you’ve experienced
Thanks for your fb WP ! Your ultimate esk8 build imo … look cazy and you give us to want a test ride haha
… hurry to see your next all terrain e-board !
Good continuation
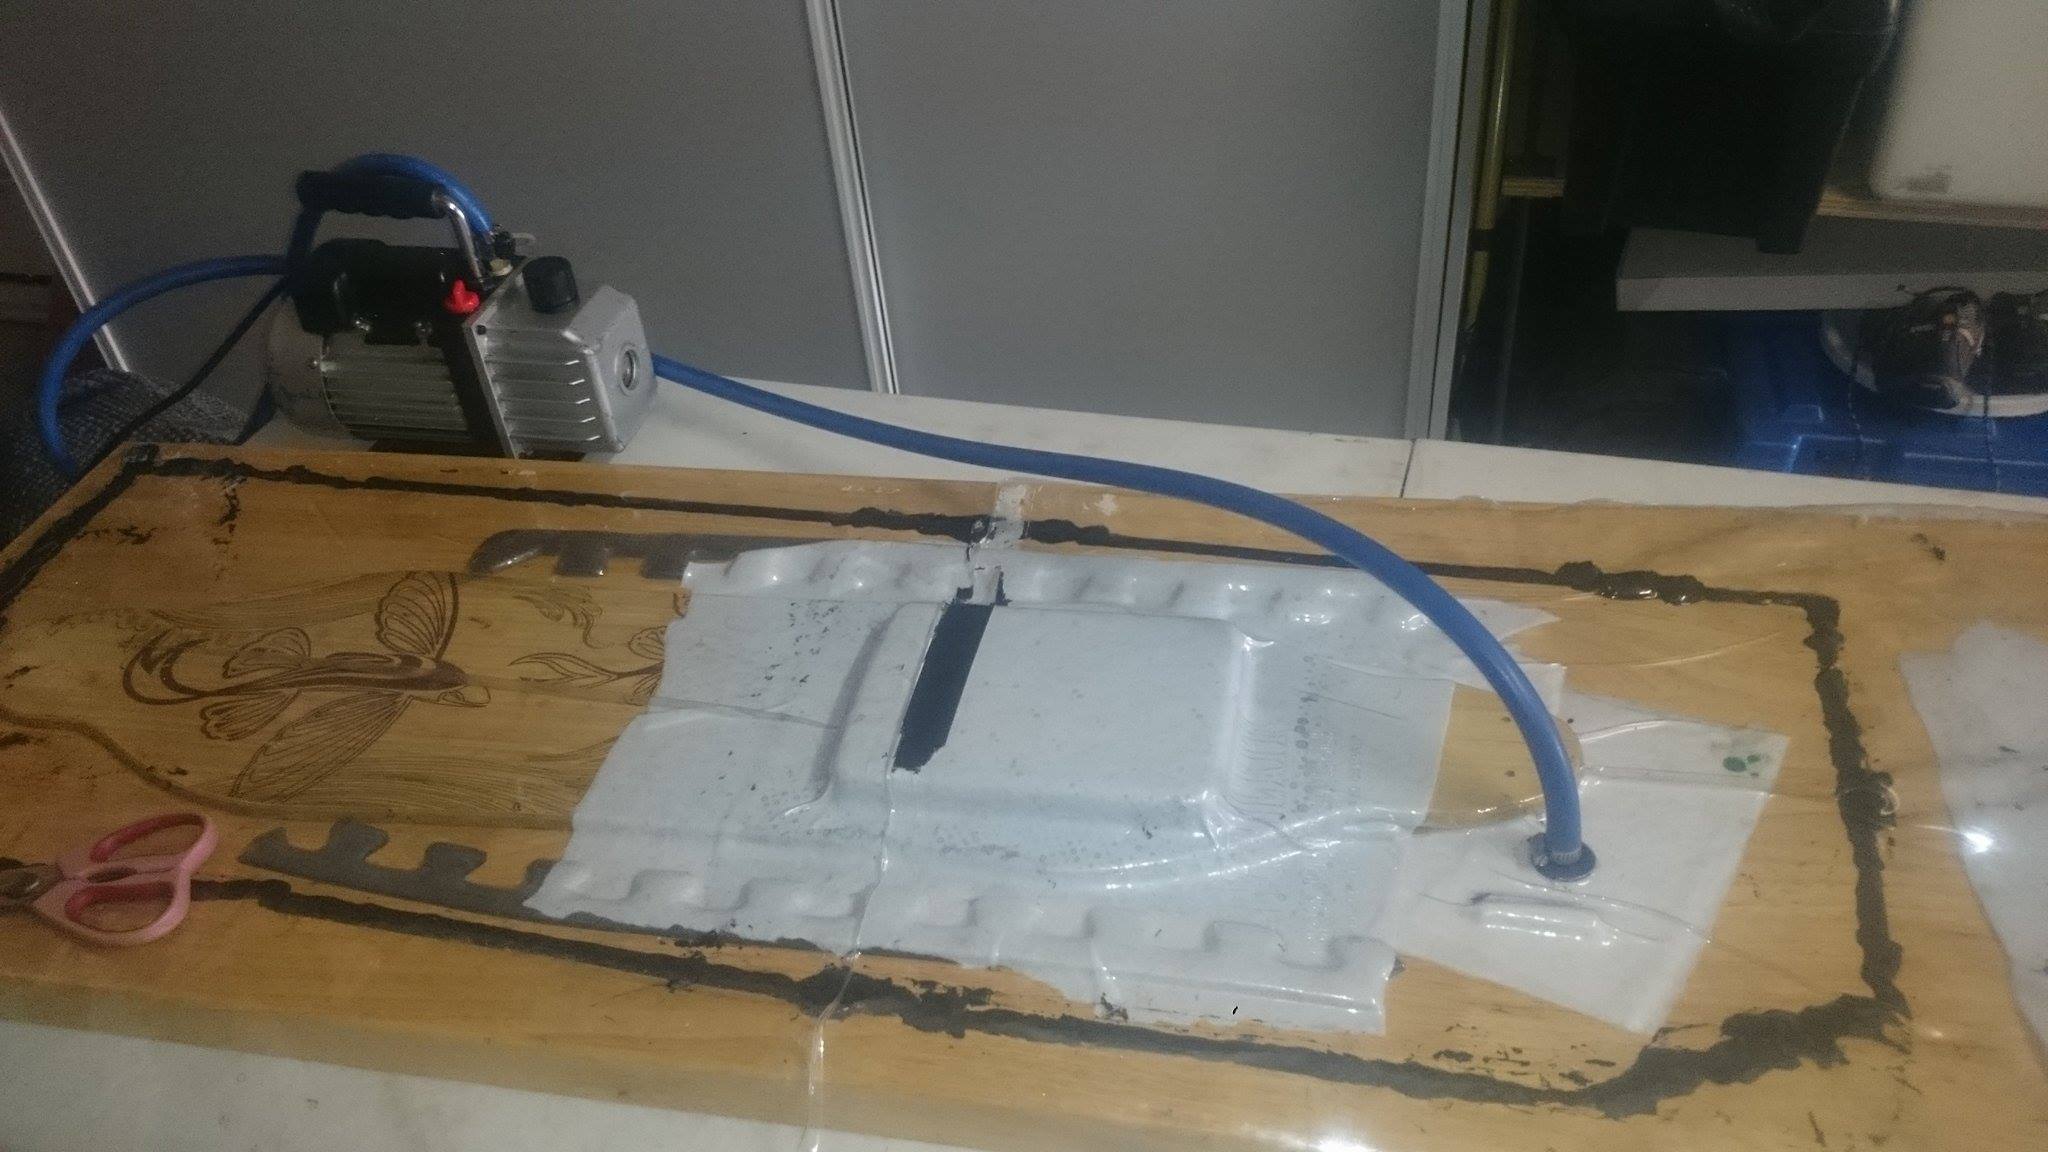
My twill has arrived, borrowed a vacuum pump from a friend, new mold is ready…
Can you tell me, how much epoxy ratio to cloth do you use? I have read equal weight epoxy to cloth and also read just to coat the cloth evenly. Do you go by feel or measurement? I used equal weight epoxy to cloth this time.
I usually use “enough”, soaking everything heavily, excess resin is pressed through bleeder layer into the soaking material anyway! looking at your soaking material it looks as if its not really getting a lot of resin, so I guess you couldve used a little more to be save! youll see the next day
awh how did you make the mold? I used the hardest foam that was available and for my latest enclosures I used MDF wood which is very strong, but still quite easy to shape. atmospheric pressure is STRONG, 9.5tons of pressure per square meter if you have a good pump!
I used plaster of paris, toward the stronger spectrum of water to plaster mix-found a cool tupperware container that fit the cells as per your build, but a vacuum pump running continuously is so powerful.
I will try again. and again. Was a little dry I think more epoxy is needed.
Also I think I should use MDF - terrible to unwrap a present to find this.
Routed into the flex 2 I picked up yesterday for $65 now have flex 1,2,3 to play with.
The extra burny bit is handy routing with a dremel to take the top of the curve away.
after a week with the trampa I switched to my DIY deck today for some urethane carving and woah, one week nearly made me forget how absolutely perfect this deck is - every detail is spot on. perfect flex, perfect trucks, perfect bushings, good old kegels which are great for this kind of excellent pavement.
I recently reworked the deck slightly because, for the first time ever, the top carbon layer came off in a few places - really weird. I was able to peel the carbon right off with the grip tape - never saw anything like it before:
I gave it a very thorough rough sanding and took it as an opportunity to replace the 200gr/m^2 carbon with 400gr/m^2 fiber glas for an improved reception and minimally harder flex. it has bonded strongly as always now, inseparable. really not sure what went wrong with the carbon back then. the reception is really improved with the glas. I had the problem before that I wasnt able to keep the mini remote in my pocket, kept having dropouts like that. now I can keep it just about anywhere without any reception issues.
decided to upload a short video I made with my phone, so you get an idea why I build the boards the way I build them. every detail is made for the endless carve with my favoured carving frequency.
if you switch to slow motion, you can see very well the compression for a turn, decompression after a turn and taking the free energy right into the next turn. the carving frequency is pretty much determined by the flex of the board. if you remember my flex test videos: the natural swinging frequency is very similar to the perfect carving frequency - basically you will ride in tune with the natural frequency of the board for the best energy returns in the right moment. its highly addicting
i dont really see the point of a dropdown unless you want to push your board? for carving, a deck that got your feet too close to the road feels somewhat “shallow”, not sure how to explain it better.
firstly, you loose board flex travel and might bottom it out or your heel/foottips might touch the road.
more importantly, the higher your feet are from the trucks, the more leverage you get over the truck and the easier leaning in gets - its feels more like balancing a rope, much livlier experience compared to low decks.
ultimately, this offset feet<->truck pivot point determines how much force is transferred to the outer wheel while carving - with a sharp lipped outer wheel, a large offset adds a lot of pressure and in return adds a lot of traction. its the “top moints have more traction, drop through slide easier” consensus in the longboard world. thats why you see only super high slalom boards - always top mount, often with high risers.
but if you rearmount the motors or start the drop after the motor sure, its possible. from a carving perspective: not optimal!


 Particularly interested in the one used in the vanguard. Just the length might help

 how did you make the mold? I used the hardest foam that was available and for my latest enclosures I used MDF wood which is very strong, but still quite easy to shape. atmospheric pressure is STRONG, 9.5tons of pressure per square meter if you have a good pump!


