Here’s my third build (reworked from my first one), hub motor based, It currently has ~50 miles on it and it’s very smooth to ride compared to my belt one.
w/ rider weight 105kg (230lbs)
Max speed: 44 km/h (27mph) https://metr.at/r/BxvSe - theoretical max speed 54km/h
Max range: 38km (25 miles) - at avg speed 20km/h
Max vesc temp: 70C
The urethane on the hubs doesn’t seem to slip, I tried them at 6S and they became really hot pretty quickly, but with the 10S they seem to stay cool, I have still to try them on a long hilly track to see if they can whitstand the load (I’m ~105kg).
Controllers (I have two of them) are super reliable, both vesc work well and seem to perform almost equally, charger/bms are good. I like the led inside the anti spark switch because not only looks cool but I sometimes forget my old board (the MKV2) on, and the vesc in standby discharges the battery a bit.
The Sulaco enclosure is really massive, it could fit 60+ cells but I think with 10S4P I should be ok for now, I would like to make a 10S5P for more range and less voltage sag in the future
I’ve still to route a path for the cables in the deck but I’ll probably wait for the Carvon V2.5s to arrive (next week) and I plan to do a quick video comparison between jacob hubs and the carvons next month (carvons w/ 97mm flywheels).
Here are some shots of the old 6S setup, when assembling the current battery pack, power switch / coulometer details etc…
I’m using standard 18650 battery spacers, some copper wire soldered on the cell solder tabs (I used a 80w soldering iron) Added some foam and taped everything together (I need some appropriate heatshrink I know)
nice works~~ i like the meter, i planning to use this meter too, but still figuring how to mount on top the deck instead at the bottom. Because can directly see meter while riding~~
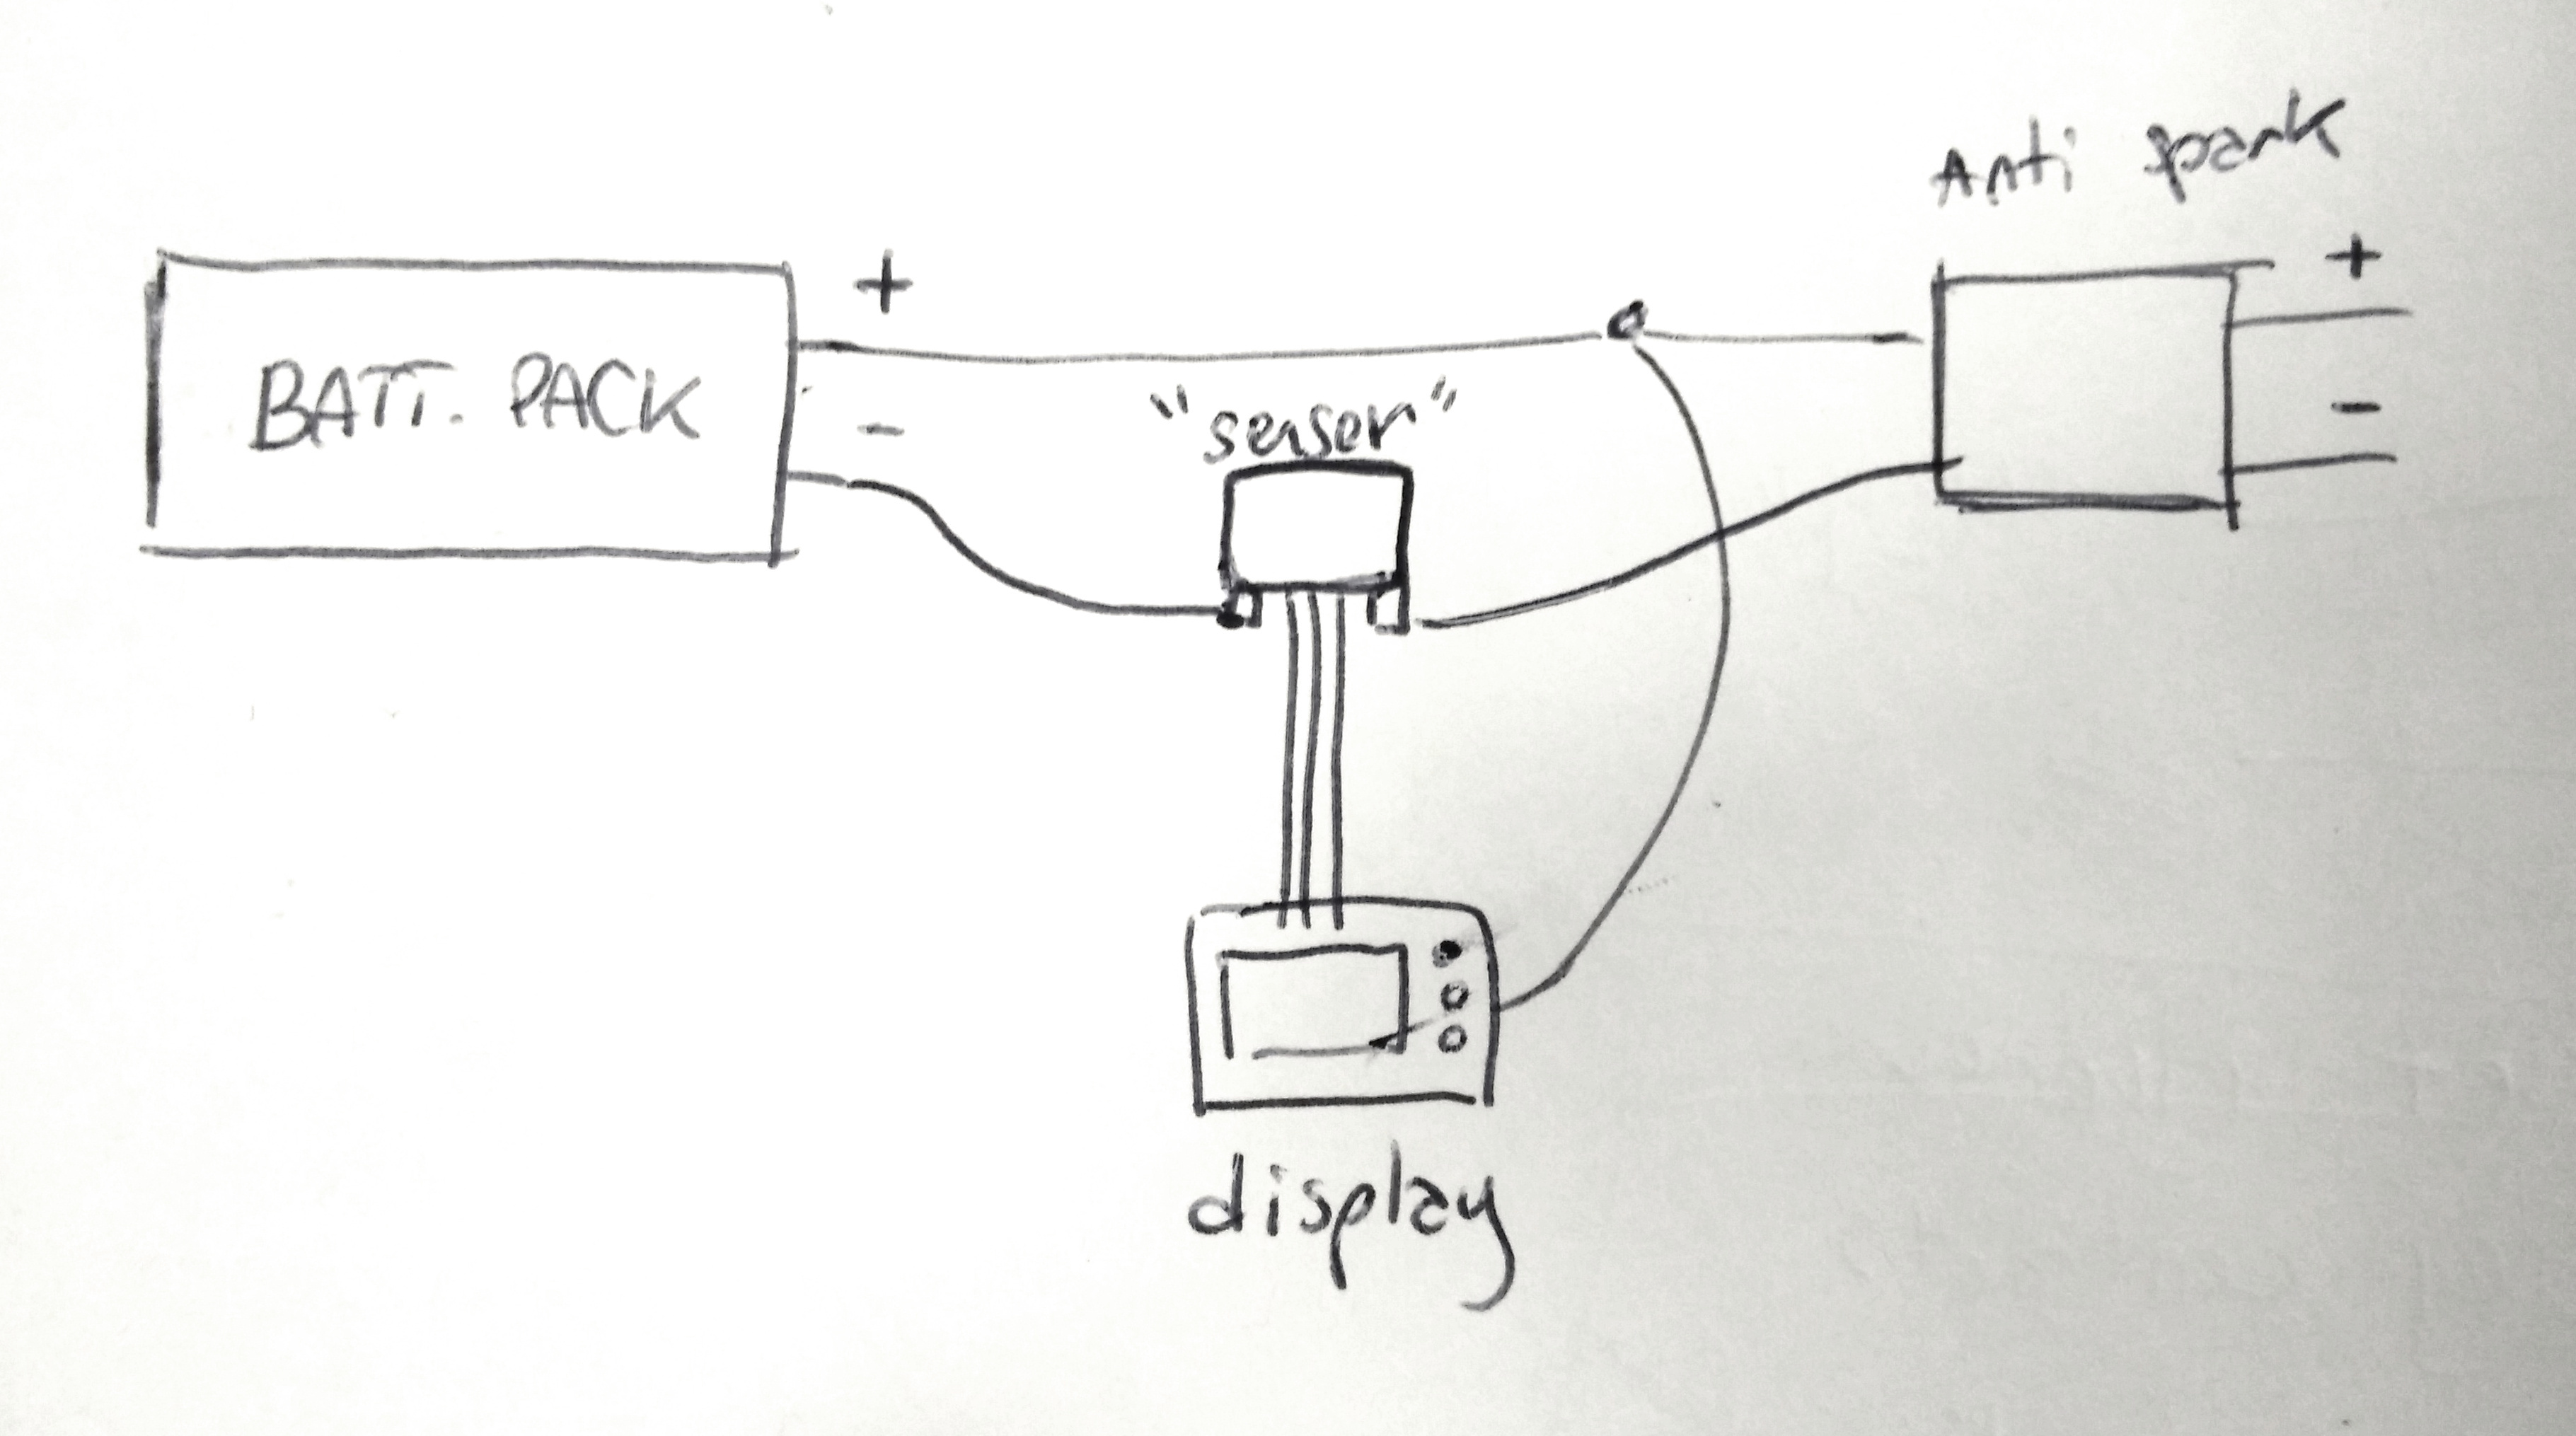
here’s my diagram, as I don’t have the 350A version but the 50A the layout is a bit different
everything goes before the anti spark so it can track the battery status when charging
the plus coming out from the battery meter goes on the + line
the minus need to pass from the sensor, the meter will get current from the meter itself (there are 3 cables that go to the sensor, 2 of them are black ^^)
Yes I have an additional switch on the cable marked as + but I didn’t expose it outside the enclosure. I guess that the consumption is minimal because the lcd backlight goes off (standby) until you start charging the battery or press a button.
I will probably switch it off only when I don’t plan to use the board for long periods
more pics of the second board, I needed to change deck because I cracked it failing to get over a small step lol, it’s a cheap deck but it works (yocaher drop down I got from amazon uk)
It flexes a bit on the drop which is nice even if it’s 9ply. I have ridden it a lot so for what it costs I was more than fine with the idea to get a new one.
I would like to try another drop down deck, probably I will get thegravity tequila sunrise soon.
If someone knows of any similar/good drop down decks with a very big wheelbase (33"+) please tell me ^^
mkv3’s (dirty) top - old mkv2 enclosure will have holes for the cables for the top motor as well, this time (because I have a second working build) I will manage the cables a bit better
I went for a ride today, 6 miles total, hubs handled very steep and long hills better than my single 6374 build (1 motor caused the vesc to overheat, with 2 vesc and these guys it seems fine, I still have to check the vesc temp to confirm this though…). braking was very good, the only downside is that where I live the roads/pavements are really not good, thus the thin urethane that covers the 90mm motorized wheels is not enough to dampen vibrations, I will try to get softer risers to see if that’s better.
Pushing is still a bit hard (I’d say at par as a single motor) because the magnet inside the motor make some resistance while pushing, I’m curious about this aspect with other hub motors, I tried an inboard and it was very smooth, but hopefully I won’t need to push much because the board will work 100% of the rides and I will never finish the battery, right? ^^
I was able to finish the ride but near home I noticed a thing…
the hub stays, I had slightly slipping urethane on one wheel which I think I can fix with some double sided strong tape and/or some glue. Today Carvon(s) V2.5 arrived and I decided to try them while I fix the others (actually this made me think of starting a third build even if I think that I will probably make it and then sell another one because I don’t think I can have 3 or my wife will kill me lol).
The other build (dual 6374) has really a lot of power, I want to try that soon as well, looking forward to the w/e, hopefully I can make a short video too!
loll, I posted the wrong pic! They sent me the wrong ones I actually sent those back and they replaced them very quickly, that was the pic I used as proof for them, the new chargers are 3A 42V, also I have this charger which is nice because it charges very slowly at 41.2v (95%) charge which should increase the battery life a bit.
It stops at 41.2v, ~95%, it charges the battery very slowly (36w vs 130w of the 3A charger) so I usually leave it overnight. That should help increasing battery life too
I wanted to make a video, I haven’t used the gimbal in a long time, I was a bit sleepy and this happened lol
The gimbal was a bit broken already (my wife and his boss used it improperly) so I hope I can get a new one soon next month to make a full video of my usual ride (25m one way)