Lush Machine 3D | Calibre II Trucks | 80mm Kegel Wheels | Alien 5065 270kv | Alien Drive System Motor Mount | Hobbywing 8BL150 | 2x 3S Zippy 8000mAh (6S) | Aliexpress Micro Remote | Wee Dave Enclosure

Hi everybody, I hope you’re all well!

I’m Jonny, I live in the South East of the UK and I’ve been on the forum for a fair few months, joining in on conversations, but I’ve also been building this board in between.

Months of research, saving money, buying bits that were scattered throughout Europe, learning to solder again (having attended electronics classes years ago) and having the last two weeks off work to finish everything has led to the build you see here!

https://www.instagram.com/p/BJtN2AJAwrd/

(Quick note: 2x Zippy 8000mAh 3S Lipos (6S) with a single 5065 motor, ridden for nearly an hour over 5 miles (a few high speed bursts and hill climbs) will leave you with 65% battery ;-))

The journey…

I went for the Lush Machine 3D deck as I loved the look of the shape, the mould had taken two years of development by the guys at Lush to produce and they’re based up in Bristol here in the UK - a city very famous for skateboarding.

https://www.instagram.com/p/BGwwa57vFEs/

This video of a team rider sliding the board had me sold as well!:heart_eyes:

https://youtu.be/vylV7yQEzYc

Originally I went with Paris trucks to go with the Alien Drive System 50mm single motor mount kit

https://www.instagram.com/p/BGcQN2UvFBQ/

…But soon discovered that I would have to spend ages filing the trucks to get the mount shim to sit right… to allow the belt alignment to be spot-on. I then realised why Calibre trucks are widely used - the profile lends itself perfectly to motor mounts. Fortunately the ADS motor mount only needed the shim replacing with the Calibre-shaped alternative, so I ordered that and the Calibre setup was complete - much happier!

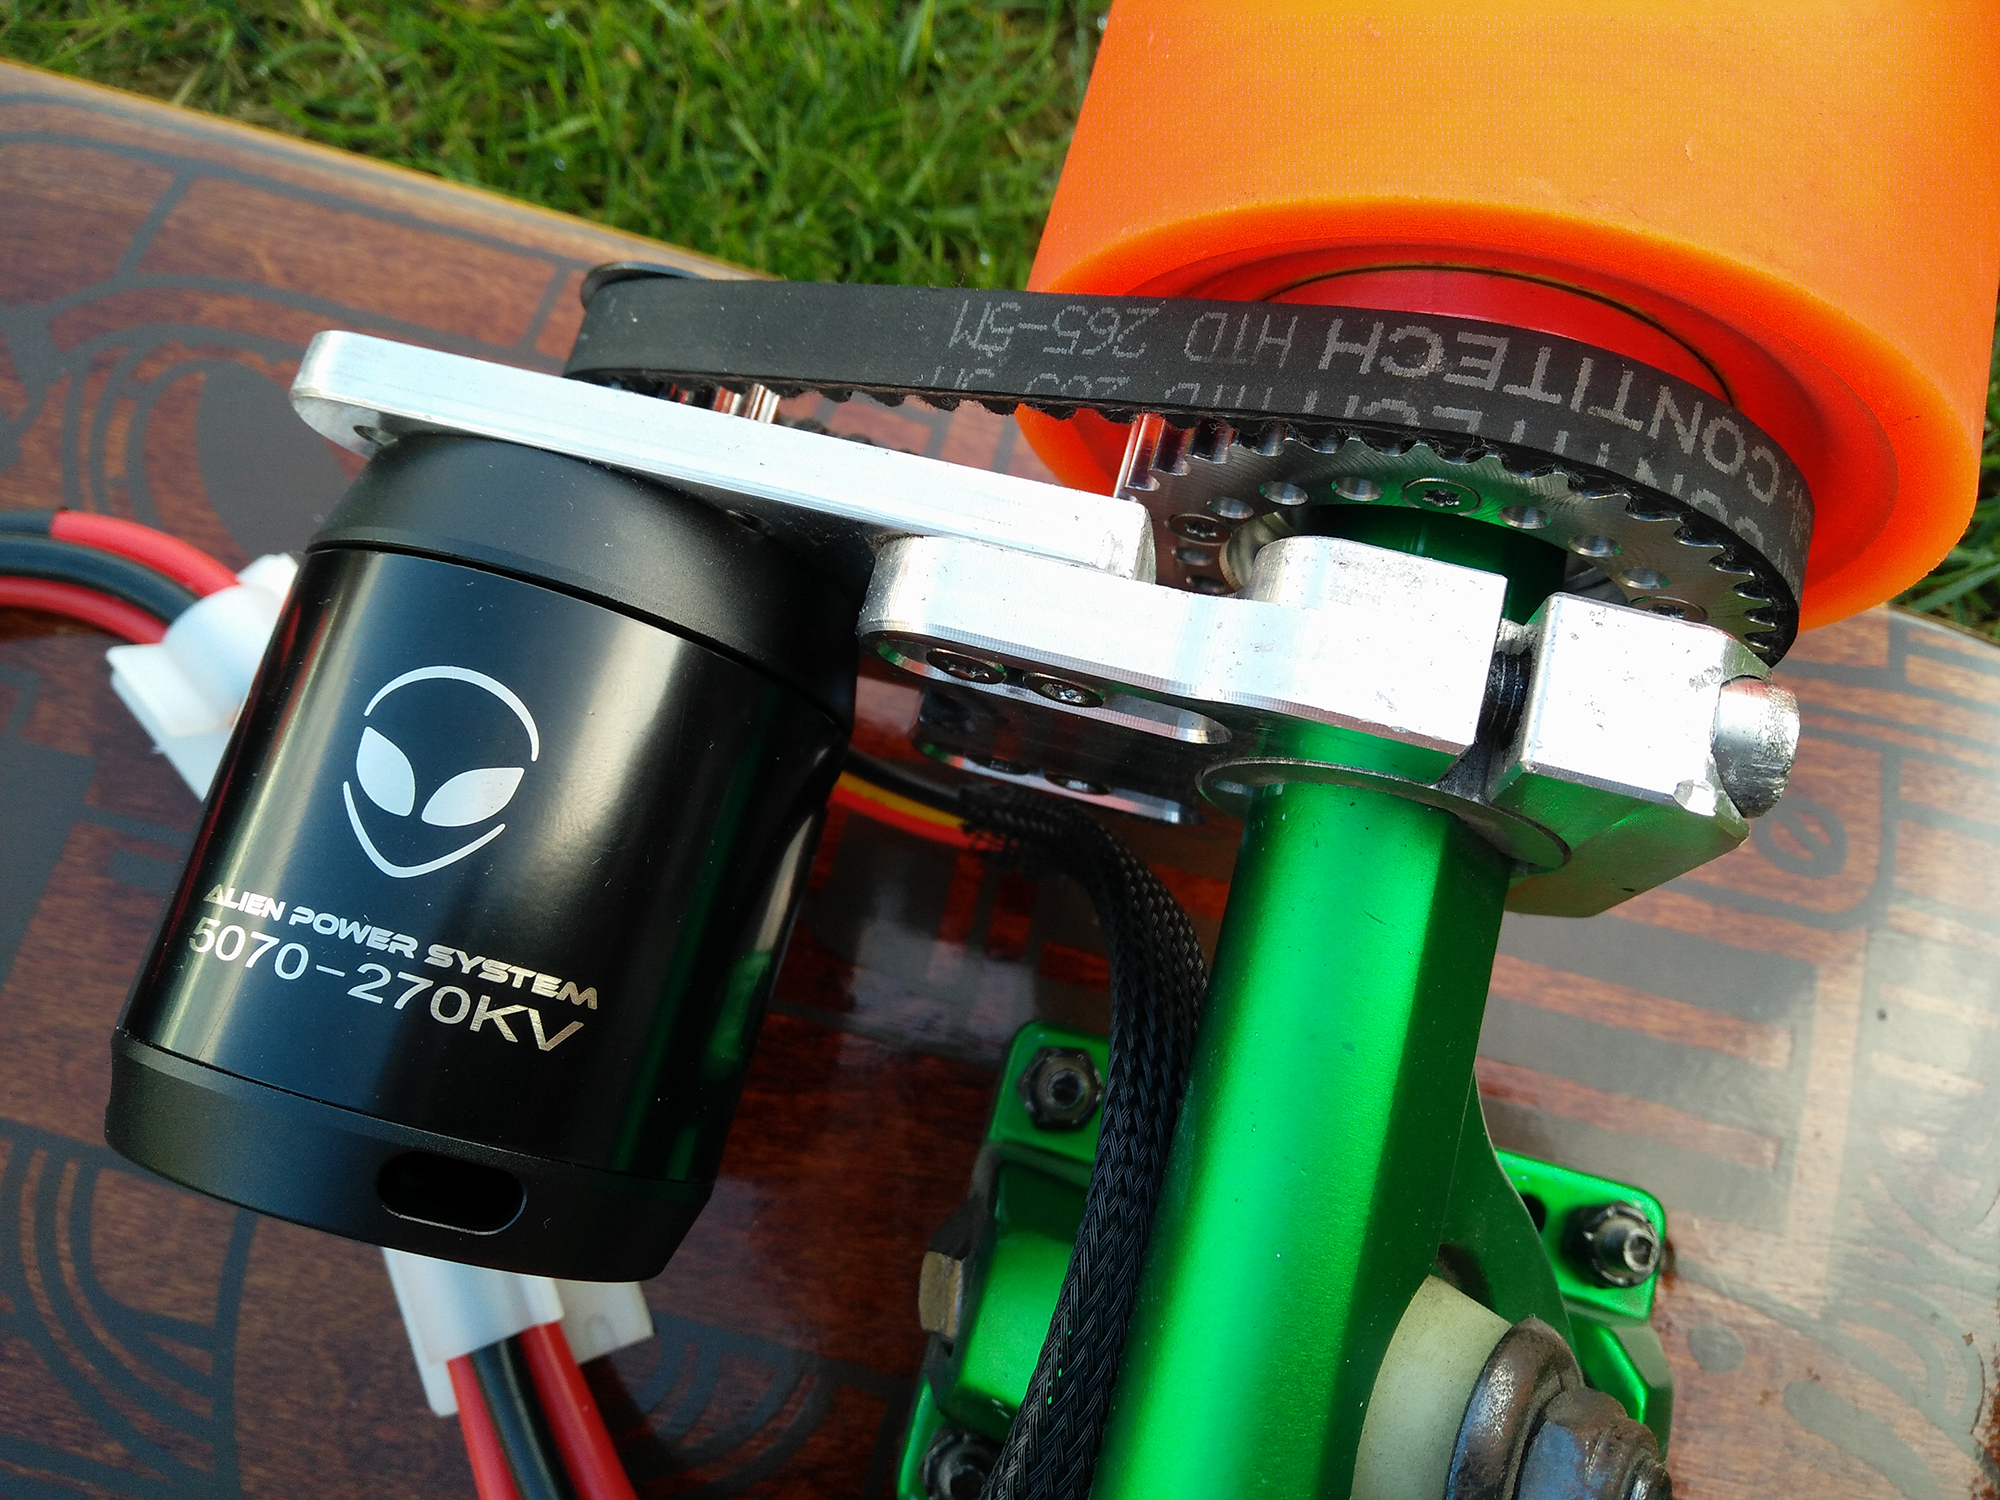
The Alien Power System 5070 motor that I purchased at the same time as the ADS mount ended up making some strange clicking noises before I’d even wired it up.

https://www.instagram.com/p/BHRyJrSAidN/

Bruno @ Alien has said he’ll take a look at it, so I’ll be shipping that back to him soon, I’m sure it’s an anomaly. In the meantime, I ordered a 5065 270kv motor and I’m super happy with it! The three motor wires were very short and thin, so I merged them into some 10AWG wire and that allowed me to trail the connection back to the enclosure to the ESC.

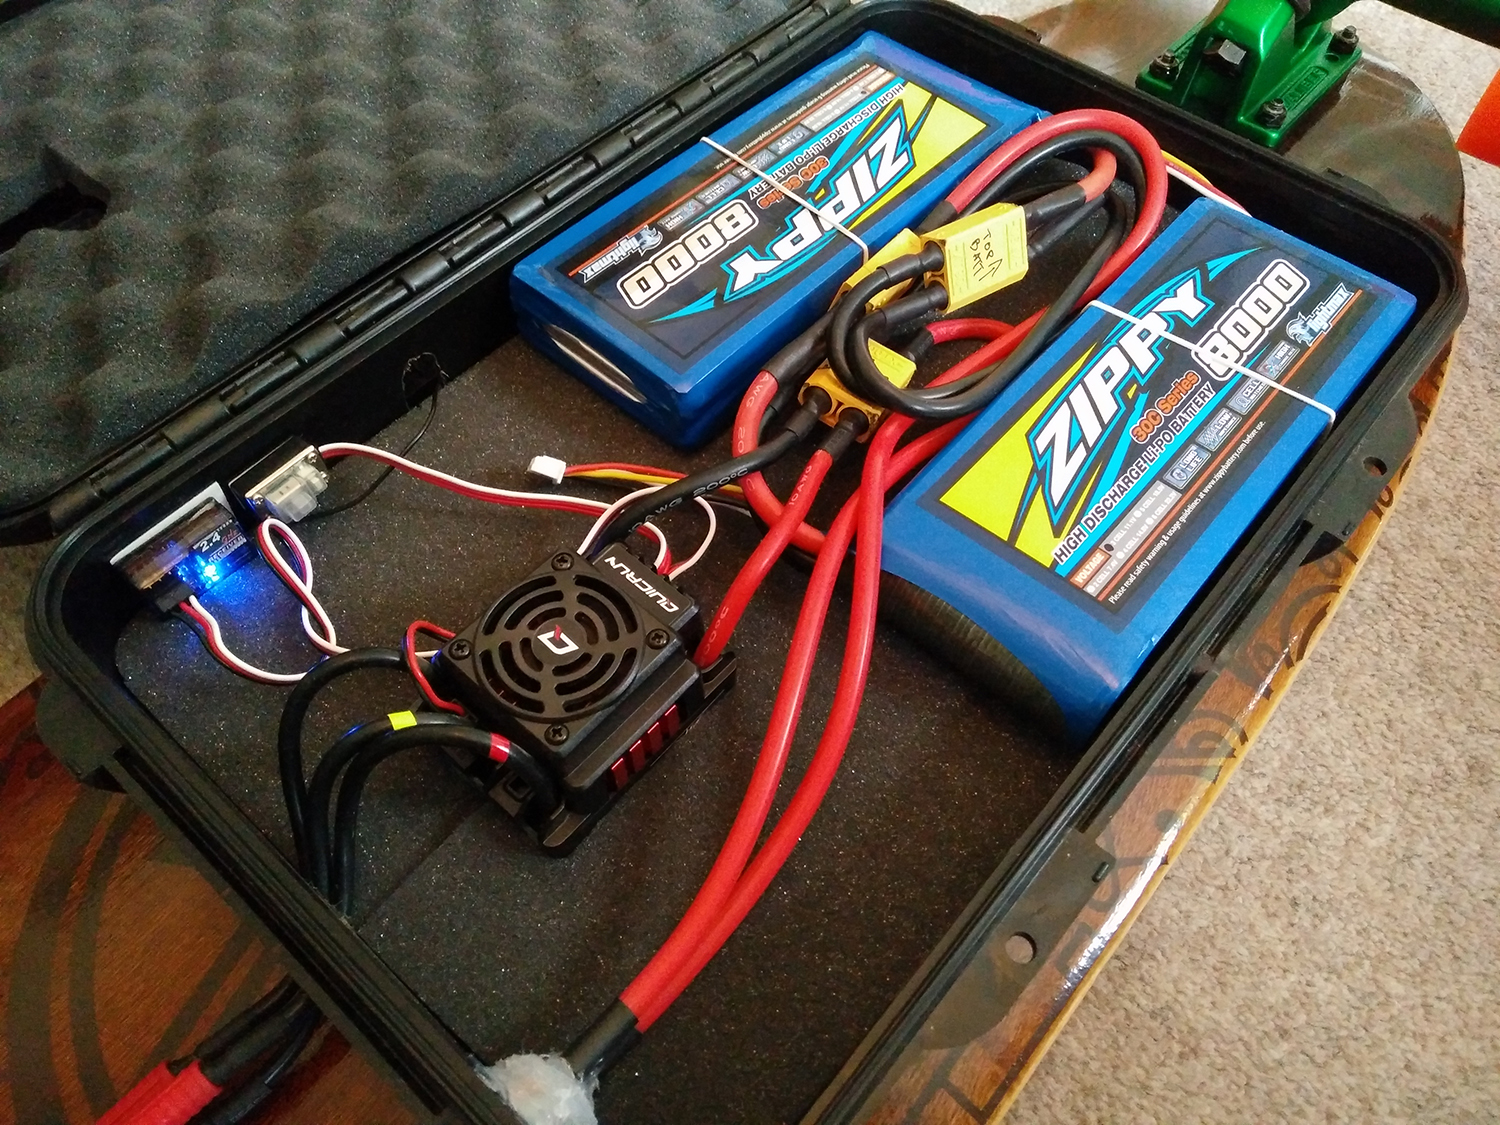
To start with, I honestly wasn’t sure what ESC to use, but through email conversation with Jenso from E-TOXX, he recommended the Hobbywing 8BL150 (150A) as I only wanted to run 6S for this first build. It was the best decision as the ESC is super easy to program (with the optional programming card), it’s waterproof (without the fan mounted) and has performed flawlessly so far - it hasn’t got hot or anything, even after climbing some properly steep hills. It can only handle up to 6S, so if I decide to go 8S or more, then of course a VESC will be added to the board!

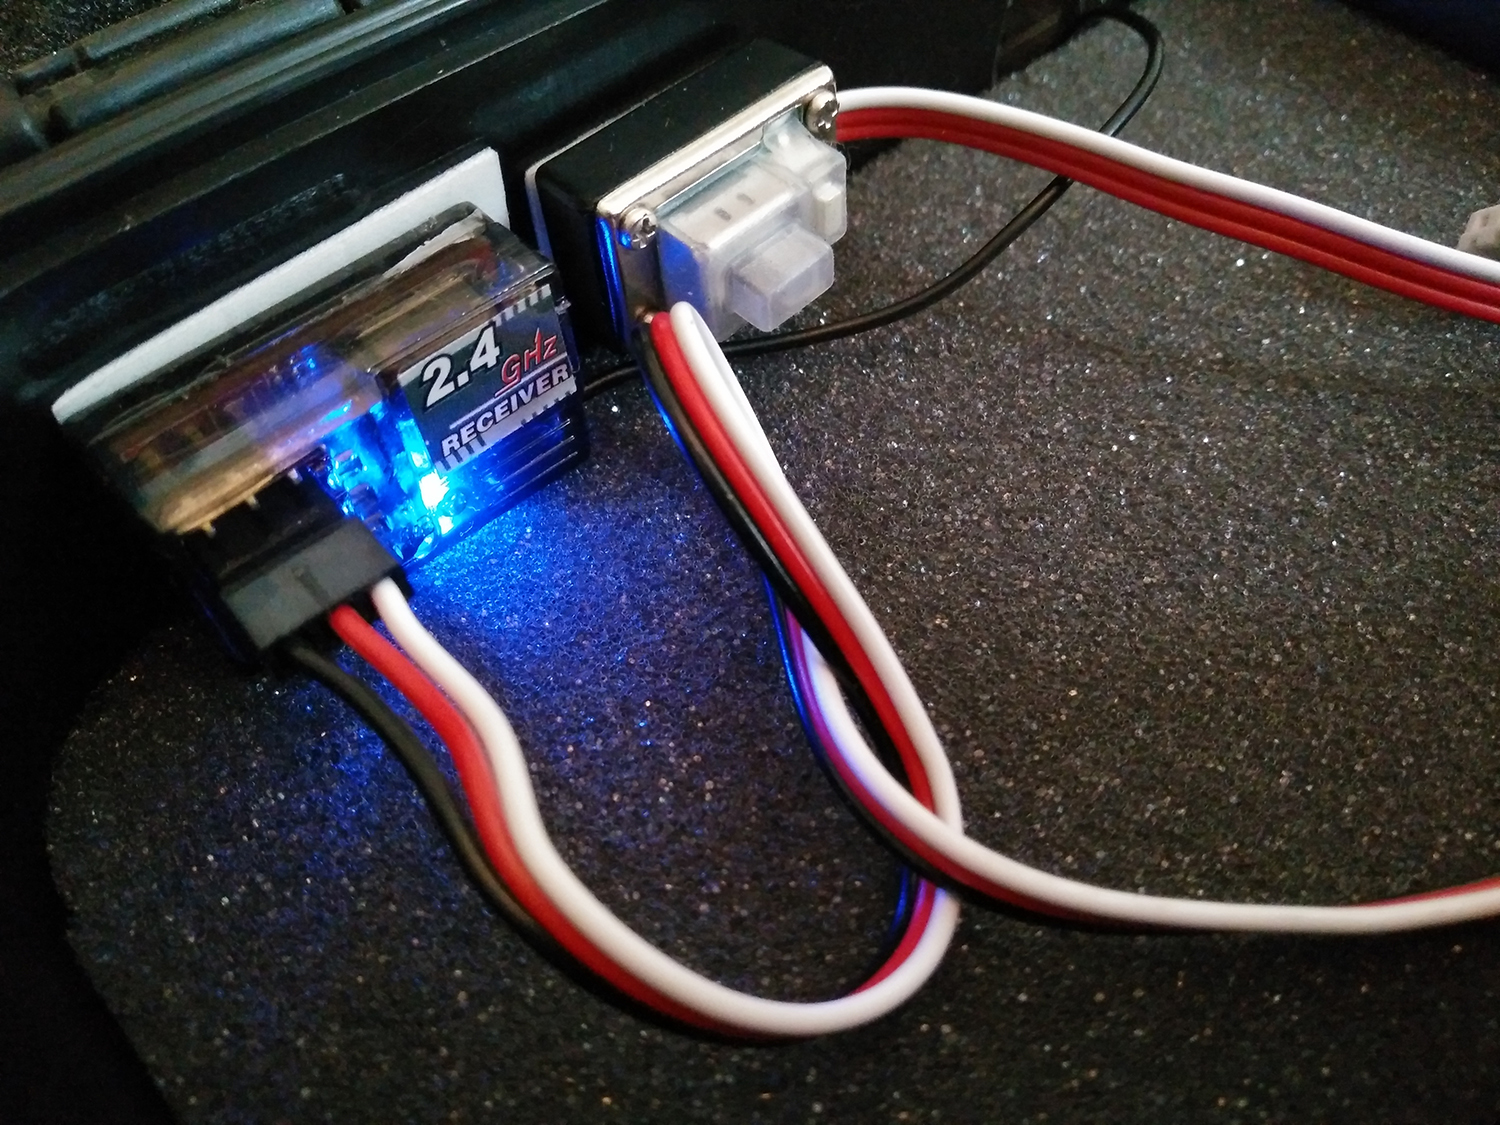
To compliment the ESC, Jenso also sent me a link to the popular micro remote, which you can buy from Aliexpress for very little money (shipped). Great experience buying from Aliexpress for the first time, too. I believe there’s a group buy for these on the forum at the moment? So if you’re looking to get one, you might be able to save yourself some money taking part in that.

The enclosure had me searching for weeks to find something suitable. Then I found a company here in the South of the UK that produces a range of water-tight plastic cases with hinged lids with security flaps - perfect! I wanted a hinged top to take the batteries in and out as fast as possible. I purchased two of the smaller ones to start with (one for the batteries and series harness and one for the ESC), they turned out to be too small and awkward for the batteries and harness, so I went with their second to last largest case, which turned out to be exactly what I needed. There’s even space for a second ESC if needed. The case connects to the board using 6 pronged ‘captive’ T Nuts and matching allen screws.

As I mentioned above, I’ve spent the last two weeks soldering everything: 10AWG wire, XT90 and 4mm HXT connectors, burning myself with the soldering iron (only twice!) and working out how to mount everything.

If you’re new to soldering, don’t waste your money on a 40W soldering iron, get an 80W iron as a minimum. Also, a couple of soldering tools like this from Hobbyking or eBay… Solder connectors joined together, as in the male and female parts joined - that way you won’t make the metal parts melt out of the plastic.

https://www.instagram.com/p/BJnhLxmAcut/

And that’s about it. Below are some additional photos of the build!

Stickers produced by me as that’s part of what I do for a living :slight_smile:

I managed to install the Anti-Spark loop key in between one of the ‘supports’ within the case. I used a glue gun to hold the XT90 female part of the connector in place, works well!

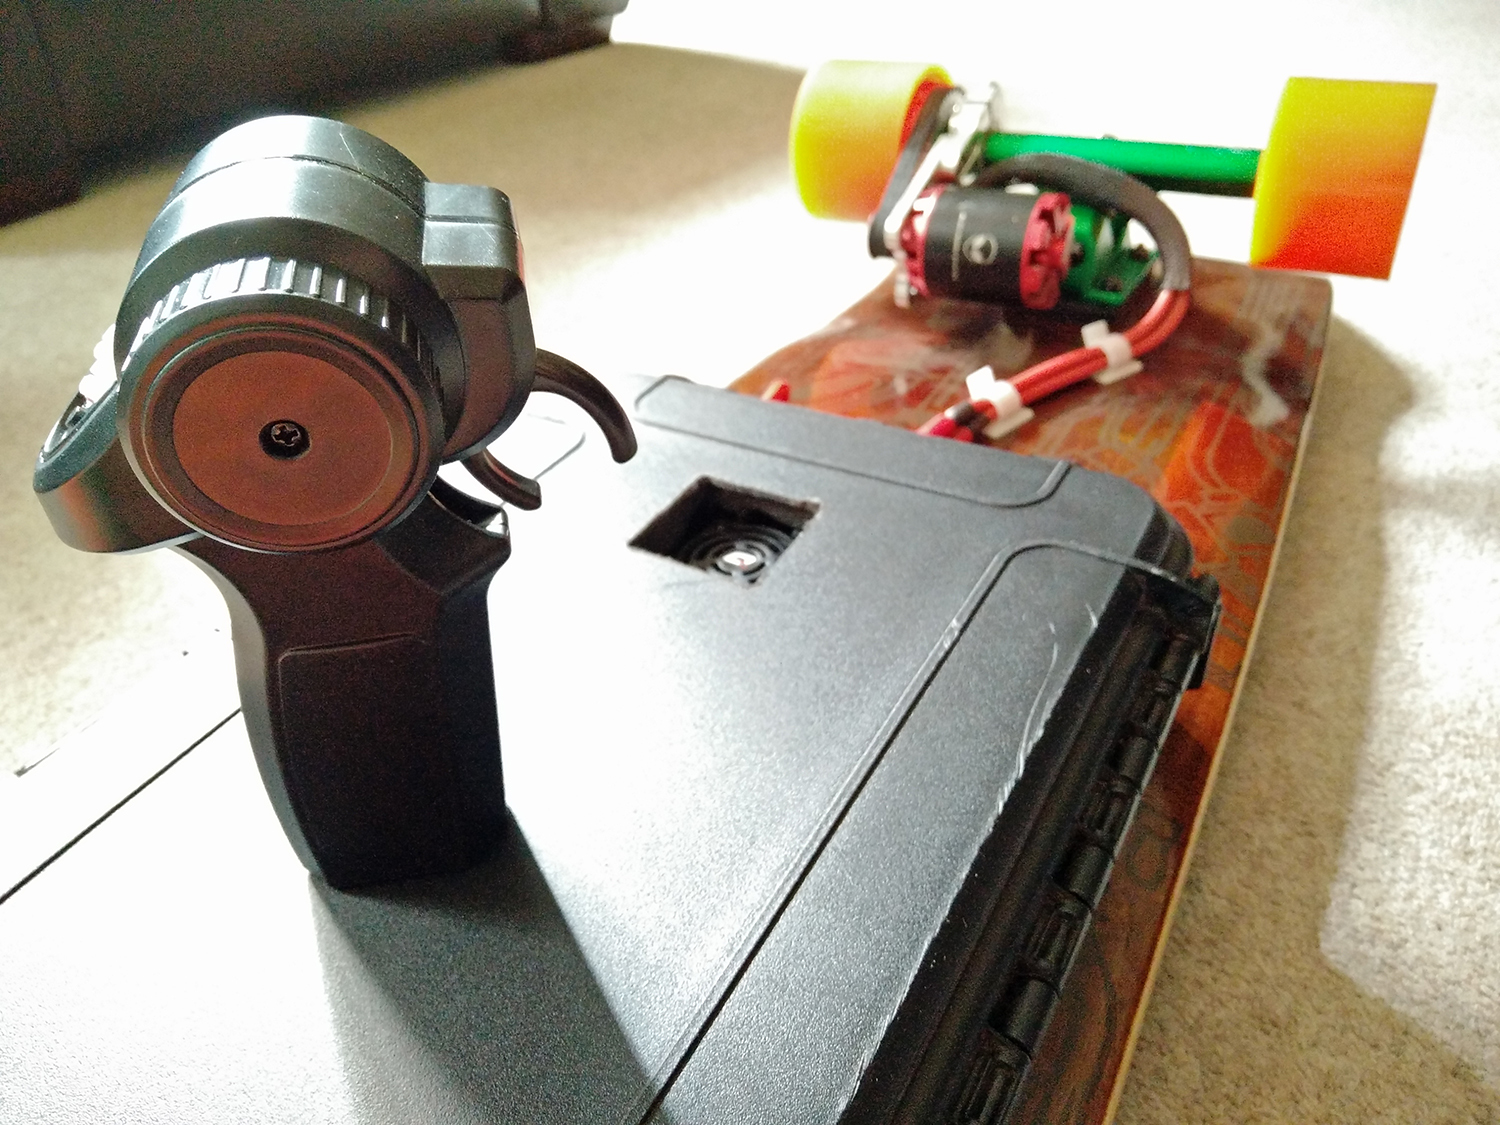
The deck has these awesome pipework/cable graphics to compliment the Machine 3D deck name - absolutely perfect considering it’s now an electric longboard!

Initial thoughts after riding the board for a couple of days…

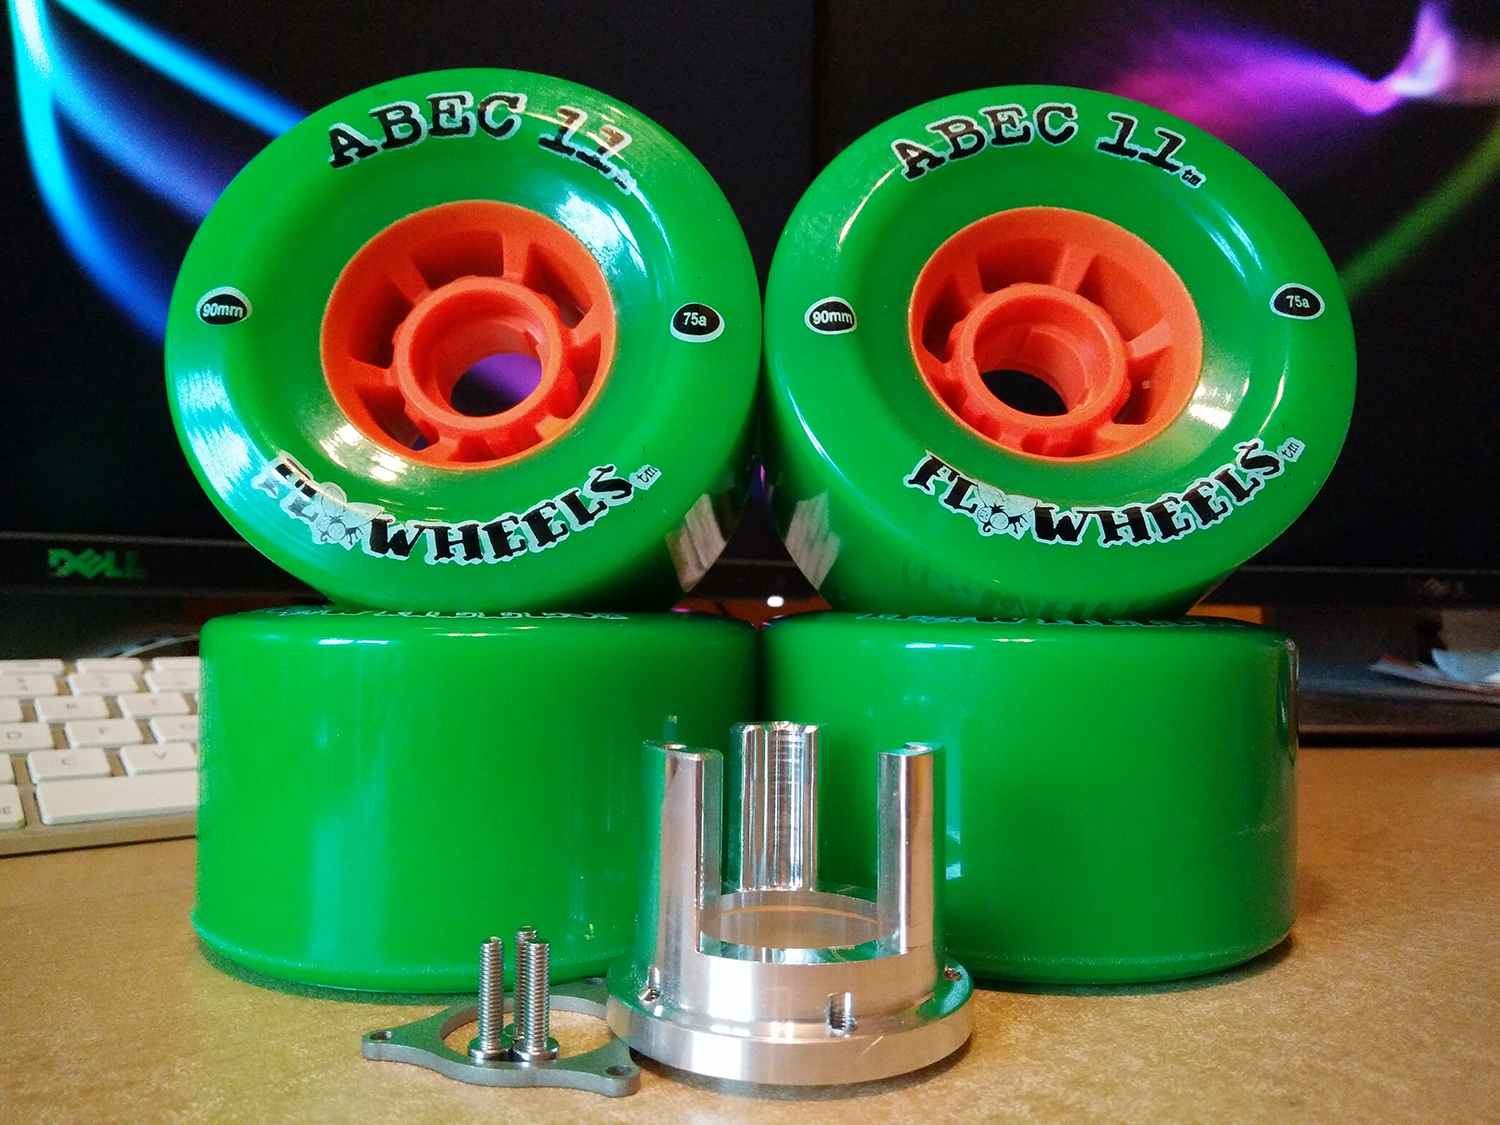
It’s become apparent that I need larger wheels (the 80mm Kegels are great, but 83mm or 97mm wheels will make rolling even better and should help even more with the really bad pavements (sidewalks) and roads we have here in the South of the UK. I may also change the gearing and upgrade to a 15mm belt, we’ll see.

Lastly, huge thanks to everybody that I’ve mentioned, also to everybody who’s on this forum (and to @onloop for starting it) - without you guys/girls this place wouldn’t be what it is, it’s utter motivation and inspiration for people to build something that will make them smile for miles!! :grin: :sunglasses:

Any questions, ask away! :slight_smile:

Cheers, Jonny.

14 Likes

Ive got a lush Symbian 3D which I like for pushing / manual boarding. It’s a great board and I’m enjoying it’s shape. Bought a bamboo landyachtz on eBay but which looks like may be too flexy for an eboard. So the machine 3D may be it one day!

Great build man!

1 Like

Could you post a link to the T screws at all?

be careful with that ESC, it burned out my G160.

Lush do make awesome decks, they were quite surprised when I told them my plans!

Thanks dude! Also, here’s the T nuts, the same seller has all sorts of screws and fixtures…

Can you elaborate on that a bit? What actually happened? Thanks! :slight_smile:

Idk exactly what @link5505 experienced, maybe these ESC’s are just hit and miss. Mine has been working for months now, totally flawless. Also just for a small suggestion, you could mount that ESC switch outside of your enclosure. I used a dremel to make a small hole in my enclosure, and then took the metal cover off of the switch and used the 4 screws to go through the plastic (again, thinned it out a bit with the dremel) and then back into the switch. Works like a charm, looks nice, and adds a bit of convenience.

1 Like

Thanks for the suggestion about the ESC switch :slight_smile: I’ve mounted it inside the enclosure as I just leave it switched on and use the Anti Spark to turn the system on/off. I’ve seen on a number of threads that this is fine to do. Correct me if I’m wrong, though!

I decided to ride the route to work the other evening. It turns out that the pavements (sidewalks) here in the UK around where I live are terrible, even more so than I thought - the 80mm Kegels really struggled. So I thought about getting some 97mm ABEC 11 wheels, or similar, but couldn’t find any decent ones in stock… anywhere! There were a few comments on here saying that the 97mm wheels were “a bit too much” or “a bit too wobbly”… so I went with some 90mm ABEC 11 Flywheels… in 75a. Most of you will know this, but for those that are still wondering around the forum, because of the ADS motor mount kit, I only had to order the ABEC wheel adaptor to make the switch to the Flywheels.

ABEC’s 75a urethane is apparently discontinued (?), so I feel extremely lucky to have found some on the LBUK website! I’ll be fitting them today and playing with the board some more this weekend :grin:

Jonny.

2 Likes

were they out of stock (on the website) when you bought the wheels, too? http://www.longboardsuk.com/abec-11-flywheels-90mm.html

Just spent 20 mins looking for an 80w soldering iron / station, and doesn’t look that easy to find… well, below £100. mind sending a link for the one you got / have?

Great build and like what you’re setting up there!

You’ll love the soft 90’s. I have a couple sets of the 97’s and they are my favorite. Not wobbly at all, and eat up bumps and rough roads like they’re nothing!

Here you go mate: https://www.amazon.co.uk/gp/product/B003DP5BG2/

The 90mm Flywheels were in stock when I purchased mine, if they’re now out of stock then I might of had the last set. I rang the shop and spoke with a guy who was very knowledgable about the whole ABEC 11 range, so it might be worth asking them when they’re getting more stock.

@sl33py Thanks! :slight_smile: Yeah I’m really liking the 90mm Flywheels, definitely a smoother ride and 10mm more clearance for the drive belt. 19MPH top speed so far. I’ve got some new, super-soft rubber riser pads to fit now, hopefully take some further vibration out of the ride feel - the Lush deck doesn’t flex at all so I’m hoping these will help a bit… not that it’s uncomfortable to ride, I’m just interested in seeing what difference they’ll make.

1 Like

super thanks.

1 Like

Here’s the first video of the board! Myself and @Alexander are heading to Brighton tomorrow for a cruise along the sea front, anybody in the UK that’s free can join us! :sunglasses:

https://youtu.be/GGspDp8p80g

7 Likes

How is the enclosure working out?

Pretty good overall. The hinge section sometimes half pops off if I go over any really rough surfaces over and over, but other than that it’s solid. I use wire ties (the things you use to tie wires together on power bricks, etc.) through the two holes on the front of the enclosure (where the locking flaps are) to act as a fail safe.

Bruno @ Alien Power System managed to get the replacement 5070 270kv motor to me this past week (first one had unexplained clicking noises), so I installed it yesterday and had a test ride. It’s a lot louder than the 5065 motor I had on there, but you can feel the extra power as the 5070 is a 2200W motor compared to the 5065 which was a 2000W.

I had to re-do and re-route the wiring, I actually find soldering quite therapeutic, hopefully I’m not alone… haha!

Due to the 5070’s wire exit point, I had to point the wiring downwards. There’s just about enough clearance when turning the trucks left and right, I had to move the Alien Drive Systems bracket upwards slightly, no big deal.

Hope you’re all enjoying your boards still why we have some kind of light in the late afternoon/evening :slight_smile:

3 Likes

what about mounting the motor 90 degrees clockwise(on that last picture) so that the wires would be pointing to the trucks? there should be enough room for that.

Nice idea and that’s how I had the 5065 motor mounted. The problem with the 5070 is that the heatshrink, which protects the wires as they come out of the motor, protrudes too much to have it mounted at 90-degrees so the wiring faces the trucks - you can’t mount the motor as the heatshrink hits the motor mount. You could spend some time filing the motor mount but there’s little point. I could also have rotated it 90-degrees the other way but I wasn’t comfortable with the wires facing the direction of potential on-coming debris from the ground. :slight_smile: