What resin would I be able to put colors in? Smooth-cast 310?

Not sure if the other ones can take color. You can always call them, they are usually pretty helpful.
1 Like
Any updates? I would also like to 3d printing this if possible!
Hi, i’m actually totally new to this forum, but not to e-skateboarding. id love to use one of your Munkeys. But 1st i do not getit how to PM in this forum. and 2nd would you be willing to share the 3d data, so that i could make some changes -id need a pot-signal for the steering channels instead of the swiches you made (for linear controlling a break servo for magura breaks additionally but separate to the regen-break)
I use Autodesk inventor and would be happy if you wanna share your data. otherwise where are you acutally living, and what would you take for one munkey inc shipping to Austria/europe
greets
Notger


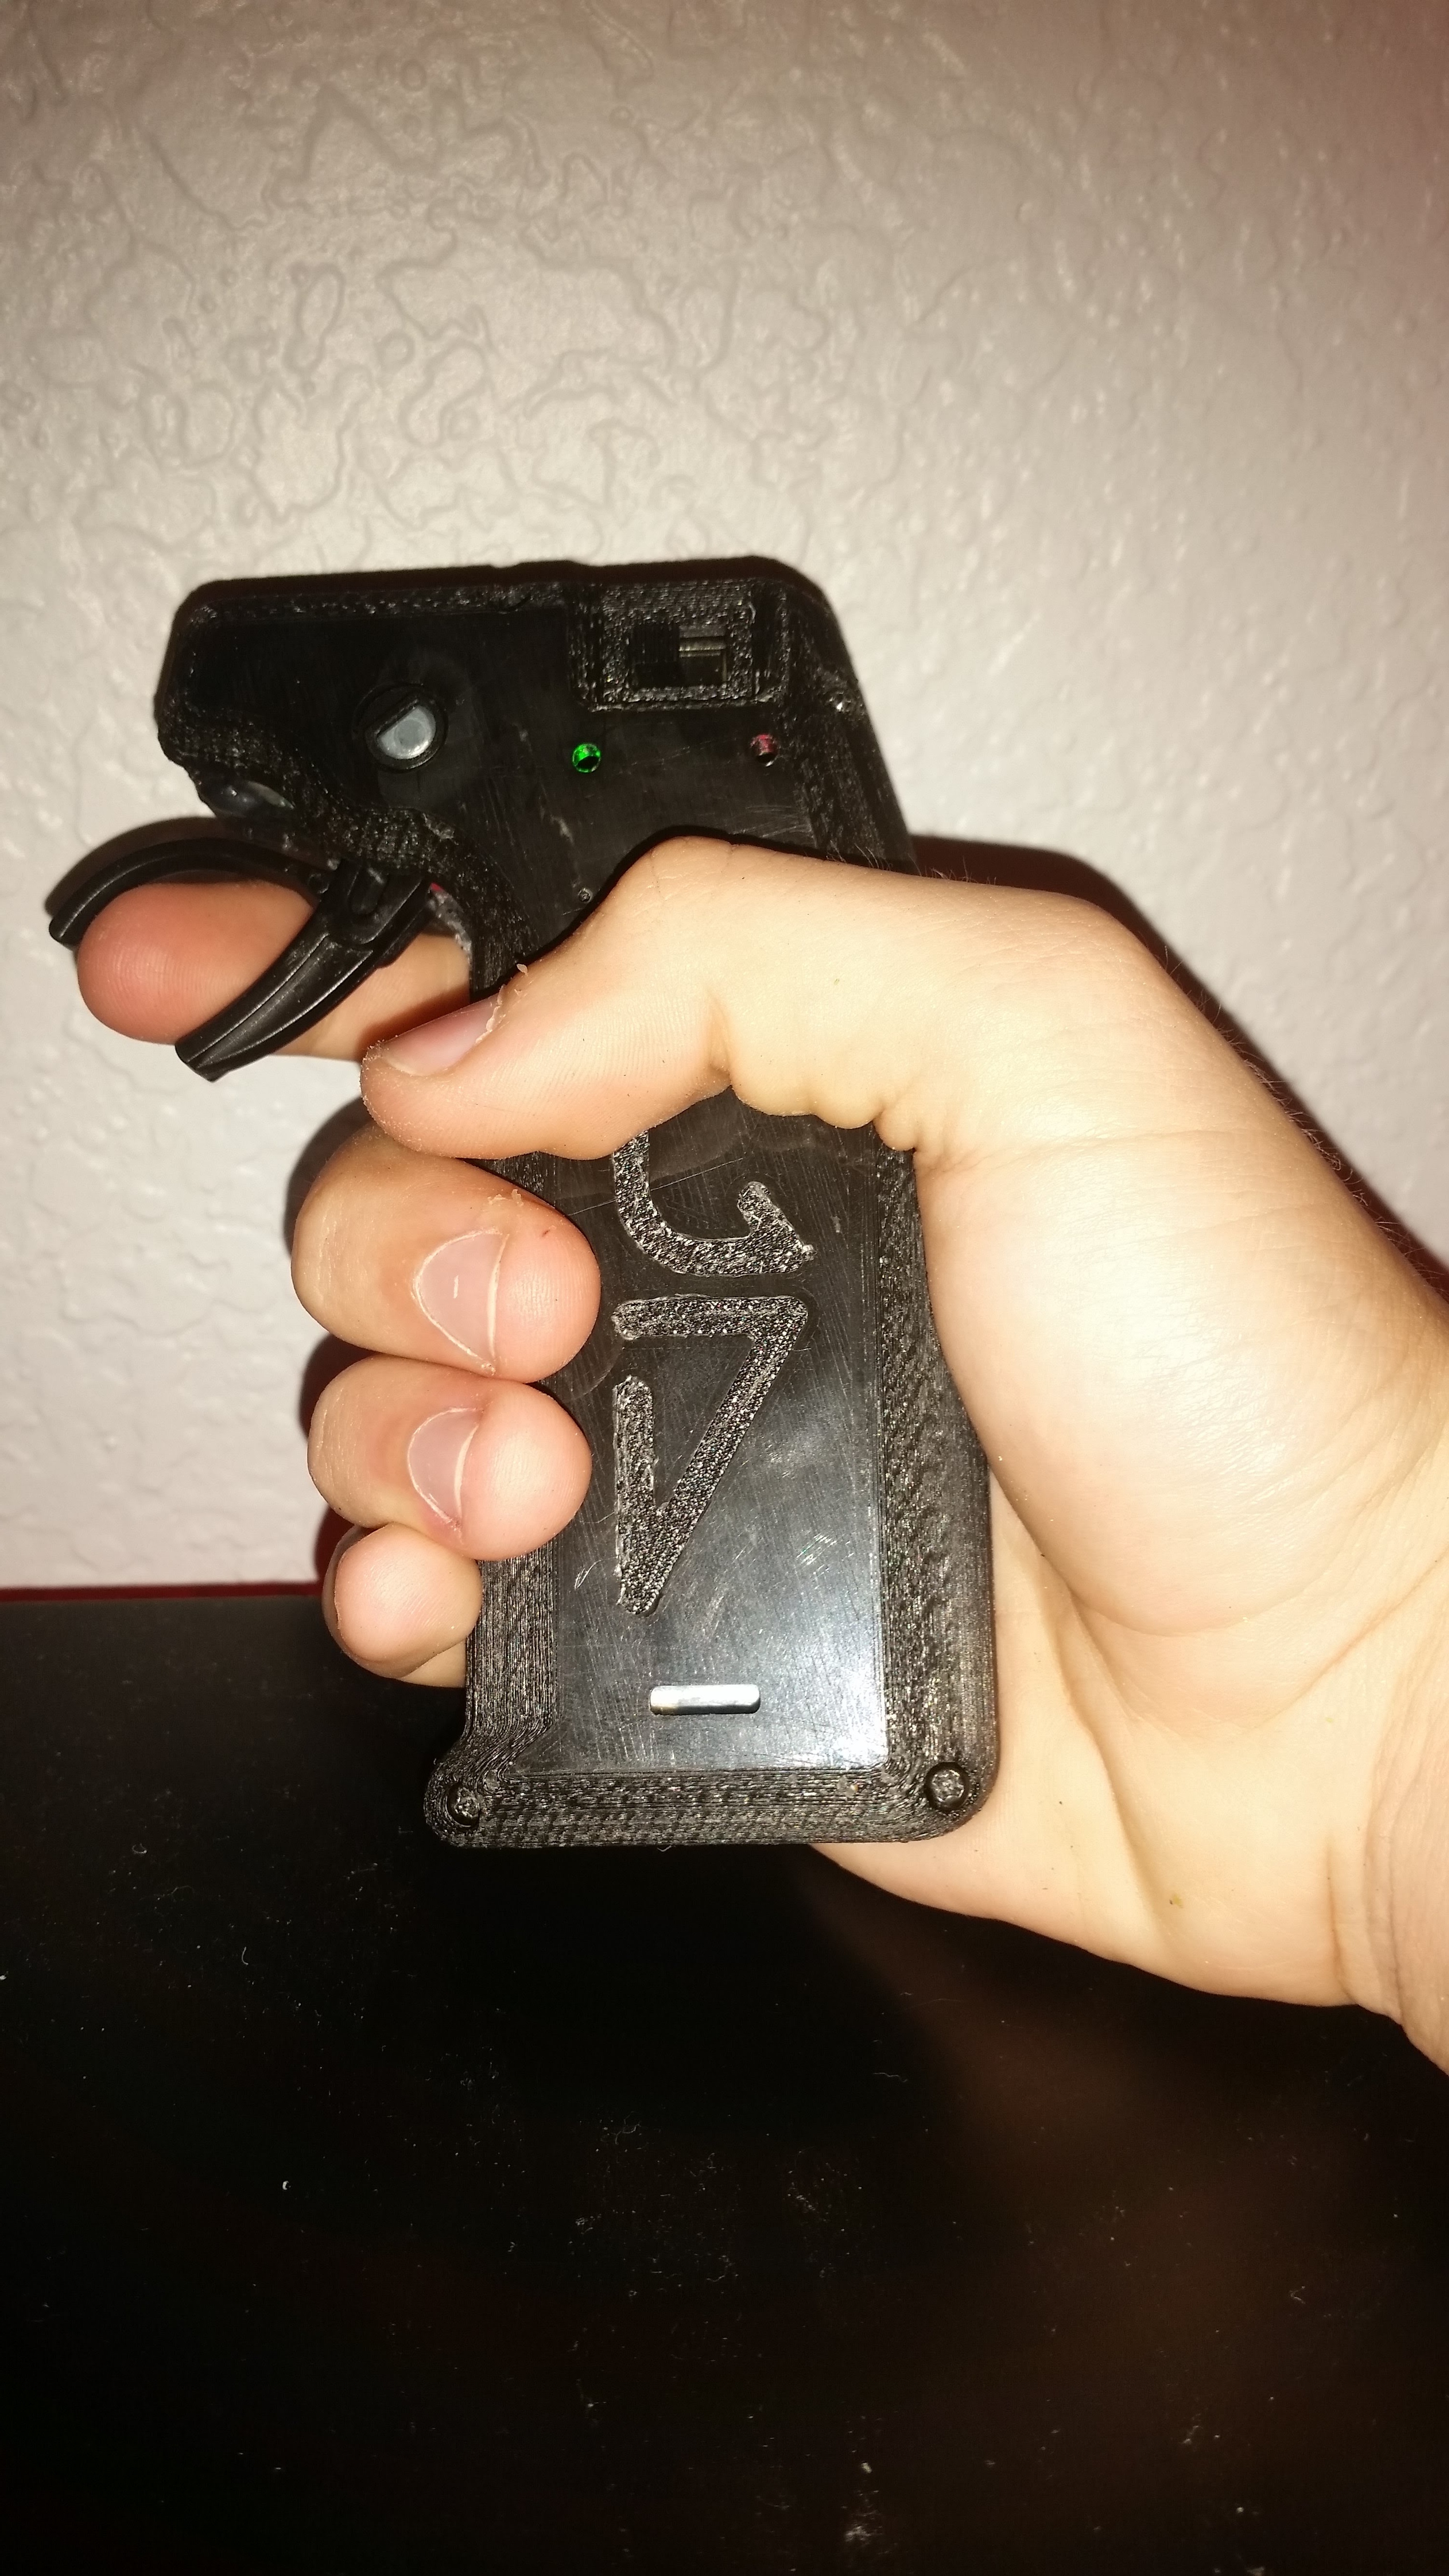

Happy Tuesday! Alright boys and girls, the Mad Munkey is up and ready for download.
-----------------------------------------------WARNING-----------------------------------------------
READ THIS BEFORE YOU BEGIN TO BUILD A MAD MUNKEY!
You WILL have to place one of the two plastic sheets that you took off the battery when taking it apart back on top of the battery or you WILL short the board pins out on the metal battery casing.
If this case has helped you enough for you to donate please do. Any donation will be appriciated for the time taken and the reels of filament harmed in the making of this case. PayPal - [email protected]
If you need any build questions answered don’t hesitate to ask. If you don’t have a 3d printer or acess to one and would like one printed for you, email me at: [email protected]
Happy building, hope you enjoy this case and here is the link. http://www.thingiverse.com/thing:1550237
8 Likes
I’m glad you got the enclosure together and working! Hope you enjoy it.
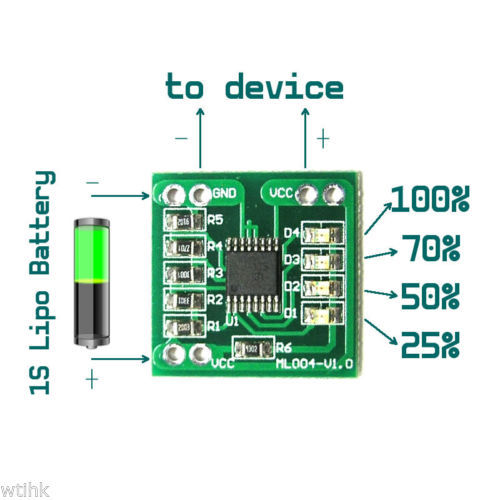
Here is the link to the voltage meter I used on the front of the MadMunkey enclosure. I have a feeling this guy might start selling more of these… http://www.ebay.com/itm/1S-Single-Cell-Lipo-Battery-Voltage-Status-LED-Indicator-Gauge-Module-/282030494790
4 Likes
he better start free shipping
2 Likes
Shipping for those definitely sucks if your buying one.
would it be possible to make a tutorial to build the controller? similar to what was done for gt2b bad wolf mod here
Yes, almost done with a how-to. Time is against me, just went ahead and uploaded the file on thingiverse.com because I know people were waiting. Just make sure when you take the battery apart that you save the plastic sheets you take off to reuse on top of the battery.
1 Like
awesome sounds good! yea mine is going to start printing once i get home so i can wait…
oh and already ordered the voltage meter 
1 Like
This is similar voltage indicator (maybe a little bit longer) that is cheaper for anybody who is only getting one. http://www.ebay.com/itm/3-7V-Li-ion-LiPo-Battery-Voltage-Indicator-Capacity-Status-Display-4stage-R1-510-/221639739350?hash=item339ac207d6:g:qk0AAOSwu4BVjRNk
1 Like
Here is the picture of the plastic piece stuck back on top of the battery to protect the battery and bms.

I havn’t, but definitely will when I get time! It will probably be next week some time. …Waiting patiently for someone to do a complete build thread…
2 Likes
But wait, putting those things together is pretty LEGO-like.
and if you read the Wolf built thread or better watch the pictures, or look a the pictures here, what’s more to explain.
Maybe the torque-rates of the screws, or not to mix up upper an lower enclosure.
And please, do not lick, or swallow the small parts, thats dangerous ![]()
![]()
![]()
2 Likes