Thxs man! 
With DIY hub di you mean diyeboard? In my case l had 3 pre drilled hole pairs that allowed me to place the rear truck in 2 different configurations, shorter (you will get a bit more kicktail) and longer (more space for enclosure and more stable). I didn’t have to drill any additional holes. I went for the more stable configurations but in that case the last pair of hole in not on the same level than the other, that’s why I made the rear riser to follow the deck shape.


1 Like
I got the spud deck from bkb (where did you get yours?) And the bolt holes on the deck seems had different range configuration with my other board. Yes i got diyeboard hub, but they’re fit just fine with my other board holes. Hmm it seems my spud deck comes with different configuration holes. I’ll take picture when i got home.
If you check my first post you can see my part list. Anyhow yes I think you got one with a slightly different configuration. Not a big deal. You can make new holes and if the are far enough from the previous one than just leave them otherwise you can close them up with sand and epoxy, resin or whatever you have at home.
1 Like
Yea, i need to drill another holes then. Thanks bro.
1 Like
No problem.
I made my “stealth” version of the board. Same board just paint the wheels… Should I call it Avenger-X now? 
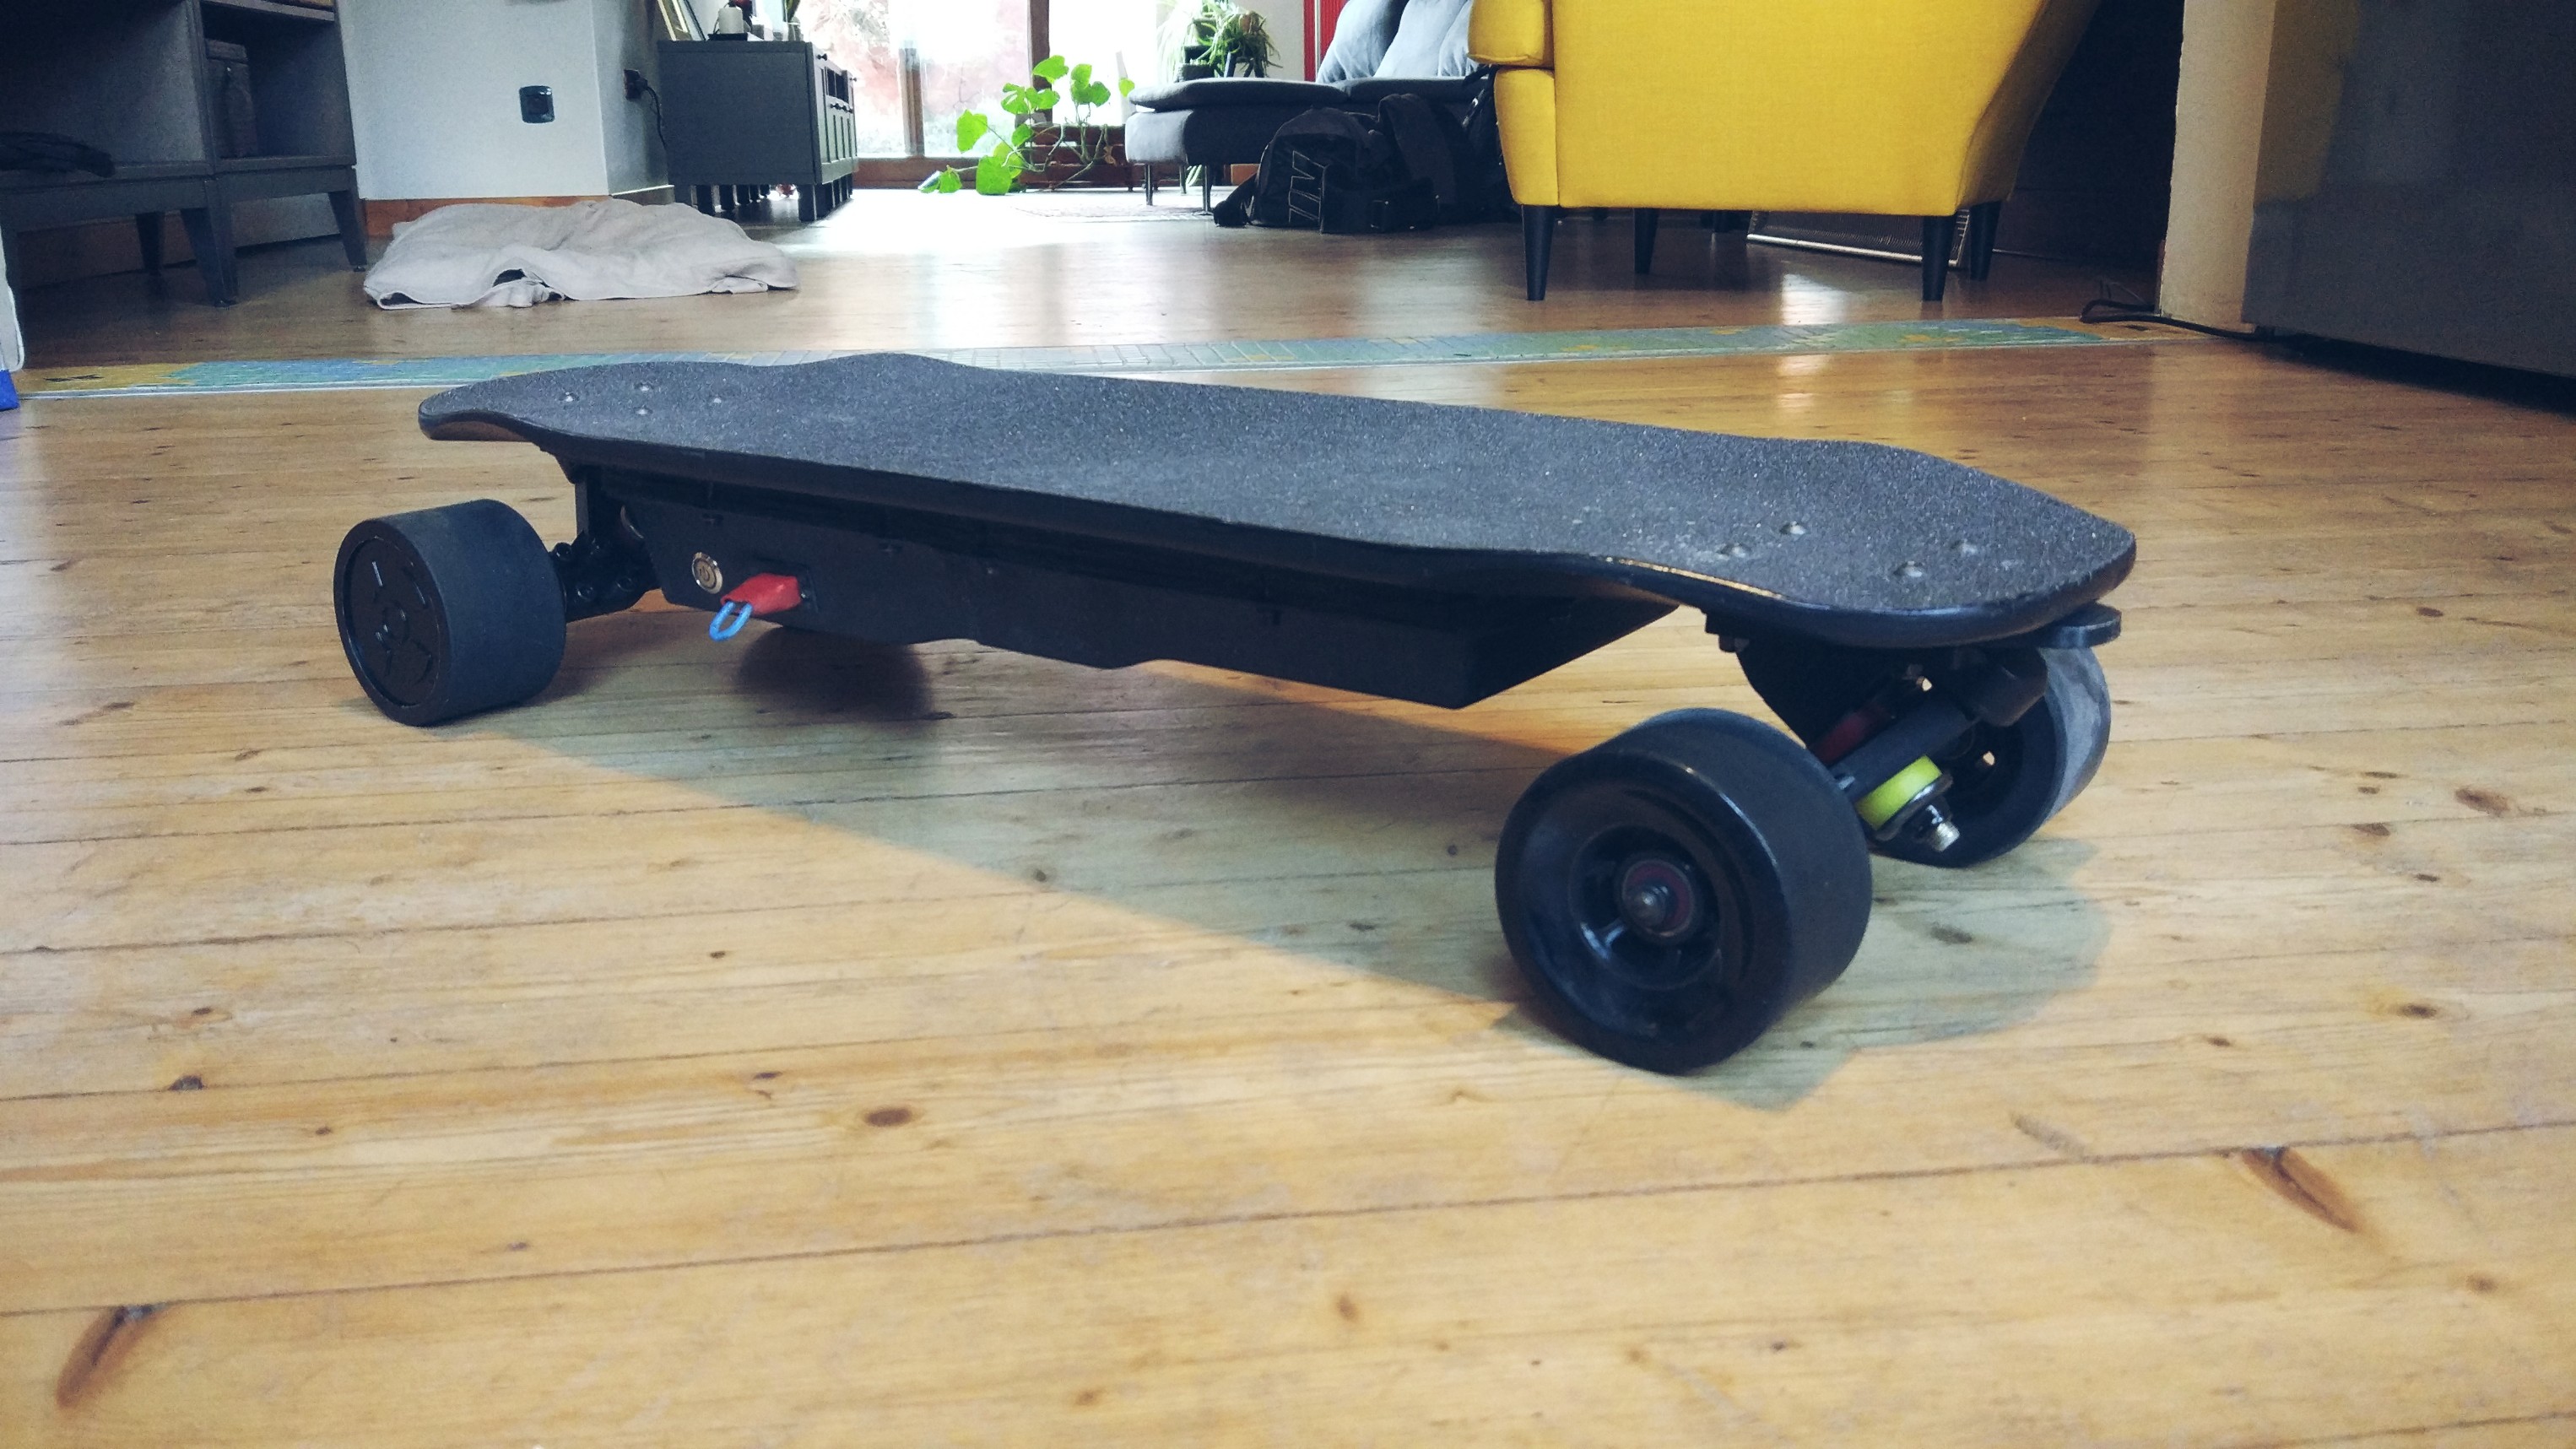


We’ll see how long it’s gonna last. Ciao
5 Likes
Haha nice, i also paint that silver things to black, but its made from aloy, i dont think the black paint would last. My only concern is about the truck actualy, i saw like 2 videos reporting broken hub trucks hmmm, they also provide extra trucks for sell tho but ya maybe thats why. Please update how the ride so far will you 
1 Like
Yeh I saw the video too. I hope they won’t but we’ll see it. Up to now I really enjoy it. For my commute use is really the perfect size, fast enought, nice tourque and great range. I know that they are made of aluminium and paint is not the best. In the past for my motrbike I went with powder coating and anodization. I also saw cheap kit that should work pretty well but you have to know that you will use it for multiple projects otherwise is not worth it. To paint the plate I use two coats of primer and 6 of jet black. I am sure that if you sratch hard you will leave signs but yeh I hope it won’t happen. Who designed this thing probably finished the patience once there
Is your black paint lasting?
I haven’t built them yet, at the moment still 3dprinting my enclosure, mean while i’m thinking to repaint the the trucks also  , i’ll make a built thread as soon as everythings ready.
1 Like
Now you made me curious. Send me the link when you start the thread
Will do 
1 Like
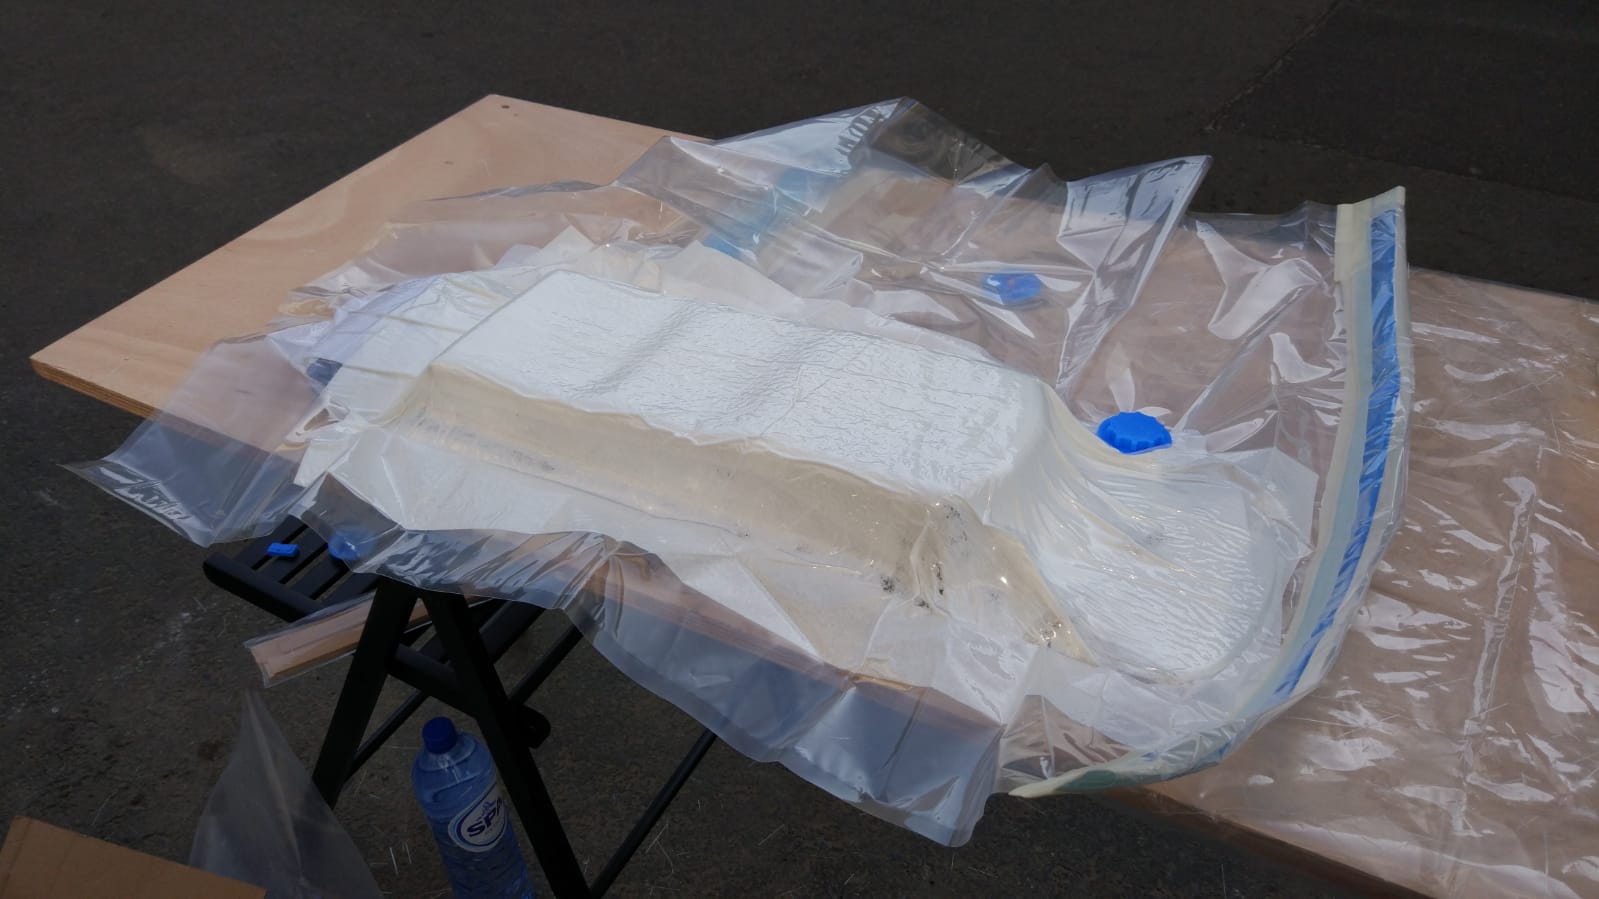
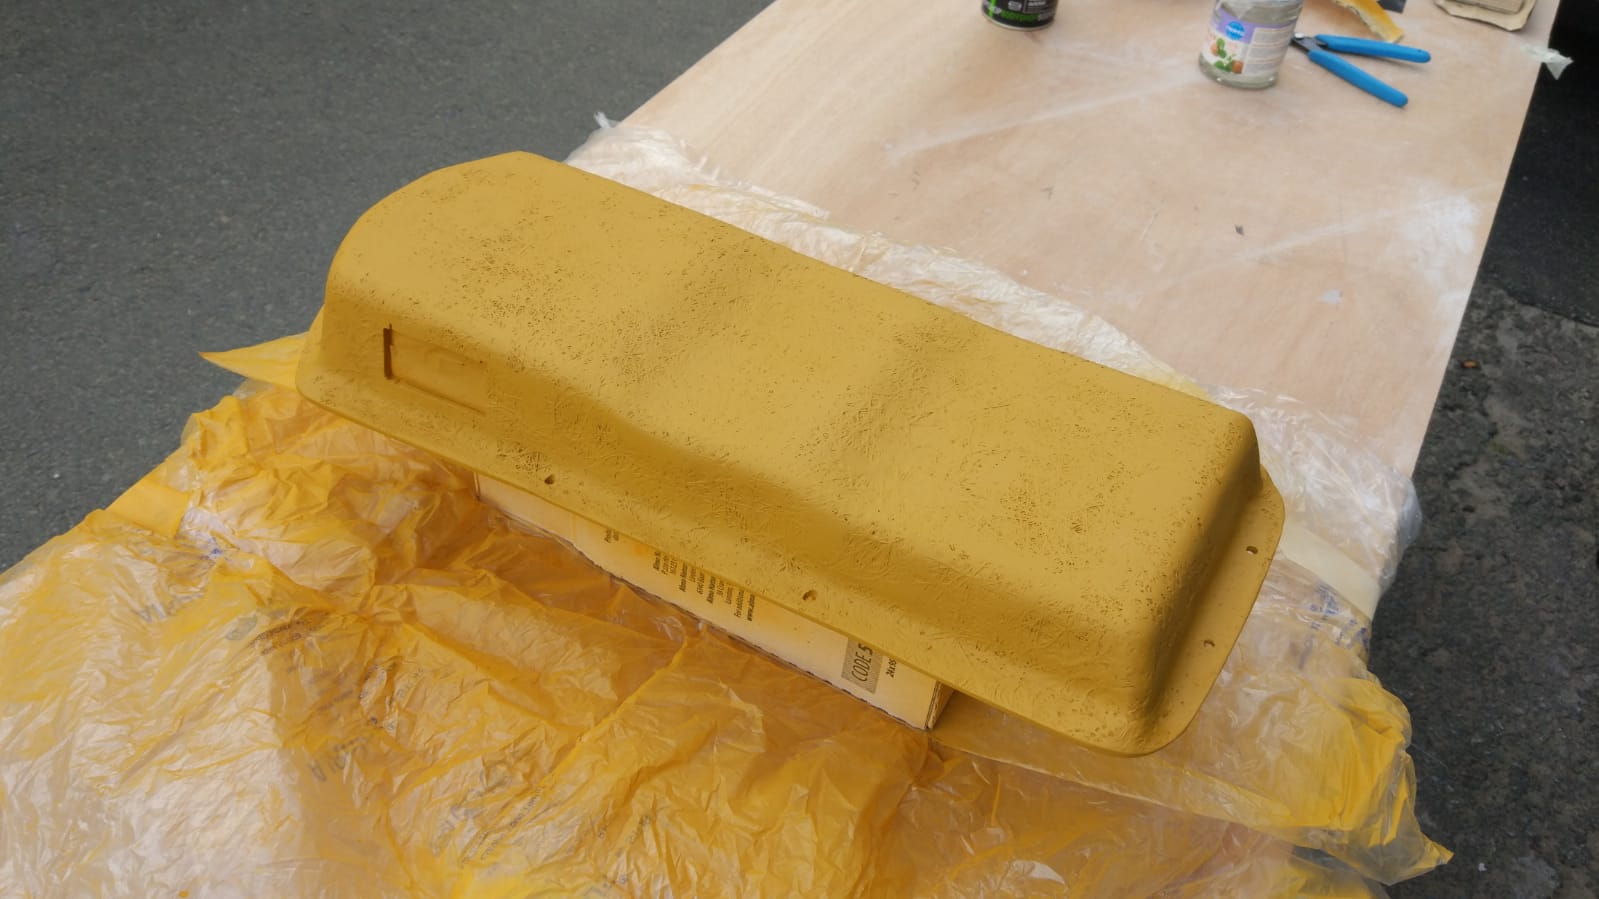
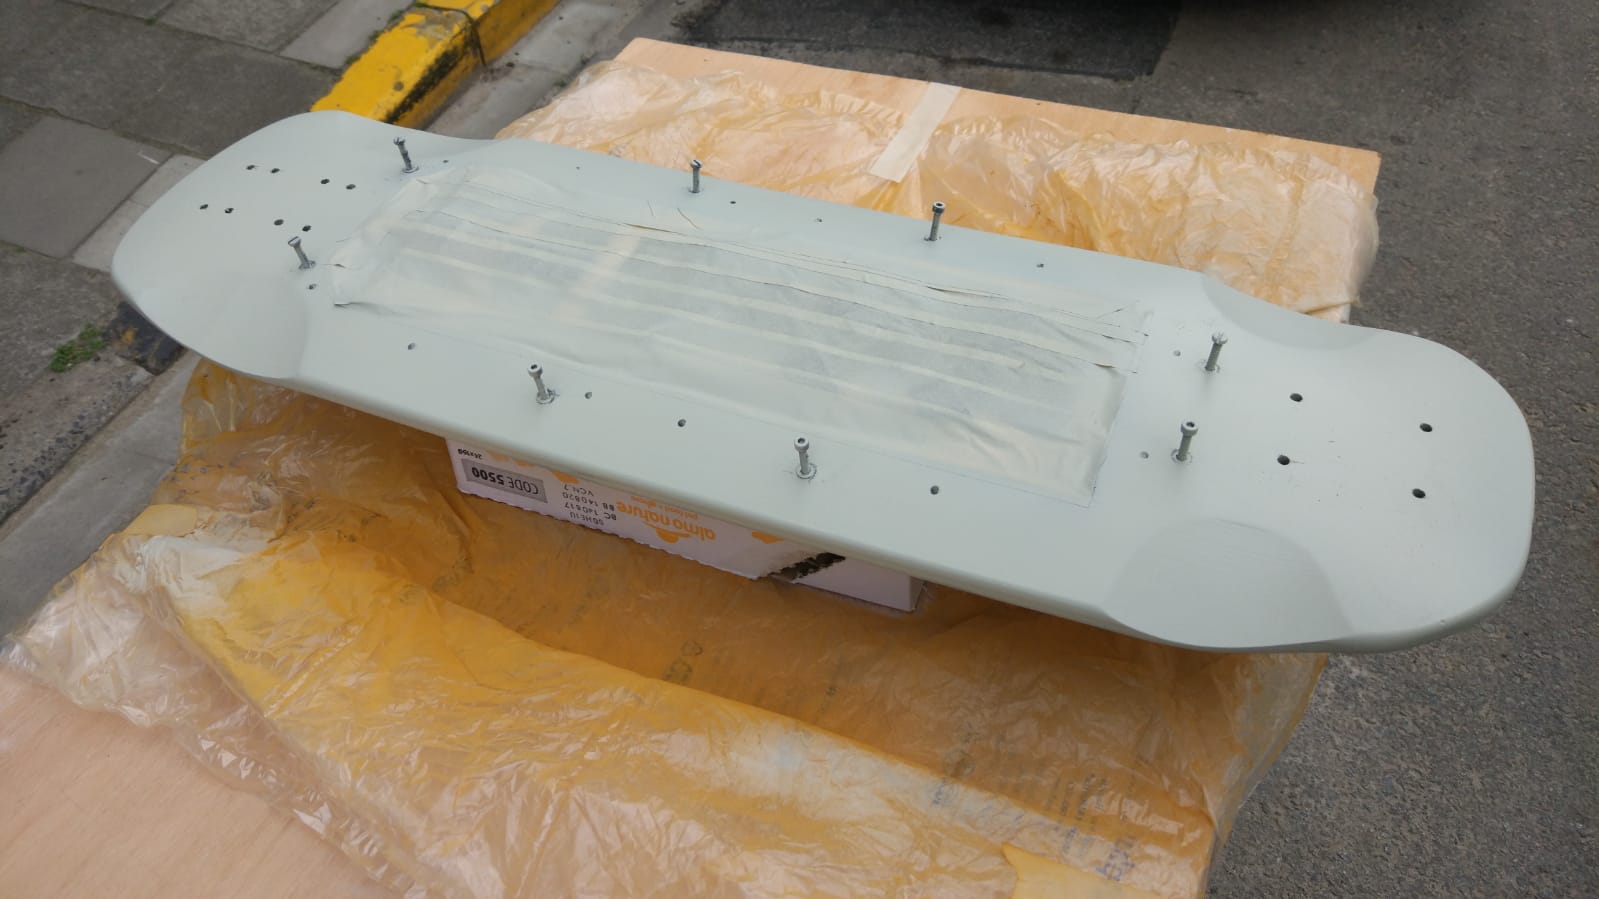
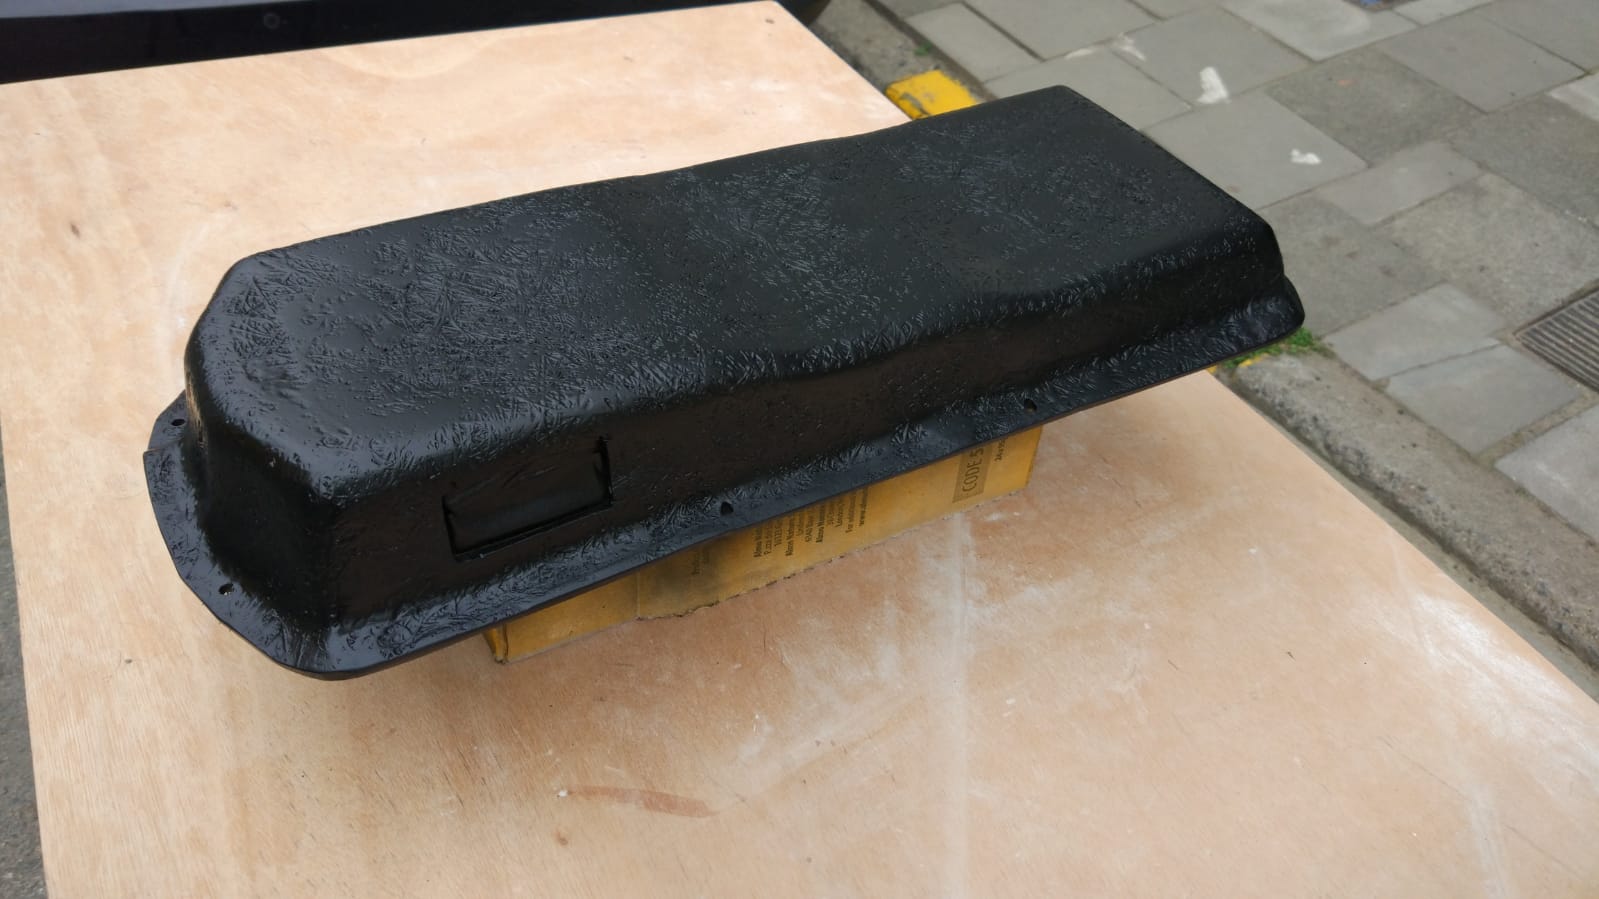
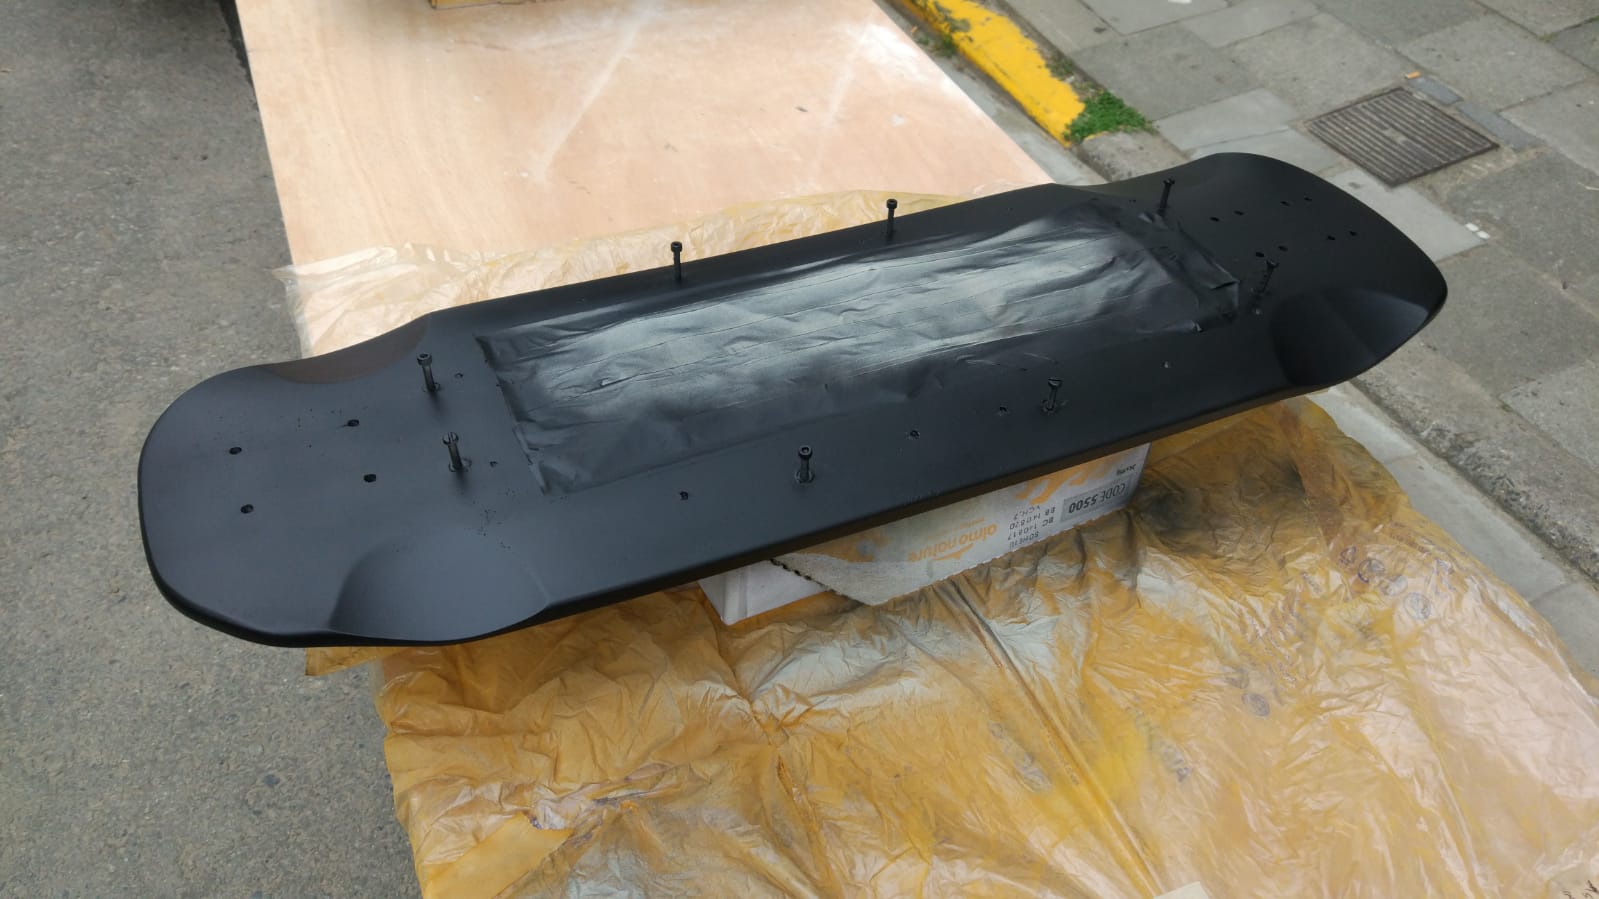
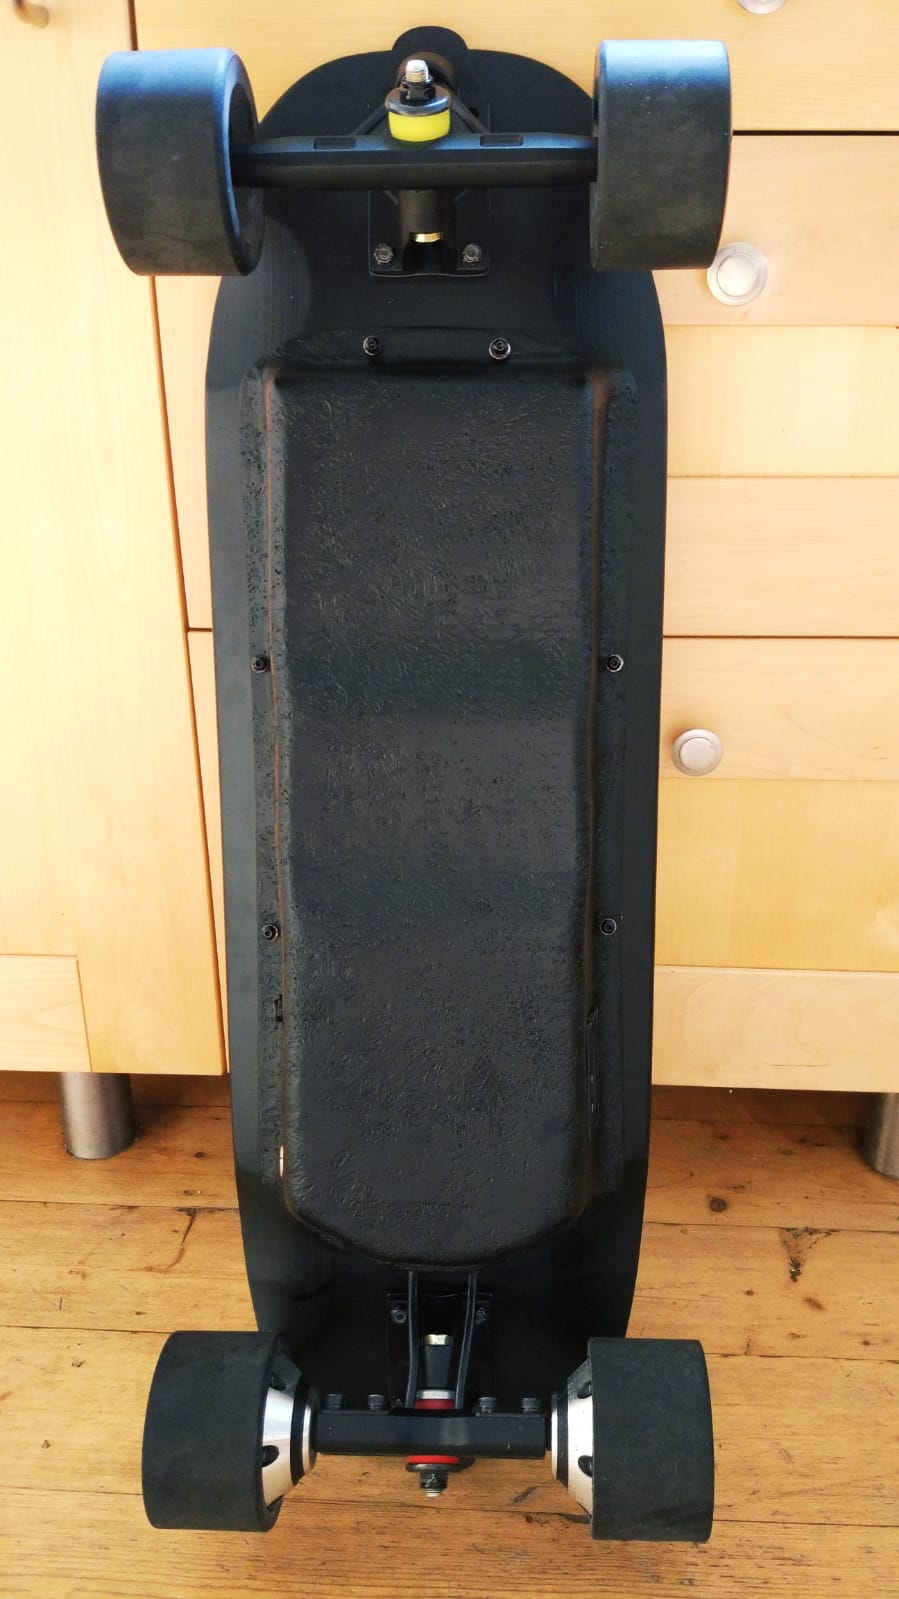
Ok! Finally I finished the fiberglass enclosure. First time. Learnt a lot, which is always nice. I didn’t get the super smooth surface because I run out of resin and I didn’t have the gel coat. I can always decide to recoat it afterwards (if I find the time and the patience). I used my old 3D printed enclosure, cut out the edges, wrapped, than resin, fiberglass, remove bubbles…check and repeat several times. Peel ply, breeder and vacuum bag (ghetto style @ninja). It came out really strong and at that time I understood how long it would take to sand it. Few hours and 2 arms gone later I cleaned up the enclosure and sanded it down as best I could until wet sanding. Made the holes for the electronics and hardware. Closed the old holes with resin to remove the bump on the top of the board. Drilled the new holes, this time went for wood threaded insert M4 x 8mm. Big thanks to @Sebike who sent them to me for free, allowing me to continue because the one I ordered were still on the way. Final steps, repaint the board, and the enclosure with first primer (filler one for the enclosure) and then Matt black. Now a sequence of pictures that tell more than the words…


Ciao! 
10 Likes
Nice one! Good job!!
1 Like
Very nice! Good move changing the printed enclosure to a fiberglass one!
1 Like
Now I am waiting for your Spud build updates…
1 Like
I am waiting for it too! hahahaha
2 Likes
Nice build! I love the size, quite similar to mine. I also learned alot doing the FG enclosure  But felt good seeing the product. Next time(?) I hope I can get a better finish as well.
1 Like
Thanks! I checked your build really nice. Moreover since you made even the board! That is on a next level. Yeh the final super smooth finish is not that difficult if you have additional epoxy or polyester resin, or even better a gel coat. It takes time but it’s feasible. How does the board run?
The board runs great even with one single 6355-motor and belts. With dual setup and a bit more batteries in parallell it would really master the hills well and also break a bit better. But it is alot of fun as it is and running for 20 kms+. I love the small form factor - easy to pick up, take on bus if needed etc.
What about yours?
1 Like