E-MTB conversion kit for TRAMPA Mountainboard on a budget

I bought a Trampa mountainboard with the objective of creating an E-MTB. I’m pleased to report that the journey from start to finish is almost complete, as I am only missing non-essential components (lights, etc). :slight_smile:

I was inspired to do this project when I saw the amazing builds that @Nowind was creating. His direct-drive setup is the most beautiful mountainboard that I have ever seen (and I still REALLY want one!). Unfortunately for me (at least in this specific scenario), I live in Canada, and the currency conversion rate ensures that my bank account would be obliterated by international purchases. And so, I bought a 3d printer, and began my journey to DIY convert my new Trampa MTB into an E-MTB.

I went through a few iterations of just about every single 3d printed part, but I think I have nailed down the formula. I printed all the parts in PLA, which is very stiff, but can be brittle. Due to these properties, I tried to keep the load bearing parts relatively thick. So far, all the parts have held up extremely well, even after 100km and some minor offroading. I will start experimenting with other materials in the near future.

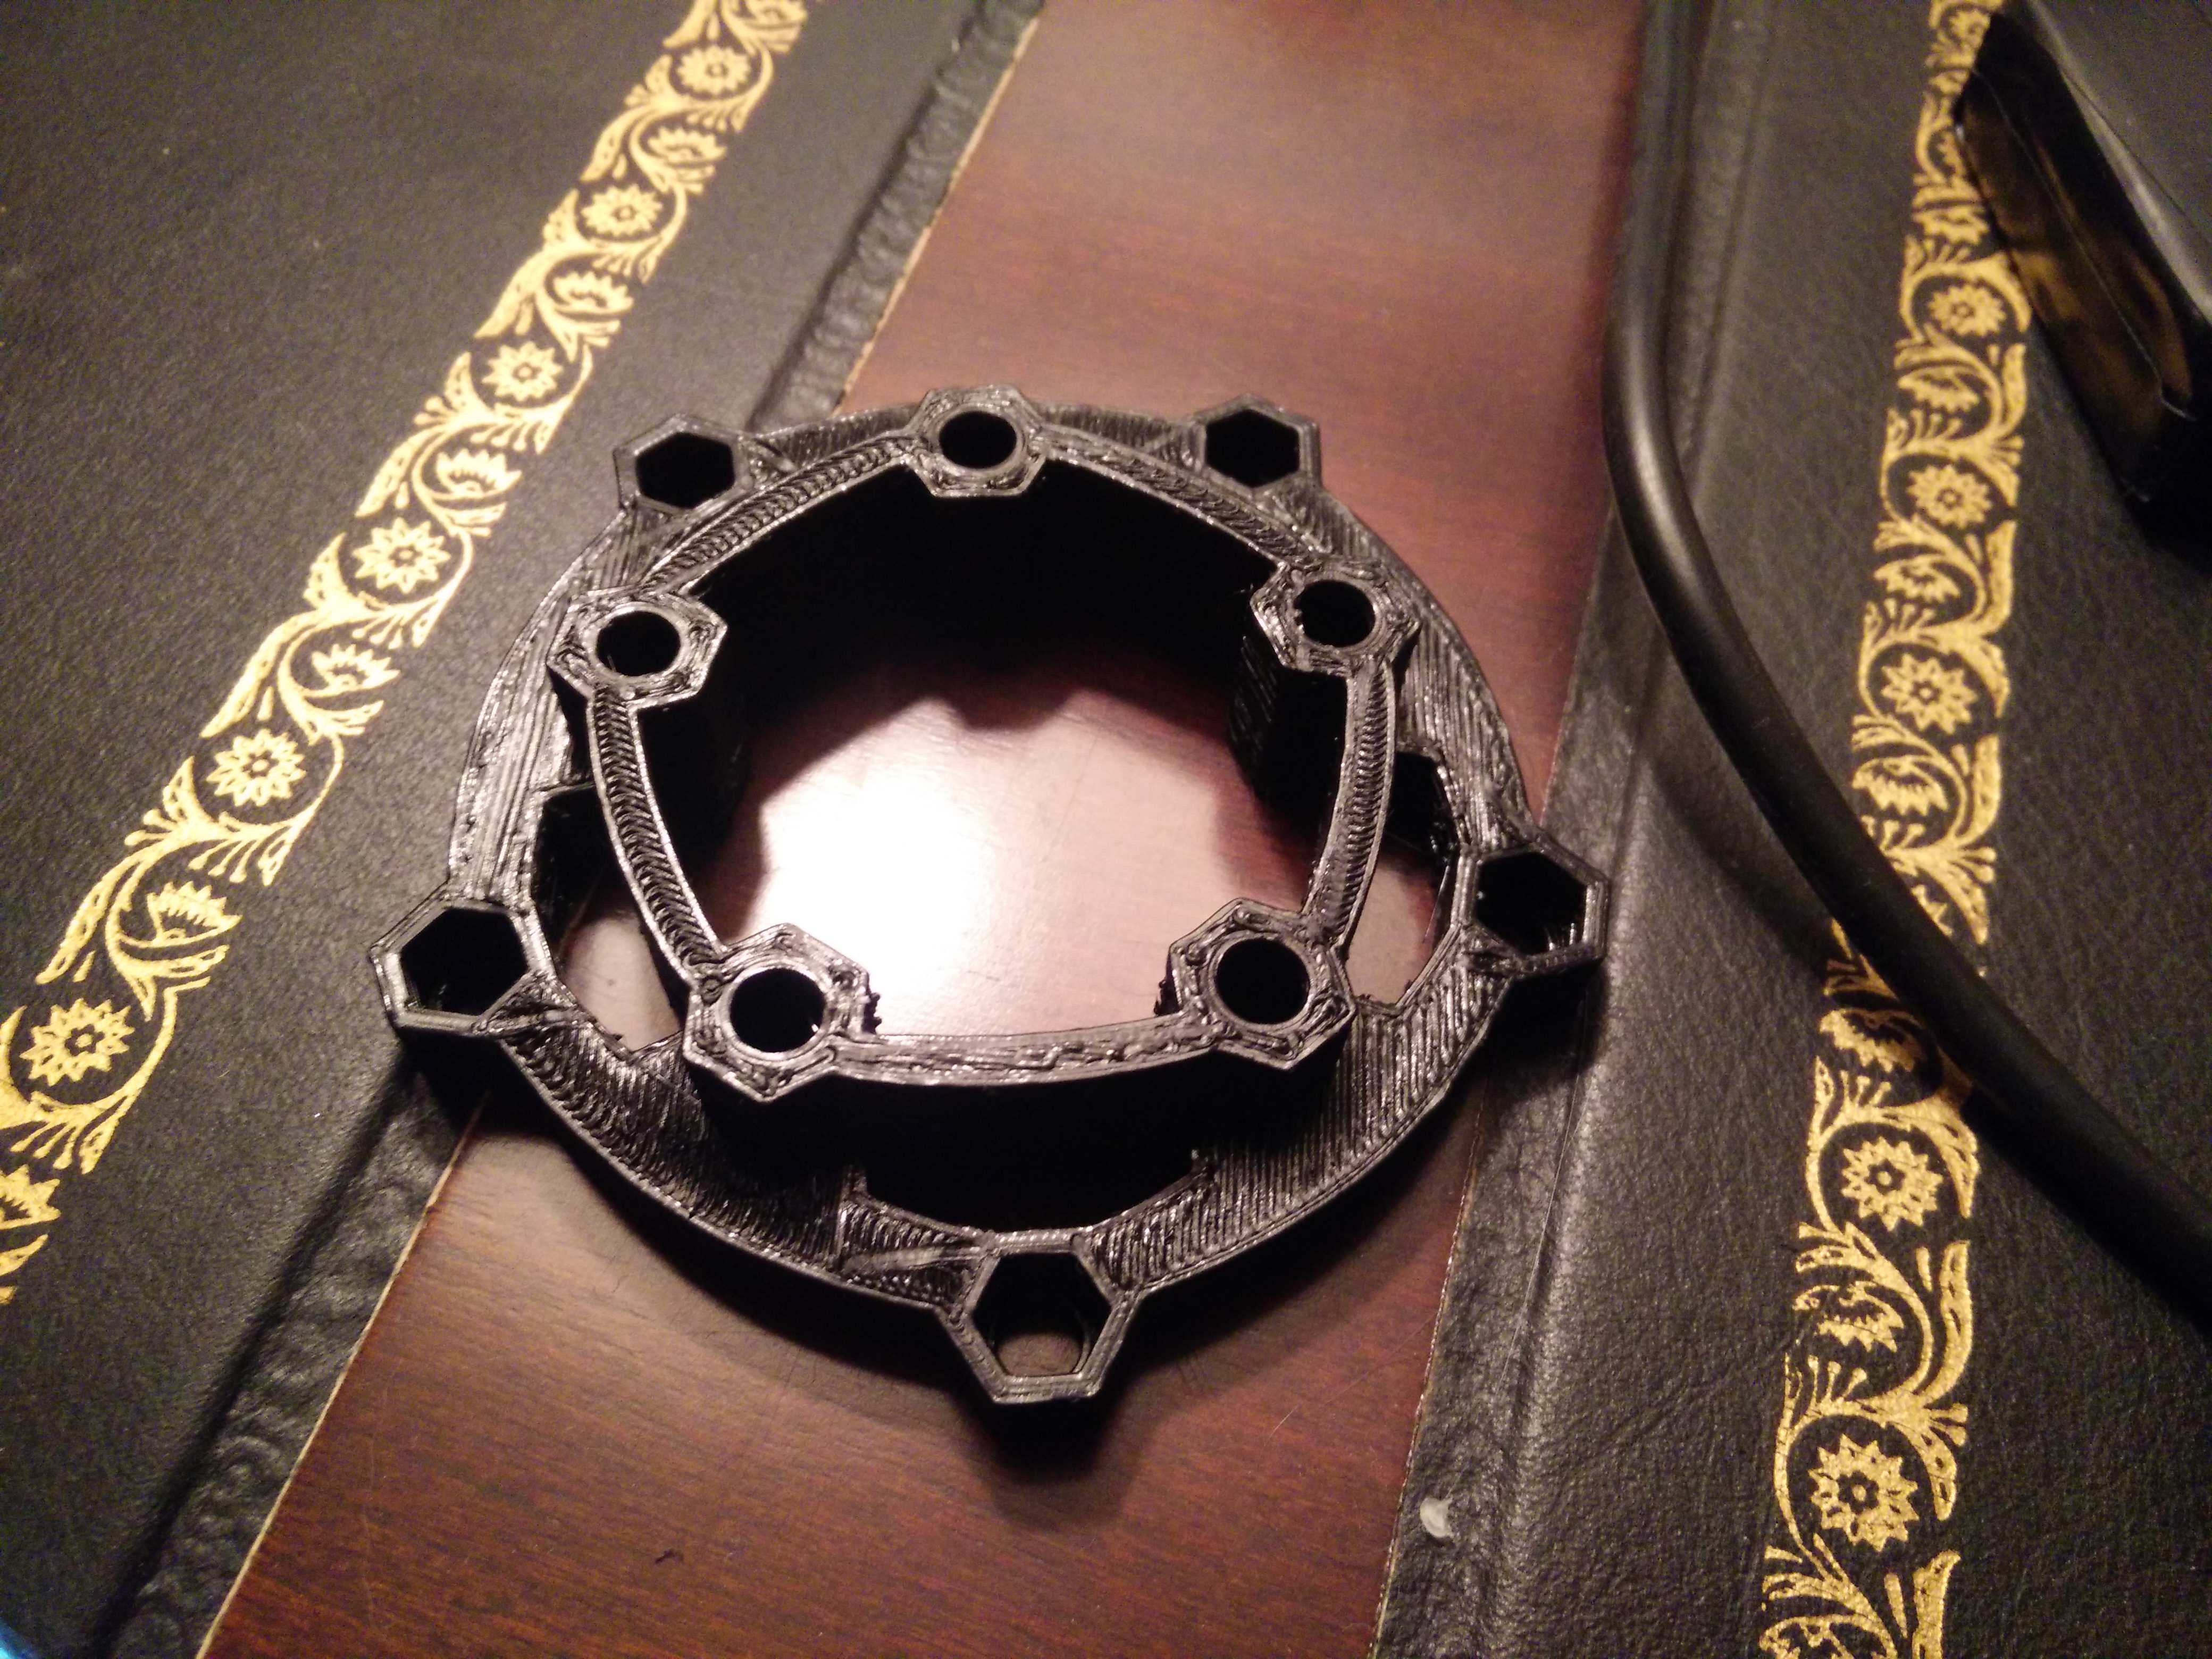
These are the front and back pictures of my wheels spacers. They hold the sprocket to the wheel. They are incredibly strong!

Failed print of 2nd part of the 1st generation motor mount. The infill network inside keeps the parts very light.

this is the completed 1st part of the 1st generation motor mount. it clamps on to the truck very easily. I have updated and improved the entire motor mount assembly since these two pictures, and I will upload pics or videos of how they work as soon as they are printed. I am also going to adapt this system for 63mm motors.

PARTS:

ELECTRONICS: Motor: 2x 5065 270kv ESC: 2x Hobbywing MAX6 Battery: 2x Turnigy Multistar 6s 10,000mah batteries (in parallel) Transmitter/receiver: I used my phone as the transmitter, but I am working on a remote now. Receiver is an Arduino Nano with custom code, paired with an HC-05 bluetooth chip

CHAIN DRIVE: gearing 4.9:1 2x #25 59t Sprocket 2x #25 12t Sprocket 2x #25 chain 3D printed motor mounts/wheel-sprocket spacers for SuperStar Hubs. Chain tension is easily adjustable at any time.

SPECS:

Top speed: 54km/h Range: 24km (with a safe 20% remaining in the battery) Motors: 2000w each (claimed by the company that I purchased them from) Breaking: Regenerative Weight: 29lbs or 12.9kg

Most of the high cost of an E-MTB is unavoidable. The electronics, chain-drive, and the board itself get to be quite expensive. I am, however, pleased that I could save several hundred dollars by 3D printing all the parts that I needed to connect the conversion to the board (wheel spacers/motor mounts/electronics case).

I am going to add lights, as well as braided wire sheaths and zip-ties to clean up the wiring. This is what the build looks like so far!

Looking forward to feedback! :slight_smile: Ryan

19 Likes

Nice fabric bag. I also got one, only in black.and not from same material. A while ago i spotted koreans also using such bags for their builds… so interesting to see a few more.builds.incorporating this feature :slight_smile:

Yeah I took inspiration from them too! I really like the look of it, as opposed to the hard plastic cases. I was scared that the plastic cases wouldn’t conform to the curve of the board properly, or that it might rattle on the board. (I HATE rattles! :joy:)

Yeh, it sure elimates rattles but it might slide back and force, how did u secure the bag? Didnt see much details about how u might have done it.

Cool thing u also witnessed their builds… i dont even remember anymore how i came up with the korean forum but it was mentioned somewhere or a picture lead to.the forum

I bought a bunch of adhesive velcro strips, put some on the top of the board and some on the bottom of the bag. The bag also has all these loop things that are found on tactical vests (I got the bag from an army surplus store), so I ran some stretchy velcro straps around the board and through the loops. It fit perfectly! and I can tip the board up vertically or upside down and the battery pack wont budge :slight_smile:

I saw it on this YouTube channel called Crazy RC. His board is pretty amazing too! and I think he somehow waterproofed it.

Clever / nice use of straps and velcro. Yeh i remember crazy rc too. He had some crazy custom.made.mounts / metal parts too, if i remember correctly

I had more trouble with my bag at first though, i tried to secure it just with some rope, so to speak. But the rope always got a bit loose or it was a bit too hard to properly tighten it, in end i just reinforced the bag sideways with some belts, the ones u might use for jeans lol but it worked better than just ropes and was easier to adjust.

I assume straps, which can be adjusted and connected with the bag in some way would be the best.

As about the motors u use. Nice to see that your speed might be such high with 6s packs… when i built mine i took 192kv motor as the rest on hobbyking was out of stock, even though i wanted to get the 245kv for higher top speed. Well at least i have more headroom now (also a bit more cooling / heating room comparing the two) but i still think now that i could have used smaller.motor amd basically 6374 might be a bit of over engineering. Especially for light off roading and city terrain

So yeh just my thoughts on why i think your motor choice was quite good… :slight_smile:

Thanks!

Yeah he did. I will probably go metal one day too, but CNC stuff is so expensive, so i’ll have to save up for a while

Very resourceful build. Your electronics enclosure for the Max6 case, can you post the STL files for that? It looks really cool. At least include a few more close-ups if you don’t wish to share the STL file. Would be very appreciative.

I almost wish I went with an 8S pack though, as I have heard that voltage is better than capacity. The bottleneck that caused me to go for 6S was my balance charger. It can only do 6S, and i’m not very experienced with a BMS yet, so I didn’t want to take a chance on one at this point.

You definitely have a good point with the motors though. While mine do have a high top speed, and haven’t given me any reason to believe that they are under-powered, the do get quite warm if I ride aggressively on a hot day. Cooler running 63mm motors would be of great benefit for me under these conditions. That said, as much as I am concerned that the warm motors might cause problems with the plastic mounts, its hasn’t shown any evidence of this yet. We’ll see in the future I suppose. Either way, its hard to complain when the motors were only $30 each. :slight_smile:

I can probably put the STL (3files) on here, But first I will have to correct a mistake or two that I made with it. I was having trouble with one of the screw holes and managed to break a section of the cover, you might be able to see in the pictures that the top part of the case is slightly lifted from the bottom on one side. I also need to make a small adjustment to the bottom two pieces so that it will fit the bolt pattern of the board better.

They are pretty easy fixes, but I am a little busy this week. I should be able to find some time for this before the end of next week.

2 Likes

Nice, what filament did you use for it… did it last… Enough

Everything is printed with PLA. I found ABS to be a little too problematic for my liking.

So far, its holding up great!

1 Like

I just tried posting the .STL files, but it turns out you aren’t allowed to post them. I suppose I can understand why this would be the case.

So for anyone who wants a case, I may be able to sell one to you. This is the voltage tester that fits with the case:

-Ryan

You could always just post it on thingverse.com and link it to us.

In any case, if you don’t wish to do that… how much would you sell one for?

EDIT: Here is a link to a Max6 esc 3d STL file for Trampa on thingverse.com - it’s an OK shape, I think your design is better.

1 Like

Good point! I completely forgot about thingiverse. I will upload it there, but I have to wait 24hrs to upload because I just created my account. I am a little too lazy to figure out shipping and all that nonsense anyway.

However, if anyone does not have a 3d printer, I could still work something out for you.

-Ryan

For anyone interested in my electronics case, the .STL files are on thingiverse!

-Ryan

2 Likes

Ryan that is super-generous,

Thank you so much!

no problem! I haven’t printed a new one since I made some small modifications, so please let me know if it needs any changes. also you’ll probably need some pretty long m4 bolts (or something similar) to connect the top part of the case to the bottom.

The top part of the case also has some extra holes beside the speed controller that you can pass the voltage monitor wires through to connect to the esc main leads, and a small gap at the front and back of the top part of the case if you want to add lights or something to the setup.

Hope it works out for you,

-Ryan

since its been a while now, how is your 3d printed mount holding up?

was thinking about doing something like this as well but i have serious doubts that its going to hold since the smaller version i designed before allready, had troubles with a 3200W motor.

It actually worked out pretty well. I was able to do quite a bit of off-roading with them. Although on my last ride of the season, I hit a nasty speedbump too fast and one my the mounts broke at the clamp. Surprisingly I was still able to limp the board home with only one mount carrying the weight of two.

I redesigned the clamp recently with a stronger clamp section and this time I will print with nylon or ABS instead of PLA.

My motors were only 5055s, so not too heavy, but the job. If you go with larger motors, I would recommend keeping the distance from the motor and the truck as small as possible. That way, you’ll put much less mechanical stress on the mount each time you go over a bump.

I will post my updated mount soon!

2 Likes